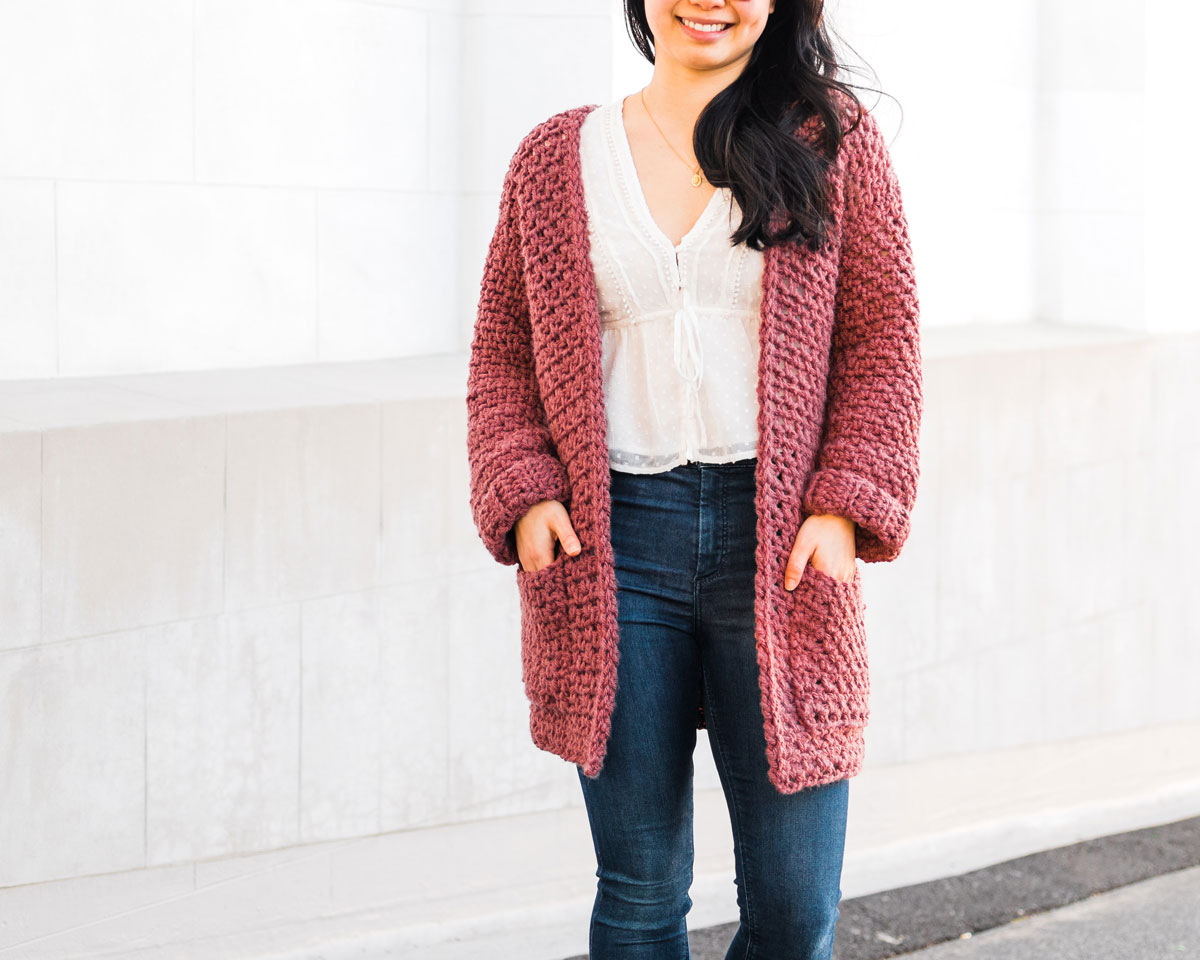
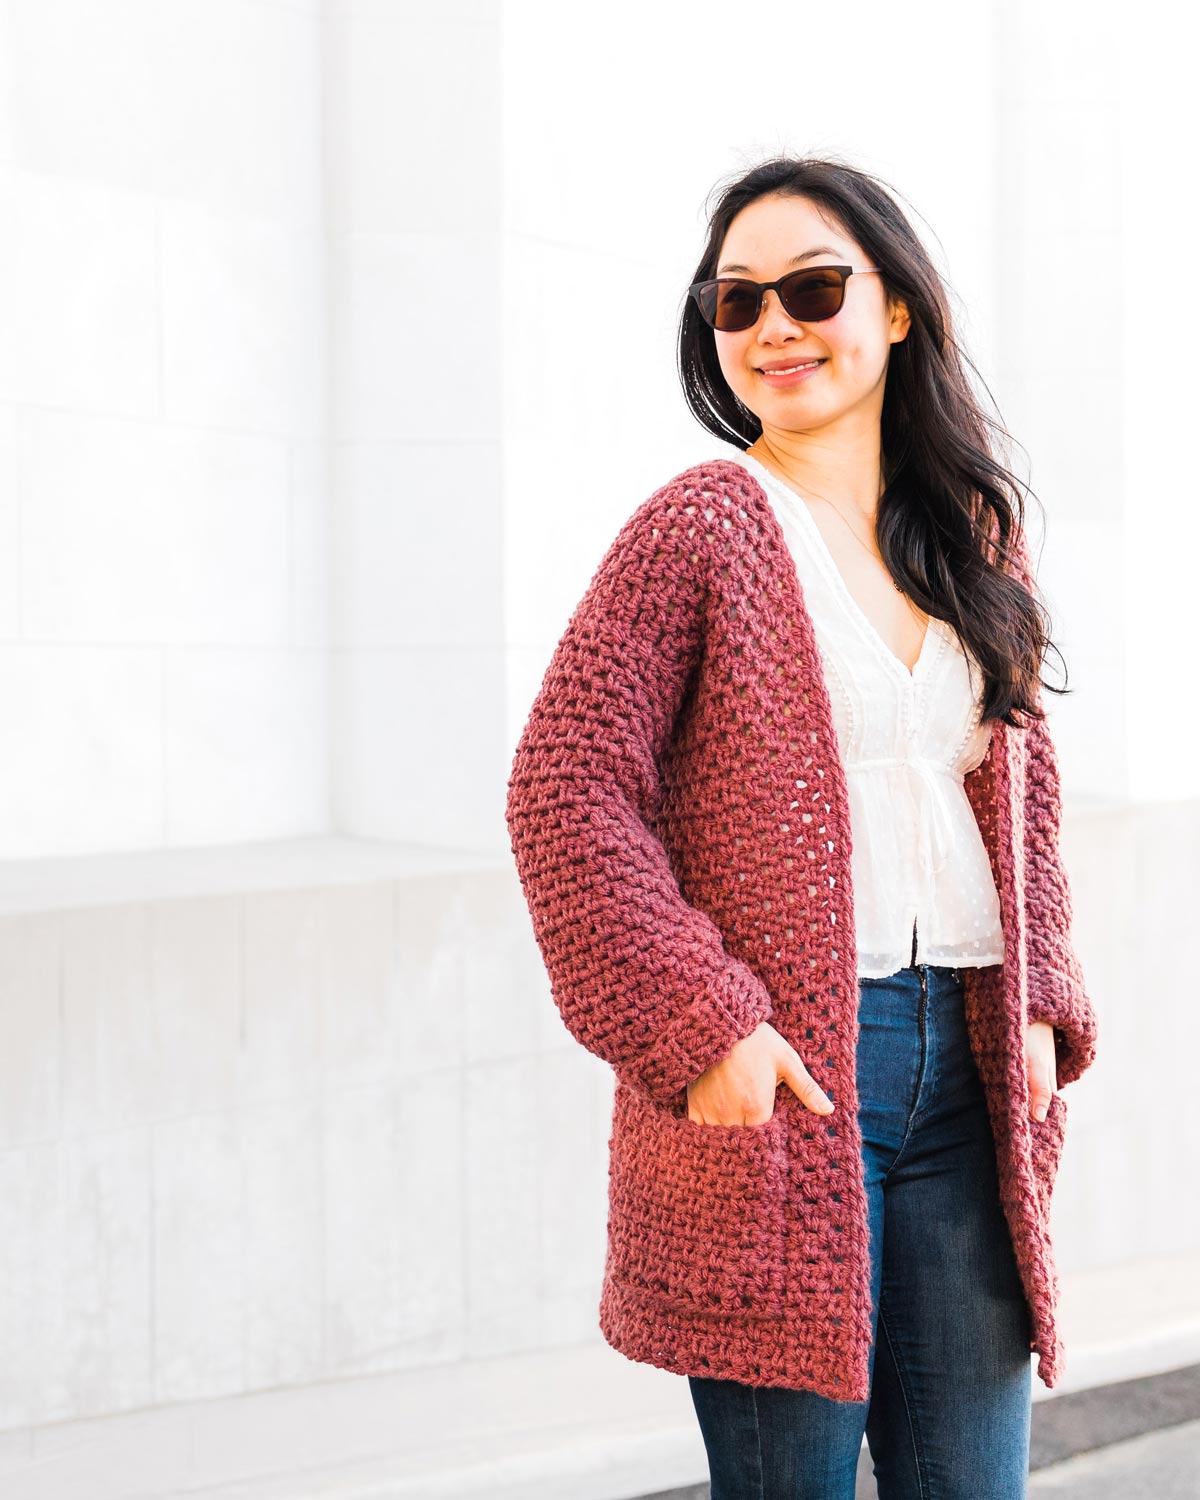
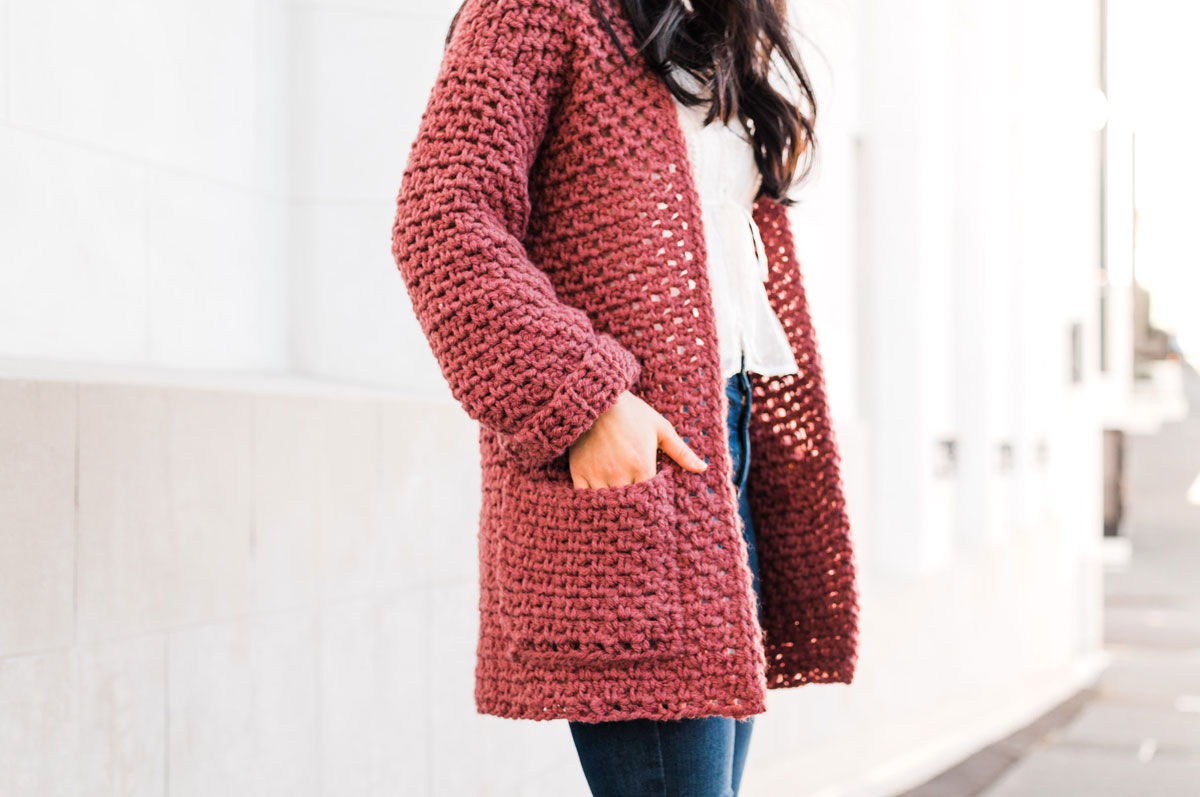
The Rosewood Coatigan - a modern, minimalist crochet coat with pockets! This beginner-friendly project works up quickly with simple basic stitches.
Scroll down for this free crochet coat pattern and step-by-step video tutorial, or purchase the ad-free, printable PDF here.
This post may contain affiliate links, view our disclosure policy for details.
Thank you to WeCrochet for providing the yarn for this free crochet coat pattern! As always all thoughts and opinions are 100% my own 🙂
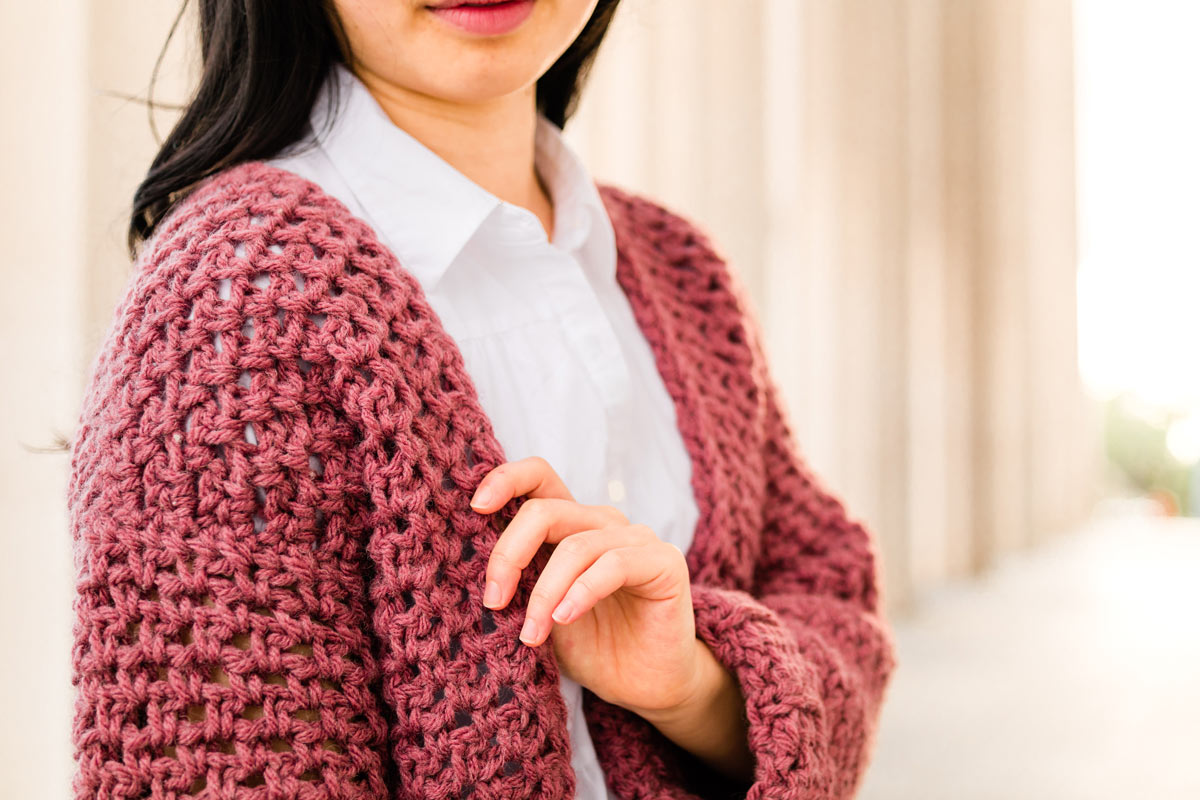
A sophisticated and modern take on the humble linen stitch, the Rosewood Coat is the sweater you need in your crochet wardrobe! This design features a loose oversized body, drop shoulder seams and wide roomy sleeves to create a clean straight silhouette. The entire pattern is worked up in two beginner stitches – single and half double crochets, making this a wonderful first sweater project!
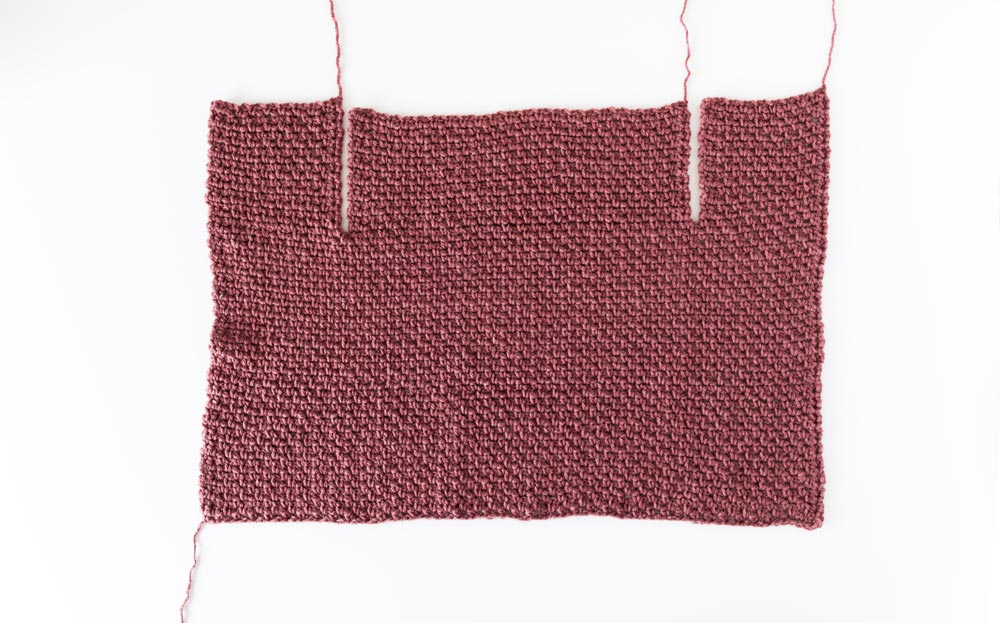
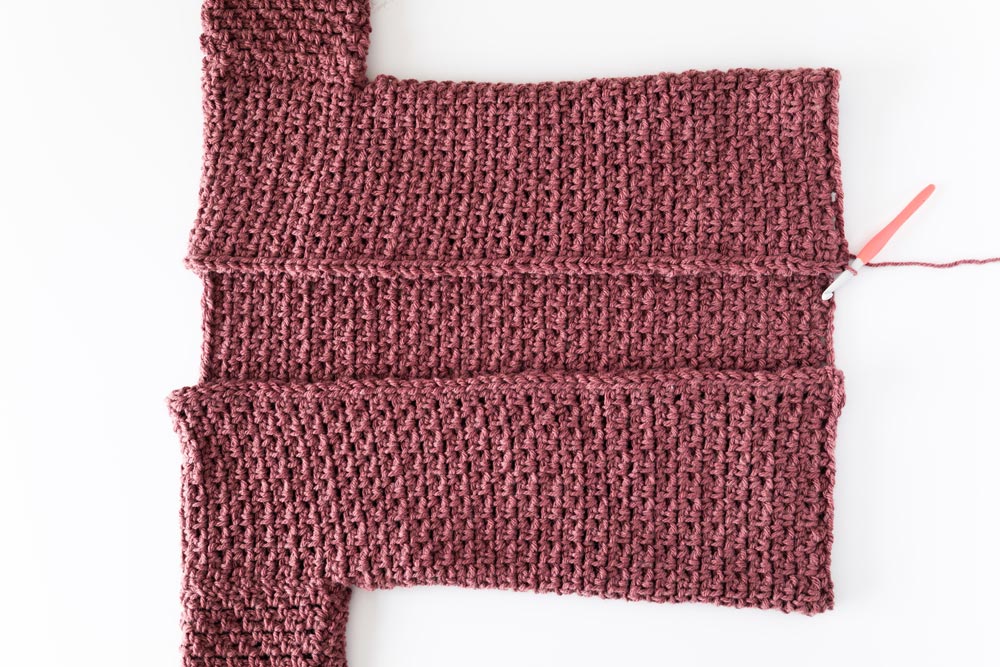
The body is worked entirely in one piece which means you’ll have fewer ends to weave in. We’ll start by crochet from the bottom up and the foundation chain runs the length of the back panel and two front panels. The foundation chain will seem ridiculously long but trust me – it’ll all work out in the end!
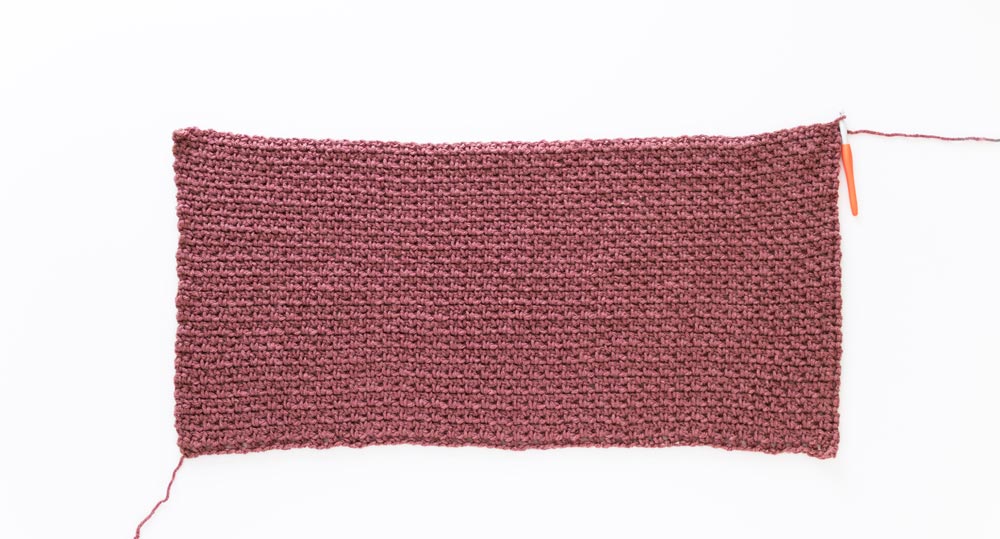
This crochet coat pattern is worked up in the linen stitch which is made up of single crochets and chains – that’s it! The stitch pattern follows an intuitive two-row repeat, you always place a single crochet in a chain space and crochet 1 chain in between the single crochets.
Once we’ve crocheted the bulk of the coatigan, we’ll create armholes by simply crocheting fewer stitches for the first front panel, fasten off and reattaching our yarn along the edge of the body to crochet the back panel. We’ll then repeat this process for the second front panel.
If you’ve never crocheted a garment using this method before don’t worry, there are lots of step-by-step progress photos demonstrate the process. There is absolutely no shaping in this entire pattern so it’s very beginner-friendly and is a great meditative make for more experienced crocheters.
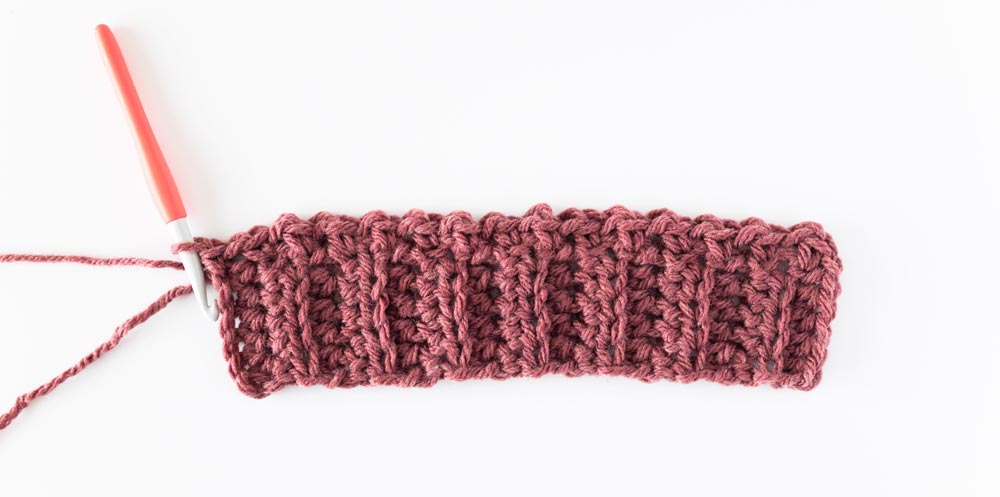
The sleeves are also worked form the bottom up and we’ll start by crocheting the ribbing. Then we’ll crochet a few rows of back loop half double crochets and then crochet the linen stitch directly on to the long edge of the ribbing.
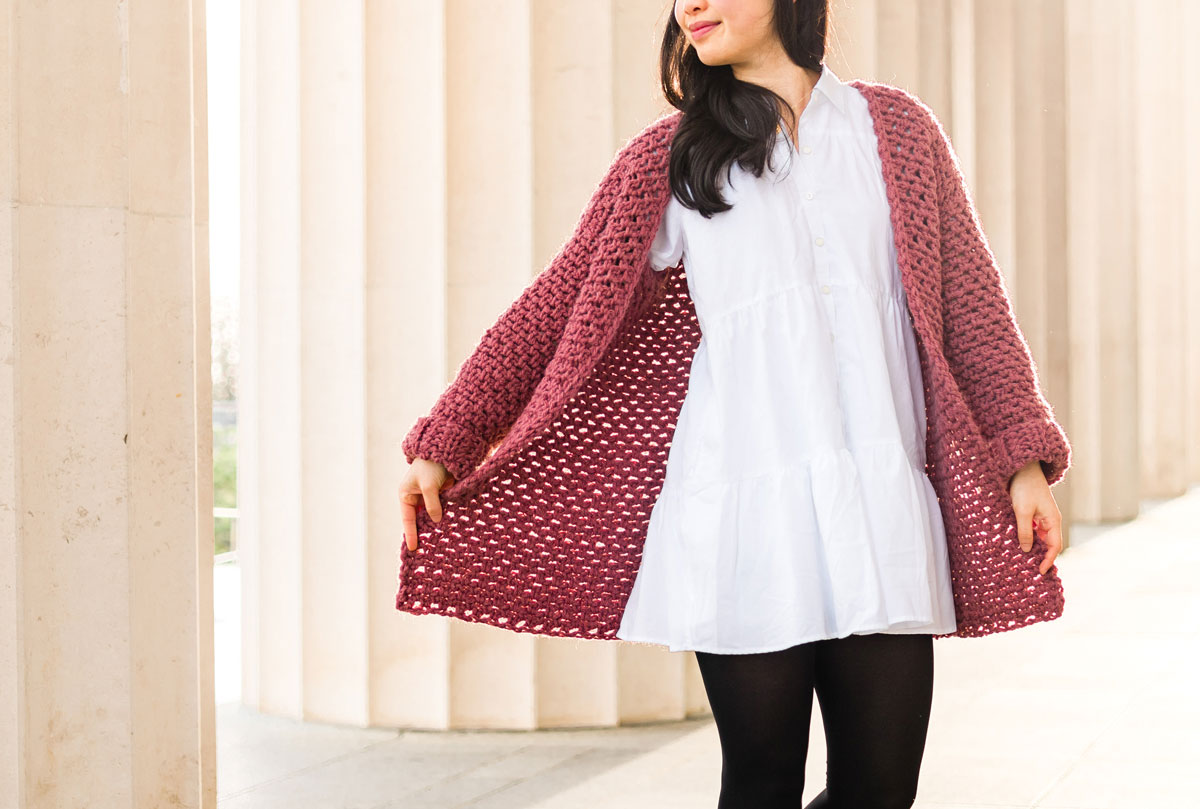
If you want, you can also crochet pockets separately and then add them onto the coat. I’ve taken photos of both options and I like it either way! Which one do you prefer?
Once you’ve crocheted all the pieces we’ll sew them together and then add a simple slip stitch edging around the neckline. I crocheted approx. 1 stitch per row but this number will change depending on your tension and yarn. You just want to make sure your stitches are spaced out evenly so that the corners lay flat.
Design Inspiration
It’s been a long time since my first crochet ‘coat’ pattern, the Stonewash Coatigan and I thought it was time for another outerwear project. Since Christmas is days away, I really wanted a pattern that was mindless and a nice break from the mad rush of organising leading up to the holidays.
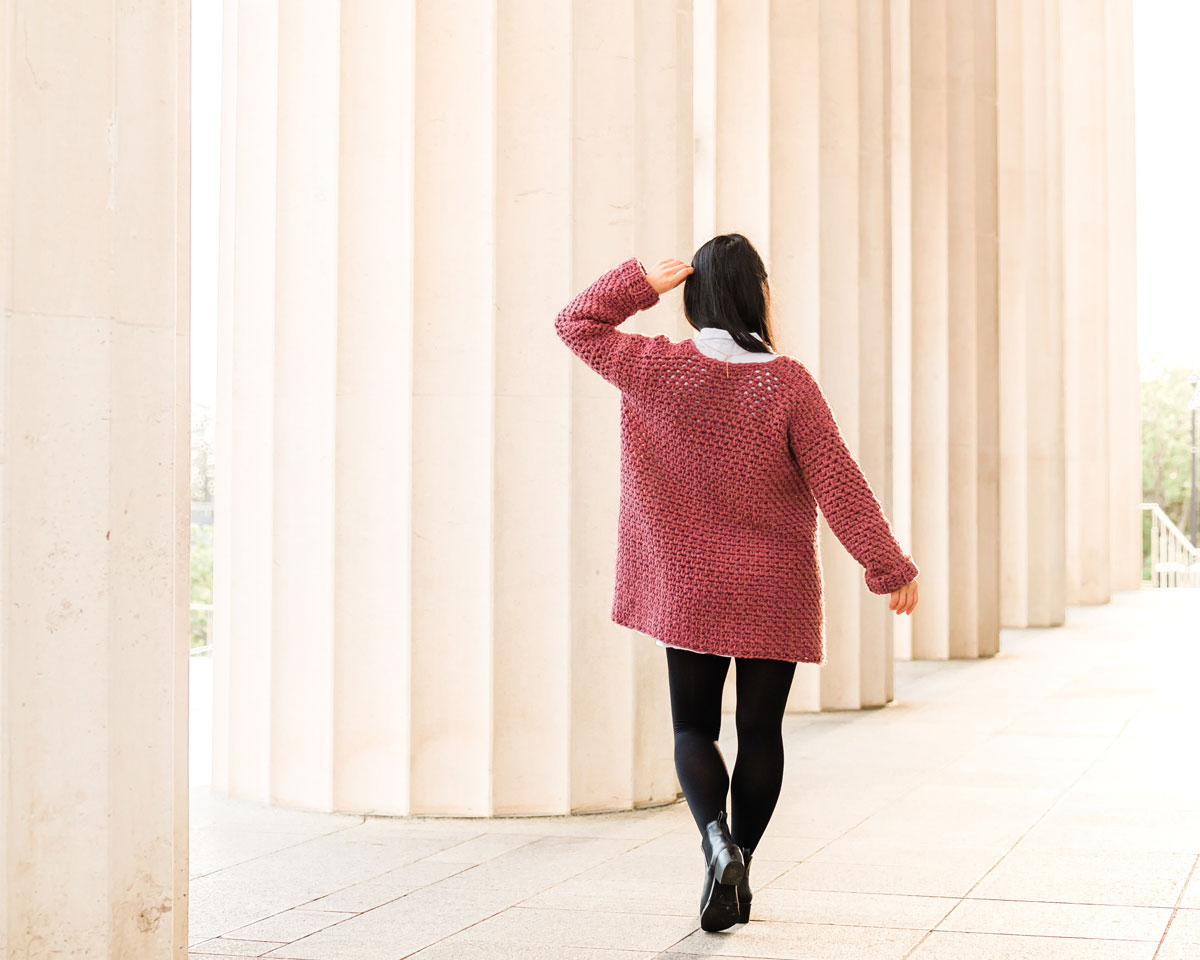
I love the boxy silhouette of the body and the wide chunky sleeves. I think sleeves pretty much make or break the ‘feel’ of a sweater! This design has very few details and I think that’s the best part about it 🙂
Looking for more free crochet patterns?
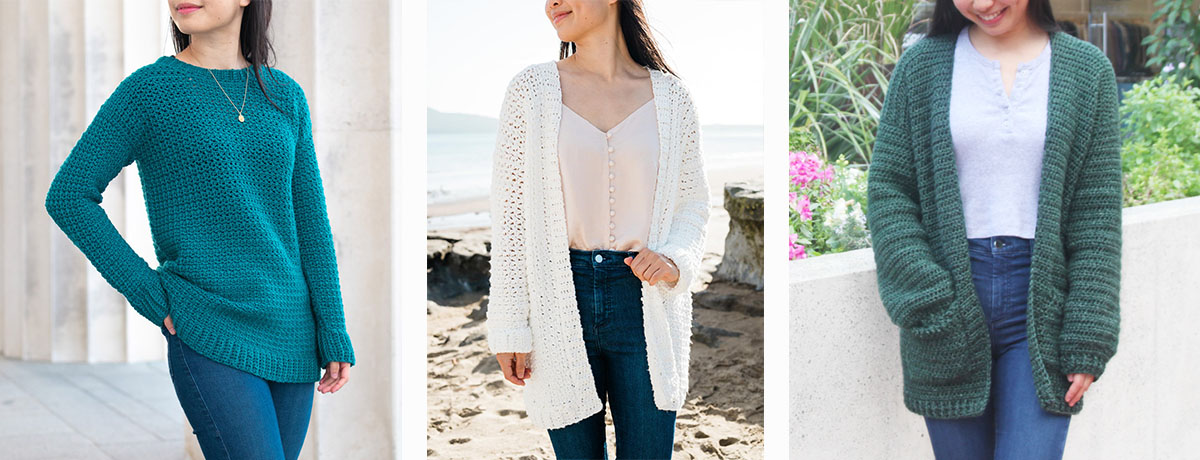
1. Weekend Snuggle Sweater / 2. In The Clouds Cardigan / 3. Briar Pocket Cardigan
Yarn
The Rosewood Coat uses LionBrand’s Hue + Me yarn in the shade ‘Love Song’ but honestly all 18 shades in this yarn are stunning! All the colours lean into a more muted, understated palette so they all match each other and have a more timeless feel.
Hue + Me is a bulky acrylic-wool blend that has a very tight spin to it and it’s quite stiff and structured. The stiffness of this yarn works really well to hold the shape of the Rosewood Coat. For a more relaxed and drapey ‘coatigan’ look, a yarn with a looser twist (like WeCrochet Mighty Stitch Bulky) will give you a more slouchy cardigan feel.
Video
Pin me for later!

I love to see your finished projects! Use #forthefrills and tag me on Instagram @forthefrills for a chance to be featured 🙂
Add the Rosewood Coat to your Ravelry queue!
Purchase the ad-free, printable version of the Rosewood Coat!
Rosewood Coat Summary:
A beginner-friendly crochet coat with an oversized fit, loose sleeves and pockets! You’ll only need single crochets, chains and half double crochets for this pattern.
NOTES:
*Sample is a size small shown on a 5’3” model with a 32” bust.
*The sizing guide follows size XS(S, M, L, XL)(2XL, 3XL, 4XL, 5XL). E.g. “Ch 78(82, 90, 104, 112)(120, 130, 142, 150) means Ch 78 for XS, Ch 82 for Small, Ch 90 for Medium, Ch 104 for Large, Ch 112 for XL, Ch 120 for 2XL, Ch 130 for 3XL, Ch 142 for 4XL and Ch 150 for 5XL.” If there is only one number, it applies to all sizes.
*"HDC 10" means HDC into the next 10 stitches.
*The turning chain, ch 1 does NOT count as a stitch. Otherwise, ch 1 counts as a stitch.
*Total stitches are indicated between < >.
*This pattern uses US crochet terms.
*This crochet cardigan is constructed from 3 main pieces – 1 body panel and 2 sleeves. There are also additional 2 pockets (optional).
*The body panel, sleeves and pockets are crocheted from the bottom up.
*For the body panel, bottom of the front and back panels are crocheted one piece. e.g. the foundation chain runs the width of the back panel + 2 front panels.
*To create armhole openings, the top of the two front panels and back panel are crocheted directly onto the main body piece but in separate sections.
*The sleeve ribbing is crocheted lengthways and then the sleeves are crocheted directly onto the long edge of the ribbing. The sleeves are designed to be extra-long so that the cuffs can be folded over once.
*Sew all pieces together with the wrong side facing outwards. With this pattern either side of the stitches can be the ‘right side’. Just pick whichever side you prefer and be consistent when sewing your pieces together.
*The majority of this crochet sweater is crocheted in the Linen Stitch (moss stitch) which follows a 2-row repeat comprising of 2 different types of rows which are referred to as LINEN A and LINEN B.
*The length of this cardigan is customisable (alteration instructions provided).
*Add approx. 15(17, 18, 21, 22)(24, 26, 28, 30)g of yarn for every additional 2.5cm / 1” of body length.
*The sample sweater is worked in Lion Brand’s Hue + Me yarn which is very stiff and tightly spun. A bulky weight yarn with more drape (e.g. WeCrochet Mighty Stitch Bulky) will result in a looser, drapey cardigan look rather than a structured coat.
LEVEL: Beginner+
Materials
Yarn – Lion Brand Hue + Me – Bulky / Chunky (5), 125m/125g, 137yds/4.4oz, 80% Acrylic + 20% Wool, Love Song
approx. 640(685, 775, 850, 950)(990, 1110, 1180, 1290)g
9mm (US M/N) Crochet Hook
Darning Needle
Scissors
Stiches & Abbreviations
Ch = Chain
Sl st = Slip Stitch
SC = Single Crochet
HDC = Half Double Crochet
BLO = Back Loop
Ch-sp = Chain Space
St(s) = Stitch(es)
Rep = Repeat
Sk = Skip
Measurements
*Measurements are taken from the garment lying flat. This coat is intended to be oversized. Choose your normal t-shirt size for an oversized fit (as pictured).
*Coat body and sleeve length will stretch out by 3-5cm / 1-2” after being worn a few times.
Measurements cm:
To fit Bust: 71(81, 91, 101, 112)(122, 132, 142, 152)
Back Width: 46(50, 55, 61, 66)(70, 76, 81, 86)
Armhole: 16(16, 18, 18, 20)(20, 23, 23, 25)
Sleeve length: 40(41, 42, 42, 44)(44, 45, 45, 46)
Length: 62(64, 67, 67, 69)(69, 71, 71, 73)
Measurements inches:
To fit Bust: 28(32, 36, 40, 44)(48, 52, 56, 60)
Back Width: 18(19.5, 21.5, 24, 26)(27.5, 30, 32, 34)
Armhole: 6.5(6.5, 7, 7, 8)(8, 9, 9, 10)
Sleeve length: 15.5(16, 16.5, 16.5, 17)(17, 17.5, 17.5, 18)
Length: 24.5(25, 26, 26, 27)(27, 28, 28, 29)
GAUGE: 10cm/4” square = 8 stitches wide x 10.5 rows tall in Linen Stitch
Linen Crochet Stitch Pattern
FOUNDATION CHAIN: Chain an even number of chains.
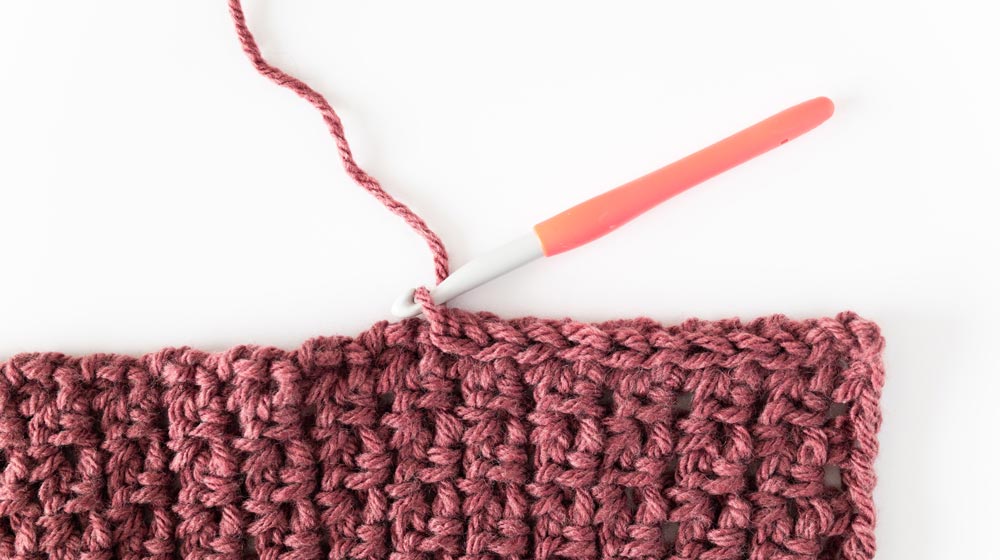
ROW 1: SC in 2nd ch from hook, *ch 1, sk 1 ch, SC; rep from * until end, turn.
ROW 2 (LINEN A): Ch 1, SC in 1st st, SC in ch-sp, *ch 1, sk 1 st, SC in ch-sp; rep from * until last st, SC in last st, turn.
ROW 3 (LINEN B): Ch 1, SC in 1st st, *ch 1, sk 1 st, SC in ch-sp; rep from * until 2 sts left, ch 1, sk 1 st, SC in last st, turn.
Repeat ROWS 2 – 3 until you reach your desired length.
Rosewood Coat Crochet Pattern
Body Panel
FOUNDATION CHAIN: Ch 78(82, 90, 104, 112)(120, 130, 142, 150)
ROW 1: Working into the back bumps of the chs, SC in 2nd ch from hook, *ch 1, sk 1 ch, SC; rep from * until end, turn.
<77(81, 89, 103, 111)(119, 129, 141, 149)>
ROW 2 (LINEN A): Ch 1, SC in 1st st, SC in ch-sp, *ch 1, sk 1 st, SC in ch-sp; rep from * until last st, SC in last st, turn.
ROW 3 (LINEN B): Ch 1, SC in 1st st, *ch 1, sk 1 st, SC in ch-sp; rep from * until 2 sts left, ch 1, sk 1 st, SC in last st, turn.
Repeat LINEN A – LINEN B until ROW 42.
*You can add/remove rows to make your sweater longer/shorter. Just make sure that your final row is a repeat of Linen A. Also keep in mind that the armhole rows will add approx. 16(18, 20, 20, 22)(22, 25, 25, 27)cm / 6.5(18, 8, 8, 9)(9, 10, 11)” to the current length of your coat.
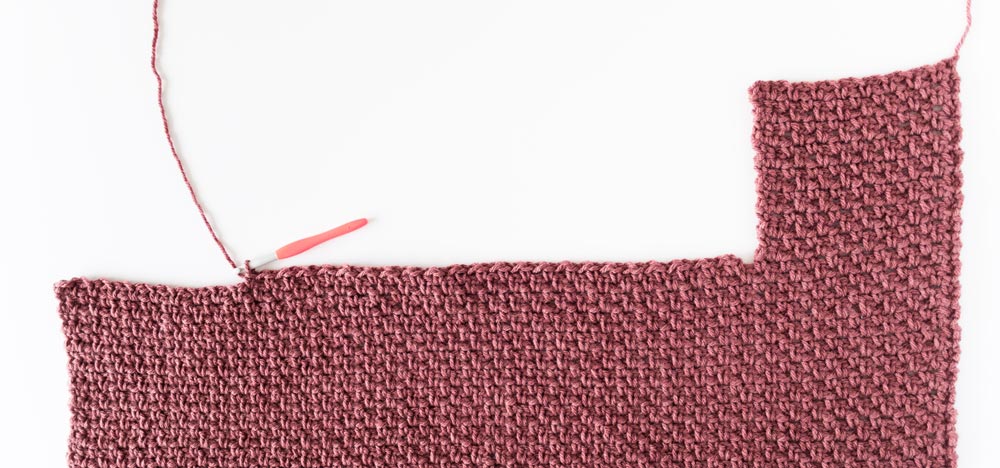
Do not fasten off! We’ll now crochet the ‘FIRST FRONT PANEL’.
First Front Panel
ROW 1: Ch 1, SC in 1st st, *ch 1, sk 1 st, SC in ch-sp; rep from * until you have 17(17, 19, 23, 25)(27, 29, 33, 35) sts, turn.
<17(17, 19, 23, 25)(27, 29, 33, 35)>
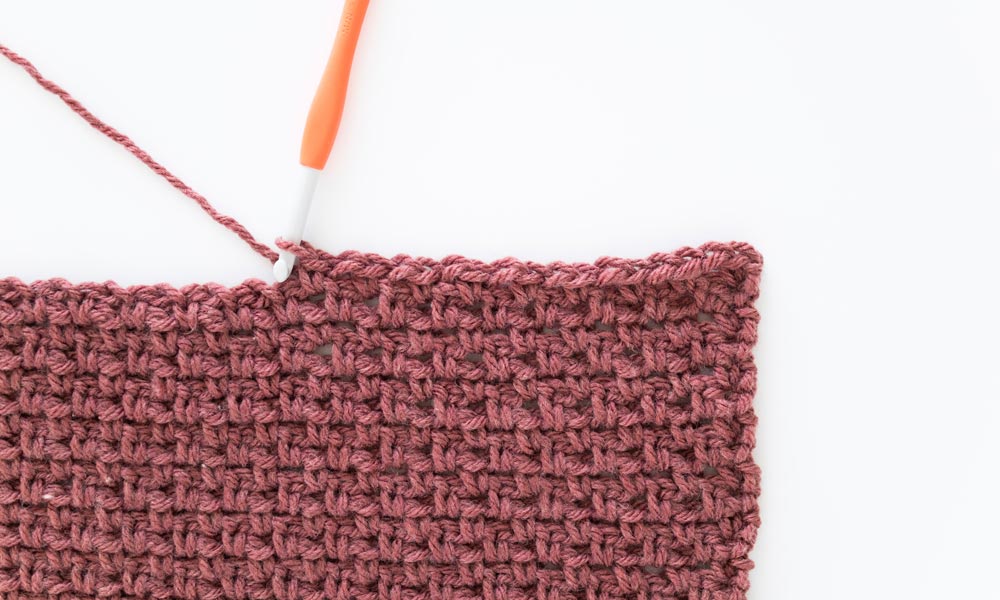
Repeat LINEN A – LINEN B until ROW 14(14, 16, 18, 18)(20, 22, 22, 24).
Fasten off.
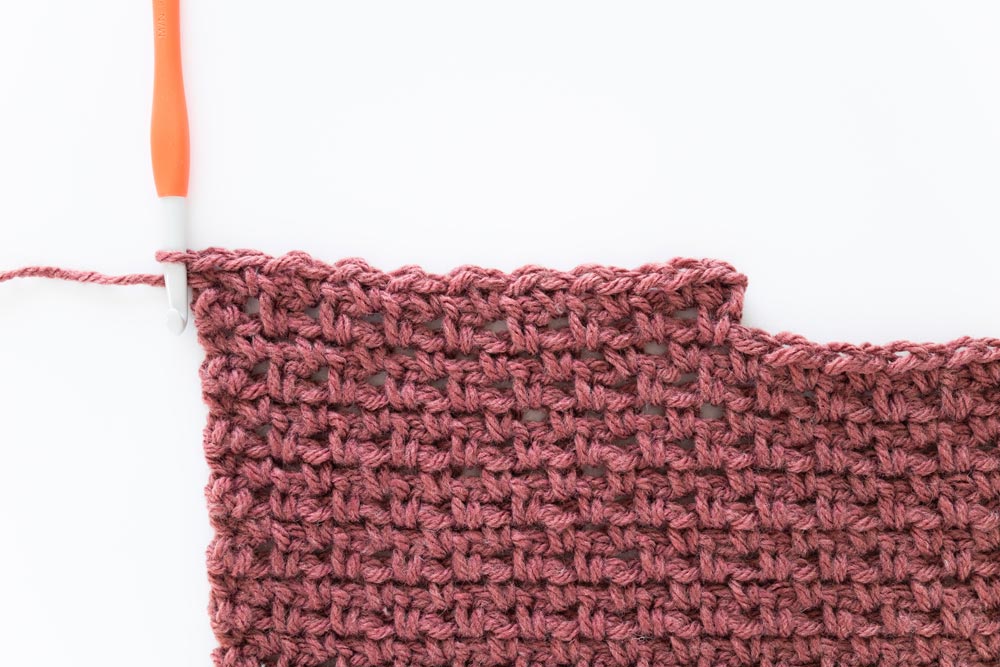
Back Panel
Counting from the last st of ROW 1 from the FIRST FRONT PANEL, sk 1 st, insert your crochet hook into the next st.
*Your hook should be in a ch-sp, not a SC.
Secure your yarn and pull up a loop.
ROW 1: Ch 1, SC in 1st st, *ch 1, sk 1 st, SC in ch-sp; rep from * until there are 18(18, 20, 24, 26)(28, 30, 34, 36)sts left in the row, turn.
<41(45, 49, 55, 59)(63, 69, 73, 77)>
Repeat LINEN A – LINEN B until ROW (14, 16, 18, 18)(20, 22, 22, 24).
Fasten off.
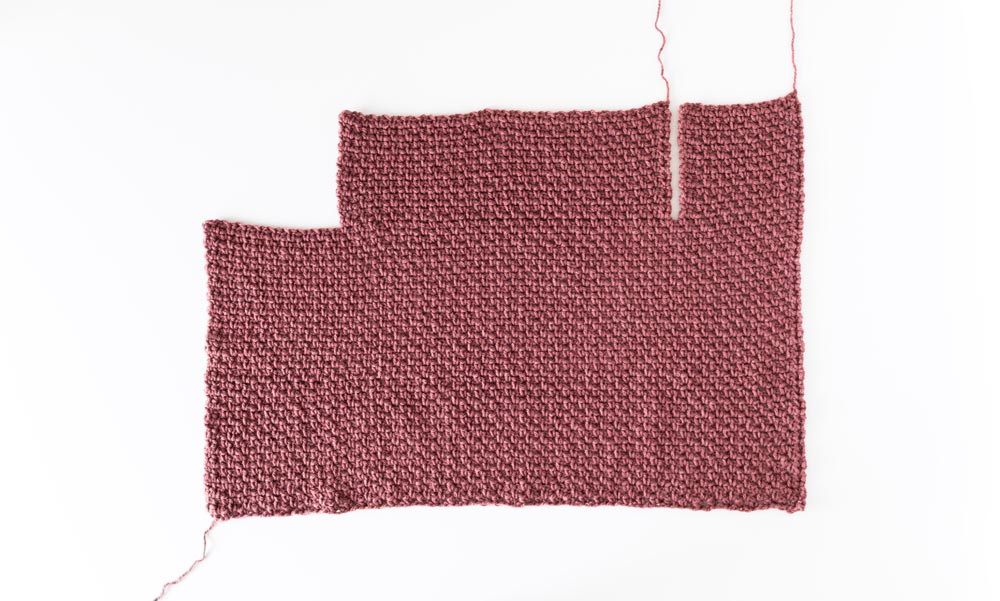
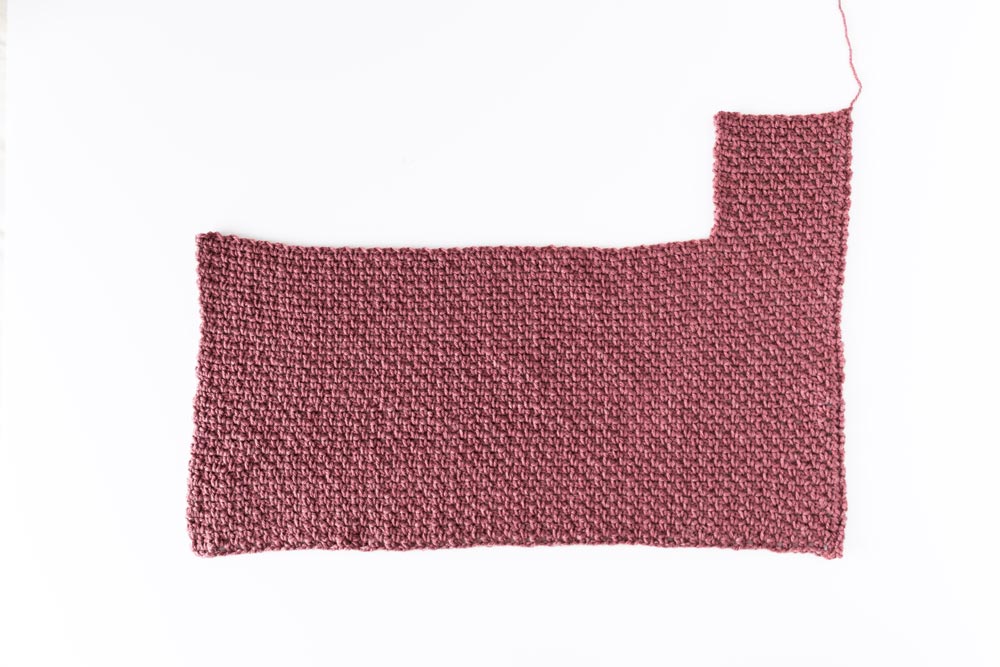
Second Front Panel
Counting from the last st of ROW 1 from the BACK PANEL, sk 1 st, insert your crochet hook into the next st.
*Your hook should be in a ch-sp, not a SC.
Secure your yarn and pull up a loop.
ROW 1: As LINEN B.
<17(17, 19, 23, 25)(27, 29, 33, 35)>
Repeat LINEN A – LINEN B until ROW (14, 16, 18, 18)(20, 22, 22, 24).
Fasten off.
Sleeves
(make 2)
SLEEVE RIBBING
FOUNDATION CHAIN: Ch 6.
ROW 1: HDC in 2nd ch from hook, HDC in each ch across, turn.
<5>
ROW 2: Ch 1, BLO HDC 4, HDC, turn.
<5>
Repeat ROW 2 until ROW 15(15, 17, 17, 19)(19, 21, 21, 25).
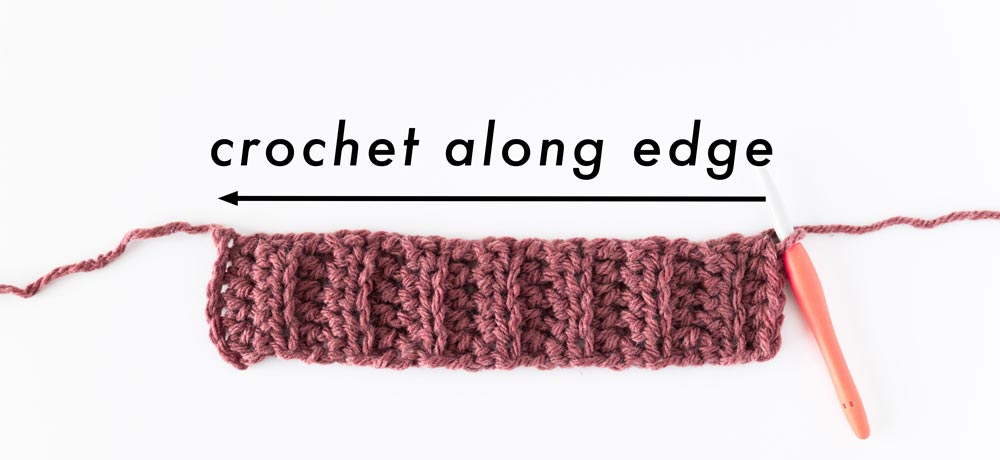
Do not fasten off! We will now work along the long edge of the ribbing.
SLEEVE
ROW 1: Ch 1, SC in 1st row, *ch 1, SC in next row; rep from * until end, turn.
<29(29, 33, 33, 37)(37, 41, 41, 45)>
Repeat LINEN A – LINEN B until sleeve measures 40(41, 42, 42, 44)(44, 45, 45, 46)/ 15.5(16, 16.5, 16.5, 17)(17, 17.5, 17.5, 18)”.
Fasten off.
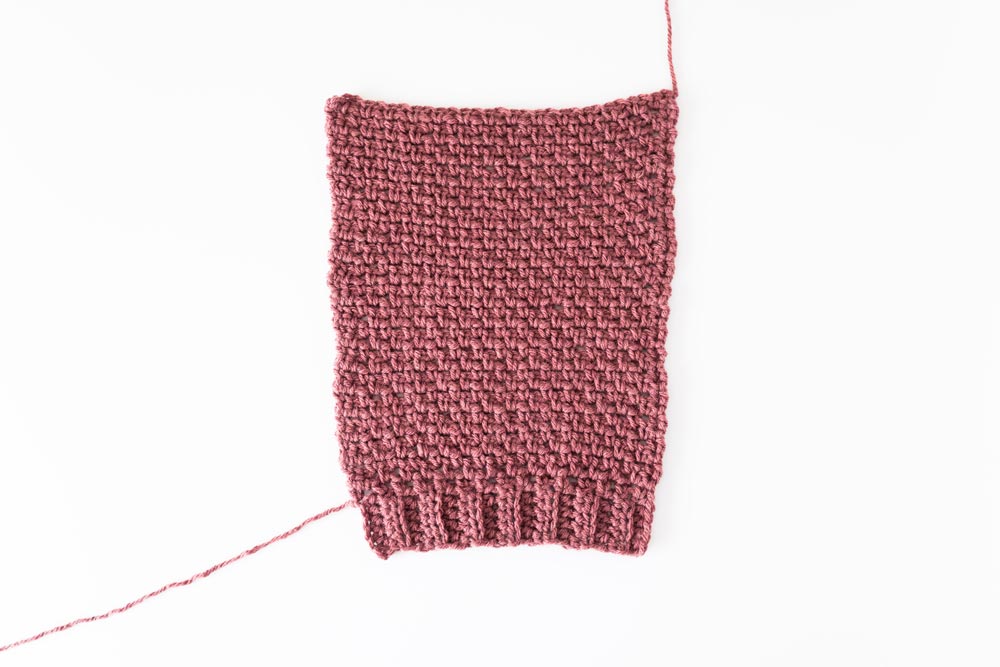
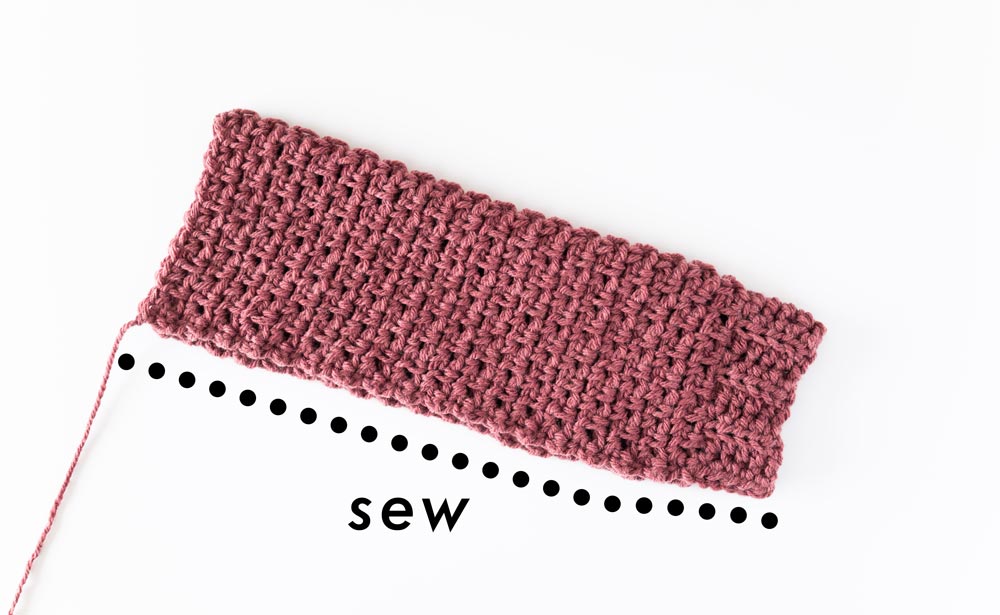
Fold sleeve in half lengthways and whip stitch the long edge of the sleeve together.
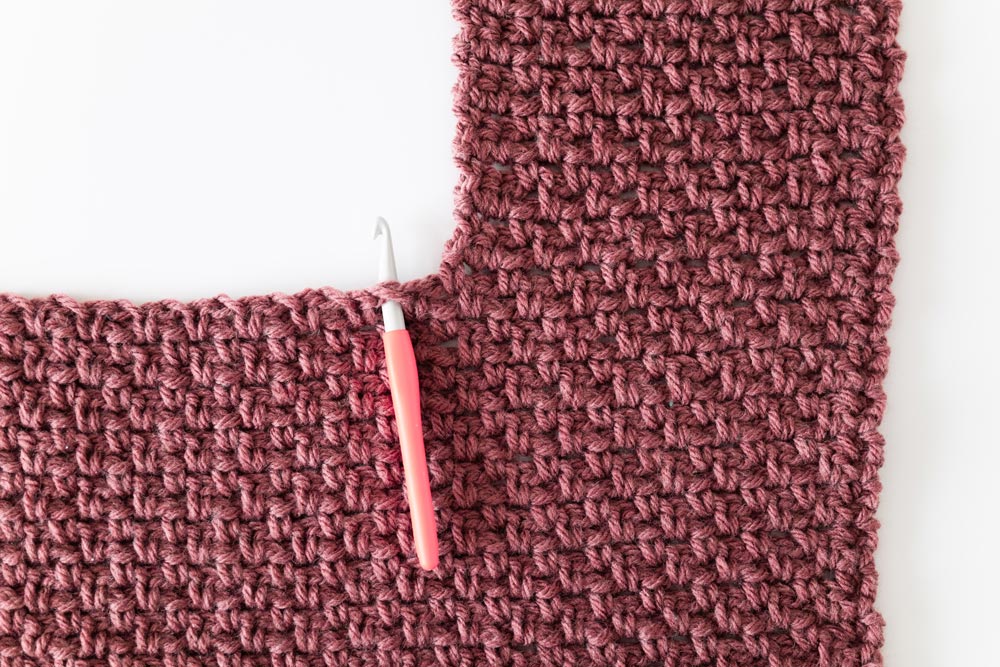
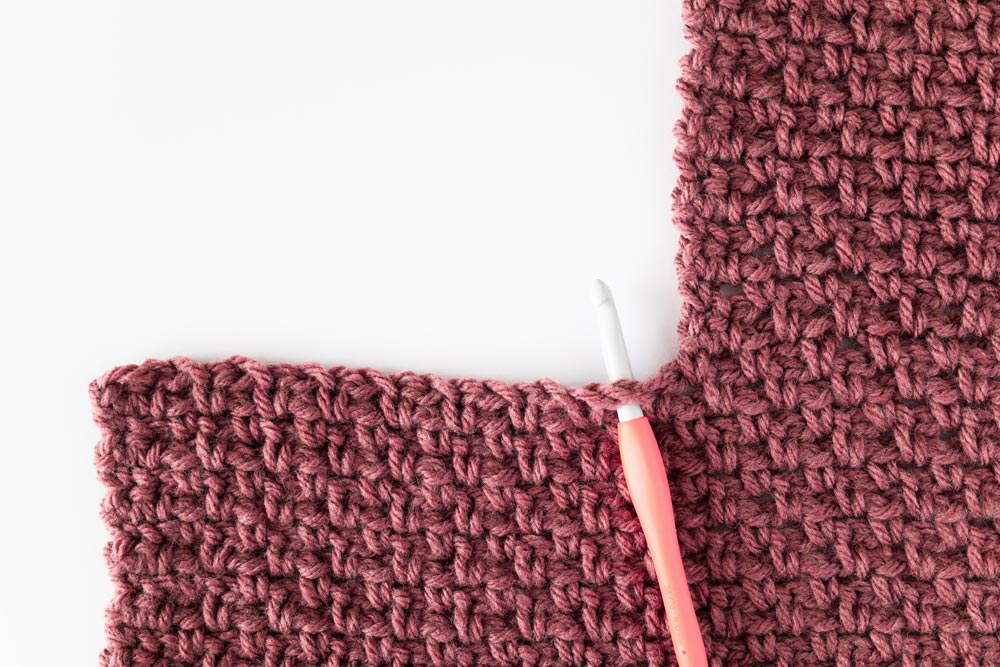
Assembly
Lay the front panels on top of the back panel.
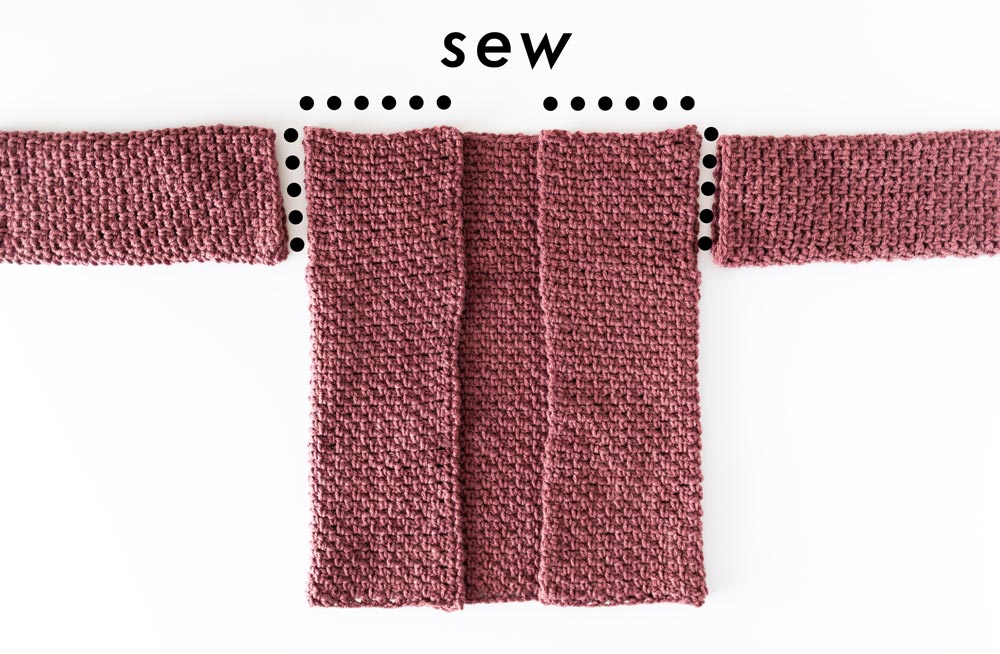
Whip stitch the shoulder seams together.
Whip stitch the top of the sleeves to the body.
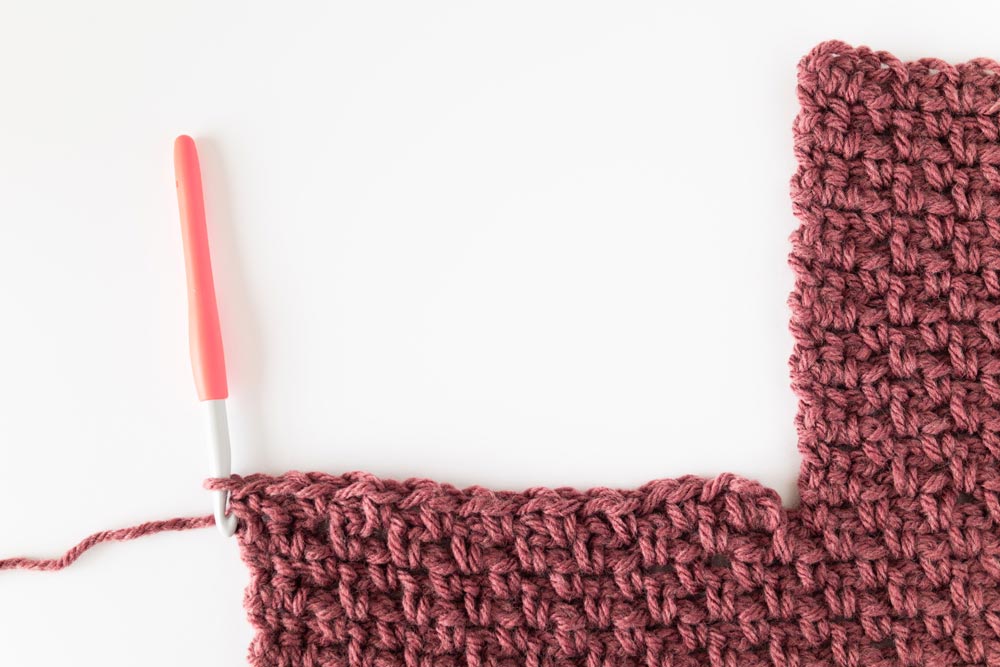
Finishing
With the right side facing you, insert your crochet hook in the corner of the front panel. Secure your yarn and pull up a loop.
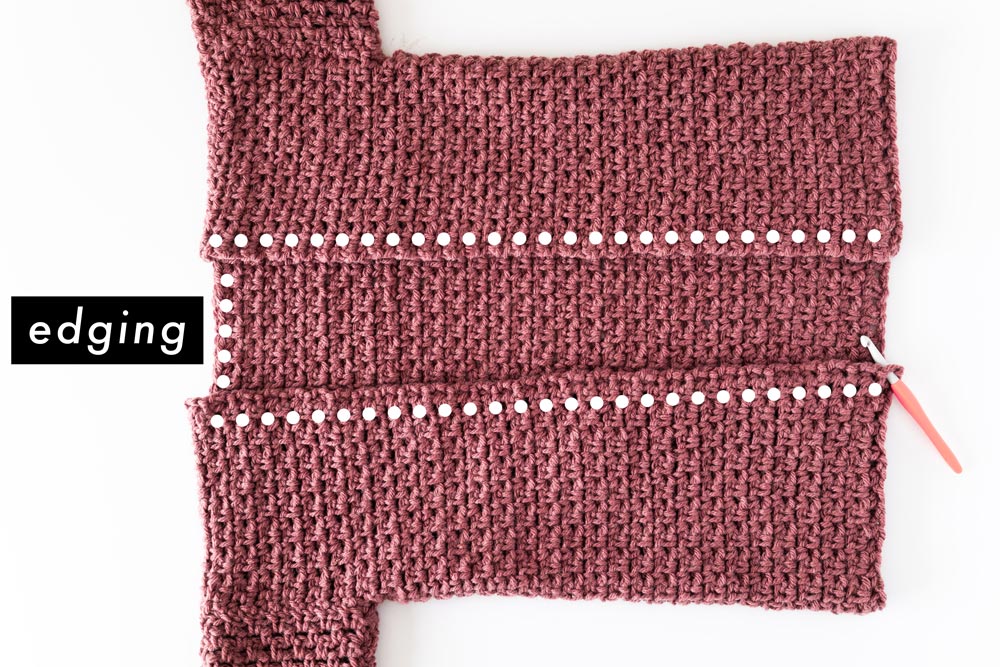
ROW 1: Ch 1, sl st evenly along the edge of the neckline, turn.
*The exact number of stitches doesn’t matter, rather focus on spacing out your stitches evenly. If your neckline is ruffling you have too many stitches and if your neckline is puckering you have too few stitches.
*For a minimalist look with clean edging (as pictured) you can fasten off.
*For thicker ribbing follow the instructions from ROW 2.
ROW 2: Ch 1, BLO sl st across, sl st in last st, turn.
Repeat ROW 2 until ROW 7.
Fasten off.
Pockets
(make 2)
FOUNDATION CHAIN: Ch 16.
ROW 1: Working into the back bumps of the chs, SC in 2nd ch from hook, *ch 1, sk 1 ch, SC; rep from * until end, turn.
<15>
Repeat LINEN A – LINEN B until ROW 14.
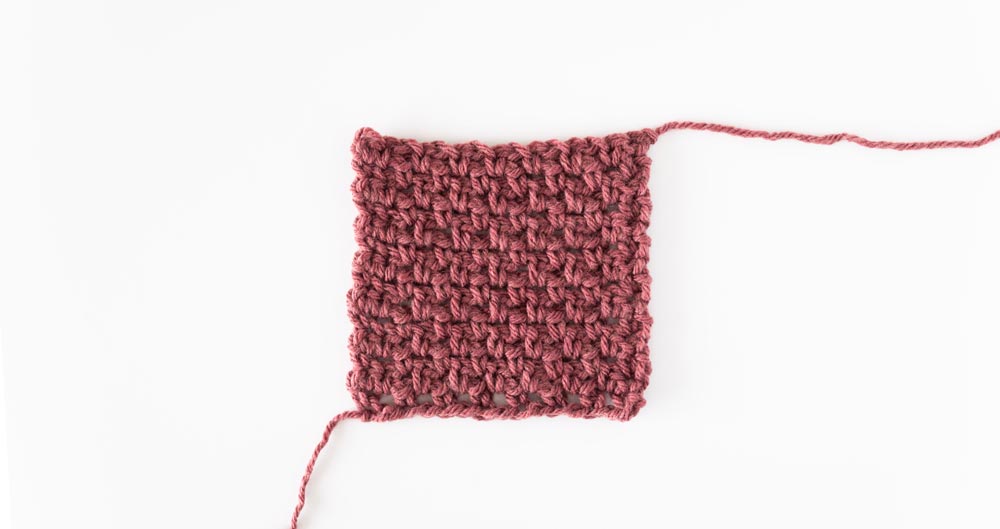
Fasten off.
Using stitch markers/safety pins, pin the pockets into place on the front panels.
*I suggest trying on the cardigan to double check the pocket placement.
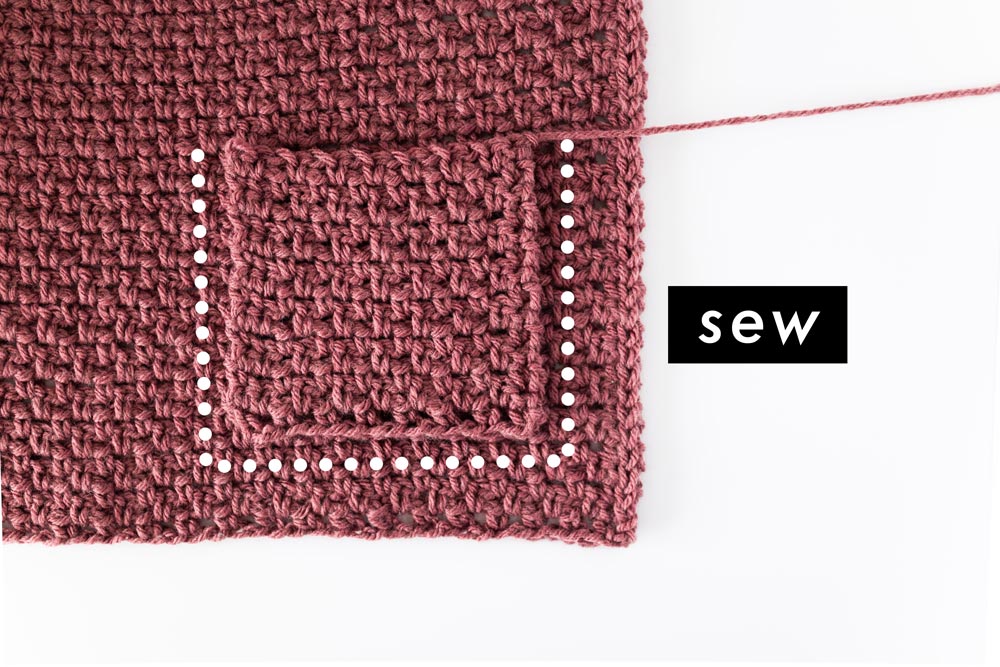
Whip stitch the edges of the pocket to the front panels, leaving the top of the pocket open.
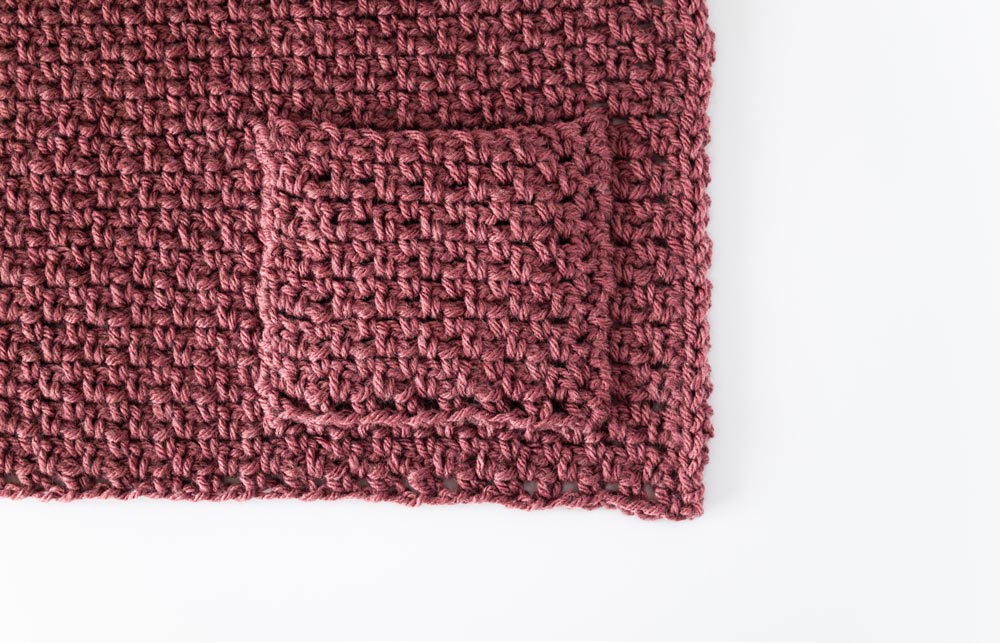
Weave in all of your ends.
Voilà! You’ve finished your Linen Stitch Coat 🙂
It might be a beginner cardigan,but it looks like a perfect project to wear for work.
The color of this yarn is beautiful.
My only drawback is that i can't use this yarn since it has wool in it. I'll need to find a suitable acrylic substitute.
Thank you for sharing.
I have used this stitch for a recent sweater project. Love it.
Hi! I was wondering if your measurements are after blocking or not? Thanks so much for another wonderful pattern!
Hi Grace! I'm super excited to make this coatigan but before I begin, I'm curious how many skeins it will require! So sorry if I missed this in your pattern! Thanks -Coca
I bought the pattern. It is a good thing I read the free pattern on line The written pattern has an error about the gauge. It says 18 stitches wide and 9 inches rows tall. I figured that was incorrect because it didn’t make sense.
I'm having trouble with the gauge. I used the 9mm hook and my gauge swatch is much bigger. i tried dropping down hook size a few times and the gauge is still off. What am i doing wrong?
Hi Nancy, I am having the exact same problem. Did you manage to solve it?
Hi! Thank you so much for sharing this pattern. I just made the body and one sleeve of the cardigan in a size small. I used bulky yarn that was 100% acrylic. It seems as though it is almost half the size it is supposed to be. I have never worked with a linen stitch before- do A and B count as 1 row? Or does A count as row one, B count as row two, the next A count as row three, and so on. Thank you!