
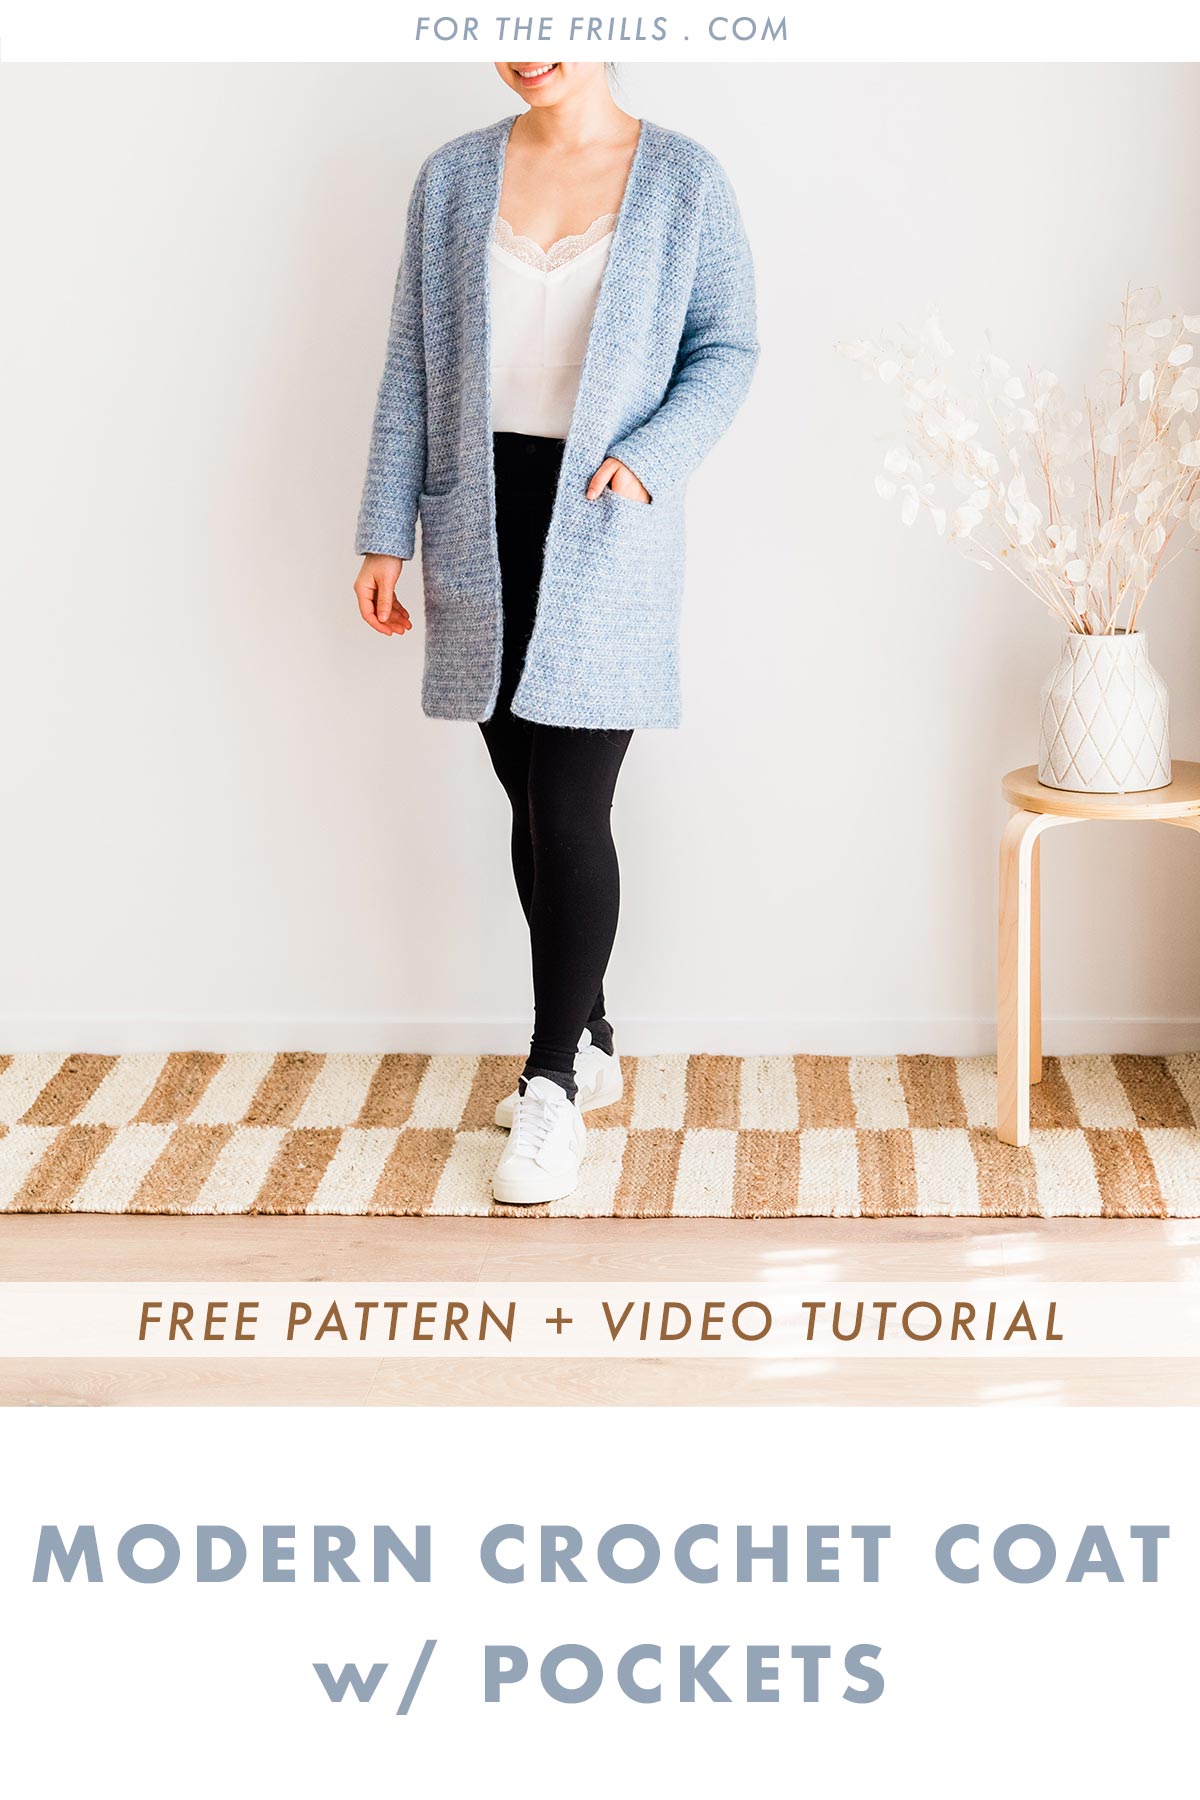
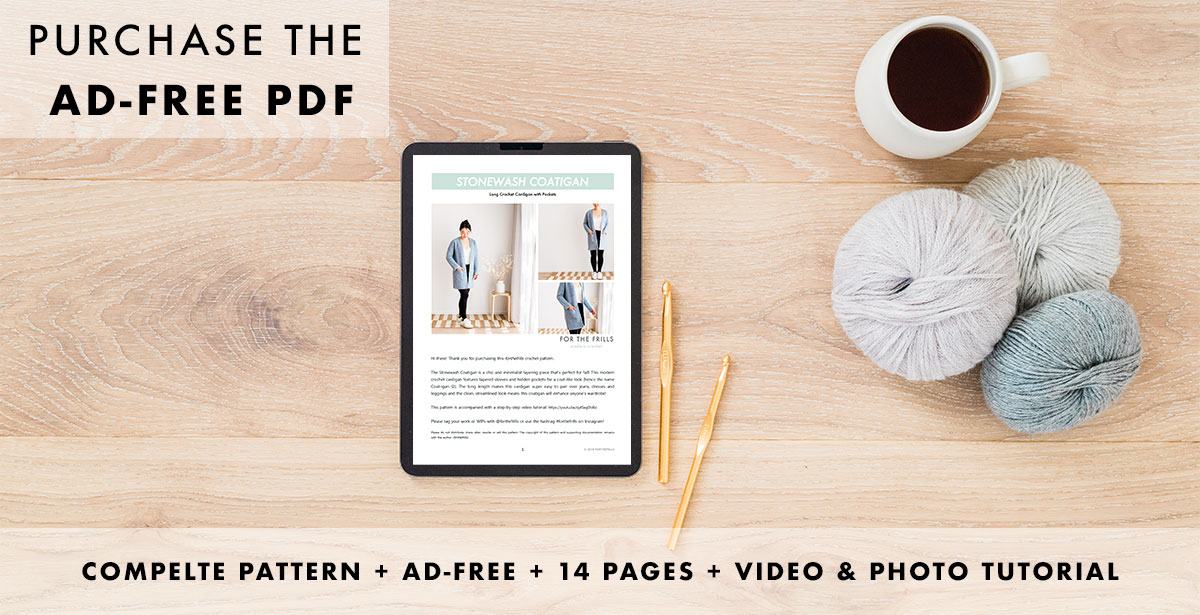
Scroll down for this free crochet cardigan pattern and step-by-step video tutorial or purchase the ad-free, printable PDF here.
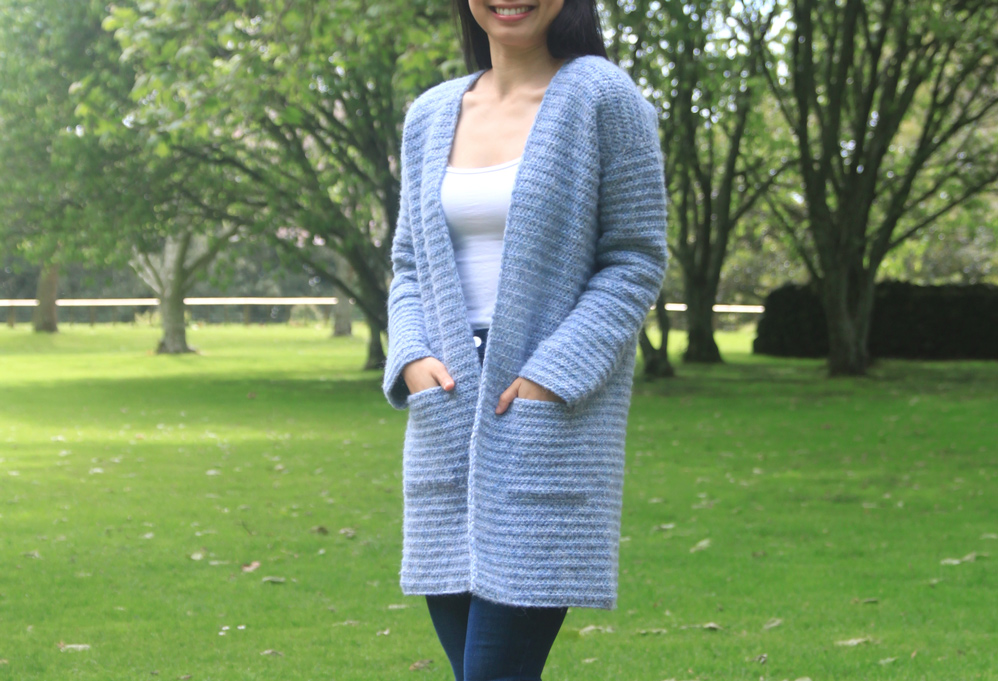
Learn how to crochet this easy crochet coat with invisible pockets. The simple boxy silhouette combined with tapered sleeves creates a timeless crochet cardigan!
This post may contain affiliate links, view our disclosure policy for details.
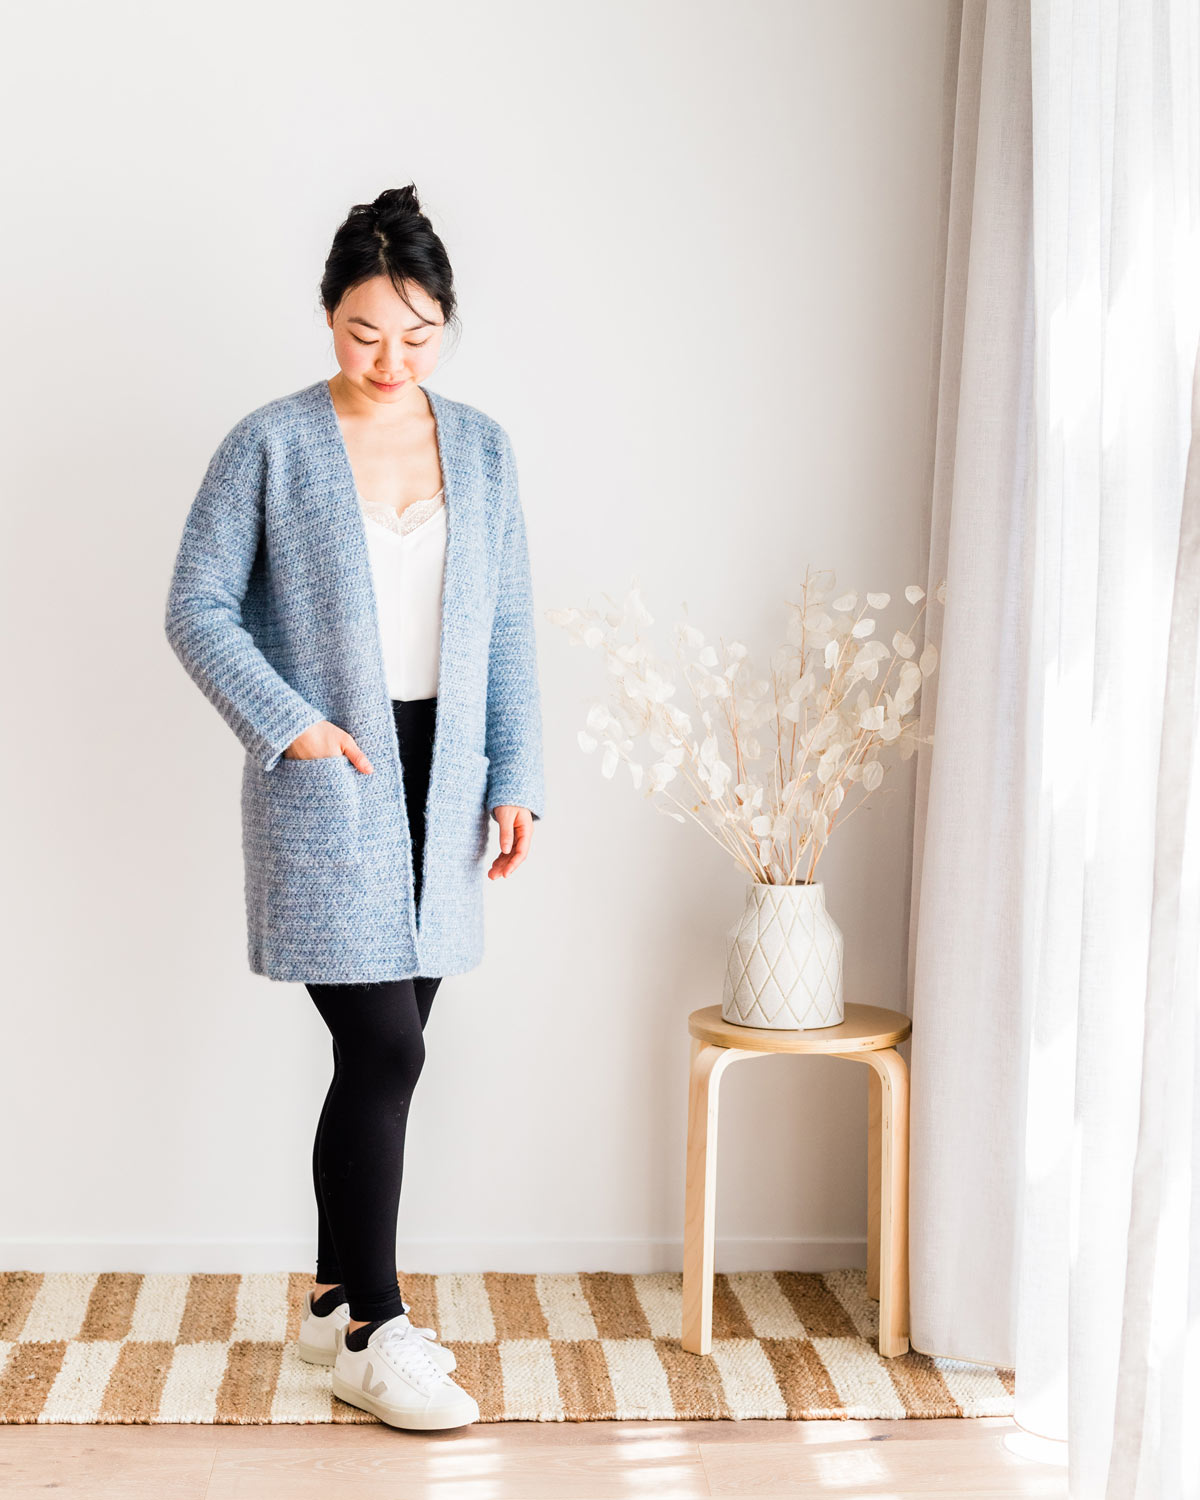
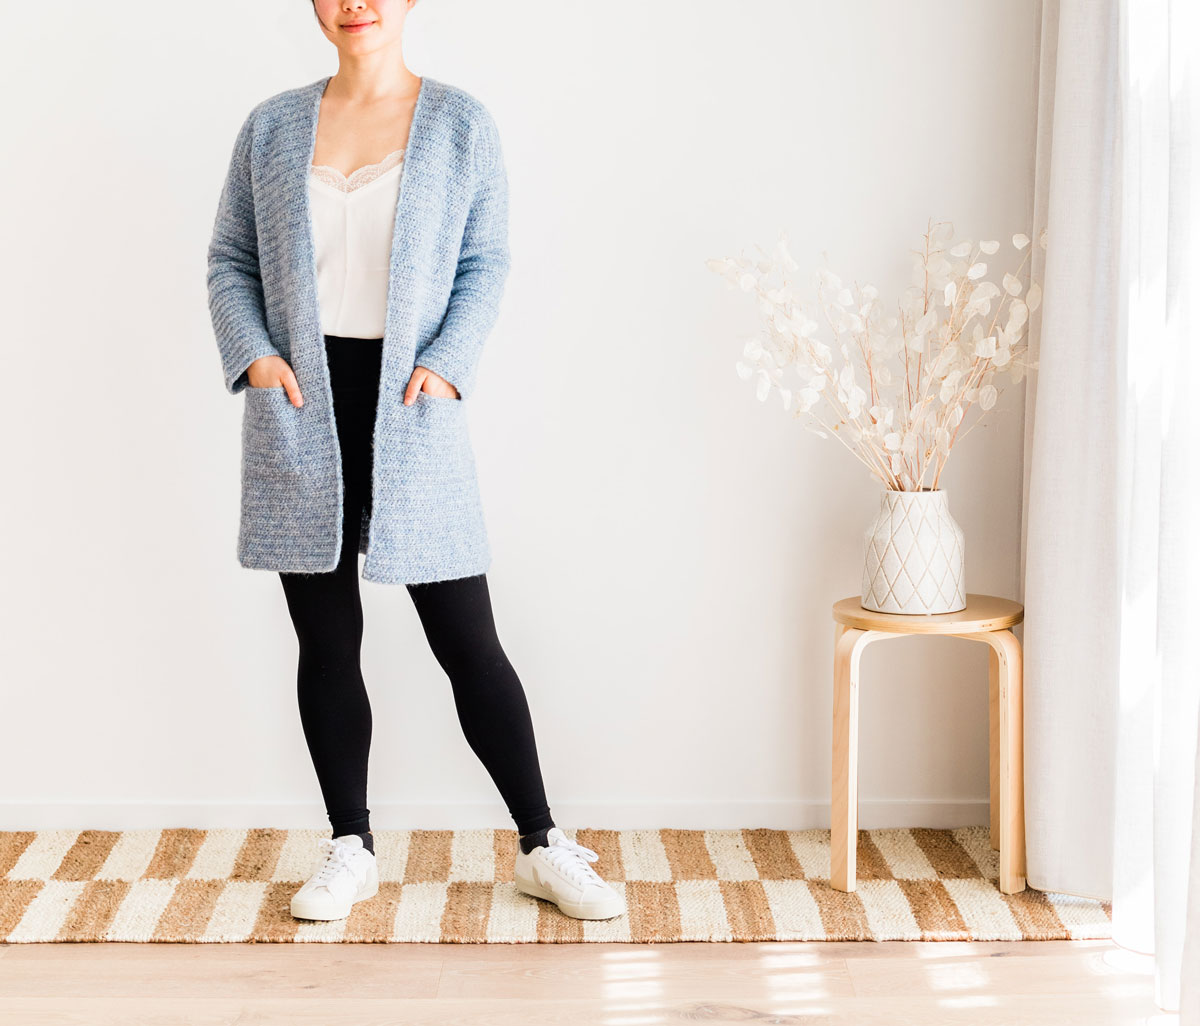
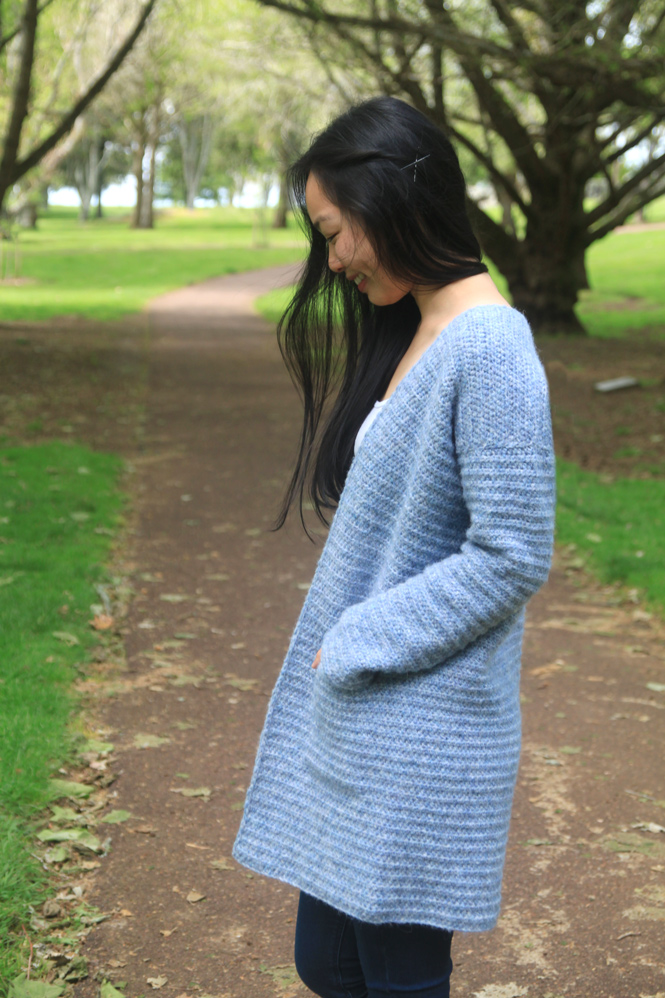
Is it a coat? Or a cardigan? The Stonewash Coatigan is chic, minimalist and wonderfully versatile! This modern crochet cardigan features tapered sleeves and seamless pockets for a coat-like look (hence the name Coat-igan 🙂 ).
The long length makes this cardigan super easy to pair over jeans, dresses and leggings and the clean, streamlined look means that this coatigan will effortlessly fit into anyone’s wardrobe!
Simple Stitches
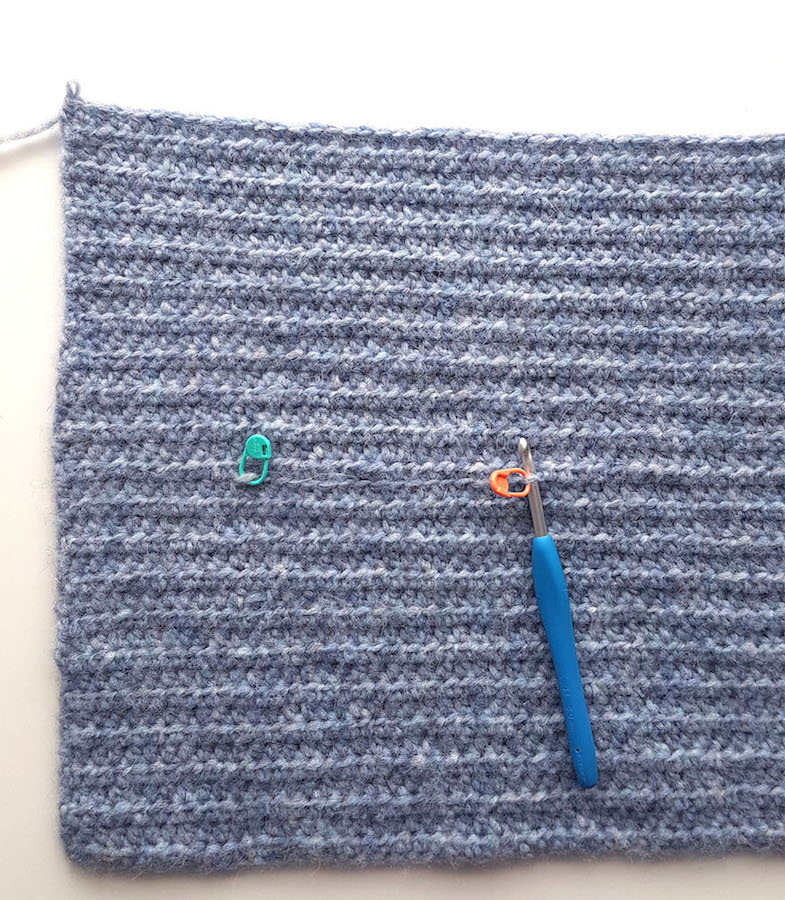
For the Stonewash Coatigan, the humble half double crochet is the star of the show! In this pattern half double crochets make up 99% of the entire cardigan. Simple stitches are often overlooked, but I find that there’s something so meditative about easy stitches. The body is repetitive so this is the perfect to crochet while watching Netflix!
Construction
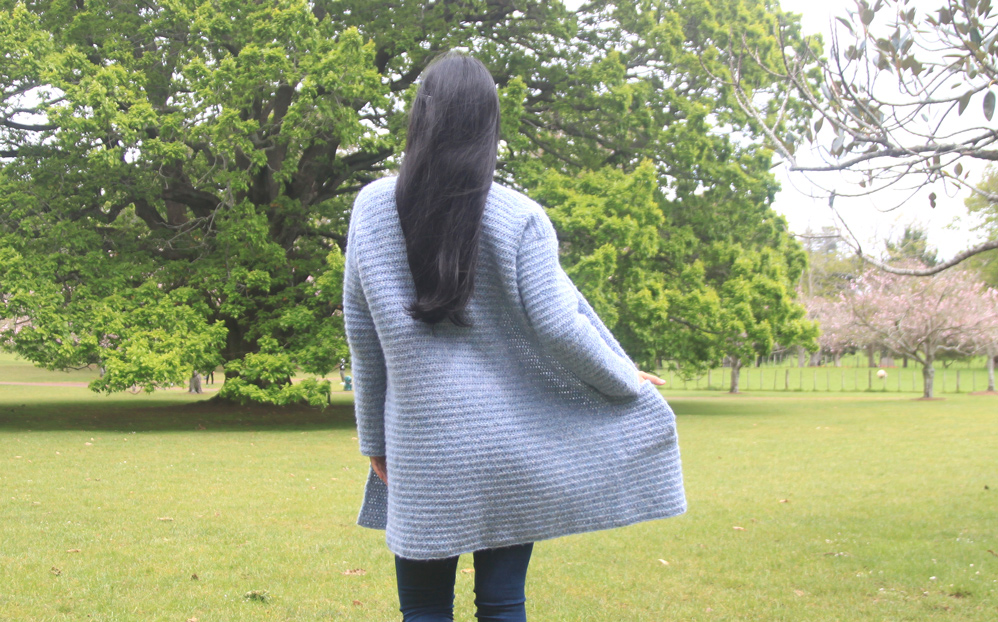
Despite its long length the Stonewash Coatigan only requires shoulder and armhole seaming, which greatly reduces the time you spend sewing!
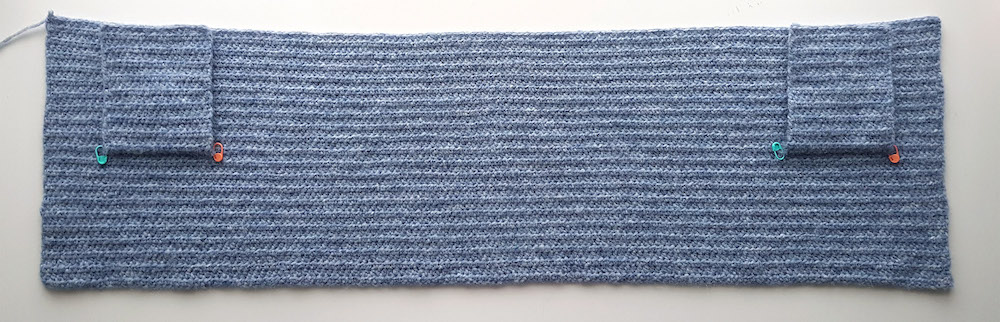
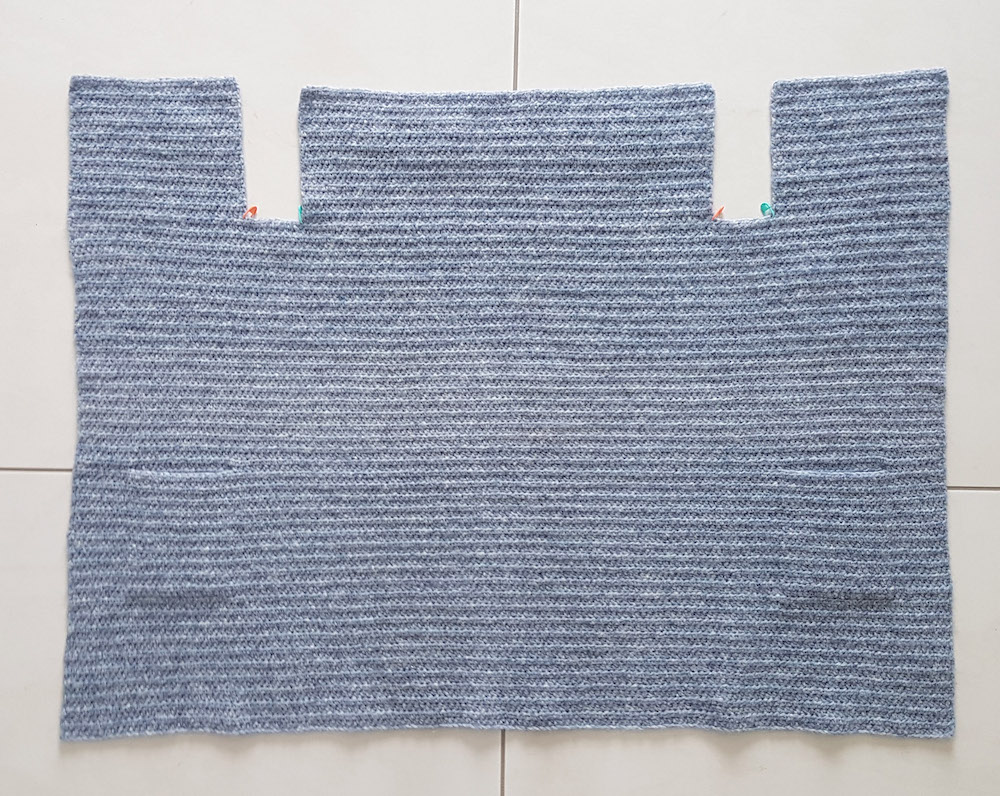
We’ll start with the hem of the body panel which is crocheted entirely in one piece. We’ll crochet rows of half double crochet until it’s time to crochet the pockets. The pockets are crocheted directly onto the cardigan, and then the body panel is divided into 3 sections – 2 front panels and a back panel.
The armhole shaping is the key to the minimalist look of the coat. The gaps allow the sleeves to perfectly slot into body. The sleeves are crocheted from the armholes to cuff, this way you can double check that your sleeve will fit into the armhole slot.
The coat sleeves are worked in the round with half double crochets 2 together every few rounds to create the tapered shape.
Since we’ve eliminated sewing down the sides of the body and the sleeves of the cardigan, this means you can save on time that is better spent crocheting 🙂
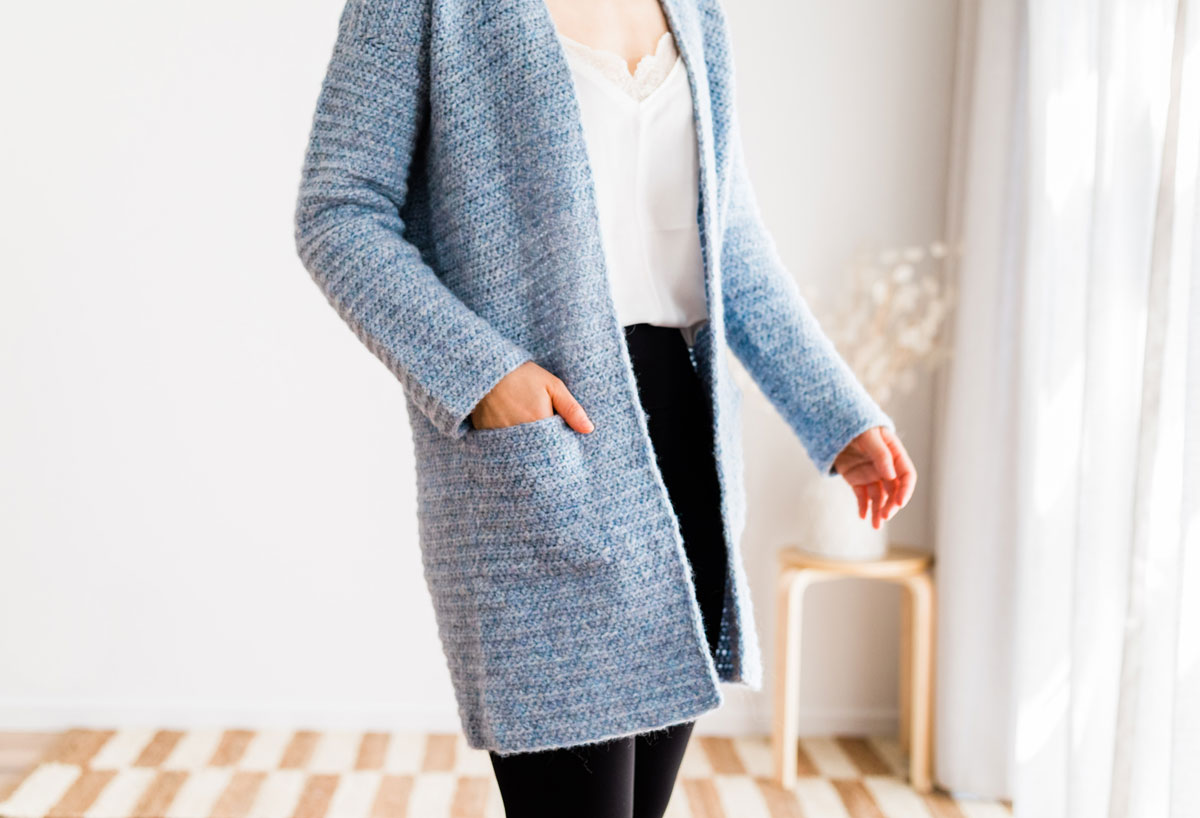
How to Crochet Invisible Pockets
If you’ve never crocheted hidden pockets before, this technique might seem a bit daunting but it’s a lot easier than it looks – especially if you use stitch markers to help you out! When crocheting the body, we’ll have 2 sections where we’ll crochet back loop half double crochets. This is the key to creating a seamless pocket! We’ll crochet the bottom of the pocket directly into the left over front loops.
The pocket will be connected to the body a few rows later. We’ll crochet directly onto the top of the pocket and skip the same number of stitches on the body panel. This forms that hand opening for the pocket and then the sides of the pocket are whipped stitched in place. Just make sure to not insert your needle into the front of the cardigan. This will keep your pockets looking ‘invisible’.
If you’re still unsure about invisible crochet pockets, make sure to check out the full step-by-step video tutorial for a detailed demonstration.
Print and Crochet!
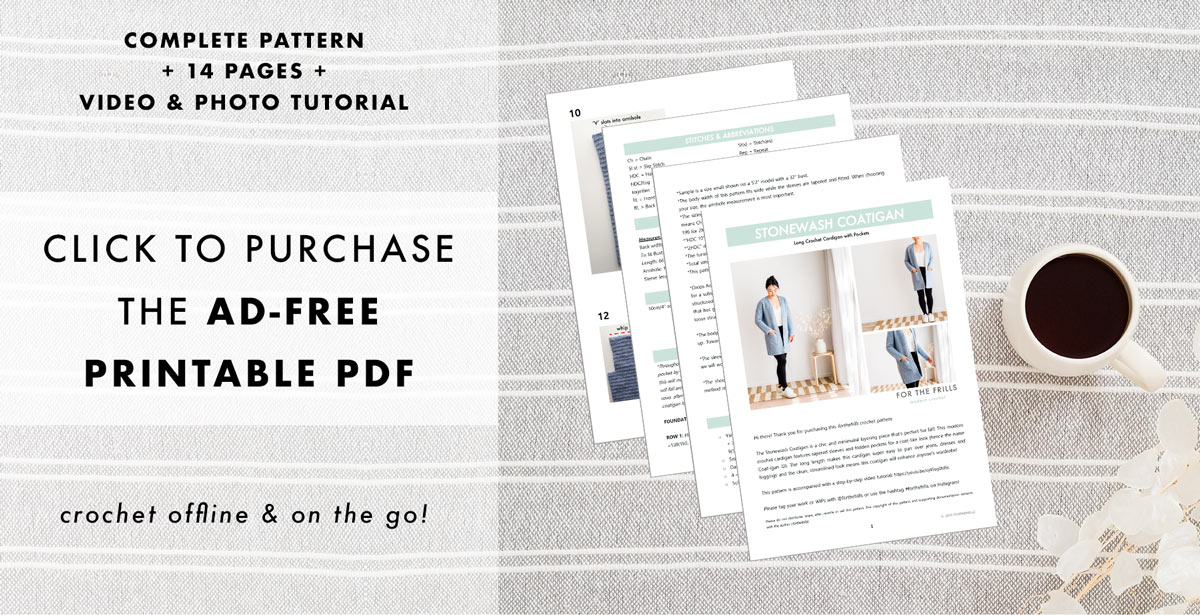
If you prefer paper patterns or love to crochet on the couch, you can always find a low-cost ad-free PDF version of all my free patterns. This nicely-formatted pdf contains 13 pages, with photos and a link to the video tutorial. You’ll also find the PDF to be a really valuable upgrade, as you can highlight you stitch counts, make notes and view it from your phone, tablet of laptop.
Design Inspiration
I’ve been dreaming of a structured crochet cardigan/coat for ages! Compare to knitting, I think crocheting lends itself well to more structured pieces and I wanted this design to look more like a coat than a slouchy casual cardigan (although I love those too! – check out the Briar Pocket Cardigan here!). I knew that the body of this cardigan would be quite long, so I decided to use a different construction method to reduce the seaming because sewing pieces together always takes me forever!
Since the overall look of this cardigan is clean and minimalist, I really wanted the pockets to be invisible/hidden within the body of the design rather than sewn on top. Initially I tried to make the pocket opening to be on an angle but that made the pattern ridiculously complicated and didn’t look nearly as neat. So, I scrapped that idea and went with horizontal pockets instead and I love the way they look!
Making these pockets is really a lot easier than it looks and they’re big enough to fit a smartphone. I really think that female clothes need to have more pockets because it makes life so much easier. 🙂 However, you can leave of the pockets entirely if you want a smooth look and this crochet cardigan will be even easier to make!
Yarn
Let’s talk about the yarn! For this project, I used Drops Air in the colour fog. It’s a beautiful soft mix of pale blue, grey and white to give an overall look of a dusky blue. All the colours are a soft mix of 2-3 shades which give a gorgeous dappled or stonewashed effect to a garment.
Drops Air is a ‘blown’ yarn which means that unlike traditional spun yarns, fibre is blown into the centre of a mesh tube to create yarn. You can use less fibre per 100m, so this technique creates an incredibly light, yet strong fibre.
Blown yarns lend themselves well to more structured designs as it allows you to create long garments without them becoming too heavy and pulling down the design. On the other hand, blown yarns have very stiff drape and don’t tend to stretch out or ‘relax’ as much after blocking.
I love the way this yarn looks for the Coatigan as I think it enhances the minimalist, streamlined look however feel free to experiment with other yarns if you wish! This design would also look lovely for casual everyday wear in a merino or acrylic!
If you want the structured look but can’t find Drops Air, Wool and the Gang’s Feeling Good Yarn is a great substitute or Lion Brand’s LB Collection Chainette, is a chained yarn not a ‘blown’ yarn but it has similar properties of great yardage per 50g due to its chained, lightweight construction!
Check out more free crochet patterns!
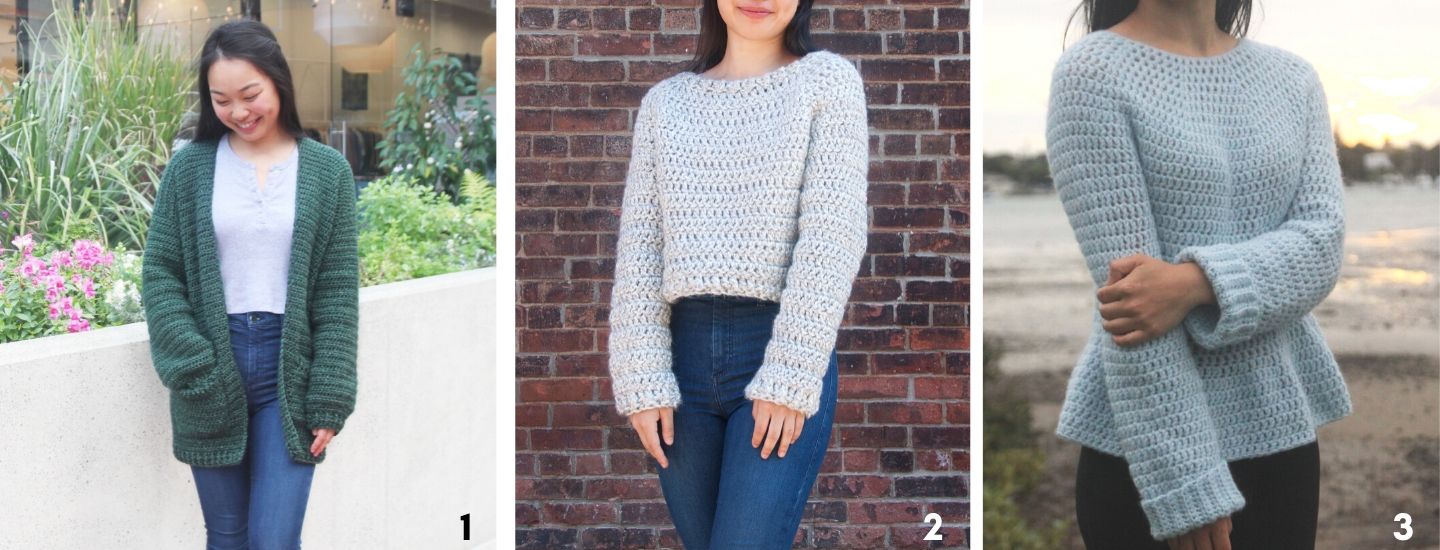
1. Briar Pocket Cardigan / 2. Top Down Quick & Chunky Sweater / 3. Julia Peplum Sweater
Stonewash Coatigan - Part 1
In part 1, we’re going to focus on creating the body and seamless pockets of the cardigan. The body is created from the bottom down and entirely in half double crochets. If you’d like to change the length of your coatigan there are alteration instructions along the way. The bottom of the pockets will be crocheted directly onto the body and then we’ll join the top of the pockets by crocheting across the body and pockets.
You can find Part 2 here!
Click to Pin me for later!
Add the Stonewash Coatigan to your Ravelry queue!
Purchase the Ad-Free Printable PDF of the Stonewash Coatigan!
Find the step-by-step video tutorial here!
MINI EXPLANATION:
A long crochet cardigan with hidden pockets, tapered sleeves and a coat-like structure. This pattern uses half double crochets and half double crochet 2 stitches together to create a simple and minimalist crochet coat.
*Sample is a size small shown on a 5’3” model with a 32” bust.
*The sizing guide follows size XS(S, M, L, XL, 2XL, 3XL). E.g. “Ch 139(151, 163, 175, 187, 199, 211) means Ch 139 for XS, Ch 151 for Small, Ch 163 for Medium, Ch 175 for Large, Ch 187 for XL, Ch 199 for 2XL and Ch 211 for 3XL. If only one number is mentioned, it applies to all sizes.
*"HDC 10" means HDC into the next 10 stitches.
*"2HDC" means place 2 HDC into the same stitch.
*The turning chain ch 1 does NOT count as a stitch.
*Total stitches are indicated between < >.
*This pattern uses US crochet terms.
*The body of the coatigan is worked as one piece and crocheted in horizontal rows from the bottom up. Towards the top of the cardigan, we will fasten off and reattach the yarn to create armholes.
Materials
Yarn – Drops Air – 10ply/Aran/Worsted/Medium(4), 150m/50g, 65% Alpaca + 28% Polyamide + 7% Wool, Fog (10)
9(10, 12, 13, 14, 15, 16) skeins
Measurements cm:
Back width: 47(52, 57, 62, 67, 72, 77)
To fit Bust: 76(86, 96, 107, 117, 127, 137)
Measurements inches:
Back width: 18.5(20.5, 22.5, 24.5, 26.5, 28.5, 30.5)
To fit Bust: 30(34, 38, 42, 46, 50, 54)
Full measurement guide available in the purchasable printable pdf!
Stitches & Abbreviations
Ch = Chain
Sl st = Slip Stitch
HDC = Half Double Crochet
HDC2tog = Half Double Crochet 2 stitches together
FL = Front Loop
BL = Back Loop
St(s) = Stitch(es)
Rep = Repeat
Sk = Skip
RS = Right Side
WS = Wrong Side
SM = Stitch Marker
GAUGE: 10cm/4” square = 15 stitches wide x 13 rows tall in half double crochet
Stonewash Coatigan Video Tutorial
Would you love to crochet a coat with invisible pockets but don’t know where to start? The video tutorial takes you through the entire pattern demonstrating how to crochet hidden pockets and the body panels in entirely one piece!
You can find the Part 2 video of the Stonewash Coatigan here!
Stonewash Pocket Coatigan Pattern
BODY (PART 1)
*In this pattern you can alter the length at two points – before the pocket and after the pocket by adding or removing rows. Keep in mind that if you add/remove rows before the pocket this will make your coatigan longer/shorter but the pocket placement will not change (the opening will fall around hip height). If you want to change the placement of your pocket you can add/remove rows after crocheting the pocket which will make your pocket fall lower/higher and make your coatigan longer/shorter.
FOUNDATION CHAIN: Ch 139(151, 163, 175, 187, 199, 211).
ROW 1: HDC in 2nd ch from the hook, HDC in each ch until end, turn.
<138(150, 162, 174, 186, 198, 210)>
ROW 2: Ch 1, HDC in each st until end, turn.
<138(150, 162, 174, 186, 198, 210)>
Repeat ROW 2 until ROW 20.
*You can add or remove rows to reach your desired length.
*If you don’t want to add pockets repeat ROW 2 until ROW 80(80, 82, 82, 84, 84, 86).
The pocket is hidden from the front of the cardigan by working stitches into the front loops. Afterwards, the pocket will be crocheted into back loops on the wrong side of cardigan.
ROW 21 (Bottom of Pocket Row): Ch 1, HDC 8(10, 11, 13, 14, 16, 17), place SM into BL of the next st, FL HDC into same st, FL HDC 16, place SM into BL of the next st, FL HDC into same st, HDC 86(94, 104, 112, 122, 130, 140), place SM into BL of the next st, FL HDC into same st, FL HDC 16, place SM into BL of the next st, FL HDC into same st, HDC in each st until end, turn.
<138(150, 162, 174, 186, 198, 210)>
SMs form two sets, each in the first and last st of a pocket. Your SMs should be in the following sts –
Size: 1st pair 2nd pair
XS: 9th + 26th st 113th + 130th st
S: 11th + 28th st 123rd + 140th st
M: 12th + 29th st 134th + 151st st
L: 14th + 31st st 144th + 161st st
XL: 15th + 32nd st 155th + 172nd st
2XL: 17th + 34th st 165th + 182nd st
3XL: 18th + 35th st 176th + 193rd st
ROW 22: Ch 1, HDC in each st until end, turn.
Repeat ROW 22 until ROW 40. Do not fasten off.
POCKETS
With the wrong side facing you, remove the crochet hook.
For right handed crocheters – insert crochet hook into the front loop (previously the back loop when inserting the SM) of the right-hand stitch with a SM of one of the SM pairs.
For left handed crocheters – insert crochet hook into the front loop (previously the back loop when inserting the SM) of the left-hand stitch with a SM of one of the SM pairs.
Secure yarn (leave a 35cm/14” tail of yarn) and pull up a loop.
POCKET ROW 1: FL HDC into the first st with SM, FL HDC 16, FL HDC into last st with SM, turn.
<18>
POCKET ROW 2: Ch 1, HDC in each st until end, turn.
<18>
Repeat POCKET ROW 2 until POCKET ROW 20.
*Note: The height of pocket should reach the top of ROW 40 of the ‘BODY’ portion.
Fasten off and leave a 35cm/14” tail of yarn.
Insert hook into the right/left hand st with a SM of the 2nd SM pair.
Repeat POCKET instructions for 2nd pocket.
BODY (PART 2)
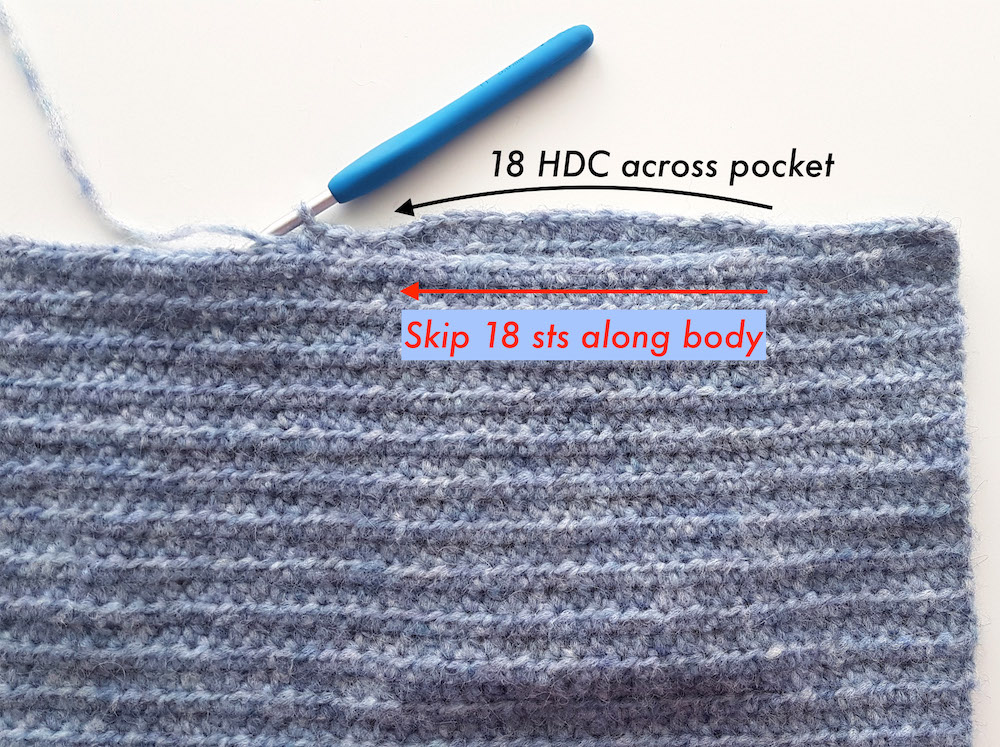
We’ll now crochet along the body of the cardigan, pick up the pocket stitches and skip body sts to create the invisible pocket opening.
With the RS facing you, insert crochet hook into last st of BODY ROW 40 (where we left off before the pockets).
ROW 41 (JOINING ROW): Ch 1, HDC 8(10, 11, 13, 14, 16, 17), crocheting into the 1st pocket – HDC 18, sk 18 sts along the body, crocheting into the body - HDC 86(94, 104, 112, 122, 130, 140), crocheting into the 2nd pocket – HDC 18, sk 18 sts along the body, crocheting into the body – HDC in each st until end, turn.
<138(150, 162, 174, 186, 198, 210)>
ROW 42: Ch 1, HDC in each st until end, turn.
<138(150, 162, 174, 186, 198, 210)>
Repeat ROW 42 until ROW 80(80, 82, 82, 84, 84, 86).
*You can add/remove rows to make your coatigan longer/shorter. Please keep in mind that this will alter the placement of the pockets (make the pockets fall lower/higher) on your body.
Do not fasten off. Proceed directly to the ‘ARMHOLE SHAPING’ instructions.
ARMHOLE SHAPING
Place SMs in the –
XS: 27th, 38th, 101st, 112th st
S: 30th, 41st, 110th, 121st st
M: 33rd, 44th, 119th, 130th st
L: 36th, 47th, 128th, 139th st
XL: 39th, 50th, 137th, 148th st
2XL: 42nd, 53rd, 146th, 157th st
3XL: 45th, 56th, 155th, 166th st
FIRST FRONT PANEL
ROW 1: Ch 1, HDC in each st until 1st SM, place HDC in st with SM, turn.
<27(30, 33, 36, 39, 42, 45)>
ROW 2: Ch 1, HDC in each st until end, turn.
Repeat ROW 2 until ROW 18(20, 22, 24, 26, 28, 30).
<27(30, 33, 36, 39, 42, 45)>
< Total Body Rows: 98(100, 104, 106, 110, 112, 116)>
*Height from FRONT PANEL ROW 1 to FRONT PANEL ROW 18(20, 22, 24, 26, 28, 30) should measure 14(15.5, 17, 18.5, 20, 21.5, 23)cm/5.5(6, 6.5, 7.25, 7.75, 8.5, 9)”. Please double check measurements as the sleeve will need to slot into the gap.
Fasten off.
BACK PANEL
Insert crochet hook into 2nd st with a SM. Secure yarn and pull up a loop.
ROW 1: Ch 1, HDC in st with SM, HDC each st until 3rd SM, place HDC in st with SM, turn.
<64(70, 76, 82, 88, 94, 100)>
ROW 2: Ch 1, HDC in each st until end, turn.
Repeat ROW 2 until ROW 18(20, 22, 24, 26, 28, 30).
<64(70, 76, 82, 88, 94, 100)>
<Total Body Rows: 98(100, 104, 106, 110, 112, 116)>
*The height of the BACK PANEL should be the same as the FIRST FRONT PANEL.
Fasten off.
SECOND FRONT PANEL
Insert hook into last st with a SM. Secure yarn and pull up a loop.
ROW 1: Ch 1, HDC in st with SM, HDC each st until end, turn.
<64(70, 76, 82, 88, 94, 100)>
ROW 2: Ch 1, HDC in each st until end, turn.
<64(70, 76, 82, 88, 94, 100)>
Repeat ROW 2 until ROW 18(20, 22, 24, 26, 28, 30).
<27(30, 33, 36, 39, 42, 45)>
<Total Body Rows: 98(100, 104, 106, 110, 112, 116)>
*The height of the SECOND BACK PANEL should be the same as the FIRST FRONT PANEL and the BACK PANEL.
Fasten off.
To learn how to crochet the sleeves and sew everything together, follow Part 2 here 🙂
How do i get the second part of crochet stonewashed pocket coatigan
Thank you this sweater is so beautiful. I can't wait to make it. How talented you are. Again thank you
I love the texture of this Cardigan, and I’m going to make it over the winter, I think I’ll shorten it a little though. Thank you for sharing this beautiful cardigan, I can’t wait to start! Does Michaels sell the Drops Air yarn? I’ll have to substitute another similar yarn if I can’t find Drops Air. You are very talented and I like it that you have included a video tutorial too if I have to look up something that I can’t understand. Thank you! 😃
Hi Elaine, thank you so much for your kind words! I don't live in the US, so I'm not sure if Michaels sells Drops Air ... I've included links from where I purchased it online and substitution suggestions. I'd recommend a yarn that is very light (has a lot of yardage for the weight) and has an airy fluffy quality to it. I hope this helps! Grace 🙂
you said it was a free pattern then why can I not download it because you have to pay for it and I cannot afford it
Hi Ronda, this is a free crochet pattern - all the information you need is in the blog post 🙂 The pdf is purchasable for a small fee to help support my business. Grace
hi Ronda
I ordered the actual yarn from the UK, and just finished this coatigan today. I saved the website and went back to it each time I sat down to crochet. I managed to make the whole thing without any hassle. This is THE Easiest garment pattern I have EVER tried. there is not much in the instructions, and its very clear. On top of that, is the little video tutorial.
The Paid pattern simply allows you to use it Without ads or extras.
I hope you Will try this. You will be really surprised at how easy and quick this garment works up.
This is a very beautiful cardigan you video are very helpfully
How many stitches is the gap for the sleeves when making a large sweater that is the only thing that I can't figure out
Hi Judy,
The gaps for the sleeves for size L is 10 sts across but as long as you place your stitch markers in the correct stitches you should be fine 🙂
Grace
G'day Grace,
I have watched the video tutorial video and read this pattern but for the life of me I cannot work out how to go to start the pocket without fastening off at the body but you say not to. Do you have multiple skeins ?
Hi Karen,
I just used another skein of yarn to crochet the pockets. Since this pattern is so large you'll need to us emultiple skeins of yarn anyway 🙂
Grace
Hi Grace!
I would love to make this, but I've already bought beautiful 100% wool yarn. On the label they recommend size 6.5 - 8 mm knitting hook. Can I just follow this pattern or should I make some changes? Or maybe size down? Which hook size would you recommend?
Thanks in advance!
Hi Jaclyn, you should be looking for a worsted/aran weight yarn - it sounds like you might be using a bulky? I'd recommend using the hook size suggested in the pattern and double check to see if you meet gauge. If you don't adjust your hook size (smaller hook for more stitches per 10cm/4" or larger hook for fewer stitches per 10cm/4") accordingly.
Grace 🙂
hello, i made this in 100% wool, 1oo g in 100 m, i adjusted the pattern by calculating the size i need to make according to a swatch i made, for the gauge, i used the method of Katarina
https://by-katerina.com/crochet-tips-tricks-how-to-adjust-a-pattern-to-your-gauge/
Hi Grace!
I’m looking forward to making this. I have my yarn in my basket ready to buy, but I’m not sure how much yarn in approximate total I would need for a medium? I’m not sure if I missed it somewhere. Thanks!
thank you, thank you, thank you for the pattern. i made this as my first project ans turned out fantastic. i made it in a thicker yarn, all wool and added a collar! can wait for the cold weather!
Hi, I've read through the pattern which seems really well detailed but when I watched the video it looks like your HDC are worked in the back of the stitch. Can you confirm if this is correct please.
Kind regards
Sue
Hi Sue,
I'm working normal HDCs unless stated otherwise. The yarn used in the sample is just really fuzzy so it's hard to see the stitch definition - if I was only working into back loops the entire coat would be ribbed.
Grace 🙂
I just completed the coatigan with the reccommended yarn, and hook, made the Small size, and ordered 11 balls... (in case I messed up something) I finished, with a tiny bit of yarn to spare,probably a couple of yards max... PLUS, One Unused ball.
Do not under sleeve directions. It says after the 5th row check to see how it fits the opening. Then starting at the 6th row on to the12, connect with a slip stitch. What about rows 1-5? Don’t they need to be joined? Or am I missing something?
Never mind. I watch a video and now understand .
Hi!
I LOVE this pattern, made it, specially ordered the Drops Air yarn, in the colour you used... All the way from the UK store to Texas... was So exited to make this coatigan. I had some issues, only because I kept forgetting to turn when doing the sleeve rows. got that sorted and it raced to the finish from there... I am actually trying a cotton blend yarn now... with self striping... same pattern... learning that self striping yarn creates issues of its own when you are doing smaller sections that will not come out the same as the much larger ones in the body of the coatigan.
My one disappointment here, was with the original yarn. I really wanted this to be a wonderful Christmass gift for my mother in law, and ended up spending almost $100 just to get the exact yarn. I had seen it reccommended in other Drops patterns, and thought it might be a lovely soft and light option for a garment. Well... its light, and soft... but working it was like creating a felted cloth... loose, flat, and with no life or spring to the yarn. I have definitely been disappointed in the final product. I washed it very carefully, rinsed and laid it flat to dry outdoors in the winter sunshine. Temps were in mid '70s here in Texas, so no harm from sun or cold... the fabric just hs no life to it. I realise the pictures here are enhanced for digital use, but the colour I chose, Fog, I think... was also more of a Grey fog, with blue tones... its very nice... but far from the lovely blue shown here.
The Pattern however, is WONDERFUL... I want to try it with all sorts of yarns. I would also reccommend this pattern, and have... to everyone I know who crochets...
Hi Sandy,
So glad you enjoyed this pattern and so sorry you're disappointed with your yarn! My Coatigan is definitely blue with hints of grey, maybe the dye lots vary greatly? I try to get the photo colours as true to life as possible but every screen is different! Also my coatigan has only ever been steamed so I find that it's still very 'fluffy' and squishy feeling.
I hope you enjoy your next version of the coatigan!
Grace 🙂
I love this pattern as it looks super easy and very effective but I'm interested to know what yarn others have made it in successfully as none of the Drops colours grab me and it's quite expensive. This is my first branch out into crochet clothing, I've only made blankets using my stash of colours. I've no experience with tension and yarn conversion and how much to use of different yarns. I live in the UK. Thank you.
Hi Judith,
You can check out some projects on ravelry to see what this project looks like with different types of yarn - https://www.ravelry.com/patterns/library/stonewash-pocket-coatigan/people
If it's your first time crocheting clothing, my number 1. tip would be to make sure you meet gauge. Yarnsub.com is good resource to find alternative yarns and just keep in mind that any time you substitute yarn chances are you'll need a different amount than what's stated in the pattern so I'd always recommend getting an extra skein or 2 to just be sure.
I hope this helps,
Grace
Hi! This may be a dumb question but is it possible to.make this a litter fuller around the hips, something a. little more a-line? . I am afraid t will fit at the top but be too narrow at the bottom. Than you.
Hi Grace, I wanted to confirm the amount of yarn needed for this beautiful pattern. I’m going to make a XS coatigan and wonder if 450 g will suffice as it really is quite a big/long sweater.
Thanks,
Sharon
Hello, your sweaters are beautiful. I'm working on this one in xl but I noticed you instructions say to chain 186 when all the other sizes start with an odd number of chains. Then the total number of stitches for the xl says 186 again when the other sizes are one number less. My question is what is the right one to do..should I chain 187 and have a total stitch ct of 186 or do I chain 186 and have a total stitch ct of 185? Thank you
Hello! Hope you can help me, I am bit co fused about the pockets rows. If I crochet 20, I see that I end up with both tail ends on the same side. When I watched the video you seem to have 19 instead, but that would not make it to match till row 40. Am I getting this wrong? How could you do an even number of rows and have the tails for sowing them on 2 different sides? Please help! <3
Hello! I have purchased Hobbii's Friends cotton silk to make this project but it is a light worsted-DK yarn. Do you think it would still work? I assume I could make the project a size up and it will turn out the right size?
Hi. This is a lovely project . I started to make it while watching your video and it appears you are working in the back loop of each hdc. I don't see this mentioned in the written pattern or the video instructions. Could you clarify this for me please. I feel it will make a huge difference to the fabric. Thanks so much.