Learn how to crochet the perfect fall beanie with a step-by-step video tutorial! The Everyday Beanie is a quick and simple crochet hat that follows an easy 2 row repeat! The free crochet beanie pattern has 7 sizes ranging from a preemie baby beanie all the way to an adult large.
This post may contain affiliate links, view our disclosure policy for details.
Thank you to WeCrochet for providing the yarn for this free crochet beanie pattern! As always all thoughts and opinions are 100% my own 🙂
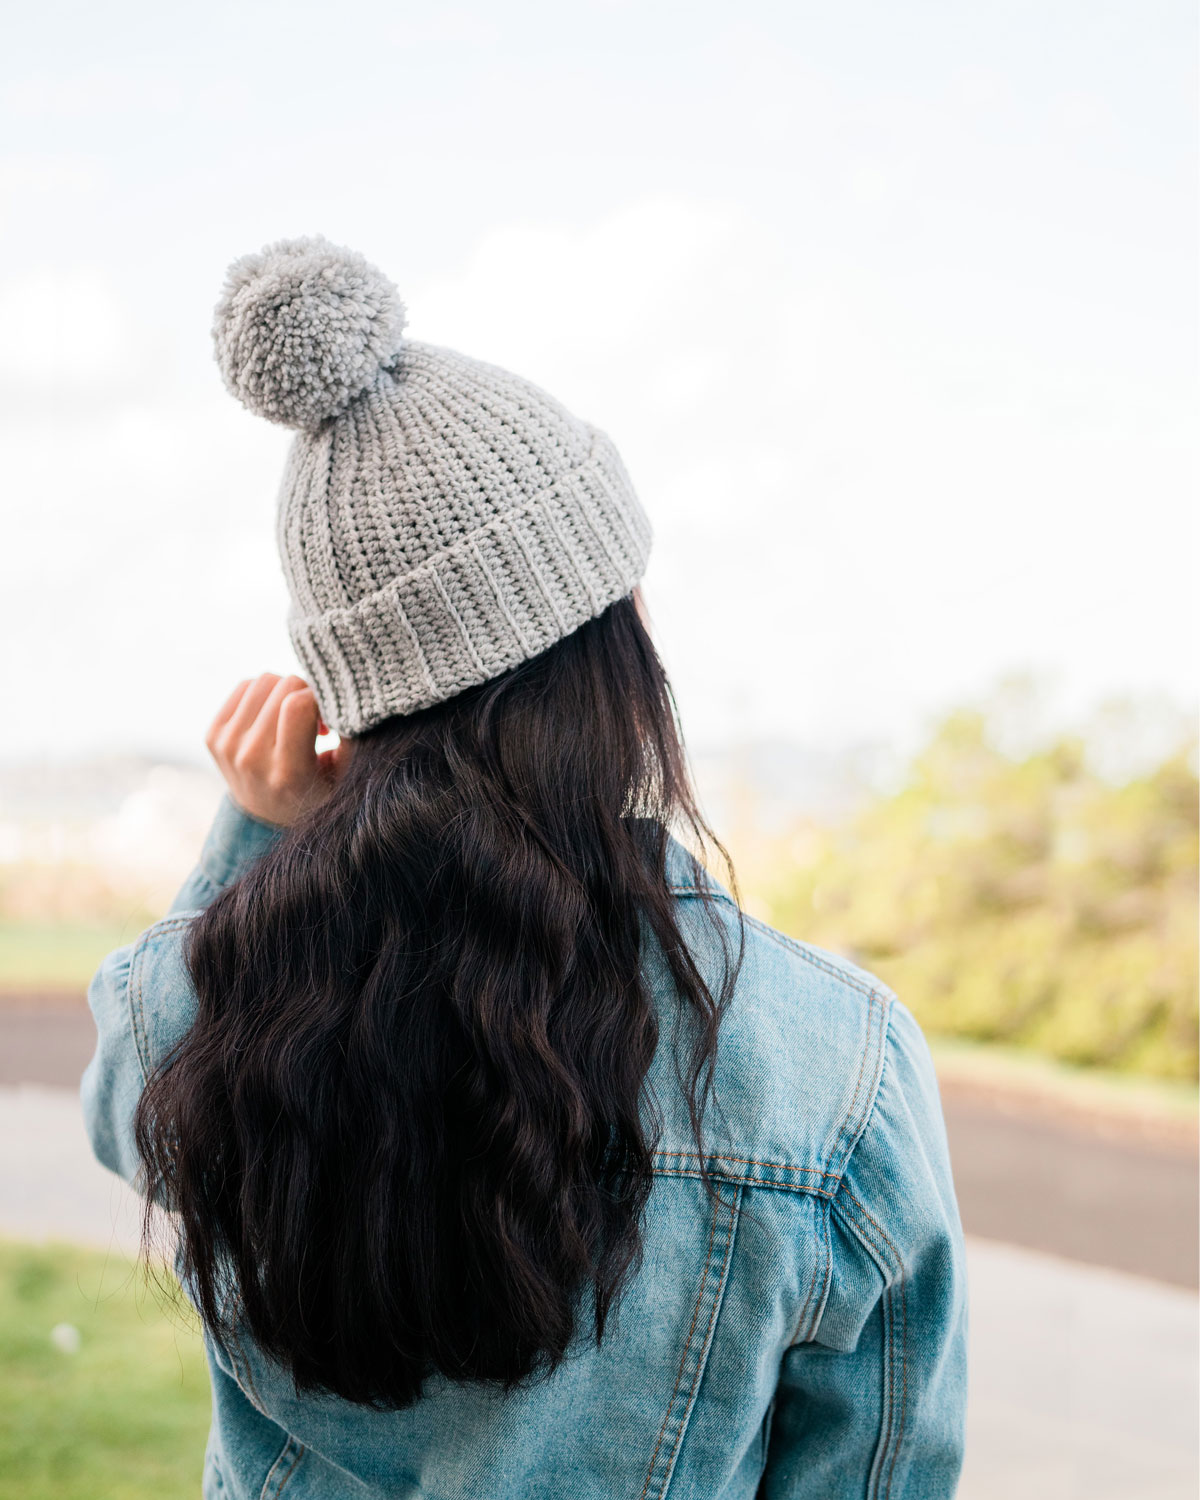
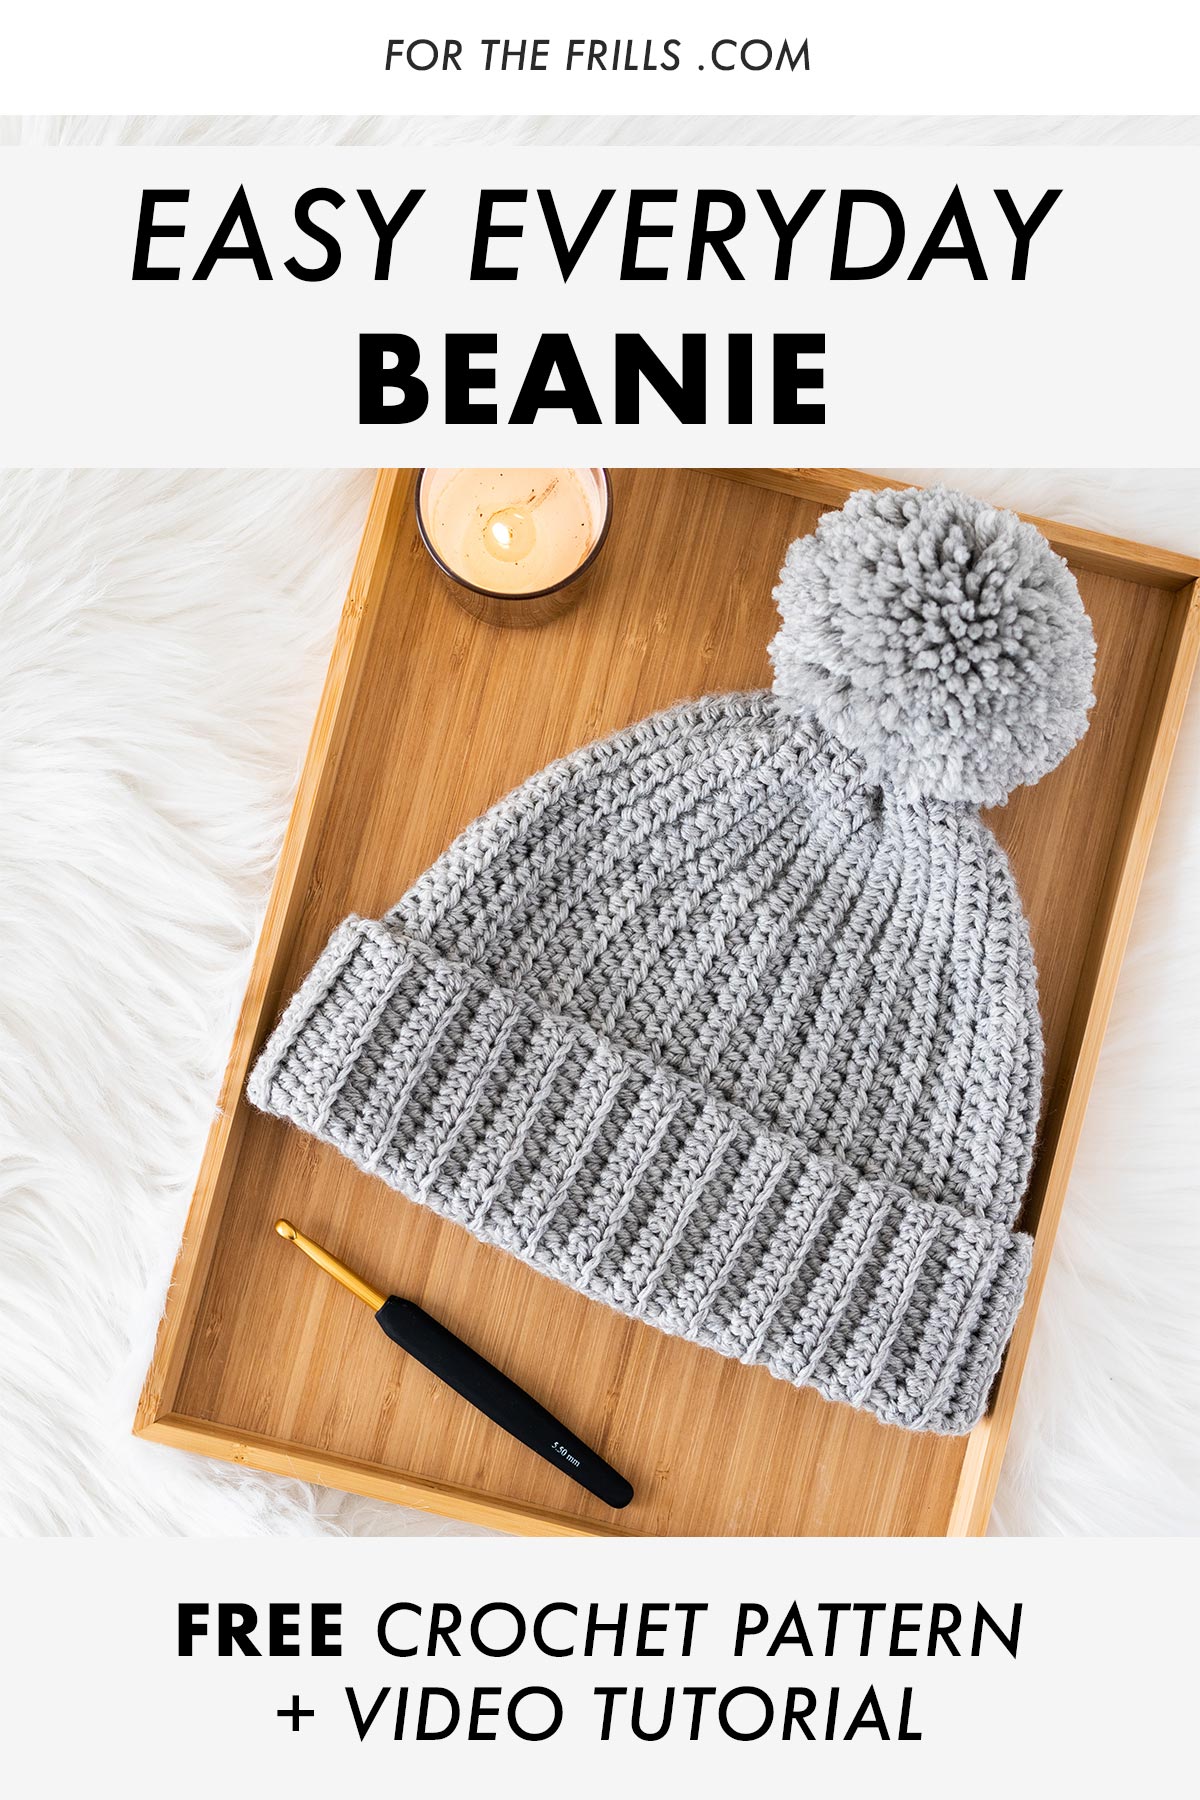
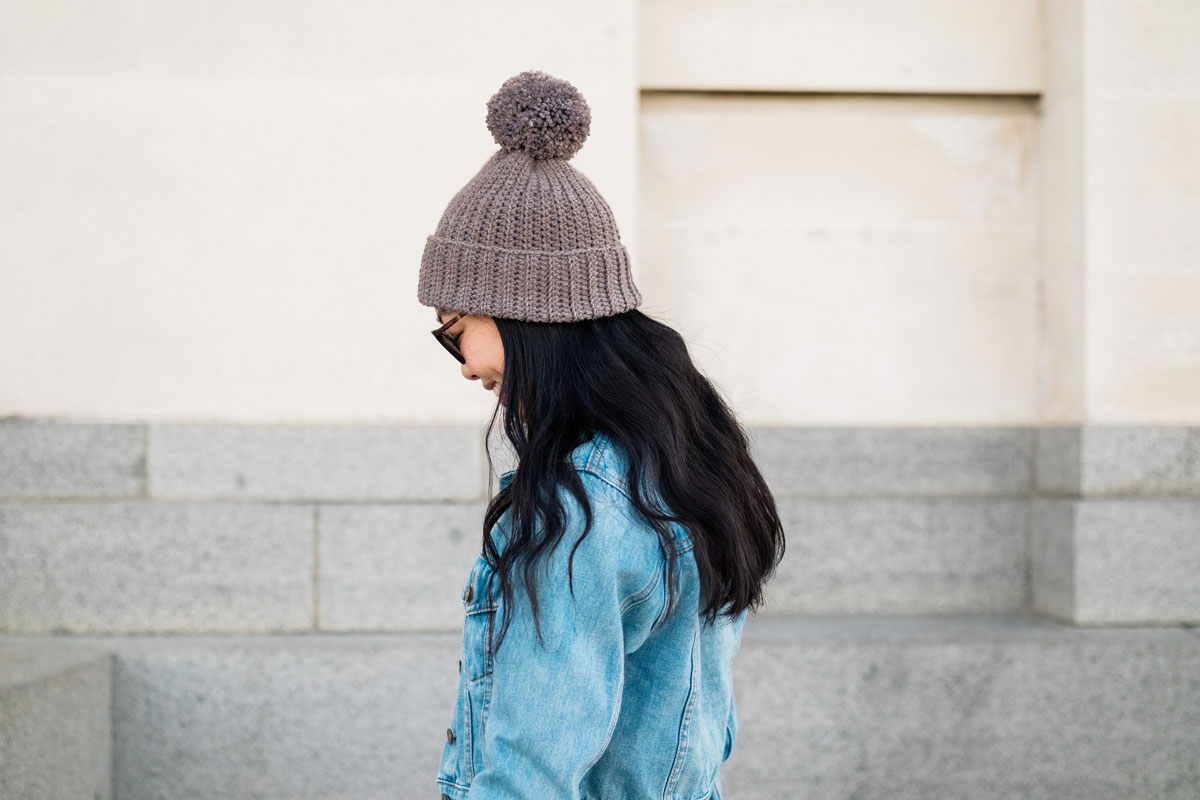
The Everyday Crochet Beanie is exactly as the name describes! It’s the perfect, easy crochet beanie that will become a staple in your fall and winter wardrobe. This beginner-friendly crochet beanie features a ribbed fold over brim with a tapered head and is topped off with a yarn pom pom! You can also add a faux fur pom pom or leave off the pom pom entirely for a chic and minimalist beanie.
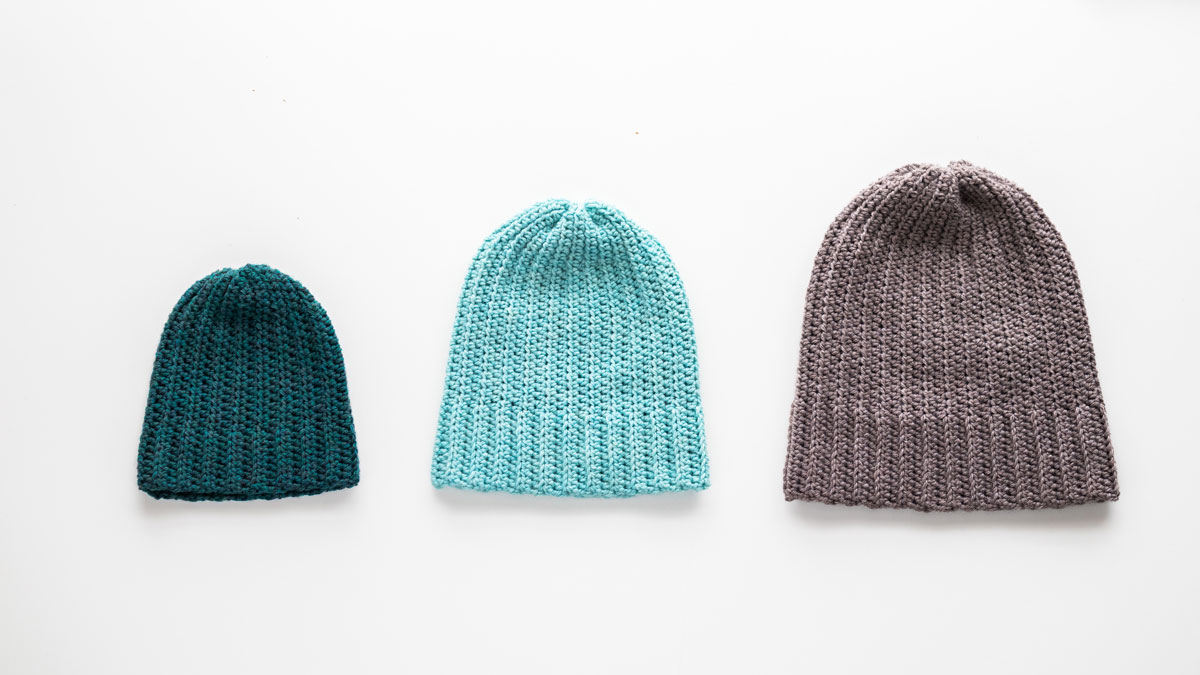
The beanie pattern has seven different sizes – preemie, baby, toddler, child, tween, adult small and adult large – so you can make a beanie for everyone in the family! And once you get the hang of the pattern, it’s very easy to customise to any size and this pattern works up quickly.
This crochet beanie pattern is great for beginners as it only has a 2 row repeat with no increases or decreases! You’ll crochet a trapeze shape, fold it in half, sew the edges together and then sew the top closed. The stitches used for this DIY are half double crochet and slip stitches – that’s it!
If you’re complete and total beginner (as in you’ve never picked up a crochet hook before) I'd recommend trying the 1 Hour Crochet Beanie or the Skylar Crop Top for an even easier 1 row repeat pattern!
Design Inspiration
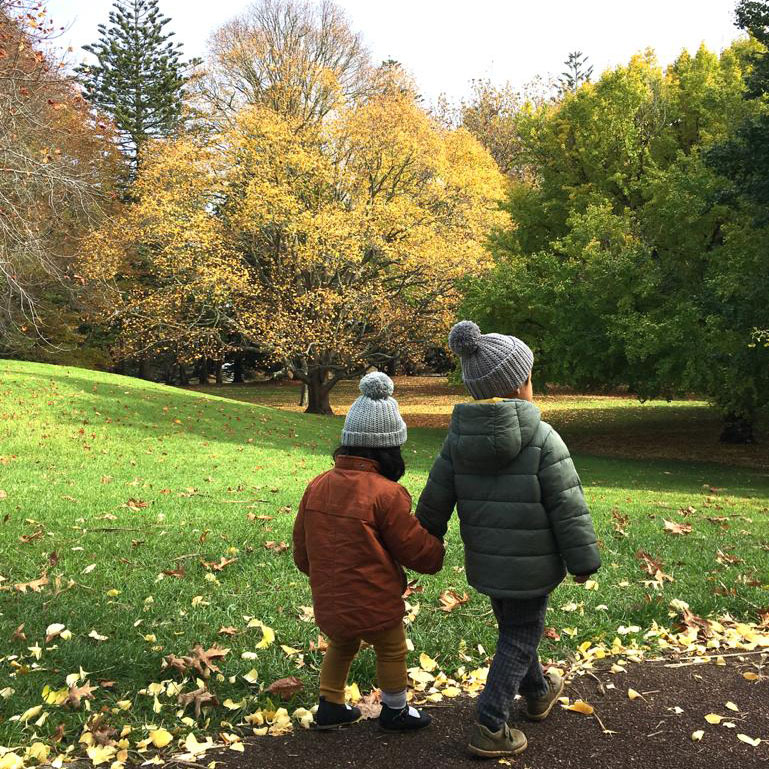
During the winter, my sister asked me to make some crochet beanies for my little niece and nephew! She was very clear that she wanted a ribbed brim, plain simple hat portion, very little bunching at the top and then a yarn pom pom. I quickly whipped up two little merino crochet beanies for them and they were just so cute!
Little did I know how much everyone else would like them too 🙂 Before I knew it friends, family members and strangers asked my sister where she got the beanies from, she told them I'd crocheted the beanies and requests started flooding in. It got to the point where all of my nephew’s friends were wearing this exact beanie!
I couldn’t find the time to keep making beanies for everyone and one of the mums asked me if I could write the pattern so that she could make her own. I hadn’t actually planned to write out this pattern because I thought that it was so simple. But it turns out that the key to this pattern – the tapered edge – isn’t a widely available crochet pattern hat construction!
So here is the tapered Everyday Beanie crochet pattern with baby, child and adult sizes!
Yarn
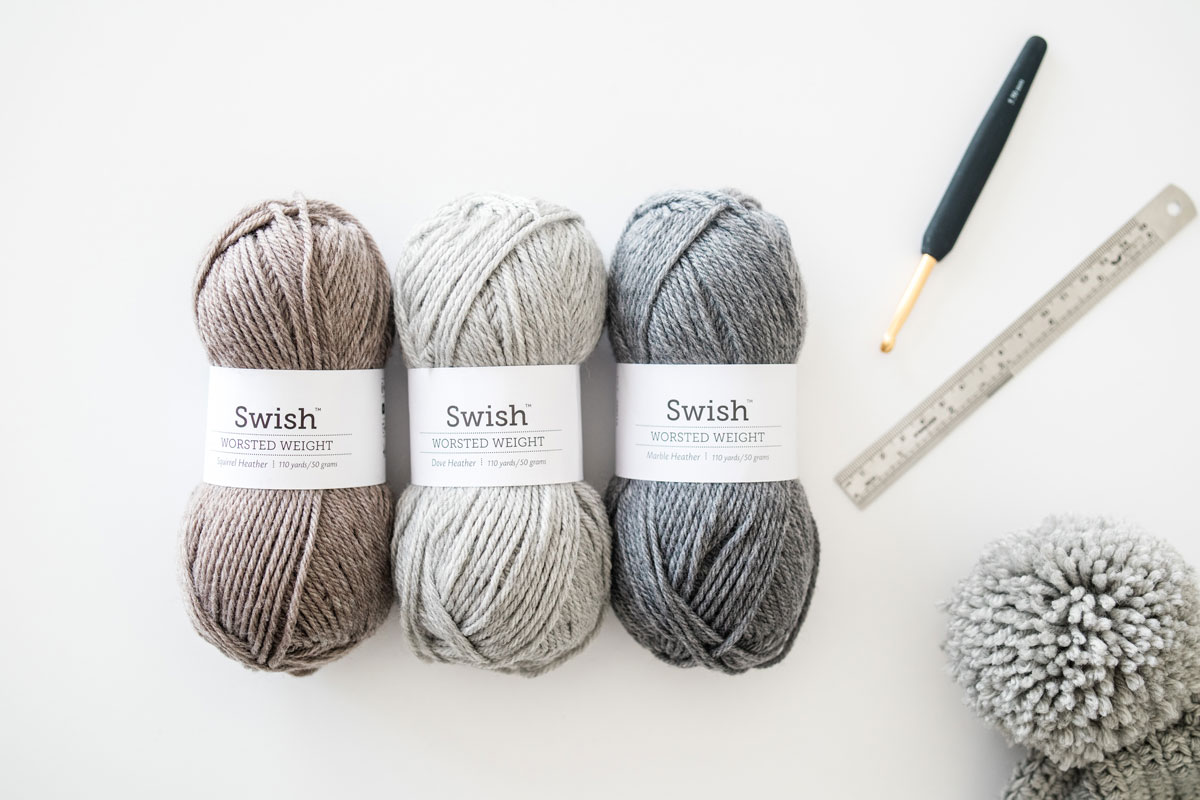
The Everyday Beanie uses WeCrochet’s Swish Worsted yarn which is a 100% merino. Merino is one of my absolute favourite fibres as it’s incredibly versatile, soft and warm. This yarn is machine washable and it can be tumble dried so its great for kid’s items! Swish Worsted comes in over 30 different shades ranging from neutrals to pastels to brights and half of the shades are heathered! I love how the heathered yarns have such a subtle mix of complementary shades.
I find that Swish Worsted is slightly on the thinner side of a worsted/aran/medium (4) yarn – it’s very close to a thick DK/Light (3). So if you want to substitute this yarn look for a thick DK or thin worsted yarn and as always make sure you check gauge so that your beanie turns out the correct size!
Beanie Construction
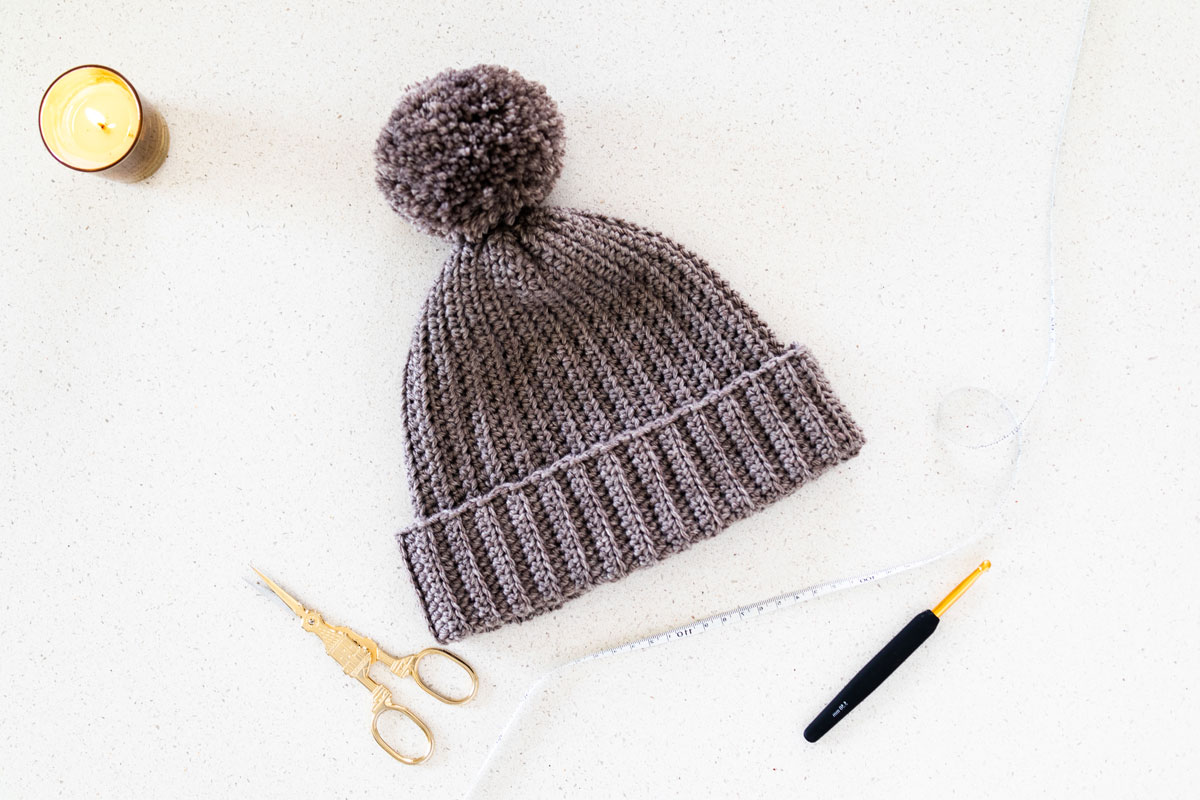
The Everyday Beanie is worked lengthways which means that the foundation chain equals the height of the beanie, not the width. This construction allows us to crochet a tapered beanie that has very little ‘bunching’ at the top of the beanie (and any bunching pretty much disappears once you wear the beanie on your head!).
I’m not sure about you but I find that beanie patterns that have too much bunching at the top of the beanie make me feel a bit like a smurf hahaha. With chunky ribbed designs you can easily crochet a rectangle and then the ribbing will hide all of the ‘bunchiness’. However with thinner yarns, the tapering in this crochet beanie pattern is the key to creating the smooth and wearable crochet beanie that looks modern and not ‘crafty’ 🙂
Pin me for later!
How to crochet a simple tapered beanie
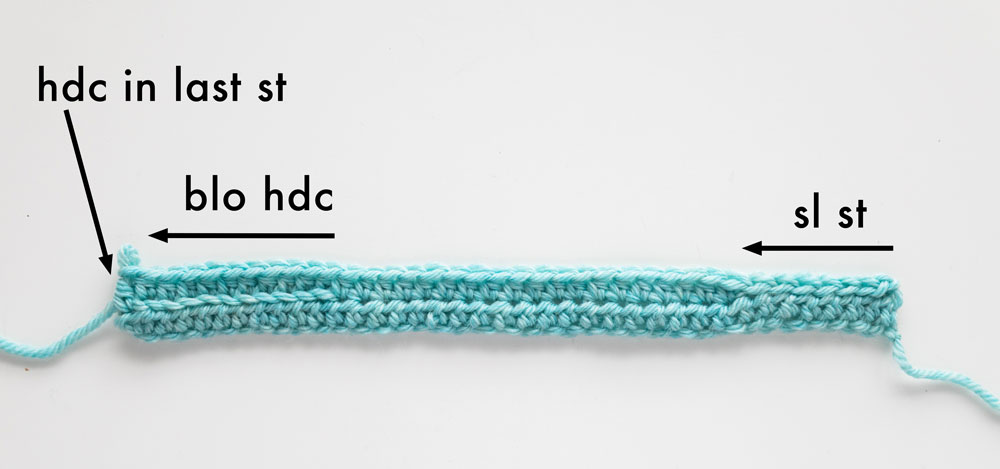
We’ll start with a row of half double crochets and then the first row of the 2-row repeat starts with slip stitches. The slip stitches are crucial to giving the beanie the ‘tapered’ look that GREATLY reduces bunching at the top of the beanie. We’ll crochet along the row with half double crochets and for the last few stitches we’ll crochet back loop half double crochets to give the brim a knit-like ribbed look.
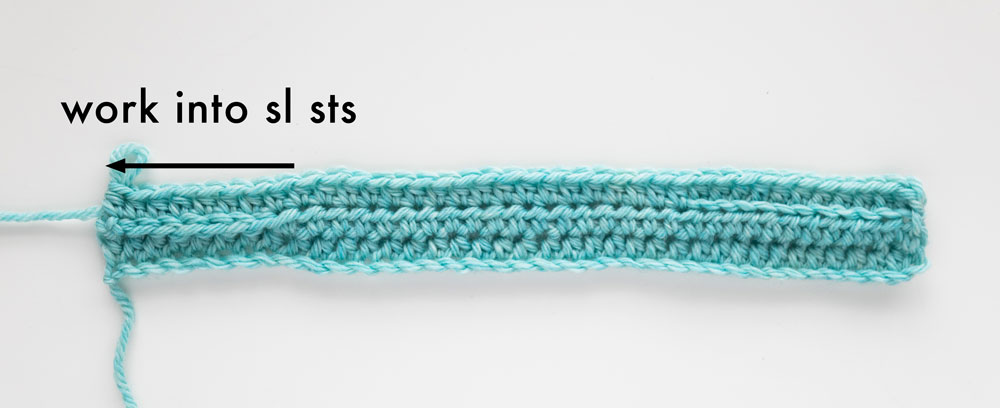
For the second row of the 2-row repeat, we’ll crochet a few back loop half double crochets and then half double crochet in each stitch until the end of the row. As you approach the end of the row make sure that you’re working into the slip stitches of the previous row.
The easiest way to make sure you’re on the right track is to rotate your stitches towards you so you can see the tops of the ‘v’ shapes. That way you’ll know that you’re always working into the previous row. This method is also great when you’re looking for the back loop when you’re crocheting the back loop half double crochets!
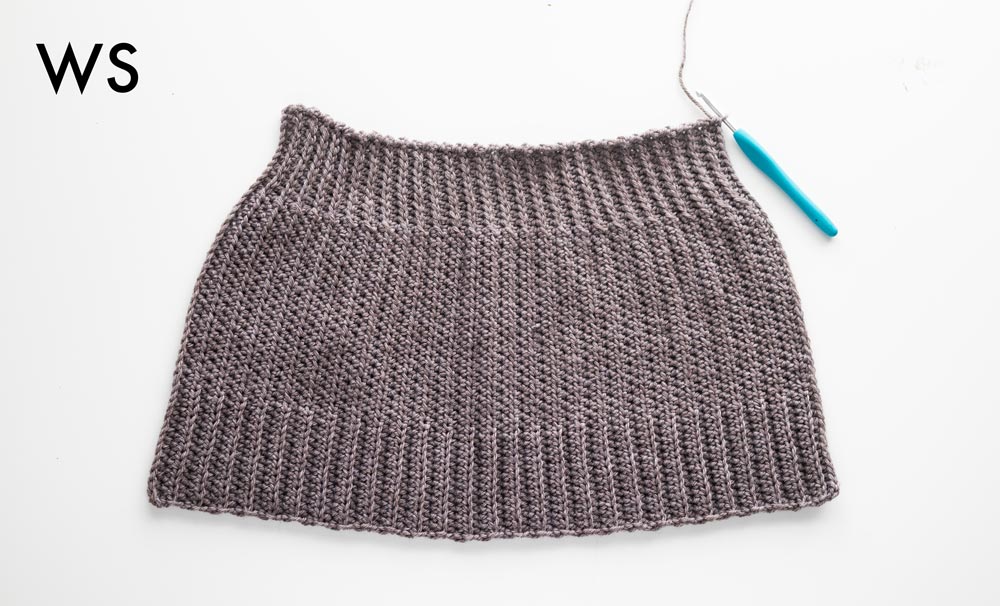
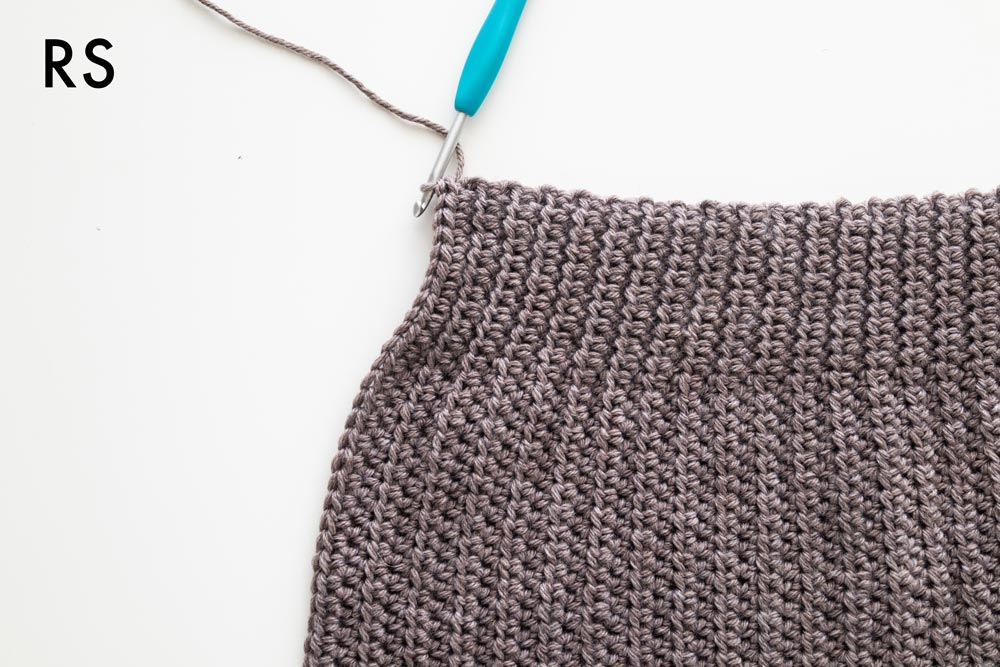
We’ll then repeat those 2 rows until your beanie is a trapeze-like shape and reaches the desired width. To check that your beanie will fit you, simply wrap the beanie around your head.
Just a note – beanies are generally very stretchy so the finished size will always be smaller than your actual head circumference!
After you’ve crocheted your tapered beanie, whip stitch the short edges together and then stitch along the top of the beanie, pulling on your yarn after every couple of stitches.
Looking for more free crochet beanie patterns?
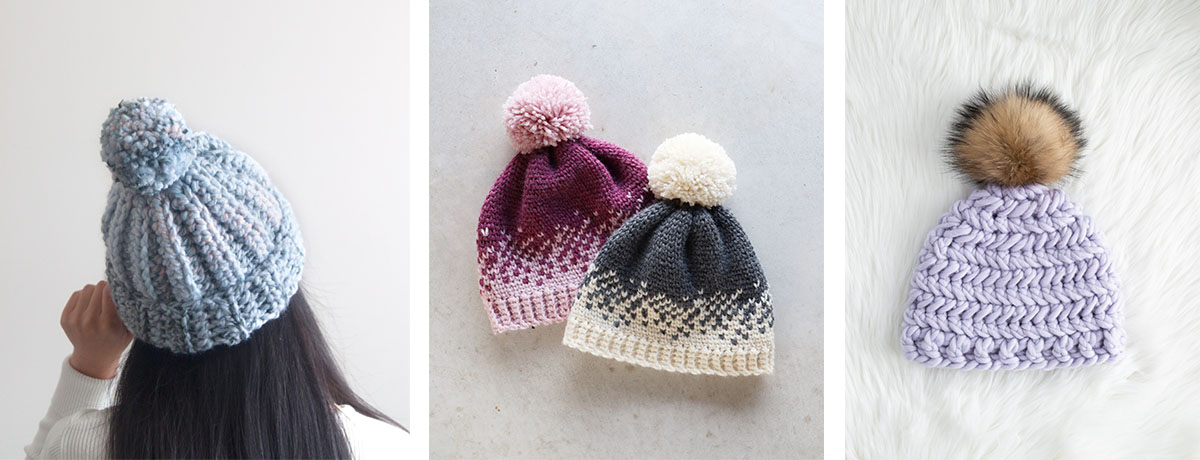
1. 1 Hour Beginner Beanie / 2. Fair Isle Ombré Beanie / 3. Herringbone Beanie
Sewing Tips for a Tapered Beanie
To have a very small hole (or completely non-existent hole) at the top of your beanie, make sure that your stitches aren’t spaced too close together (I spaced out approximately 1 stitch for every 2 rows). Also, only sew along the strands on the very edges of the beanie and pick up 1-2 strands of yarn – don’t insert your hook deep into the stitches and pull stitches together as you sew.
This description might seem very detailed but after crocheting so many beanies I’ve realised that sewing the top closed is actually one of the most important parts! It’s the key to getting a beanie that sits nicely on your head 🙂 (and it’s also why that for this beanie pattern you can leave off the pom pom and have a plain beanie that has a store-bought look to it!)
Video Tutorial
Add the Everyday Beanie to your Ravelry queue!
Ad-free, printable version of the Everyday Beanie!
NOTES:
*Sample beanie in the video is a size Adult Small.
*The sizing guide follows size Preemie(Baby, Toddler, Child, Tween, Adult Small, Adult Large). E.g. “Ch 25(29, 33, 38, 41, 45, 49) means Ch 25 for Preemie, Ch 29 for Baby, Ch 33 for Toddler, Ch 38 for Child, Ch 41 for Tween, Ch 45 for Adult Small and Ch 49 for Large.” If there is only one number, it applies to all sizes.
*"HDC 10" means HDC into the next 10 stitches.
*The turning chain ch 1 does NOT count as a stitch.
*Total stitches are indicated between < >.
*This pattern uses US crochet terms.
*The sample beanies use Swish Worsted – which is a 100% merino yarn that’s on the thinner side of a worsted yarn. You could probably also substitute this yarn with a thick DK yarn.
LEVEL: Beginner+
Materials
Yarn – WeCrochet Swish Worsted – 10ply/Worsted/Medium (4), 100m/50g, 110 yds/1.75oz, 100% Merino
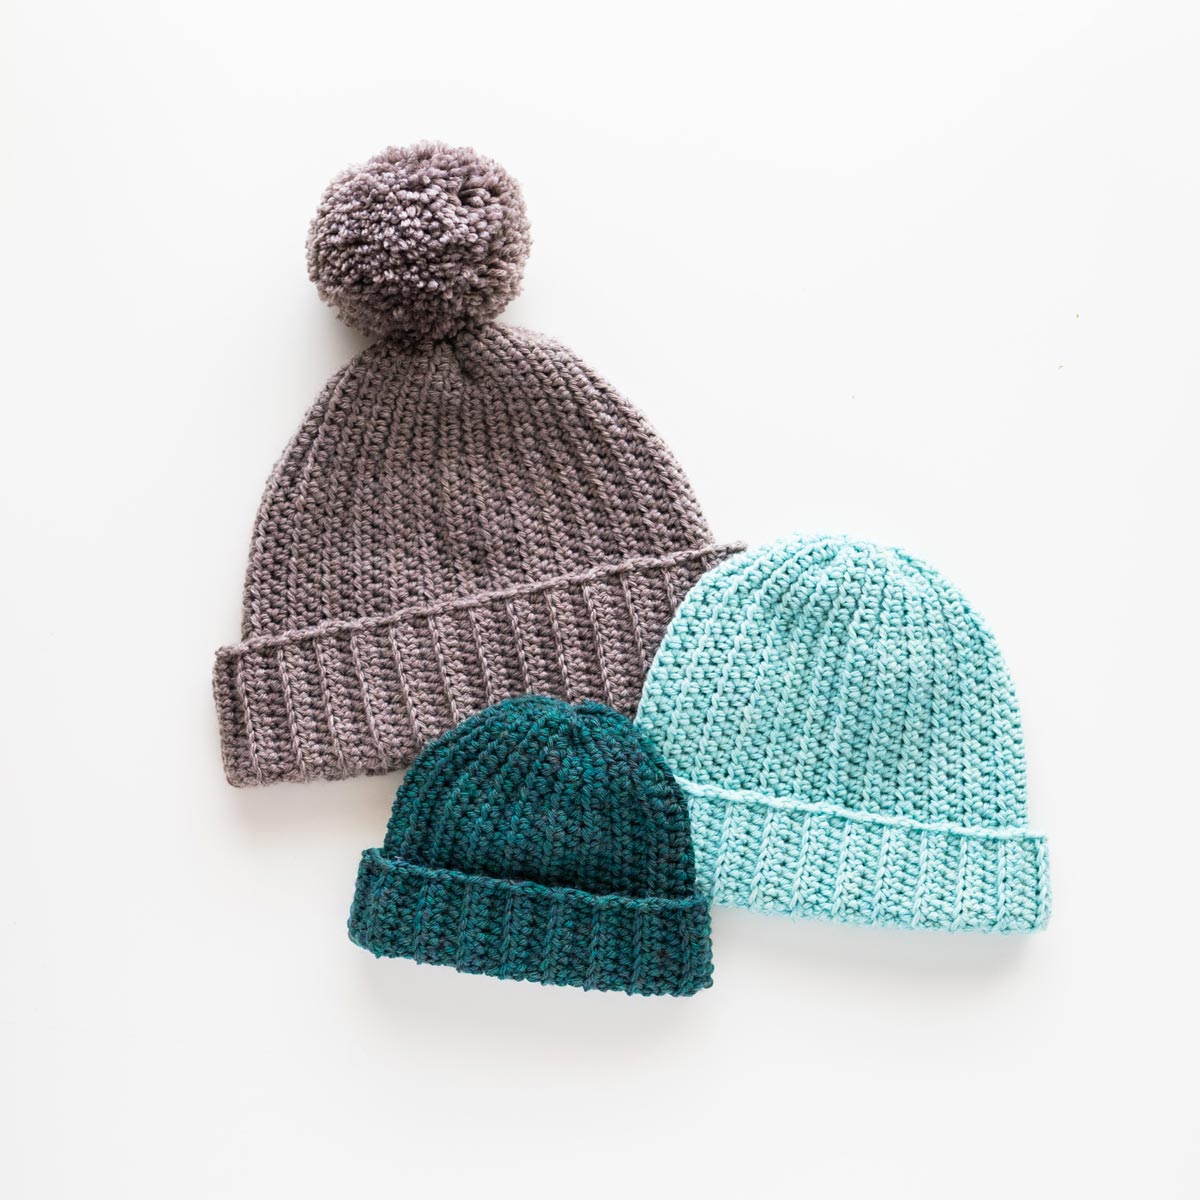
Adult Small: Light Grey Beanie (dove heather) + Grey-Brown Beanie (squirrel heather)
Child: Light Teal Blue Beanie (wonderland heather)
Baby: Dark Green Beanie (rainforest heather)
Beanie: approx. 30(40, 55, 65, 75, 90, 105)g
8cm/3” Pom Pom: approx. 20g
10cm/4” Pom Pom: approx. 35g
Scissors
Optional: (6.5cm/2 ½”) or (8.5cm/3 ⅜”) Pom Pom Maker
You can also find a How to use a pom pom maker tutorial!
Stitches & Abbreviations
Ch = Chain
Sl st = Slip Stitch
HDC = Half Double Crochet
BLO = Back Loop
St(s) = Stitch(es)
RS = Right Side
WS = Wrong Side
Measurements (cm/inches):
To fit head circumference:
Preemie: 30cm / 12”
Baby: 35cm /14”
Toddler: 41cm / 16”
Child: 46cm / 18”
Tween: 51cm / 20”
Adult Small: 56cm / 22”
Adult Large: 61cm / 24”
GAUGE: 10cm/4” square = 16 stitches wide x 13 rows tall in half double crochet
Everyday Beanie Pattern
*This beanie is worked lengthways meaning the foundation chain runs the length/height of the beanie, not the width.
FOUNDATION CHAIN: Ch 25(29, 33, 38, 41, 45, 49).
ROW 1: HDC into 2nd ch from hook, HDC in each st until end, turn.
<24(28, 32, 37, 40, 44, 48)>
ROW 2 (RS): Ch 1, sl st 5(6, 7, 8, 9, 10, 12), HDC in each st until you have 7(8, 10, 11, 12, 13, 14) sts left, BLO HDC in each st until last st, HDC in last st, turn.
<24(28, 32, 37, 40, 44, 48)>
ROW 3 (WS): Ch 1, BLO HDC 7(8, 10, 11, 12, 13, 14), HDC in each st until end, turn.
<24(28, 32, 37, 40, 44, 48)>
*At the end of the row, make sure you are working into the sl sts not the HDCs. The tops of HDCs will create ‘ridges’ at the top of the beanie.
Repeat ROWS 2 – 3 until ROW 31(35, 41, 47, 51, 57, 61).
*The base of the beanie should measure approx. 26(30, 34, 38, 42, 47, 51)cm / 10(12, 13.5, 15, 16.5, 18.5, 20)”

Fasten off.
Assembly
Fold beanie in half with the WS facing outwards.

Whip stitch the short edges of the beanie together.
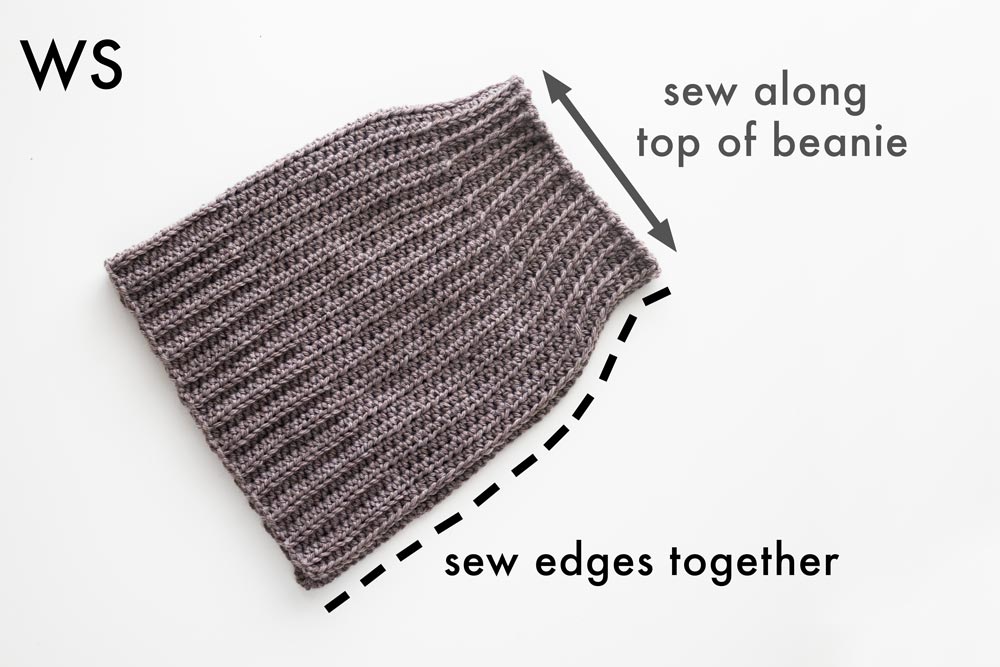
Whip stitch along the top of the beanie, pulling on your strand of yarn after every few stitches to close the hole. Pull tight on your strand of yarn and tie a knot. If necessary, sew the hole closed.
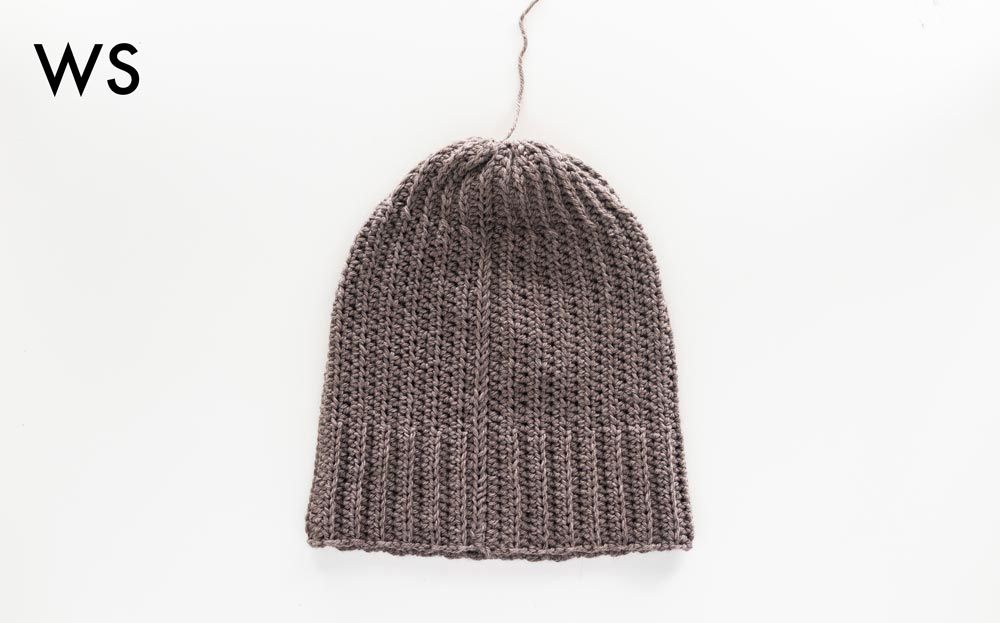
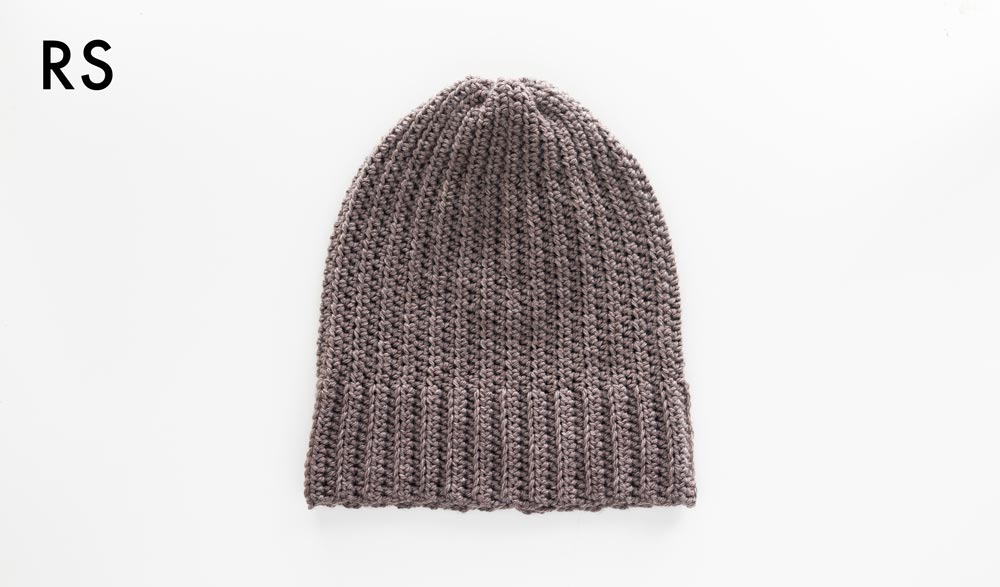
Turn your beanie inside out so that the RS is facing.
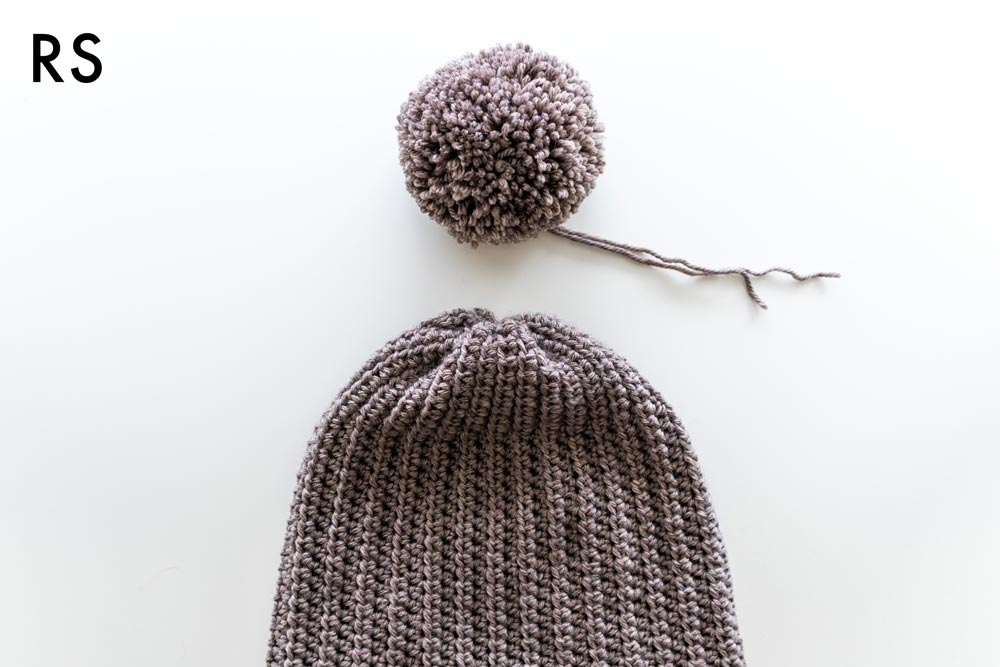
Optional: Make and sew on a pom pom.
Check out the step-by-step pom pom video tutorial here!
Weave in all of your ends.
Voilà! You’ve finished your Everyday Beanie 🙂
Where is the video tutorial ? Beautiful pattern. Thank You
Hi Joann, the video tutorial is underneath the title 'Video Tutorial' you can search for it on your browser and it's also on my youtube channel For the Frills 🙂
Grace
It's on her Youtube channel
Thank you for this adorable pattern. I just made one for my granddaughter.
Can you maybe do a little more in depth tutorial on how to sew the top. Mine always turn bulky at the top and I don't know what's wrong.
Hi Grace,
Most likely you're inserting your needle to far into the beanie - you only want to pick up the stitches along the edge or you're not sewing your stitches evenly along the top. They should be spaced out and the same size in order to have a closure without uneven bunching.
Grace
This is such a great pattern and is easy to work up. I've made a dozen in the last week, using up left over yarn. All will be donated to a homeless shelter. Thank you for this great pattern!!!
Glad you're enjoying the pattern and so kind of you to donate the beanies Crystal!
Grace 🙂
Hi! This is a GREAT pattern! I'm curious if instead of whip stitching the ends together, do you think I could slip stich them together before fastening the working yarn off? (I'm not great at whip stitching bit really good at slip stitch haha)
Thank you!
Hi Drina,
Sure just remember that the slip side will be the 'wrong side' of the beanie so when sewing on your pom pom the slip stitch seam should be on the inside of the beanie.
Grace 🙂
In order for the finished base of my beanie to be 38cm the row count is 42 not 47. Which is the more important number to go off of? Using a medium 4 acrylic yarn for reference.
Hi Stacie,
I think your gauge might not match the pattern? If so, base you hat off the measurements rather than the row counts. Just keep in mind that if you have a different gauge you might need to alter the pattern.
Grace
Hi! I love your patterns and have a question for you about this one. I'm using weight 3 yarn instead of worsted yarn (since I don't have worsted yarn), do you have any adjustments I should do for this pattern so that it will come out in the right size for an adult head? Thanks!
Hi Erin,
You'll probably need to add more chains to make the beanie longer and crochet more rows so it'll fit around your head. I suggest crocheting to the measurements provided in the pattern rather than just following the stitch counts and rows since your gauge will be different!
Grace 🙂
Hi Grace! I love this pattern, it’s beginner friendly but not bulky like so many other crochet hats I’ve seen! Can’t wait to get started! My husband is a 23.5 circumference but has requested a brim and something snug, so I’d like to make it less slouchy. Do you think that given the amount of stretch I’d be good with 45 chains instead of the 49? Thanks so much !
Hi Laura,
Yes reducing your chains will make the beanie more snug. 4 chains is a good place start and if you want the beanie to be tighter you can also just fold over the brim more i.e. fold the beanie so the brim is a bit thicker.
Grace 🙂
Can I ask, how much wool would the adult size take? Trying to Guate how many balls to buy.
Yes, me too. How many balls of wool per adult hat? Thank you!
Hi, I love your patterns!
Would you be ok if I sold items made from your patterns?
Hi Holly,
Sure! just please use your own photos and credit me (@forthefrills)
Grace 🙂
Hi! I really love you patterns and was wondering whether it would be ok to sell items made from them?
Hi Holly,
Yes you can sell finished items, just please use your own photos and credit me (@forthefrills)
Grace 🙂
Hi Grace! Absolutely in love with this pattern, and I've made it in about every color. As I'm accumulating them, I was wondering if you were alright if I make them for sale on my Depop account- I would absolutely give credit and forward this pattern to anyone who wants it-- by far the best beanie pattern I've come across!
Hi Julia,
So happy you love this pattern! It's such a great everyday staple. sure, you can sell physical items from my patterns just please use your own photos and credit me (@forthefrills)
Happy crocheting,
Grace 🙂
This is a great pattern and tutorial! I used Herrschners Baby Wonder (4 wt) and made the baby size. I have pretty tight tension so had to make several extra rows, but boy it sure turned out cute. It looks like a knit hat! Thanks so much!
How tall is the beanie supposed to end up on the adult smalls? I made a gadge square and am using the same yarn but it was off and I don't know how to alter the pattern measurments to fit right. Please help.
Ive just finished my first beanie for my sibling and it looks great! The only issue is I didnt pay attention to the yarn weight for the second beanie, and its #5 and doesn't seem as stretchy. Should that affect anything as long as I check the measurements? Thank you so much for the pattern!
Hi Grace! With this basic beanie pattern in Swish is adult small more geared to w woman’s size head ? It looks stretchy. My head circumference is 22-23 inches
Please advise
Thank you 🙂
Cannot locate hook size. The video says 4.5, hook picture is 5.5. I am using a thicker #3 yarn. Also the video hopped from the Everyday Beanie to a mohair pattern in the middle of the video.