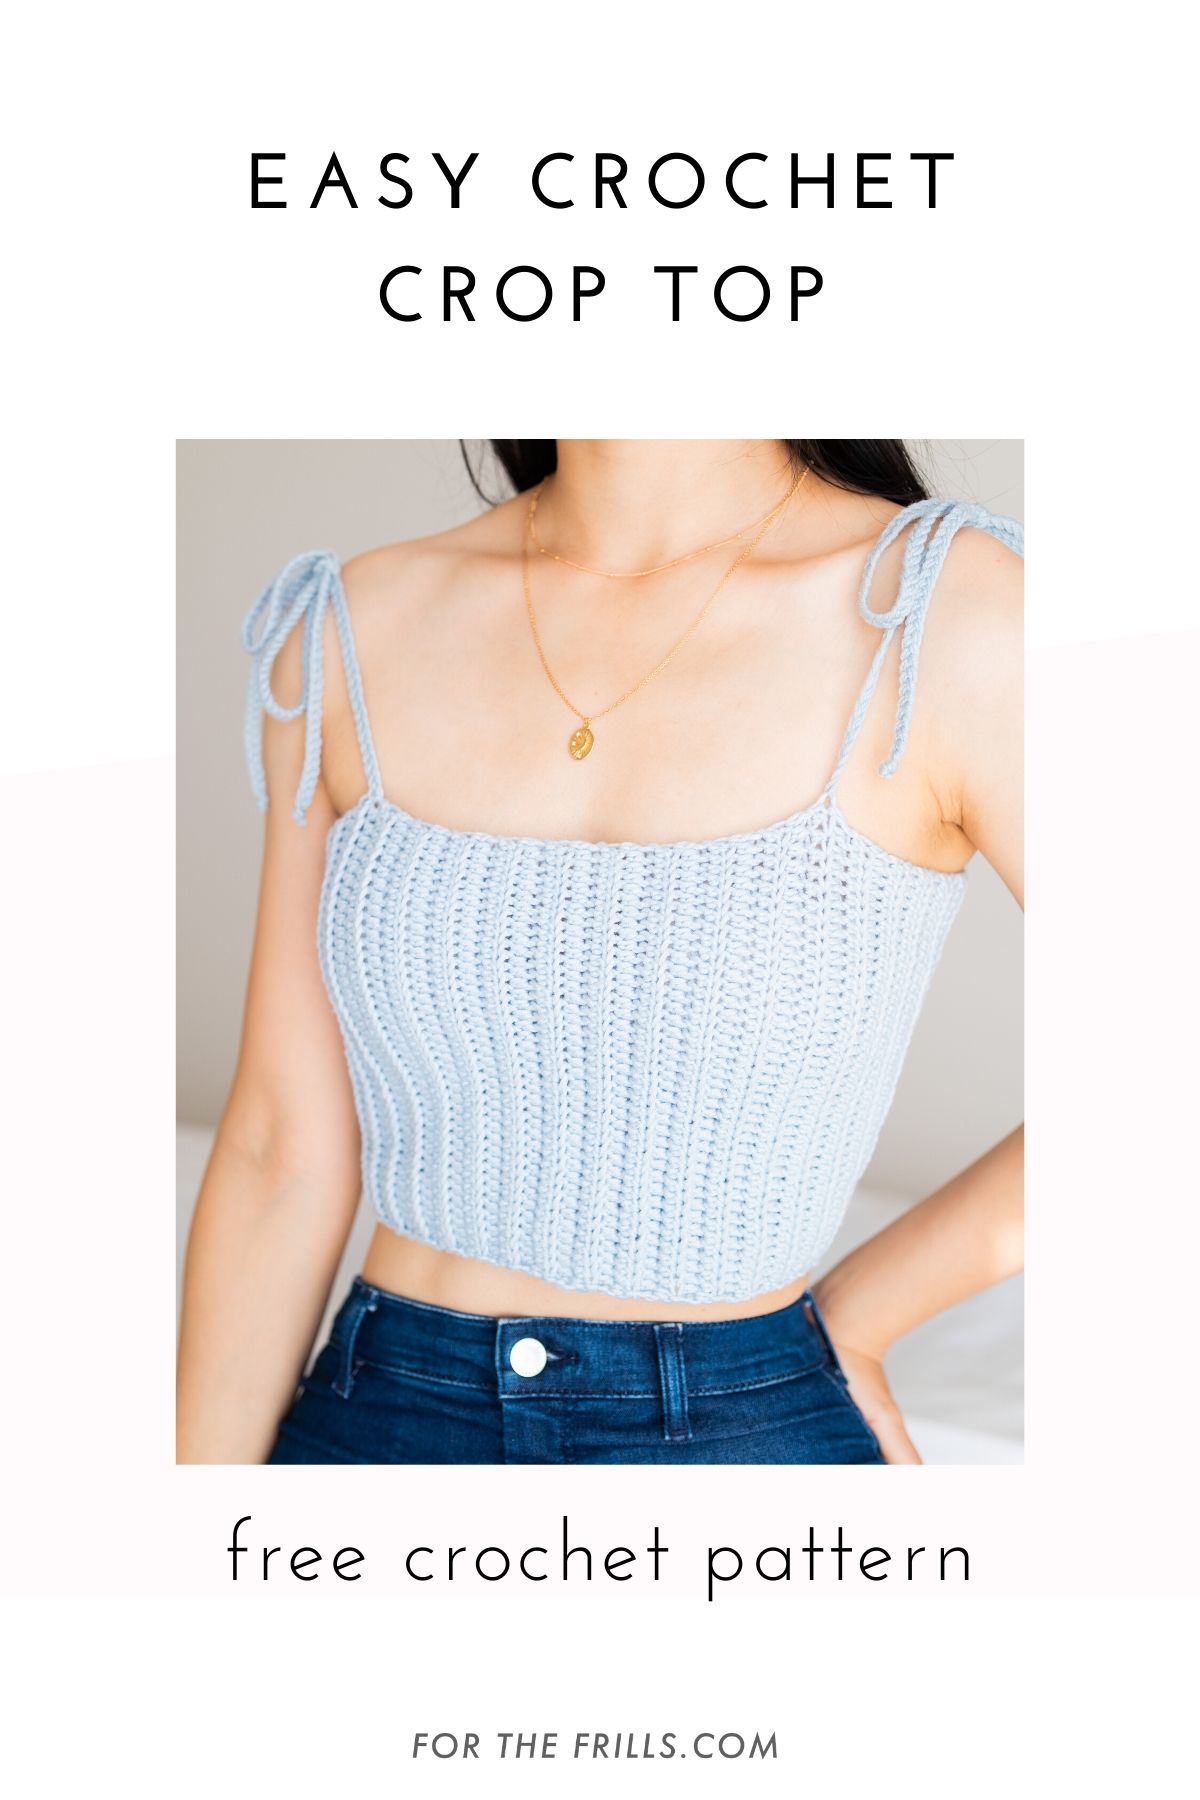
Learn how to turn a crochet rectangle into a crop top! The Skylar Crop Top is a stylish ribbed singlet and the easiest crochet garment you’ll ever make!
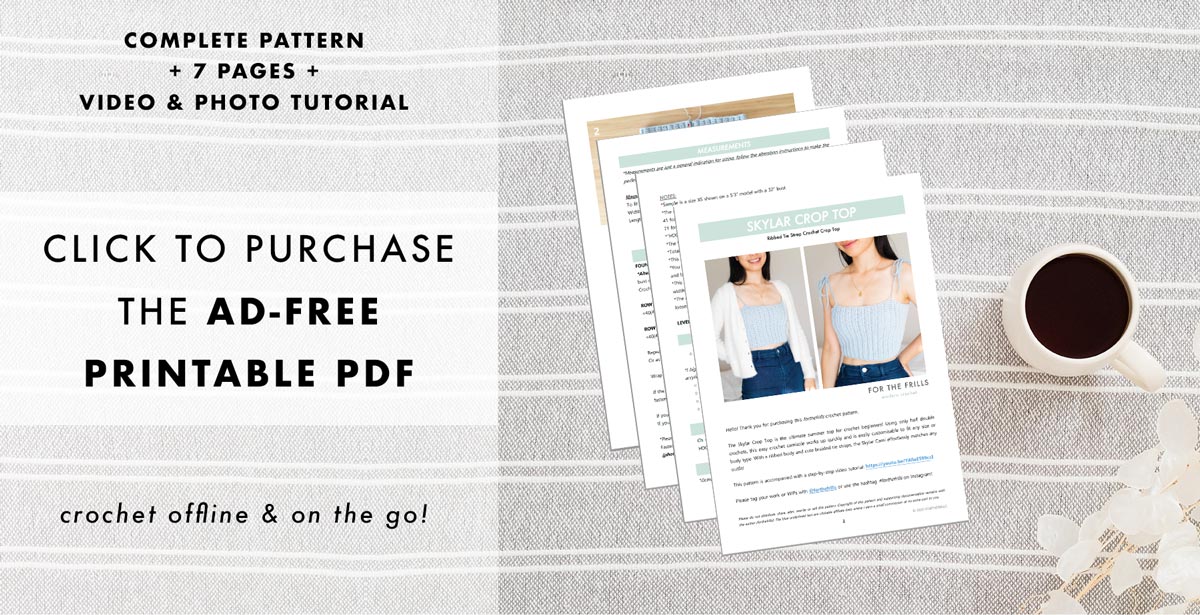
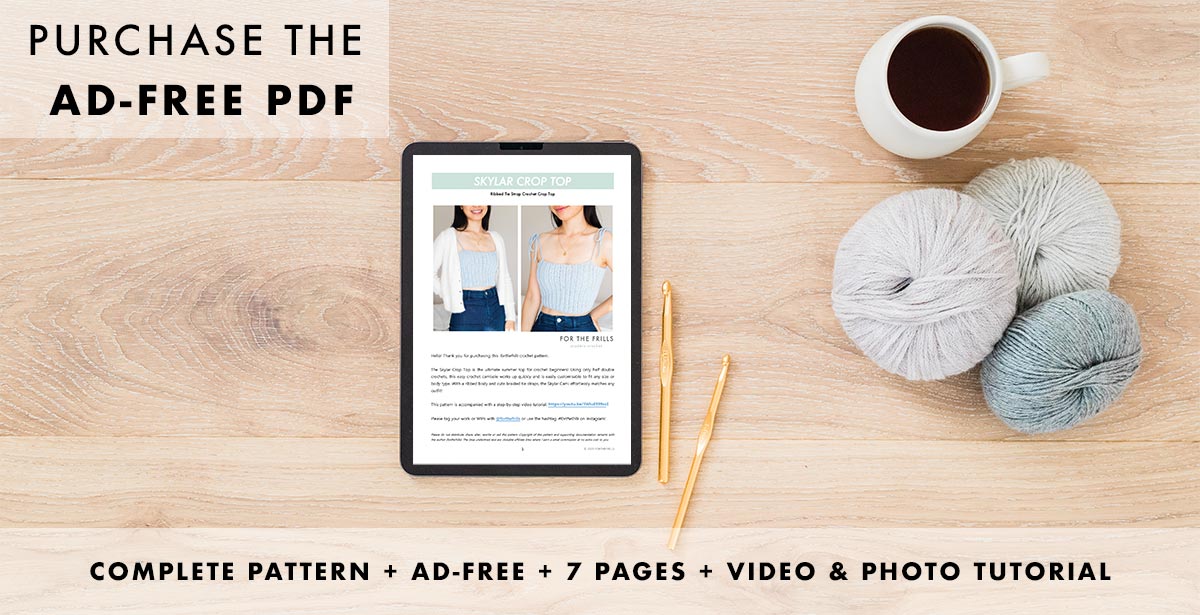
Scroll down for this free crochet crop top pattern and step-by-step video tutorial or purchase the ad-free, printable PDF here.
This post may contain affiliate links, view our disclosure policy for details.
Are you looking for your first crochet garment project? Well, look no further as the Skylar Crop Top is as easy as it gets! If you can crochet a rectangle, you can make this top 🙂
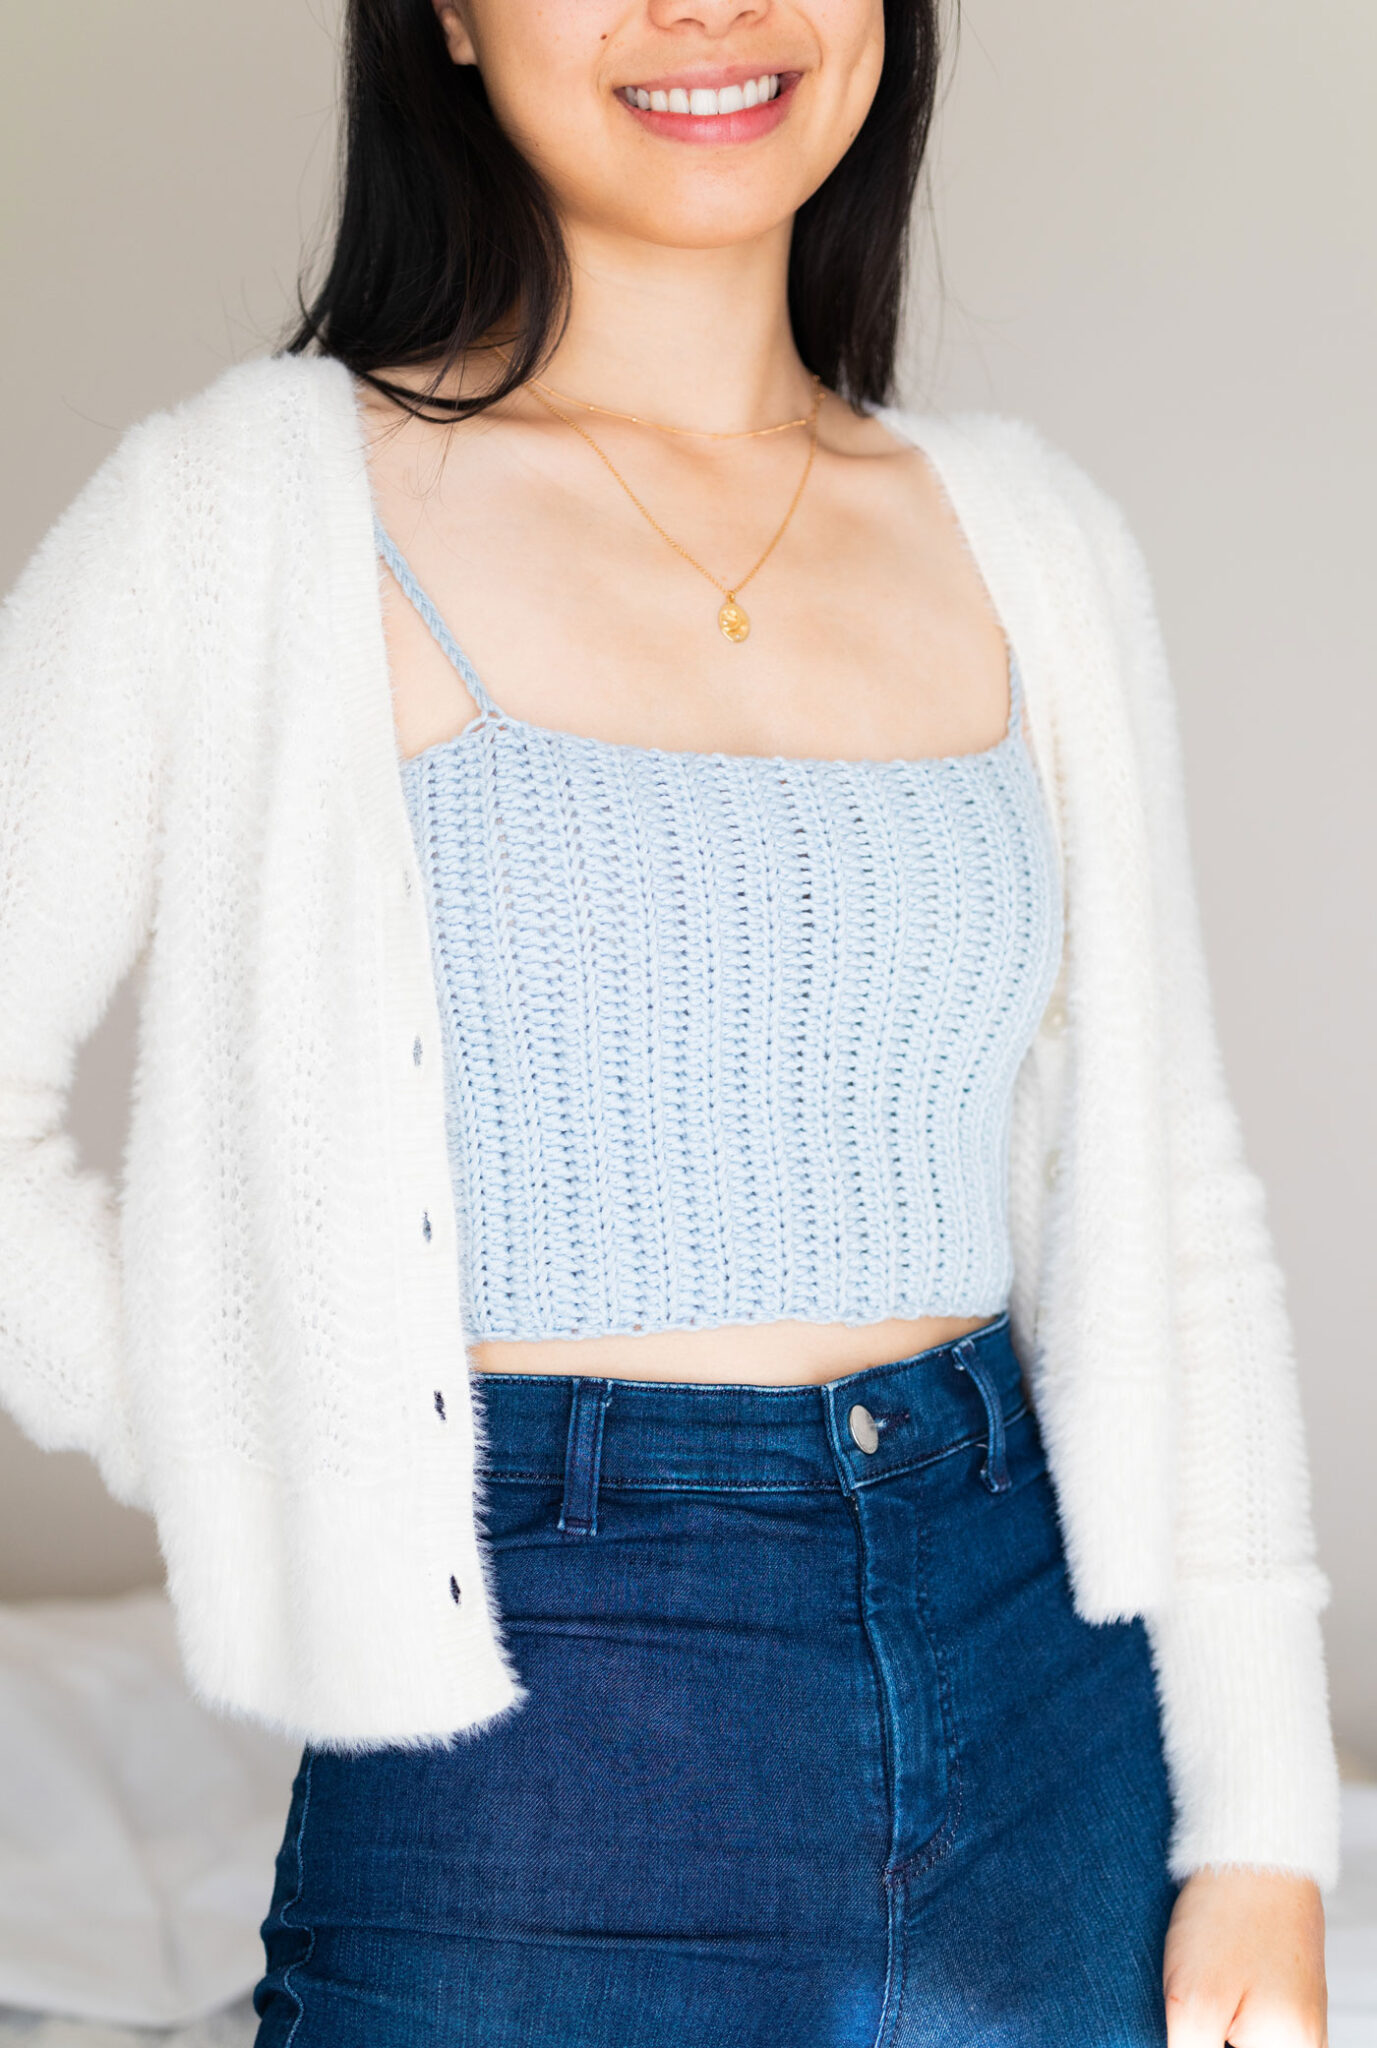
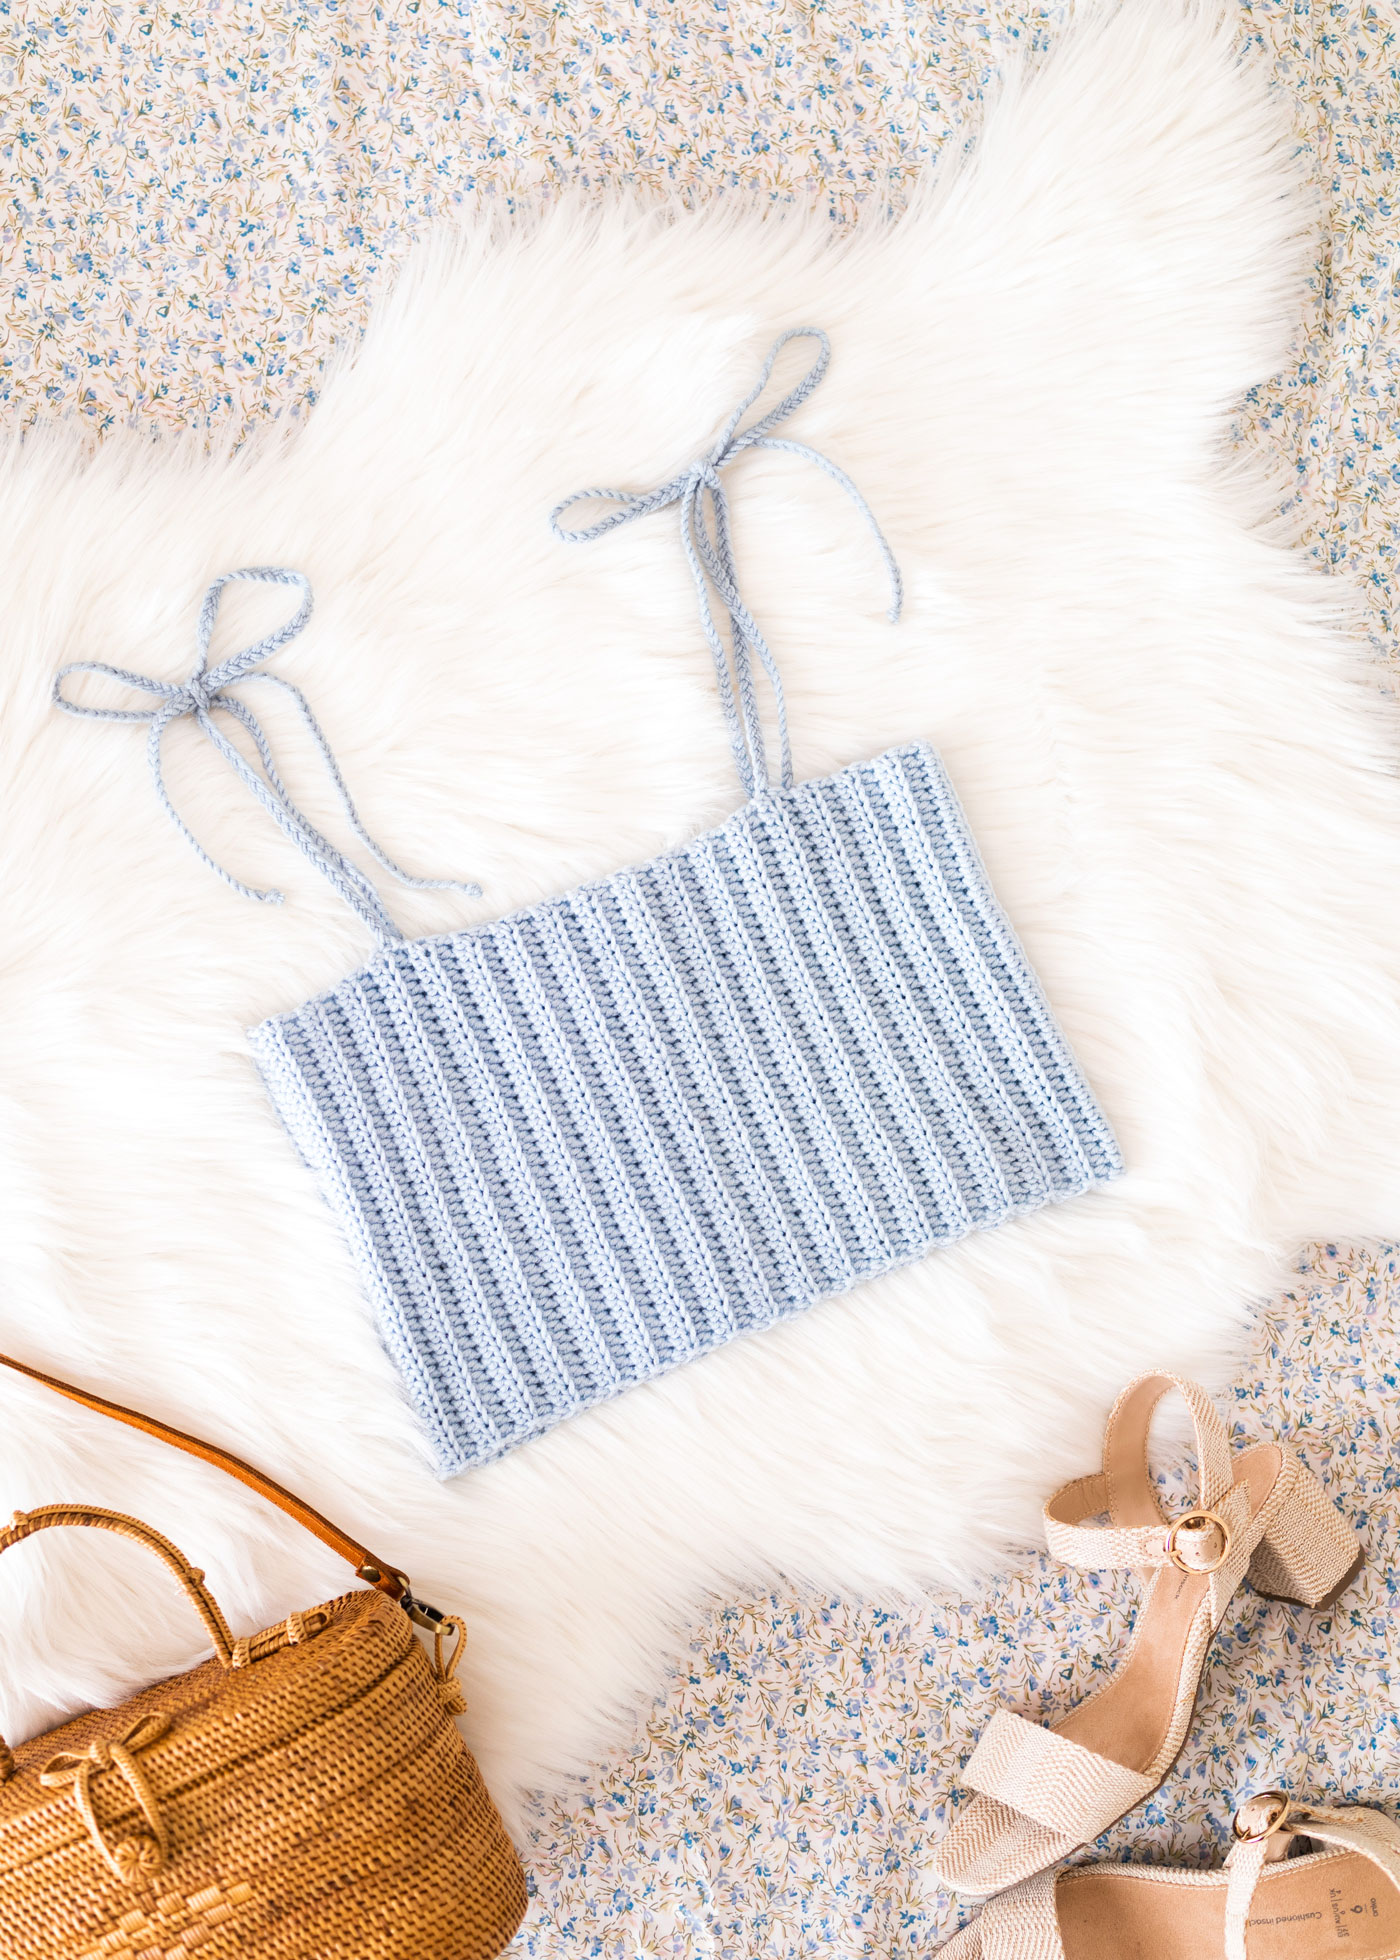
Featuring, a ribbed body and braided tie straps, the Skylar Cami effortlessly matches any outfit. Pair it with high waisted jeans, denim skirts or wear it underneath a cropped cardi for a cute, summer look.
Construction
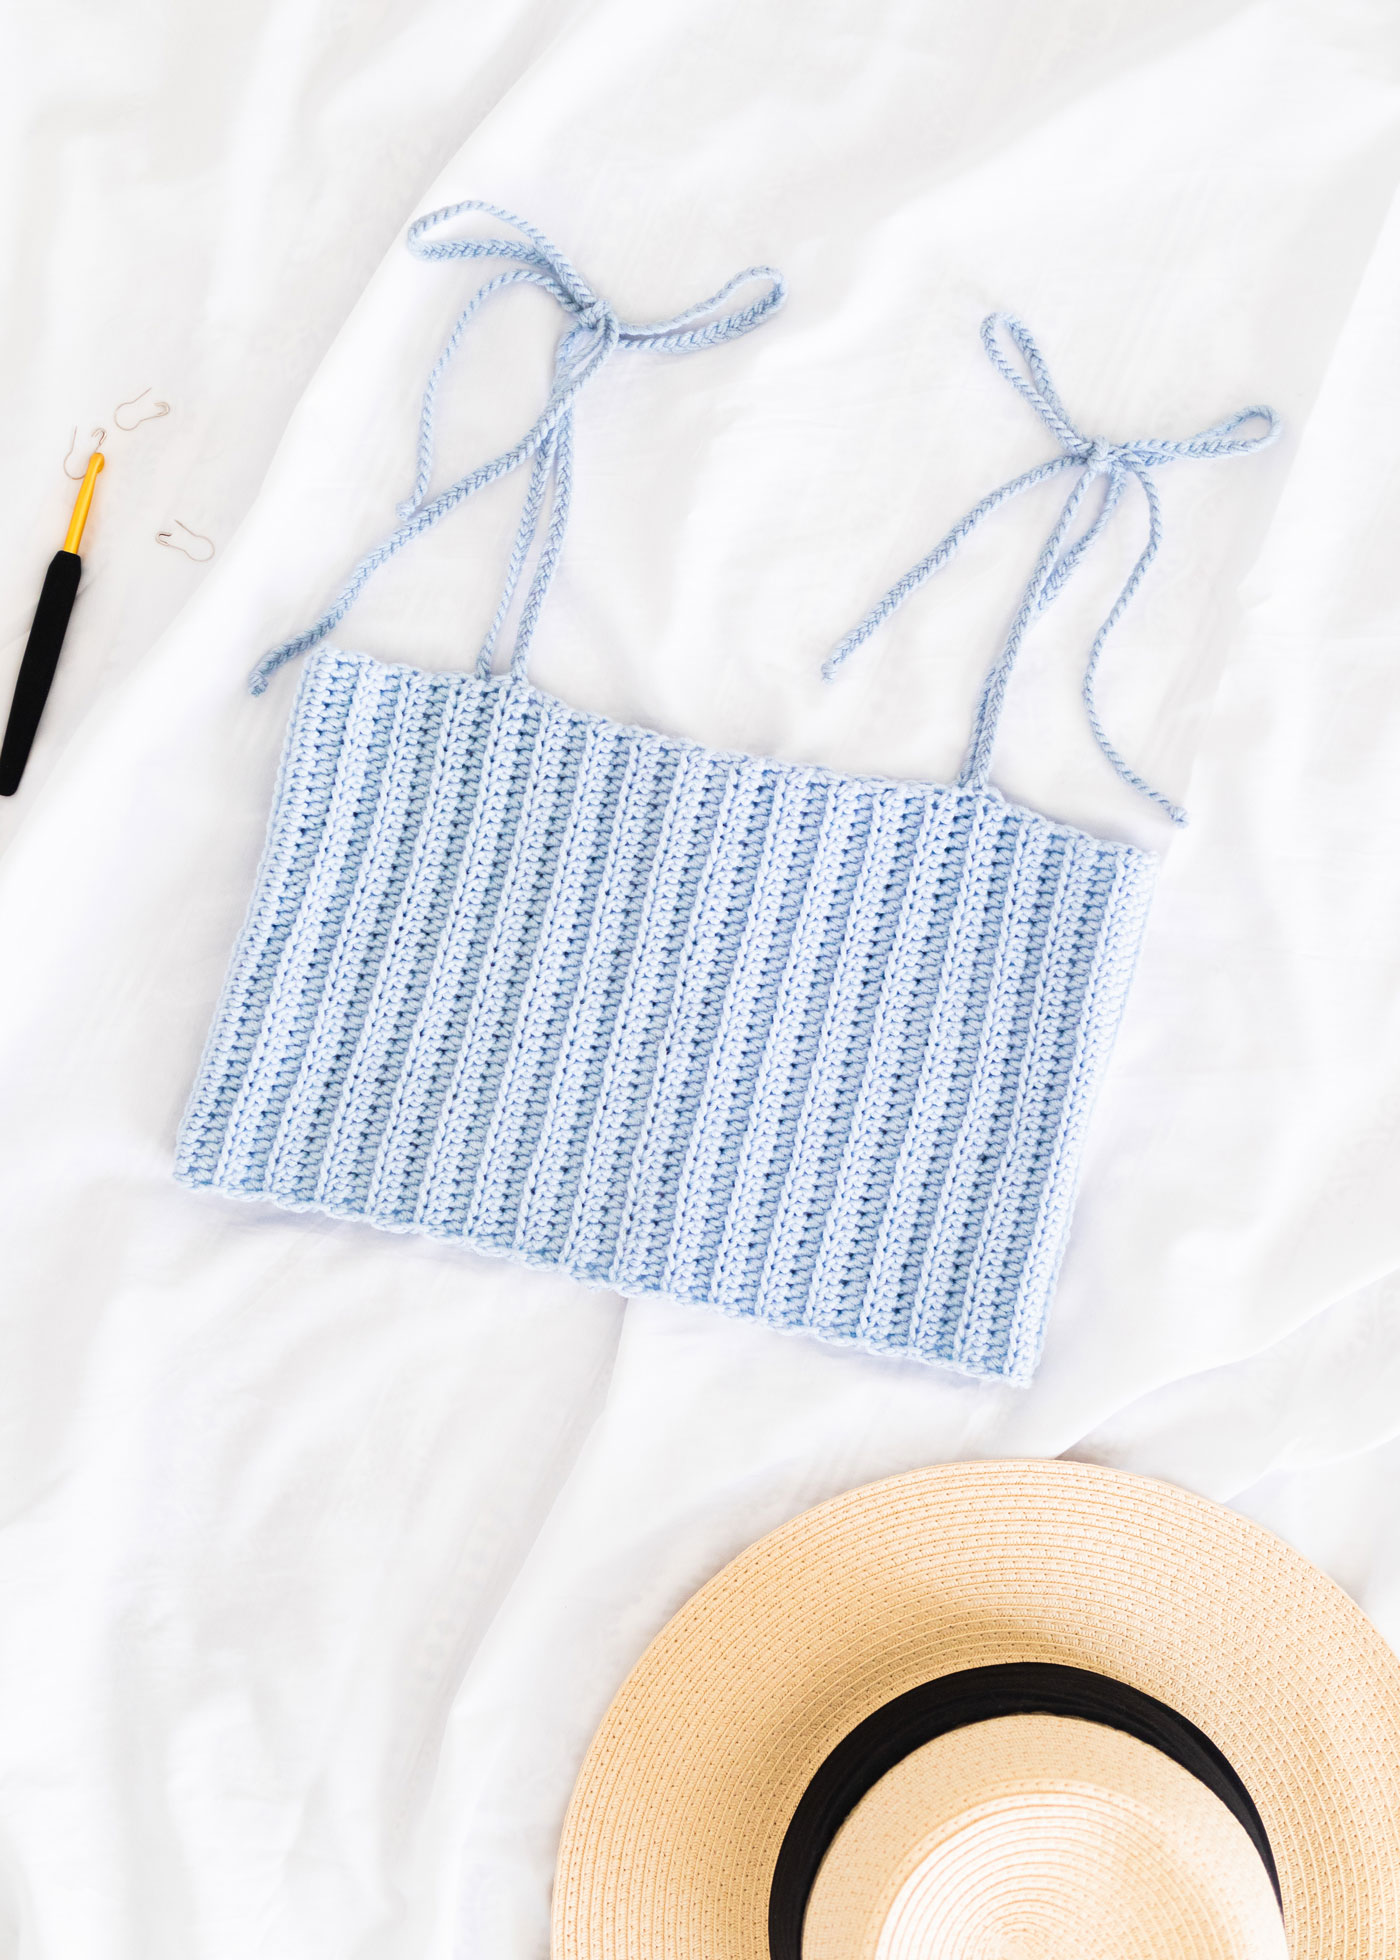
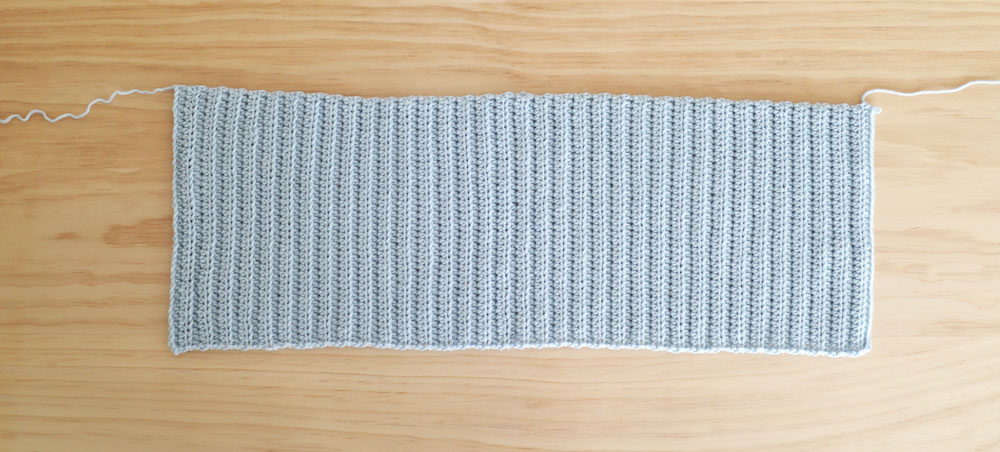
The construction of this crop top is super simple. We’ll crochet a rectangle, sew the edges together and then braid straps on the edge of the crop top.
The rectangle is made up entirely of half double crochets and we’ll work into the back loops in all stitches until the last stitch of the row.
Half double crochets are my favourite basic crochet stitch because they have a knit-like look and are quite fast to crochet.
Working into the back loops will give you the signature ribbed texture of this design and it helps the top be more stretchy so that its easy to wear on and off, over your head.
For the last stitch of every row I’ve crocheted a normal HDC to keep the edges straight and tidy. For the most ‘professional finish’ to your top don’t forget this step!
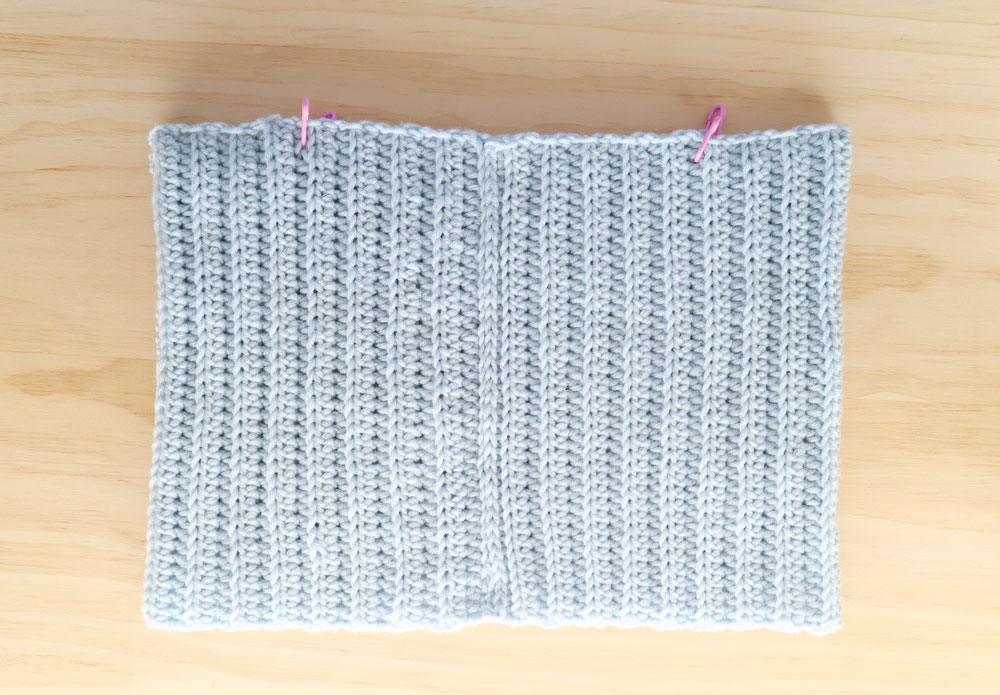
Once you’ve finished crocheting your rectangle, we’ll sew the short sides together to form a tube. At this point I recommend, trying on your top and using stitch markers, safety pins or bobby pins mark where you’d like your straps to go.
To create strong crop top straps, braid 6 strands of yarn together. In this pattern, I’ve purposely made the straps extra long so that you can use them to tie bows and adjust the fit for your body.
Once you’ve crocheted your 4 straps you’re all done!
Looking for more summer top patterns?
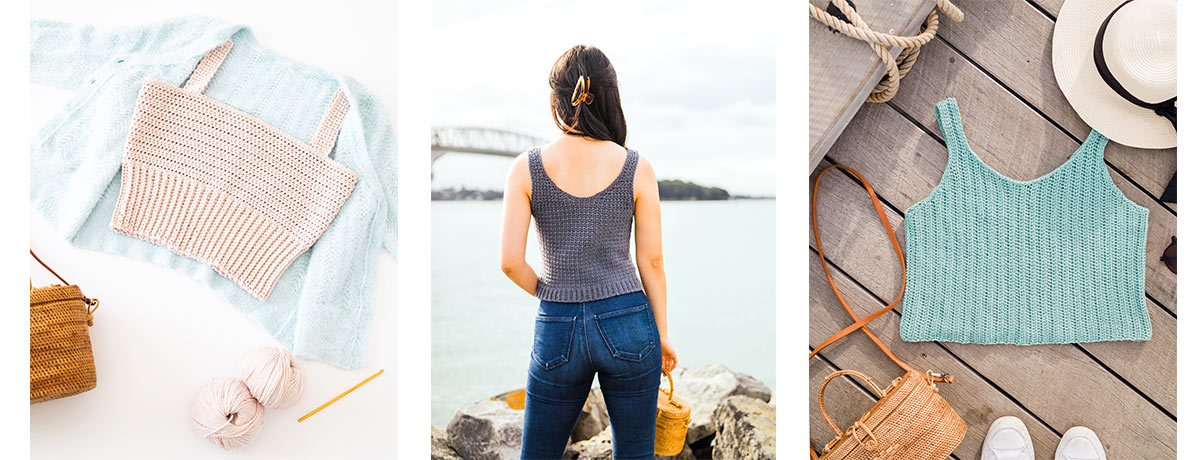
1. Blair Crop Top / 2. Terrazzo Tank Top / 3. Sagebrush Tank Top
The Skylar Crop Top is a bit different to traditional crochet garments. This project is worked lengthways - not widthways. When a crochet project is worked lengthways, the foundation chain runs the length of the garment - not the width.
This means that it’s very easy to change the width of this garment. As you crochet more rows, you can wrap the rectangle around your body to find the perfect fit.
However, if you want to alter the length of your top, you can only do so at the beginning by adding chains to your foundation chain. In general, if you’re not too sure about the length, remember that crochet projects tend to stretch out, so its generally better for your garment to be a *bit* small rather than too big.
If you’re new to crocheting garments, check out this blog post - 5 Tips for Perfect Fitting Crochet Garments!

Print and Crochet
You can always find a low-cost printable PDF version of all my free patterns. Perfect for printing out or viewing offline on your tablet or phone. This nicely-formatted pdf contains 7 pages, a link to the video tutorial and photo tutorial. The pictures are also separated from the written pattern so you can save on ink! This is a super useful upgrade that makes it even easier to crochet.
How to crochet a crop top for any size!
This best part about the Skylar Crop Top is how easy it is to alter and adjust to perfectly fit your body.
If you prefer longer tank tops over crop tops? Simply add chains to your foundation chain to create more length.
Want a loose fitting crochet singlet? Add more rows until you have positive ease (positive ease means that your top is larger than your actual measurements).
You can also decrease your chains to make a super cropped crochet bralette / bikini style top. If you want your crop top to be super form fitting you can remove rows to make your top fit snug around your bust.
Crop Top Yarns
The secret to having a crop top with great fit?
Choose a yarn with stretch! This is especially important if you want your top to be fitted at the bust and at your waist.
For fitted crop tops, I always recommend using acrylic, cotton-acrylic blends or cotton-merino blends.
If you want your top to fit snugly at your bust and your waist, I would not recommend using a 100% cotton yarn. Even though cotton yarns are super light and great for summer, once a cotton yarn stretches out it never regains its original shape!
Use a cotton yarn if you want a more relaxed and loose fit.
For this project I used Drops Merino Extra Fine in the colour Ice Blue. I love how this merino yarn is so soft and smooth, with just the right amount of stretch. Also I find that merino yarn is great in any season!
Since it’s a natural fibre, its super breathable and it keeps you warm in the winter but doesn’t make you overheat in warmer weather. I think this crochet singlet also makes such a great layering piece and I’m already working on a longer version in cream for autumn and the cooler months!
WeCrochet’s Swish DK is a great merino substitute or Lion Brand’s Touch of Merino would work well too!
To be able to follow this pattern exactly, I’d recommend substituting Drops Merino Extra Fine with another DK/Light (3) yarn.
Some of my favourite crop top yarns are -
- Drops Cotton Merino
- Paintbox Yarns Simply DK
- Lion Brand Jeans (This is an acrylic yarn that’s classified as an aran/worsted/medium (4) yarn but it’s the thinner side so you should be able to meet gauge)
Can I use a different weight yarn?
Since the Skylar Crop Top has a super simple construction, you can also use Sport or Aran/Worsted/Medium (4) yarn in a pinch!
However, don’t forget to take into account that your gauge will probably not match the pattern. You can follow the written pattern as a guide, but you’ll need to experiment and adjust your stitch counts.
To crochet a crop top from a rectangle you’ll need to:
- Crochet a foundation chain that’s roughly the length you want for your top.
- Crochet rows of half double crochets until your top can wrap around your body. Remember fewer rows = tighter top, more rows = looser top.
If you want to crochet with a …
- Sport/Fine (2) yarn - you’ll need more stitches and rows
- Aran/worsted/Medium (4) yarn - you’ll need fewer stitches and rows.
If you’re like to learn more about crochet designing and altering patterns, you can learn how I design all my crochet patterns here.
Pin me for later!
Design Inspiration
Since the weather is warming up in the Northern Hemisphere and it’s still warm in New Zealand I thought this is the time to make crop top patterns before it gets to cold! I really wanted to create a crop top that followed more of a tutorial style rather than a normal crochet pattern so everyone could get the right fit. I was playing around with different necklines and shapes but ultimately, I loved how easy it was to make this easy straight neck crop top and it was giving me all the Reformation vibes 🙂
The straps are simply braided onto the crop top (following a normal 3 strand plait) and the tie straps mean that you can adjust the fit as necessary. I’ve also included instructions demonstrating how to create plain straps but I love the versatility of the tie straps and the cute bow detail. Since this design is a bandeau and wraps around your back you can easily wear a strapless bra underneath and it won’t show!
If you’d like thicker straps for more support (or so that you can wear a bra with straps underneath) I suggest checking out -
- Mya Crop Top - textured convertible crop top
- Blair Crop Top - square neck crop top with ribbed hem
- Easy Crop Top - basic crop top
- Leila Crop Top - Tie straps and scallop hem details
Skylar Crop Top Video Tutorial
Add the Skylar Crop Top to your Ravelry queue!
Purchase the ad-free, printable version of the Skylar Crop Top!
*Sample is a size XS shown on a 5’3” model with a 32” bust.
*The sizing guide follows size XS(S, M, L, XL, 2XL, 3XL). E.g. “Ch 41(46, 51, 56, 61, 66, 71) means Ch 41 for XS, Ch 46 for Small, Ch 51 for Medium, Ch 56 for Large, Ch 61 for XL, Ch 66 for 2XL and Ch 71 for 3XL.” If there is only one number, it applies to all sizes.
*"HDC 10" means HDC into the next 10 stitches.
*The turning chain ch 1 does NOT count as a stitch.Total stitches are indicated between < >.
*This pattern uses US crochet terms.
*You can easily alter the length and width of the pattern for your preferred fit and ease for any size and body type 🙂
This pattern is worked lengthways; the foundation chain runs the length of the crop top NOT the width.
The number of rows determines the width of the crop top.
LEVEL: Beginner
Materials
Yarn – Drops Merino Extra Fine – DK/Light (3), 105m/50g, 155yds/1.8 oz, 100% Merino, Ice Blue (39)
approx. 110(135, 165, 210, 250, 300, 350)g
*I highly recommend using yarn with a good amount of stretch to e.g. merino, acrylic or cotton-acrylic blend. If you want to make your crop top shorter/longer, you’ll need less/more yarn.
5mm (US H) Crochet Hook
Darning Needle
Scissors
Safety pins/stitch markers
*Measurements are just a general indication for sizing, follow the alteration instructions to make the perfect crop top/singlet for your body/bust.
Measurements cm:
To fit Bust: 76(86, 96, 106, 117, 127, 137)
Width: 31(33, 38, 43, 48, 53, 58)
Length: 21(23, 25, 28, 31, 33, 36)
Measurements inches:
To fit Bust: 30(34, 38, 42, 46, 50, 54)
Width: 12(13, 15, 17, 19, 21, 23)
Length: 8(9, 10, 11, 12, 13, 14)
Stitches & Abbreviations
Ch = Chain
HDC = Half Double Crochet
BLO = Back Loop
St = Stitch
Gauge
10cm/4” square = 19 stitches wide x 11.5 rows tall in Back Loop Half Double Crochet
*Gauge is not particularly important for this pattern, rather crochet the number of chains/stitches to fit your measurements.
MINI EXPLANATION:
Turn a crochet rectangle into a crop top. Constructed using back loop half double crochets, this crochet sweater is worked flat and with the body seamed together to form a tube and tie straps braided onto the body.
Skylar Ribbed Crop Top Crochet Pattern
Crop Top Body
FOUNDATION CHAIN: Ch 41(46, 51, 56, 61, 66, 71).
*Alteration Note: The foundation chain runs the length of the crop top (measures down from over bust measurement until your desired length (e.g. under bust, belly button, hips).
Crochet chains until you reach the desired length for your top.
ROW 1: HDC into 2nd ch from hook, HDC in each st until end, turn.
<40(45, 50, 55, 60, 65, 70)>
ROW 2: Ch 1, BLO HDC in each st until last st, HDC in last st, turn.
<40(45, 50, 55, 60, 65, 70)>
Repeat ROW 2 until your panel measures 61(66, 76, 86, 97, 107, 117)cm / 24(26, 30, 34, 38, 42, 46”. Or as a starting point, repeat ROW 2 until your panel length = waist measurement.
Wrap your panel around your body.
If the edges (the foundation chain + last row) reach in the middle of your bust and you like the fit, fasten off leaving a tail of yarn (approx. 2 times longer than your foundation chain).
If you want your top to be looser, add repeats of ROW 2.
If you want to have a tighter top, remove repeats of ROW 2 until you reach your desired ease.
Please keep in mind that your top will stretch out slightly (depending on the type of yarn).
Fasten off, leaving a tail of yarn (approx. 2 times longer than your foundation chain).
Assembly
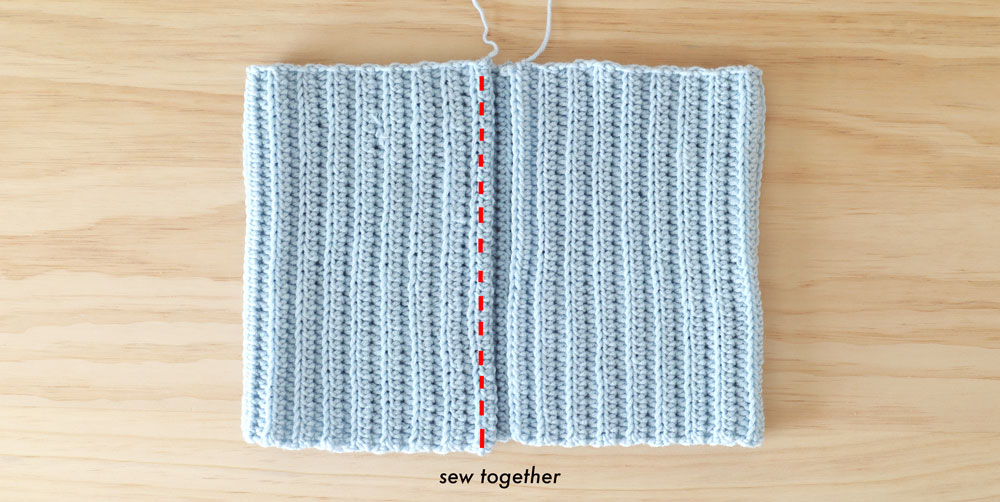
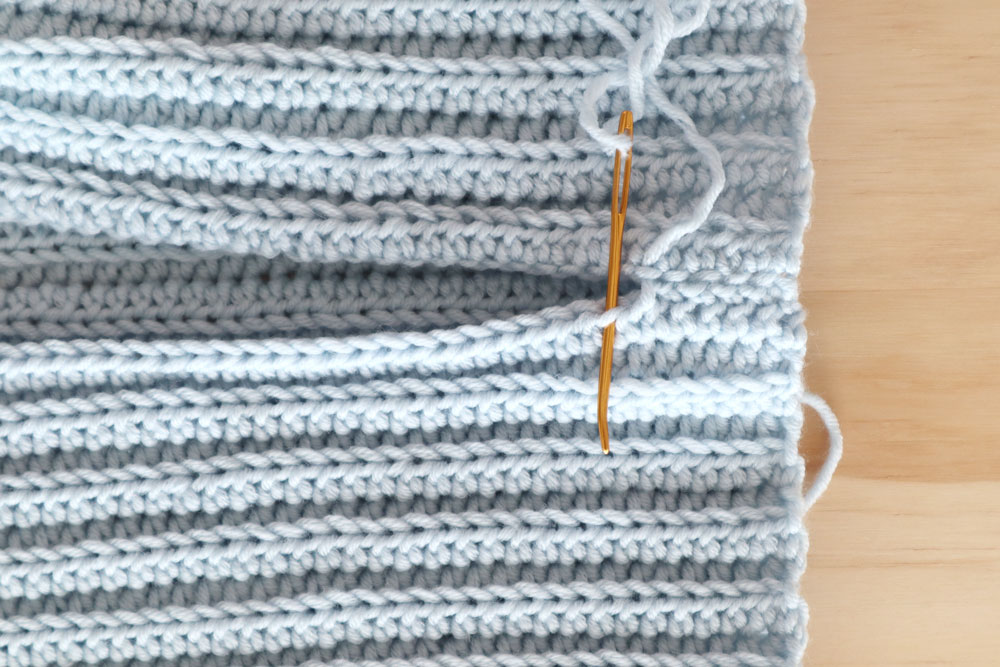
Sew the ends of your body panel together. For a more ‘seamless’ look, only sew into the back loops.
Try on your top and using stitch markers or safety pins, mark where you would like your straps to fall.
(I placed mine 7cm/2.5” in from the outside edges).
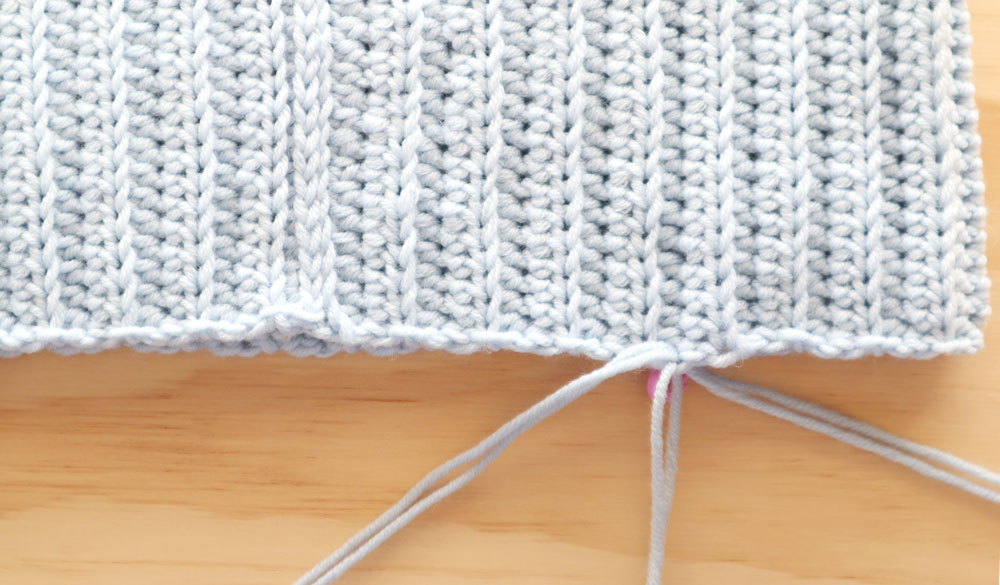
Straps
Cut 3 strands of yarn measuring 150(150, 157, 157, 165, 165, 172)cm / 59(59, 62, 62, 65, 65, 68)”.
Insert hook along the edge of the top – where you placed a stitch marker.
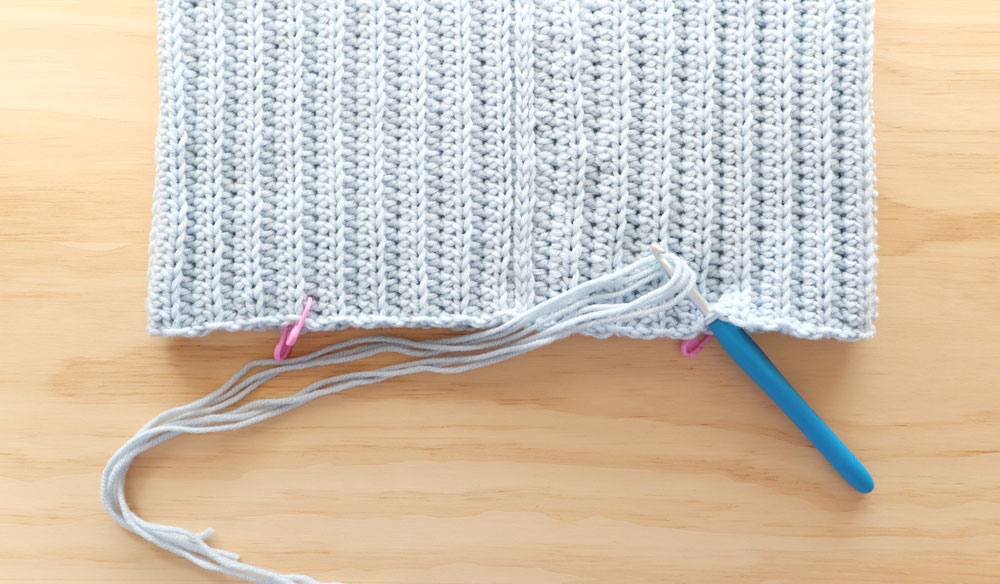
Pull through 3 strands of yarn, pull the ends to make sure the centre of the strands are in the crop top.
You should now have 6 strands of yarn. Create 3 sets of 2 strands of yarn.
Plait the right 2 strands over the centre 2 strands, plait the left 2 strands over the centre 2 strands (this is a normal 3 strand plait/braid).
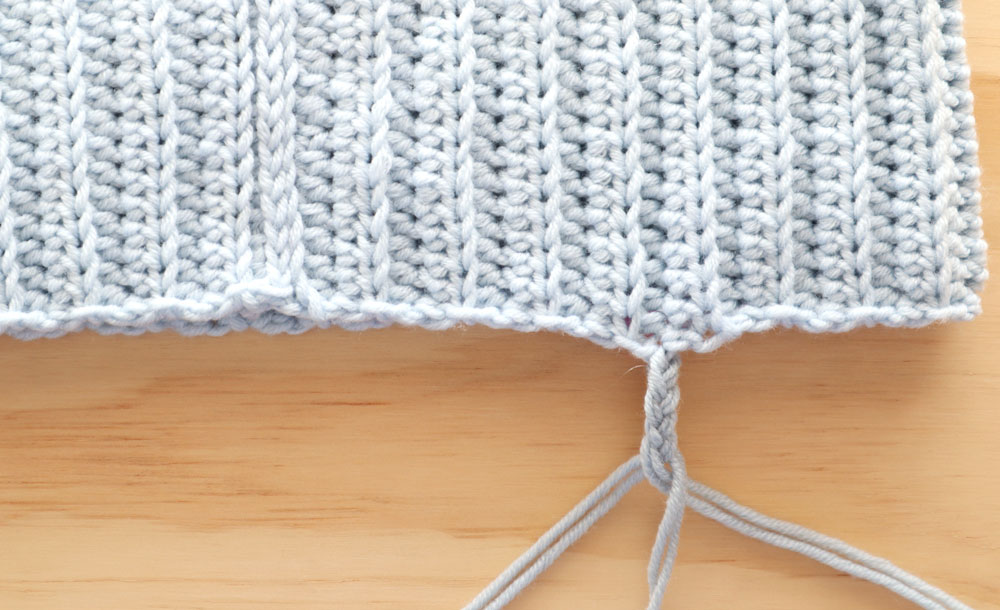
Repeat plait instructions, until your plait/braid measures approx. 50(50, 55, 55, 60, 60, 65)cm / 19.5(21.5, 21.5, 23.5, 23.5 25.5)” or you have 5cm/2” of yarn left.
Holding all 6 strands together, tie a knot at the end of your braid. Trim off excess at base of knot or leave a tassel.
Repeat ‘STRAND’ instructions for the 3 remaining strands.
*Alteration Note: If you’d like to have 2 plain straps (instead of tie straps), create the 2 front strands and then tie the 2 straps to the back of your top. Please reference the video.
Finishing
Weave in all of your ends.Voilà! You’ve finished your Easy Ribbed Crop Top 🙂
Ready for your next crochet project? Find more free patterns here!
Hi Grace, I LOVE your blog! Your patterns are so clear and straightforward and the garments look incredible. I was just wondering if you would ever post patterns for dresses? I hope you are doing well in these crazy times! KT
Hi Katie, I currently have 1 dress pattern on my blog - the Audrey Dress! I hope to have more dresses this summer 🙂 Grace
Hi its jackie hers thanks for taking the time to do these great things to make xx
Hi! I just found your blog and I’m in love. The top is so cuteee. I was never interested in crocheting and now I am! Also where is the white fluffy cardigan from? It looks so comfy
Hi Shu, sorry but I can't remember where the cardigan is from! I've just released a white button down cardigan though that you can make fluffy but using a strand of mohair - Aria Caridgan
Grace 🙂
Hi Grace! My grandmother taught me to crochet about 7 years ago and, since I'm stuck inside, I recently picked it up again and it brings me so much peace. This pattern was so easy to follow and the top I made is so pretty and I can't wait to wear it out when this is all over!
Hello, love this pattern and intend to make for my daughters. Do you think Drops Cotton Light would work - it's a cotton poly blend?
Thank you for sharing
Hi Fay, I'm sorry but I've never used Drops Cotton Light before! If the yarn has a good amount of stretch to it (e.g. when you pull on it gently it 'springs' back into shape) Then you should be ok 🙂 Grace
Hey Grace! I'm so excited to try this piece. I'm still new reading patterns so I was wondering if in this part of the blog...
"Drops Merino Extra Fine – DK/Light (3)"
...does the (3) mean 3 balls of yarn? I'm thinking of ordering from the same yarn company, so should I buy three of them? Thank you!
Hi Adalia,
DK/Light (3) = the thickness of the yarn. Lots of countries use different yarn classifications e.g. in the UK they use DK but in the US they use Light(3) (like using cm vs. inches). The amount of yarn you need is listed in the line below e.g. approx 100(200, 300, etc.)g. That's the approximate amount of yarn you need, so if you're making a size small you'd need 200g of a DK/Light (3) yarn. The yarn I used 50g a skein/ball, so you'd need approx. 4 balls of yarn to make the pattern. Please note this is just an example and refer to the amounts stated in the pattern 🙂
I hope this helps, Grace
So the 3 in the brackets refer to 3 ply? You've used 3 ply yarns?
Hi Aransha, Light (3) is the US category of yarn - a DK yarn (UK terms) is a category 3 yarn in the US. The pattern uses a DK / Light (3) yarn - which is an 8ply yarn in Australian terms.
I hope this helps,
Grace
I love all your works.but I don't know how to get the width of the top .how do I go about it.And I don't understand the part when you said the length of your panel equals your waist measurement.for instance if my waist measurement is 33 inches should the length of my panel be 33 inches.please I just need you to explain it nd also how to get the width of the top . thanks ❤️
Like!! Really appreciate you sharing this blog post.Really thank you! Keep writing.
Hi! I recently stumbled upon your blog when I picked up crocheting again for a new baby, and I really love all of your patterns! I wasn’t sure if this was store bought or handmade, but I thought I’d ask—where did you get the adorable sweater that you paired with the crop top? I kinda want to recreate this outfit and I have an unhealthy obsessions with cardigans, so a direction as to where I can buy this or how I can make it would help a lot! Thanks!
Hi Cameron,
Thank you so much for your kind words! I think the cardigan is store bought but unfortunately I have no idea when it's from because it doesn't have tags on it, sorry! I think if you search for 'fluffy cropped cardigan' you'll be able to find something similar 🙂
Grace
Hi Grace!!
How are you?
I was just wondering what happen if you use a small crochet hook? Will it look the same or will I need more chains in my foundation chain?
Thank you so much!!
PM
Hi Paula,
If you use a smaller crochet hook, you'll probably need more chains at the beginning and more rows to make the top fit.
Grace 🙂
Hello Grace!! Your designs are so pretty and your tutorials are very easy to follow. I wanted to ask, I have yarn rolls of 50g. How much yarn rolls will it take for me to make this crop top?
I would like to add that I wear a XS
Thank you for the easy pattern. It's understandable
Thank you for this pattern. Its very easy and beautiful.
I accidentally did BLO HDC instead of a HDC in the last stitch. How can I fix this?
Hi Grace,
The end result shouldn't be too different, the edges just might be not as neat/straight. If this doesn't bother you it's fine 🙂 but if you want a more secure edge you'd need to undo your work and re-crochet the rows sorry!
Grace
Thank you! I also ran into another problem after fixing this. My cloth is shrinking even though I haven't missed a stitch since I started from row 2. What is wrong and is there a way to fix it?
Hi Grace,
Normally that happens if you've dropped the stitch at the end of the row. If you still have the correct number of stitches it probably means that your tension (how tightly you hold the yarn) is getting tighter, making the top shrink. The only way to fix it is to redo your top sorry!
Grace
Is it okay to sell items using your patterns as long as I use my own images? I’m new to selling crochet items!
Hi Ashlyn,
Sure you can sell physical items from my patterns just please credit me and use your own photos thanks!
Grace
My local craft/fabric store didn't have any DK/Light(3) yarns in the color I wanted, so I opted for a Worsted/#4 yarn. Will my top still look as nice as yours?!
Hi Jen,
If you've used a different weight of yarn (in this case a thicker yarn) just keep in mind that you can follow the pattern as a guide but you'll need to alter the stitch counts (crochet fewer chains) and crochet fewer rows to have a top that fits like the sample in the photos.
I hope this helps,
Grace
Hi! is a 60% cotton 40% acrylic a good blend or should I buy a different yarn
Hi Adele, as long as your yarn has a good amount of stretch to it, you should be ok 🙂
Grace
Hi! I was wondering if you could add regular straps to this? Id like something thicker to hide bea straps!
Hi Heather,
Sure you can add the straps from the Leila Crop Top or Easy Crochet Crop Top 🙂
Grace
Hola, quisisera saber donde indicas el grosor del hilo, gracias.
Hola Maria Luisa,
El grosor del hilo está debajo del título 'Materials'.
Grace 🙂
Hello, I'm thinking of making this for a friends birthday gift, how many yard would I need if I made a size medium? Sorry I'm having trouble converting and understanding the yarn measurements, I'm still new. Please and thank you, love this gorgeous design!!
Hi Mara,
The yarn amounts are listed in the 'Materials' section. If you want to make a size M - you'll need 165g of yarn. Keep in mind that the yarn I"m using has 105m per 50g - so you'll need 4 skeins of yarn or 347m of a DK weight yarn. Remember that these amounts are approximate since we all crochet with different tension 🙂
I hope this helps,
Grace
If I was to Make an XS using the Drops Merino Extra Fine. Will I need more than one ball of wool?
Hi Jessica, all the yarn amounts are in the materials section! For size XS, you'll need approx 110g of yarn and each skein of Drops Merino Extra Fine is 50g, so 110/50 = 2.2 and to round up you'll need 3 skeins of yarn.
Grace 🙂
Hi! I was working on this top I’m in ROW 7. I was checking it I’m doing it right. I counted the stitches of ROW 2 and compared it to the stitches in ROW 7 and it’s not the same number of stitches. What do I do?
Hi Ellen,
You've probably not been crocheting in the last stitch of each row. Unfortunately the only way to fix this is to undo your work and start from Row 2 sorry! Even if you try to add more stitches now the edge will be uneven.
I hope this helps,
Grace
Hi! I love you pattern so much and the simplicity, I just have one question for you, do you do a stitch in the one chain that is on every row? Because I’ve been doing that for half of it already and I’m afraid I’ve messed up but it doesn’t look off?
Hi Sofia,
For this pattern ch 1 doesn't count as a stitch so you place your first stitch of every row on top of the last HDC of the previous row. If you count your stitches and you still have the same number you should be ok!
Grace 🙂
Hi just wondering if my yarn require a smaller hook (3mm) while your pattern require a 5mm hook, which one should I opt for? If I use the smaller one, will there be any differences, do I need to alter anything? Thank you!
Hi Ashley, if your yarn uses a 3mm hook it's probably not a DK / Light (3) yarn? In that case you probably won't meet gauge and your top will turn out smaller than the suggested measurements. You can follow the pattern as a guide but you'll probably need to crochet more chains and rows to get your top to fit.
I hope this helps,
Grace 🙂
Hello, just wondering if the cardigan you’re wearing in the pictures with this top is something you made and if so, do you have a pattern for it? Thanks!
Hey Grace, Im really new to crochet and most times on some written patterns they are like gauge blocked and guage after blocked... And I really dont understand what they mean by that or how they get the measurements so please could you explain that to me😁
hi this i easy to follow but I'm having trouble with the "fabric" like how do you make it without holes where you can't see through it?
Hi Jada, since this item is crochet there will always be small 'holes' but they shouldn't be noticeable when you wear the top. To minimise the look of the holes it comes down to yarn choice - 100% cotton yarns tend to have more stitch definition so the 'holes' are more noticeable while acrylic and cotton blends work better for this type of pattern.
I hope this helps,
Grace 🙂
hi grace, I just came across your YouTube and blog and let me just say that I am in LOVE!! I do have a few questions about this top. Number one is that I was wondering about how much wool is needed to make this (in Australian terms)? My other question is that I was wondering if it is see through so that I can know weather or not to wear anything underneath?
Hi Ashley,
The yarn estimates are provided in metric measurements (grams) and if you're in Australia you'll be looking for a yarn that is in the '8ply' section at the craft store but all of the yarn labels will be labelled with UK or US yarn terms so you'll be looking at labels with DK or Light (3) on them (I'm from New Zealand so I completely understand your struggle!). I've worn a strapless skin coloured bra underneath my crop top and from the photos you can see that you can't see anything 🙂 But how 'holey' your top looks definitely depends on the type yarn you choose which is why I recommend acrylic, merino or a cotton merino blend!
I hope this helps,
Grace
hii, does this have a size ply for the yarn? do i need 4 ply size of the yarn for making this?
I just learned how to crochet this week and I finished making this top in 2-3 days. The video tutorial is so easy to follow, and my shirt is lovely - gotten so many compliments. I thought the lightweight (3) yarn would be see-through, but with a nude bra I didn't have any problems. I added thicker straps from the "Easy Crochet Crop Top" and it's perfect for me. Thank you so much for posting your patterns and tutorials - I'm definitely going to try making more things from your website!
Hi Jodi,
Congratulations on finishing your first crochet project! Yes skin coloured bras are perfect under all crochet tops!
Happy crocheting,
Grace 🙂
Just wanted to say I love this pattern! I made it in 100% cotton so it’s less springy and form fitting than yours, but it still looks cute and I’m excited to wear it this summer. I also used two colours, blue and white, in two asymmetrical sections. I don’t know how to describe it better, but it looks very cool 🙂
I’m new to crochet and loving it. I want to make another of your tops and a cardigan as well, I’m waiting for new yarn to arrive in the mail. I tried knitting before but didn’t like it, but being able to crochet this simple top was very encouraging and fun♡
Your blog is very beautiful and so is everything you make ! I can hardly believe you put out such lovely patterns for free. Thank you, and I hope you have a great day ♪(๑ᴖ◡ᴖ๑)♪
Hi Tom,
So glad you're enjoying the patterns and thank you so much for your kind words!
Happy crocheting,
Grace 🙂
hi, love your blog and videos they are so informative and it has inspired me to crochet. I am stuck somewhere the bust size I am working on is 37" so how many chains and rows should I keep?
Thanks
Mehak khanna
I was super excited to make a crop top for the summer and the first ever shirt I've ever made, however I didn't realize when I started that there is no adjustment for bust vs waist size. My bust size is 6 inches bigger than my waist size. Is there a way to adjust the pattern for this? My yarn is stretchy but I didn't really want holes over the bust area or a loose waist area. I do love the pattern though. Thank you 🙂