
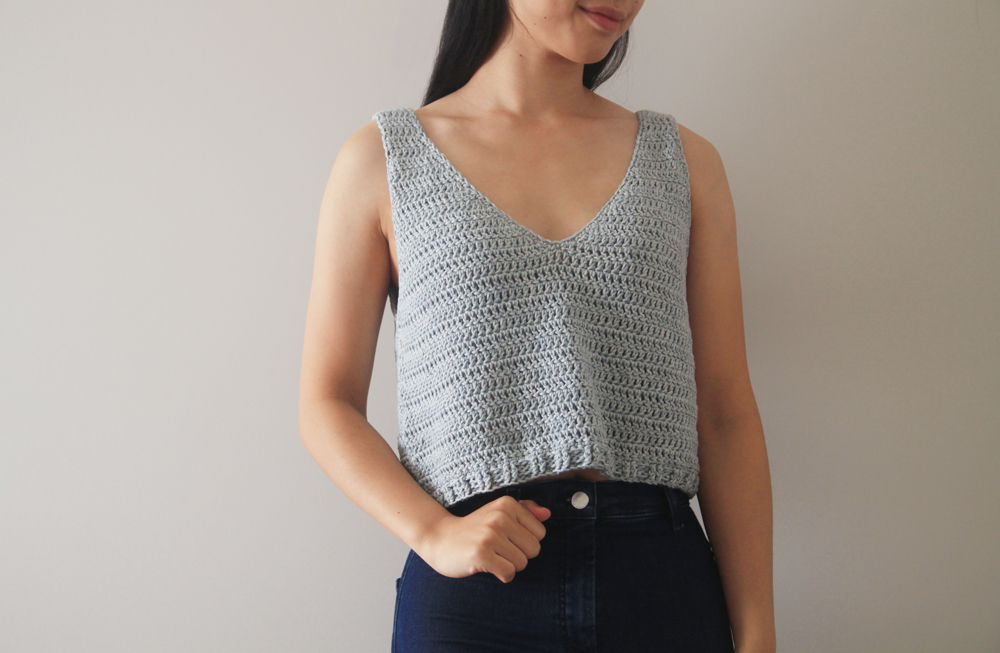
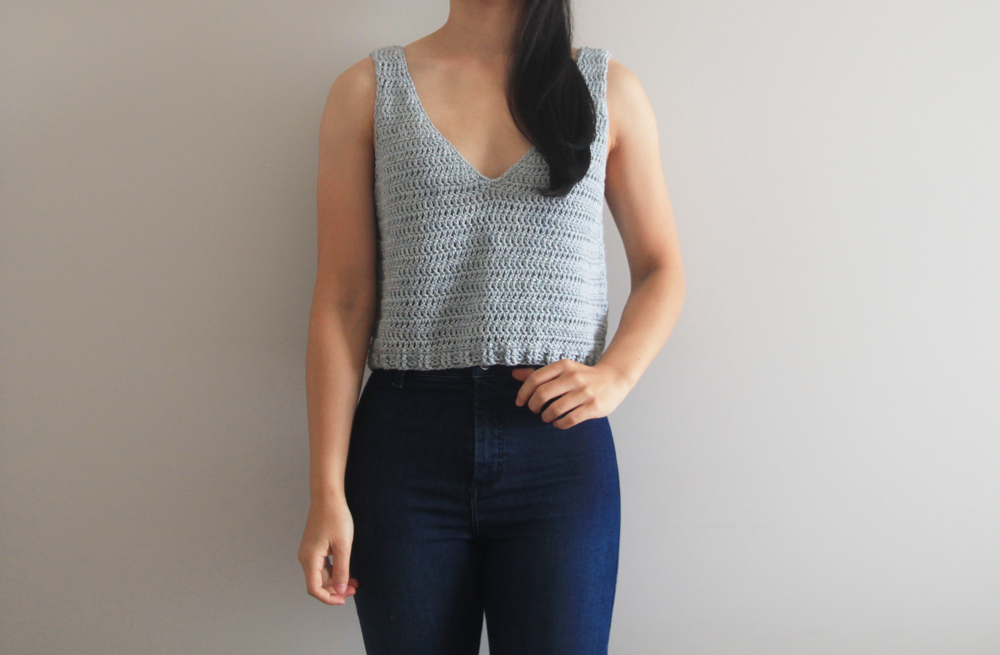
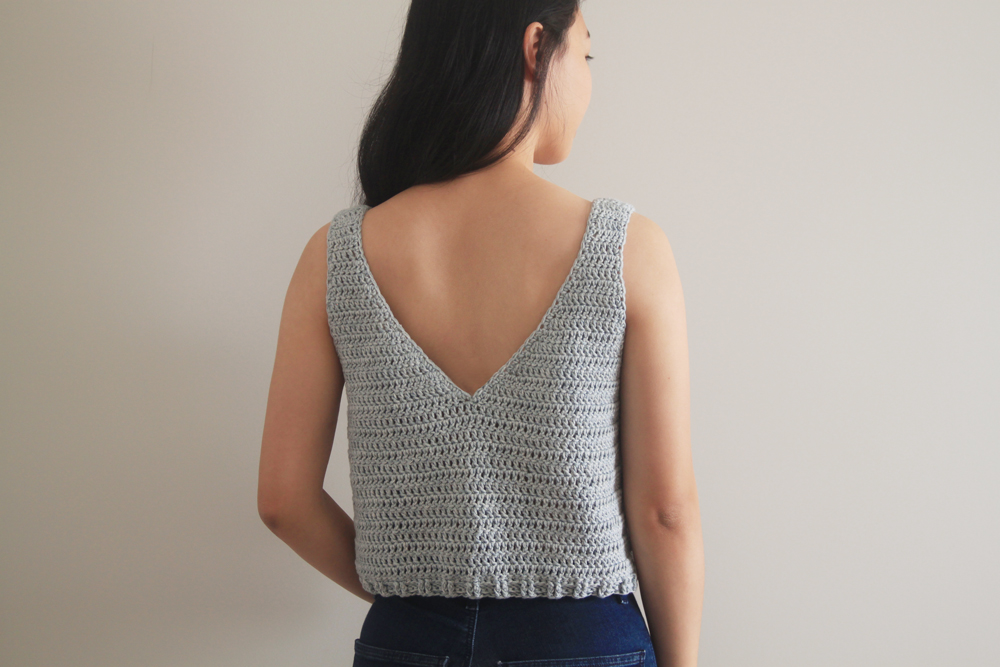
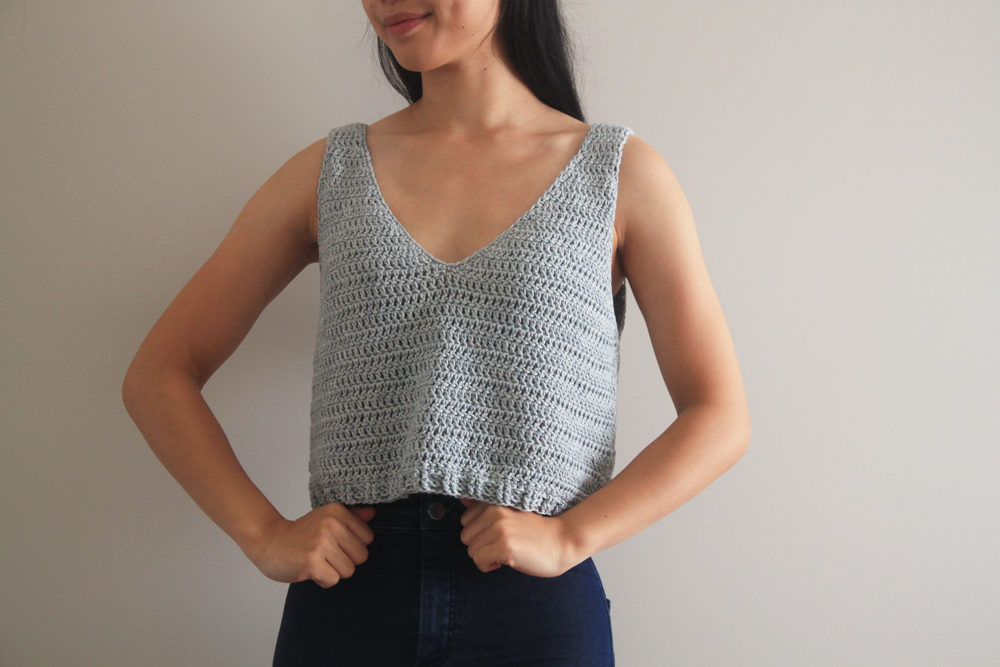
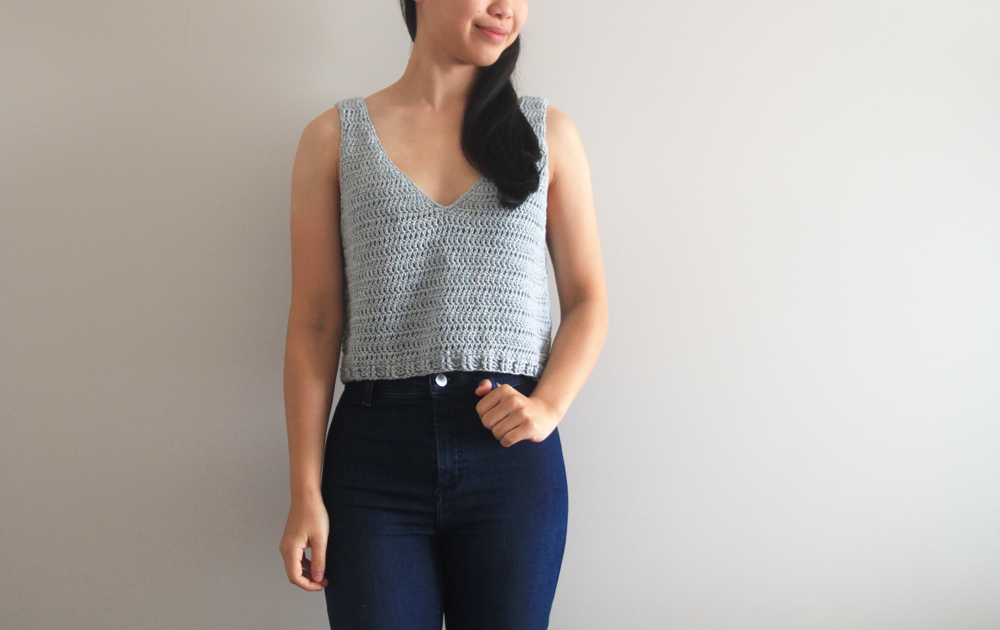
Modern, stylish and light, the Sea Breeze Tank Top is a summer wardrobe essential! With a deep neck, boxy fit and ribbed hem, this super simple pattern can be customised to any length - cropped or full length! Let's learn how to crochet a beginner friendly tank top!
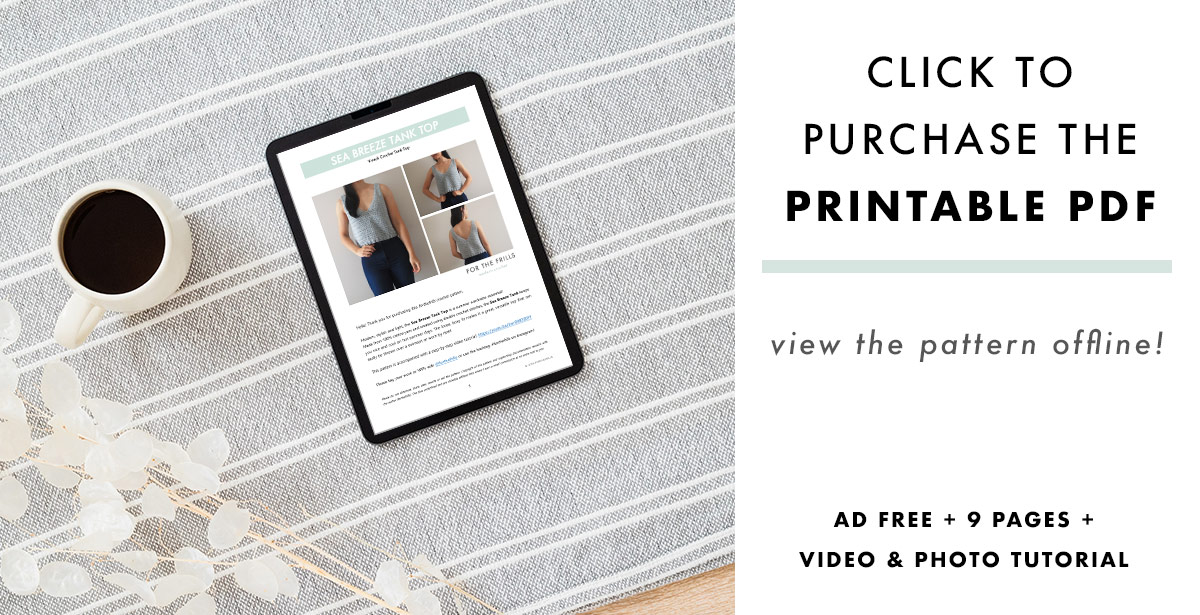
Scroll down for the free crochet tank top pattern and step-by-step video tutorial or purchase the ad-free, printable PDF here.
This post may contain affiliate links, view our disclosure policy for details.
Made from 100% cotton yarn and created using double crochet stitches, the Sea Breeze Tank keeps you nice and cool on hot summer days. The loose, boxy fit makes it a great, versatile top that can easily be thrown over a swimsuit or worn by itself.
Beginner Crochet Stitches
If you’re looking your very first crochet wearable project, the Sea Breeze Tank Top perfectly fits the bill! The majority of this pattern is worked in double crochets (the straps and the body) which means it works up quickly. There’s nothing more satisfying than seeing your crochet project grow before your eyes.
Check out more beginner friendly crochet garments here!
When you’re learning to crochet garments starting with quick, easy to follow stitches are so helpful as you can visually keep track of your row and stitch counts. The double crochet stitch is also a very tall stitch so you can easily spot any mistakes or dropped stitches.
This crochet tank top is finished off with front and back post double crochets on the hem and single crochets are added to the neckline and armholes to create smooth edging. If you’re unfamiliar with any of these crochet stitches, don’t worry! They are all demonstrated in the step-by-step video tutorial.
Tank Top Construction
The Sea Breeze Tank Top is worked from the top down and widthways. Working a crochet project widthways means that stitches across = width of the top, while the rows tall = length of the top.
Since we’re working top down, we’ll start at the straps. We’ll increase along the edges of the straps by placing 2 double crochets into the same stitch. As we increase you’ll notice that the strap turns into a triangle. The triangle shape is what creates the V-neck along the tank top.
We’ll crochet 2 triangles separately for either side of the top (a right triangle and a left triangle) and then join them together to extend the length of the body with double crochets.
The front and back of this top are identical! So repeat all the same steps for the 2nd side. After you’ve crocheted the front and back, simply sew the tops of the straps and sides together.
The best thing about this top-down construction method is that you can hold the project up to your body (or garments that you already own) and adjust the length as necessary. To make your crochet top longer or shorter you can crochet more or fewer rows of double crochets.
Just remember that the ribbing will add an extra 1-2” to the length of your top and that almost all crochet projects tend to stretch out over time. For this tank top pattern, if you’re in between sizes I’d recommend sizing down since its designed to have a very low V-neck and loose boxy fit.
If you’re a beginner crocheter or you just want to learn more about crochet garments check out this blog post - 5 Tips for Perfect Fitting Crochet Garments!
Design Inspiration
The inspiration for this design is simple 🙂 One of you lovely Youtube subscribers asked me to design a V-neck Tank Top. Since summer was just around the corner, I thought it was a great idea!
I played around with a bunch of different stitches and constructions but ultimately, I decided that the wide thick straps and simple v-neck would be most flattering on a wide variety of body types! Personally, I really loved the look of a very low v but I also didn’t want the tank top to be too revealing or difficult to wear.
Many crocheters ask me what I wear under crochet crop tops, tank tops, tees etc. I always recommend wearing a skin-coloured bra with straps. It’s the easiest option and if you have a project where you can choose the strap placement and sew them on (for patterns like this check out the Mya Crop Top or Blair Crop Top).
I recommend trying on your project with your skin coloured bra underneath and then add the crochet straps to make sure they’re in the right place.
In this design I’m wearing a size small (I’m normally right in between an XS and S) but the nature of this design means that you can easily size up or down depending on the type of fit you want.
I’ve also created a size chart according the standard size measurements however once you’ve created your first triangle please try this top or compare the sizing to similar garments you already own. As we all know that even within the same bust measurement, bra size can vary greatly!
Yarn
For the Sea Breeze Tank Top, I used Debbie Bliss Cotton Denim DK in the shade pale blue. Debbie Bliss Cotton Denim DK is one of my favourite cotton yarns that I’ve ever worked with!
I love the washed-out neutral colour palette (all the shades a ‘denim colours, so a range of blues, greys and white) and you get a good amount of yardage for the weight of the yarn. I’m already imagining more projects (maybe a cotton dress 😉 using this yarn!
If you would like to substitute this cotton denim yarn, I’d highly recommend choosing a very thick DK/Light (3) or a thin Aran / Medium (4) yarn. This yarn is definitely on the thicker side of a DK cotton yarn.
Some suitable alternatives are -
- Lion Brand Coboo Yarn - a very soft and silky cotton bamboo blend
- WeCrochet Comfy Color Mist - there's also a range of solid colours!
However, as always don’t forget to crochet a gauge swatch and adjust your tension or hook size if necessary to make sure it matches the pattern.
Check out more free crochet patterns here!
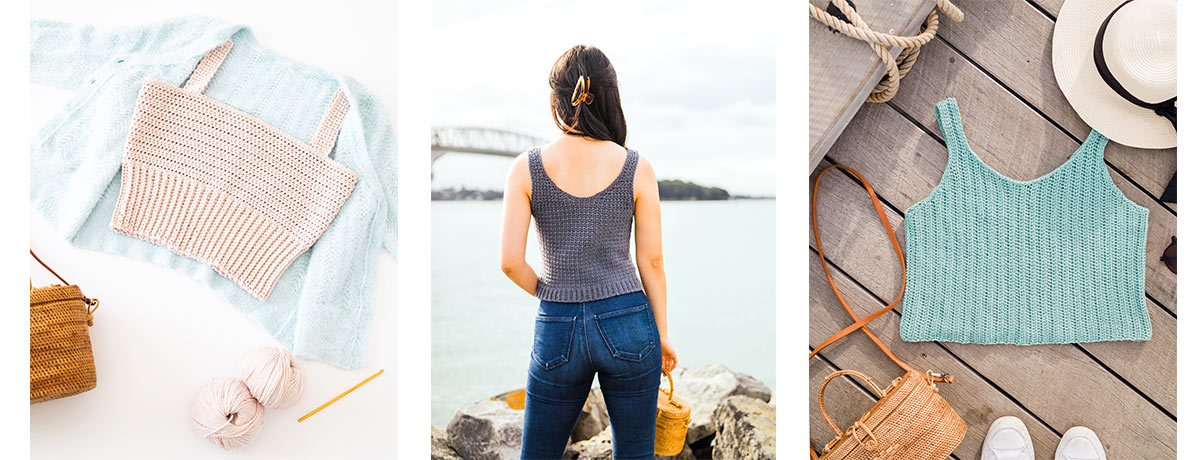
1. Blair Crop Top / 2. Terrazzo Tank Top / 3. Sagebrush Tank Top
Discover more free summer crochet patterns!
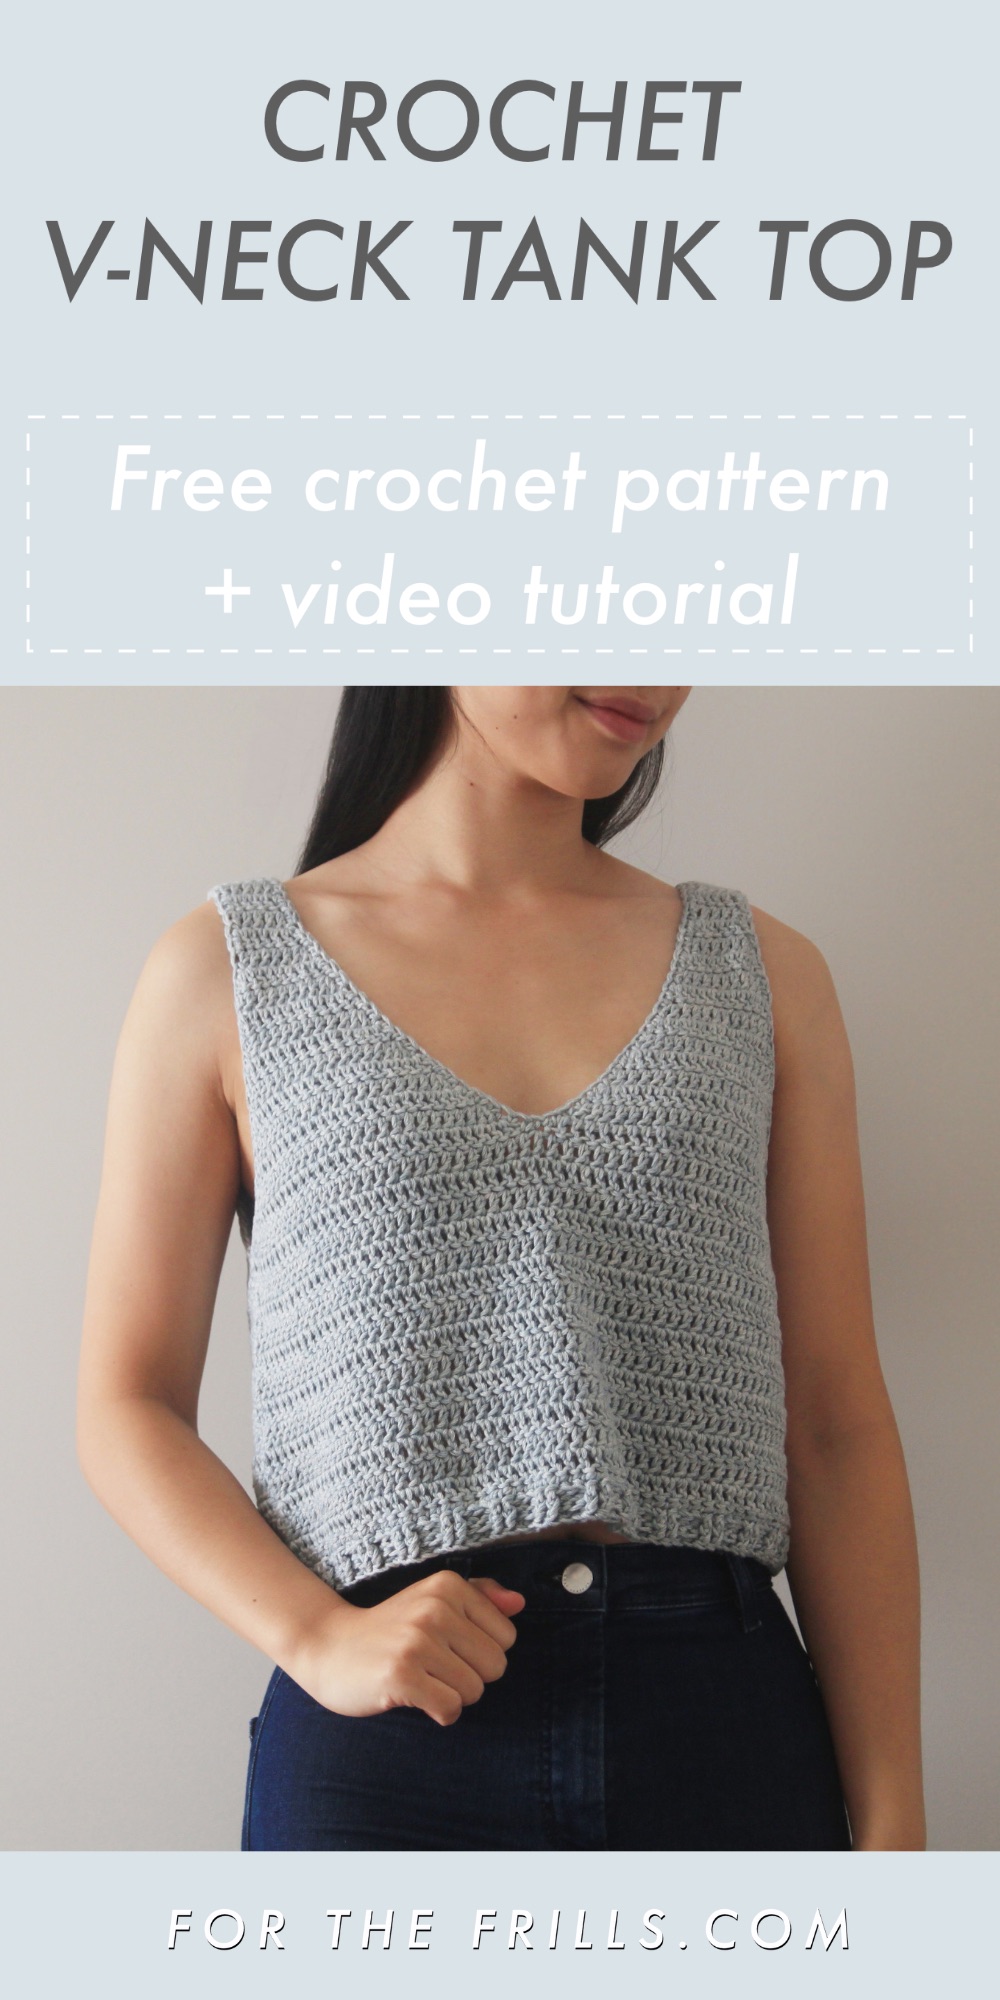
Pin me for later!
Video Tutorial
Are you a visual learner that loves step-by-step tutorials? Learn how to crochet this beginner, double crochet tank top in the video below! You can also check out the For The Frills YouTube channel for more crochet tutorials!
Add the Sea Breeze Tank Top to your Ravelry queue!
Ad-free, printable pdf version of the Sea Breeze Tank!
NOTES:
*The sizing guide follows size XS(S, M, L, XL, 2XL, 3XL). E.g. “Ch 32(36, 40, 44, 48, 52, 56) means Ch 32 for XS, Ch 36 for Small, Ch 40 for Medium, Ch 44 for Large, Ch 48 for XL, Ch 52 for 2XL and Ch 56 for 3XL
*When there is only one number, e.g. Ch 7, this number applies to all sizes
*Total number of stitches is listed between < >
*"DC 10" means DC into the next 10 stitches
*"2DC" means place 2 DC into the same stitch
*Ch 2 and Ch 1 does NOT count as a stitch
*This pattern uses US crochet terms
*Sample is a size small shown on a 5’3” model with a 32” bust.
*This top is designed for the V to fall directly in middle of the bust area. To have more coverage/the V to be higher, I recommend working to Rows 2 – 4 instead of Rows 2 - 6 when creating the straps.
MINI EXPLANATION:
An easy V-neck crochet tank top, that’s perfect for summer and hot beach days. Crocheted with single crochet, double crochet and front and back post double crochet stitches, this pattern is worked flat, top down and in 2 identical pieces.
Materials
Yarn – Debbie Bliss Cotton Denim DK – DK (8 ply), 200m/100g, 100% Cotton in Pale Blue
Skeins – 2(2, 3, 4, 4, 5, 5)
4.5mm (US 7) Crochet Hook
Darning Needle
Scissors
Stitches
st = stitch
Ch = Chain
SC = Single Crochet
DC = Double Crochet
FpDC = Front Post Double Crochet
BpDC = Back Post Double Crochet
LEVEL: Easy
GAUGE: 10cm/4” square = 13 stitches wide x 9 rows tall in double crochet
Measurements (cm):
Bust: 76(86, 96, 105, 115, 124, 133)
Armhole: 19(21, 23, 25, 26.5, 28, 30)
Length: 37(39, 41, 43, 45, 47, 49)
Measurements (inches):
Bust: 30(34, 38, 41.5, 45, 49, 52.5)
Armhole: 7.5(8.5, 9, 10, 10.5, 11, 12)
Length: 14.5(15.5, 16, 17, 17.5, 18.5, 19)
Sea Breeze Tank Top Pattern
LEFT TRIANGLE
*Once you’ve finished your left triangle, I highly recommend trying it on/holding it up to your body as bust size can vary greatly within the same size – you may need to size up or size down.
FOUNDATION CHAIN: Ch 7.
ROW 1: DC into the 3rd chain from the hook, DC 4. <5>
ROWS 2-6: Ch 2, turn, DC 5. <5>
ROW 7: Ch 2, turn, 2DC, DC 4. <6>
ROW 8: Ch 2, turn, DC 5, 2DC. <7>
ROW 9: Ch 2, turn, 2DC, DC 5, 2DC. <9>
ROW 10: Ch 2, turn, DC 8, 2DC. <10>
ROW 11: Ch 2, turn, 2DC, DC 9. <11>
ROW 12: Ch 2, turn, DC 10, 2DC. <12>
ROW 13: Ch 2, turn, 2DC, 2DC, DC 10. <14>
ROW 14: Ch 2, turn, 2DC, DC 11, 2DC, 2DC. <17>
ROW 15: Ch 2, turn, 2DC, DC 15, 2DC. <19>
ROW 16: Ch 2, turn, 2DC, DC 17, 2DC. <21>
*Size XS – Fasten off. Proceed to Right Triangle instructions.
Sizes (S, M, L, XL, 2XL, 3XL)
ROW 17: Ch 2, turn, 2DC, 2DC, DC 18, 2DC. <24>
ROW 18: Ch 2, turn, 2DC, DC 22, 2DC. <26>
*Size S – Fasten off. Proceed to Right Triangle instructions.
Sizes (M, L, XL, 2XL, 3XL)
ROW 19: Ch 2, turn, 2DC, 2DC, DC until last st, 2DC into last stitch. <29>
ROW 20: Ch 2, turn, 2DC, DC until last 2 sts, 2DC, 2DC. <32>
*Size M – Fasten off. Proceed to Right Triangle instructions.
Sizes (L, XL, 2XL, 3XL) repeat ROWS 19-20 until ROW (22, 24, 26, 28).
<38, 44, 50, 56>
Fasten off. Proceed to Right Triangle instructions.
RIGHT TRIANGLE
FOUNDATION CHAIN: Ch 7.
ROW 1: DC into the 3rd chain from the hook, DC 4. <5>
ROWS 2-6: Ch 2, turn, DC 5. <5>
ROW 7: Ch 2, turn, DC 4, 2DC. <6>
ROW 8: Ch 2, turn, 2DC, DC 5. <7>
ROW 9: Ch 2, turn, 2DC, DC 5, 2DC. <9>
ROW 10: Ch 2, turn, 2DC, DC 8. <10>
ROW 11: Ch 2, turn, DC 9, 2DC. <11>
ROW 12: Ch 2, turn, 2DC, DC 10. <12>
ROW 13: Ch 2, turn, DC 10, 2DC, 2DC. <14>
ROW 14: Ch 2, turn, 2DC, 2DC, DC 11, 2DC. <17>
ROW 15: Ch 2, turn, 2DC, DC 15, 2DC. <19>
ROW 16: Ch 2, turn, 2DC, DC 17, 2DC. <21>
*Size XS – do not fasten off! Proceed directly to Joining Row instructions.
Sizes (S, M, L, XL, 2XL, 3XL)
ROW 17: Ch 2, turn, 2DC, DC 18, 2DC, 2DC. <24>
ROW 18: Ch 2, turn, 2DC, DC 22, 2DC. <26>
*Size S – do not fasten off! Proceed directly to Joining Row instructions.
Sizes (M, L, XL, 2XL, 3XL)
ROW 19: Ch 2, turn, 2DC, DC until last 2 sts, 2DC, 2DC. <29>
ROW 20: Ch 2, turn, 2DC, 2DC, DC until last st, 2DC into the last st. <32>
*Size M – do not fasten off! Proceed directly to Joining Row instructions.
Sizes (L, XL, 2XL, 3XL) repeat ROWS 19-20 until ROW (22, 24, 26, 28).
<38, 44, 50, 56>
Do not fasten off! Proceed directly to Joining Row instructions.
JOINING ROW
JOINING ROW: Ch 2, turn, 2DC, 2DC, DC 18(23, 29, 35, 41, 47, 53, 59), 2DC into last st of Right Triangle.
<24, 29, 35, 41, 47, 53, 59>
Place the Left Triangle (with the right side facing up) to the left of the Right Triangle.
2DC into the first st of the Left Triangle, DC 18(23, 29, 35, 41, 47, 53, 59), 2DC, 2DC.
<48, 58, 70, 82, 94, 106, 118>
BODY
BODY ROW 1: Ch 2, turn, 2DC, 2DC, DC in each st until the last 2 sts, 2DC, 2DC.
<52, 62, 74, 86, 98, 110, 122>
BODY ROW 2: Ch 2, turn, DC in each st until the end of the row.
<52, 62, 74, 86, 98, 110, 122>
Repeat BODY ROW 2 until ROW 13.
*You can add or remove rows to reach your desired length – please keep in mind that the ribbing adds 2cm/0.75”.
RIBBING
ROW 1: Ch 1, turn, SC in each st until the end of the row.
<52, 62, 74, 86, 98, 110, 122>
ROW 2: Ch 2, turn, *FpDC into the next 2 sts, BpDC into the next 2 sts; rep from * until last 2 sts, FpDC, DC.
<52, 62, 74, 86, 98, 110, 122>
ROW 3: Ch 2, turn, DC, BpDC, *FpDC 2, BpDC 2; rep from * until end, DC into the 2nd chain (at the beginning of ROW 2).
<53, 63, 75, 87, 99, 111, 123>
*The extra DC at the end helps the edges of the top stay straight and neat.
Repeat all steps for the 2nd side of the top.
ASSEMBLY
Lay the 2 pieces of the top directly on top of each other. Sew the straps and the sides off the top together.
FINISHING
At the bottom of an armhole, insert hook, secure yarn and pull up a loop.
Ch 1, SC evenly along the edge of the armhole, making sure that your stitches are not too tight.
Sl st into first SC to join. Fasten off.
Repeat for the 2nd armhole.
Insert hook along the V-neck, secure yarn and pull up a loop.
Ch 1, SC evenly along the edge of the V-neck, making sure that your stitches are not too tight.
Sl st into first SC to join. Fasten off.
Weave in all of your ends. You’ve finished your Sea Breeze Tank Top!
Looking for your next crochet project?
Amazing pattern!! Thank you!!
What a great pattern! I just copied it down and can’t wait to get started. Thank you so much for providing it for free.
I have a sizing question.
Is there a way to increase the bust measurement past the 3X sizing? I wear a 4X through the bust but the 3X works - except for bust area.
Hi Cyndi, you could either make the 3XL and the top will have a few inches of negative ease or you can repeat rows 19-20 until row 30. After the joining row you might need to crochet body row 1 twice - just measure the width of your top. Once the width is half your bust measurement it should fit loosely (as pictured).
I hope this helps,
Grace 🙂
Hi Grace,
Question, could I make the front and back triangles to body row 2 then join both sides with a round of DC in each stitch and continue rounds with slip stitch for the length of the body? Instead of doing 2 panels and seaming the sides. Would this work? Thanks for the lovely free pattern.
Hi Olivia,
Sure you can attach the front and back together to work in the round after body round 2. Just make sure to turn after every round so that the body stitches look the same as the triangles and it will keep your seam straight as well 🙂
Grace
Hi! Is it possible to make the V-shape in the back a bit deeper than the cleavage in the front? Or would the two pieces then not fit together anymore in the armholes?
Such a lovely pattern, thank you for providing it for free!
Hi Kimberley,
You'd need to either add/remove rows before the joining row and then remove/add body rows. You'd also need to make sure the front and back have the same stitch count before you join them together. It's possible but you'd need to alter the pattern so I can't guarantee that it will have the same v-neck shape as the sample!
Grace 🙂
I’d like to try this in a bit smaller size. (Chest measurement is 27 and an A cup) How would you recommend adjusting for a tiny little lady?
Thanks so much!
Great pattern! I am just getting into crocheting and as soon as i feel confident enough i will try it out. I have one question though. What is the total length of the used yarn?
Hi Polina,
The number of skeins (balls of yarn) used for each of the different sizes is indicated in the 'Materials' section 🙂
Grace
HI! This tank top is so cute! I was wondering how difficult you'd think it would be to do tie straps on this top instead of the straps that are in the pattern.
Hi Melanie, I'd repeat rows 2-6 until the strap was long enough to tie into a bow.
Grace 🙂
I've basically completed the top but realised now that I've sewed straps and one side together that it is Huge
My tension was 13.5 to nearly 9brows so didn't change hook but the Medium is massive.
Am gutted. 3 weeks and now I need to frog it all.
Any tips on sizing next time as I was so excited when started the V is so deep.
Hi, all the alteration instructions are included in the pattern! As stated, the V neck is supposed to be very deep but you can remove more rows at the beginning of the straps to make it sit higher and also after your first triangle you should check that it fits you and size up or down accordingly.
Grace 🙂
Hi there this is my first go at a crochet top it’s so easy to follow. . I’m left handed So when I put it together should I reverse the instructions. ?
Hi Mary,
Yes you'll be working left to right 🙂
Grace
Hey there! This was my first attempt at anything crochet and the pattern/video are very easy to follow and doable even for a complete beginner, if you've a little patience. I ended up chaining 5 and single crocheting the first row, then continuing at the start of the pattern w row one. It helped as there was something more solid to hold. I also attempted the size M shirt -- the size I usually am -- and it was much too wide (by at least 2 inches on both sides of body, straps are a nice length) and I'll be taking it out to make a size S instead (so basically, runs large in my experience). Hope this is helpful info for others trying the pattern. Thanks!!!
Hi Tala,
Thanks for your feedback! All the measurements are listed in the pattern notes and I'd also recommend crocheting a gauge swatch before you start your project. That way you'll know if you top will turn out the same size as the suggested measurements.
Grace
Hi Grace!
Thank you so much for the pattern and the video! I have just finished making half of this top, and I’m thinking I would like to make the other side a size smaller to get a better fit. I’ve factored in a couple more rows to deal with the length difference, but I’m wondering if you think this will make the seams lie funny on the sides of the top?
Hi Anna,
Chances are the seams along the sides of the body won't fall in the middle and this could cause the top to pull/pucker. The sides of the armholes also won't match up so you won't have a smooth curve unless you alter the triangle portions of the tank. I'd recommend picking one size for both sides unless you're willing to alter the increases along the triangle portions.
I hope this helps,
Grace
Hi! since crochet instructions are supposed to assume you know to chain at the end of a row, so does it end up being 3 chains at the end? Also where on those chains should I be adding the DC for the row above?
Hi Nelly,
Usually, you either chain at the beginning of the row or at the end of the row - not both. As per the pattern instructions, Ch 2 doesn't count as a stitch so your first DC of a row should be worked into the last DC of the previous row, not in the turning chain.
I hope this helps,
Grace
Hello Grace,
it's my first try in crochet. I picked your pattern, because it looked really cute. Well as a beginner upsizing a pattern can be really difficult. I just realized that as I am doing.
I don't understand your stitch abbreviation from Row 17, as you explained everything until there in your Youtube Video ^^ What does at the end mean?
Thanks for your amazing pattern!
Stay safe and stay healthy.
Love from Germany
Hi Lara,
So sorry i've just seen your comment! The video tutorial follows Size Small, so if you're making a different size you'll need to crochet more rows to make your top larger. When the instructions say proceed to 'Right Triangle Instructions' if you've crocheted the correct number of rows for your size just scroll down until you reach the 'Right Triangle' instructions and then continue with the pattern.
Grace 🙂
Hey there! I love this top! I’d like to wear it to school, but apparently my shoulders violate the school’s dress code. Is there a way that I can add short sleeves on this?
Hi Katie,
There is a t-shirt version (Forest Breeze Tee) and sweater version of this pattern 🙂
Grace
Hello Grace,
As a beginner crocheter I really enjoyed the simplicity of this pattern. I now have 2 panels the same sized crocheted and attached at the shoulder seams, but because I have a large bust, the front panel is shorter and higher up on my body than the back panel. If I add extra rows to the front panel, then the side seams won’t match up row by row. Any suggestions for getting around this?
Many thanks!
Deepani
Hi Deepani,
I'd add more length to the tops of the straps on the front panel (the shoulder seam will sit closer towards your back rather than the tops of your shoulders) or you can just steam block your top and when it's wet, just pull down the front panel a bit. I'd be very careful with this method though because cotton can stretch VERY quickly when wet and once it's stretched out it won't spring back (unlike wool or acrylic).
I hope this helps,
Grace
This was my first "real" crochet project and I love the shirt. Super simple to follow and really rewarding! Now that I have more crochet skills I'm currently working on a second one with a Tunisian simple stitch (just adding an extra row between each row listed on the pattern). I really appreciate your designs and always look forward to your new patterns. Thank you!
Question about the listed gauge: for the rows of double crochet in your gauge square, are you doing them with a turning chain of 3 (the usual way) or with a turning chain of 2 (as you do in this pattern)? I've redone my gauge square about 5 times, but even if I get the correct number of stitches I always have too few rows of double crochet (using a turning chain of 3). Thanks!
Hi!
I think it's a wonderful pattern, easy tpounderstand and nicely put together, but i did have some issues with the finished product itself.
I'm not sure if my yarn is the culprit (I used Papatya Batik, also the fact i used a 6mm hook since i crochet really tight), my gauge was fine, but it really does run rather big as others have mentioned it.
I usually wear a size M/L and i made the M but it was huge! I knew the V was gonna be deep, but it went well down to under my sternum, almost to my stomach.
The sides went way to deep as well.
I was thinking about sizing down to S or even XS but then the armhole would be to tight, and it just wouldnt fit my chest at all.
I tried shortening the straps but then again, the armhole didn't fit.
I do have rather broad shoulders and a big chest compared to my waist and upper body in general.
I'm not sure what to do or how to modify the pattern, so i would gladly take any advice on how to make this work, since this is really something that's just right up my alley.
Thank you so much in advance!
My skein was close to running out by the time I finished one side, I ended up using an entirely different color for the other side, it looks terrific!! One side is red, the other is purple, love that I made it reversible. Easy pattern to follow and super cute, thanks!!!
Hi there! Thanks for this pattern. I just have a couple of questions. How do I know which is the "right side" of the left triangle? I think I may have attached my triangles together with the left triangle on the wrong side because it doesn't look right, but I have completely finished the panel... any tips for what I should do?
This is the first shirt that I ever made, and I thought it turned out GREAT. I put a goldish yarn the third row after joining the two triangles together to break up the white and it helped me to keep my rows straight when joining. I will be making another one in I'm thinking purple. But I think I will try the Easy V-neck crochet tee first. thanks for the pattern.
Great pattern. When you say repeat rows 19-20, do you mean the instructions on row 19 or row 20?
When I finished my 2 triad flea for the front panel (I crocheted till row 26) my ending stitch for the right triangle was at the opposite end of the side when you finished your triangles, how do I fix that or attach them?
Ciao Cara
for a size M how many chain stitches should I start with?
Hi. Love the pattern! How many skeins does it take for each size. In a previous comment response it says it is in the materials list but only a 200m skein is listed. There are none listed for other sizes. Is 200m all it takes for a size sm?
So I’ve realized after following the video for the first half and not for the second they don’t line up. Following the video is much easier as you don’t give a stitch count per row and the numbers are off on about every row after 7 if I’m following it correctly but I can’t because I end up “missing stitch’s” please review and fix for novices. Besides that it’s coming along great.
Thanks so much for this pattern! I made it with Loops and Threads Creme Cotton yarn in medium with a 5.0 hook and it turned out super cute! I think this is the first crochet garment I actually see myself wearing!
Hi Grace!
Hopefully you still read the comments on this post :')
I am having a little bit of trouble with Row 19. I counted and recounted Row 18, and the number of stitches when that row is complete matches the amount it should be. However, Row 19, I've been having some trouble. According the pattern, Row 19 should have 29 stitches, but It's not adding up to that amount when I complete the row. I'm trying to work up to size L, but the discrepancy is troubling me. I just need some assistance.
Thanks!