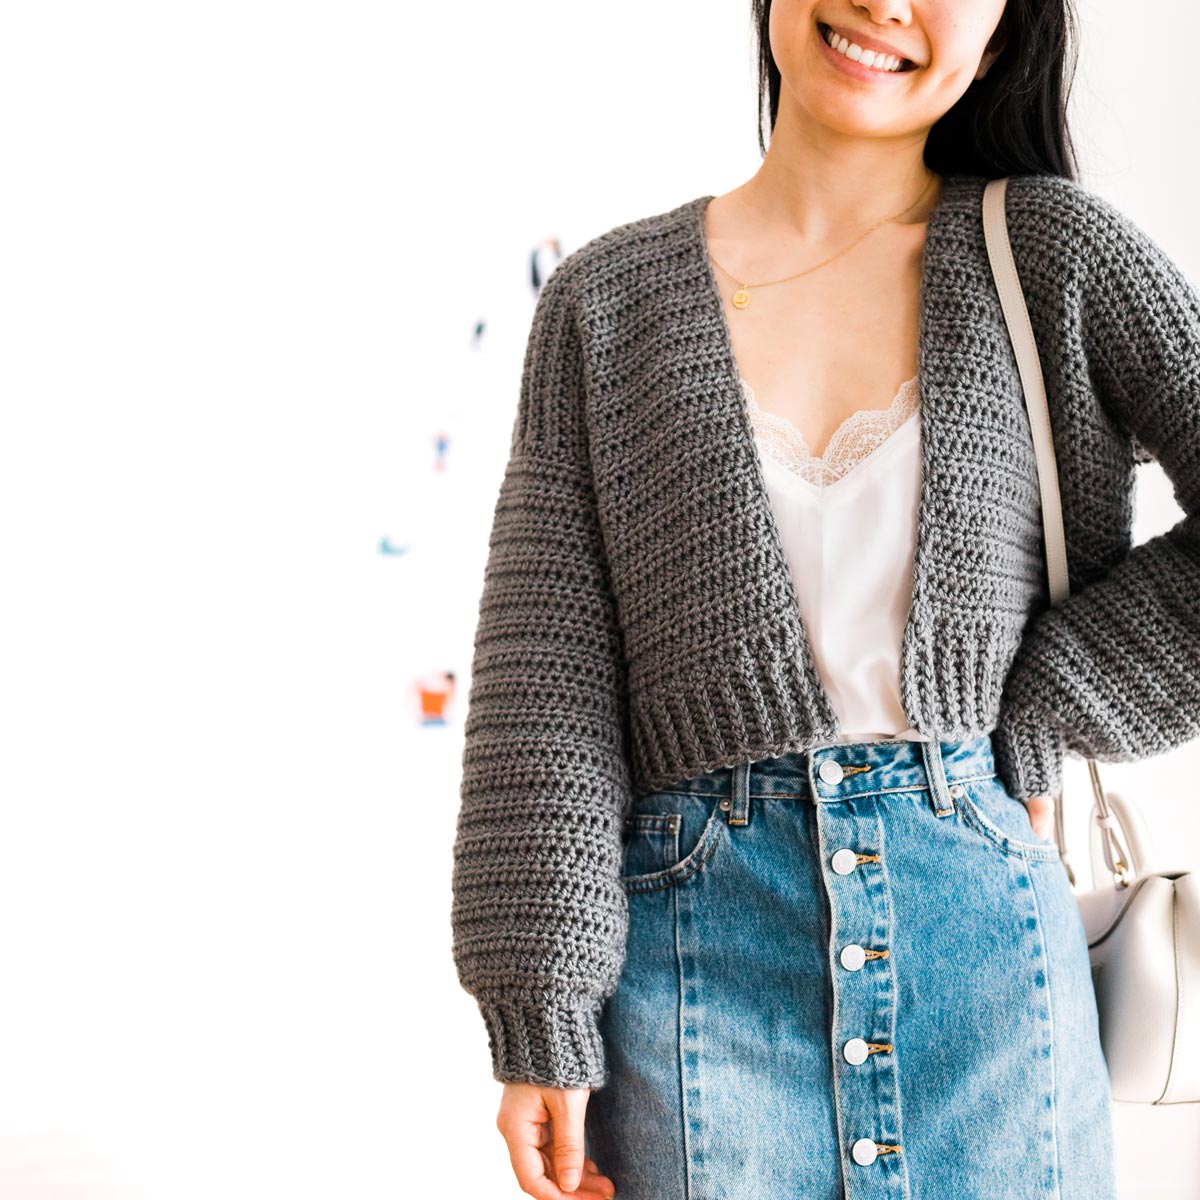
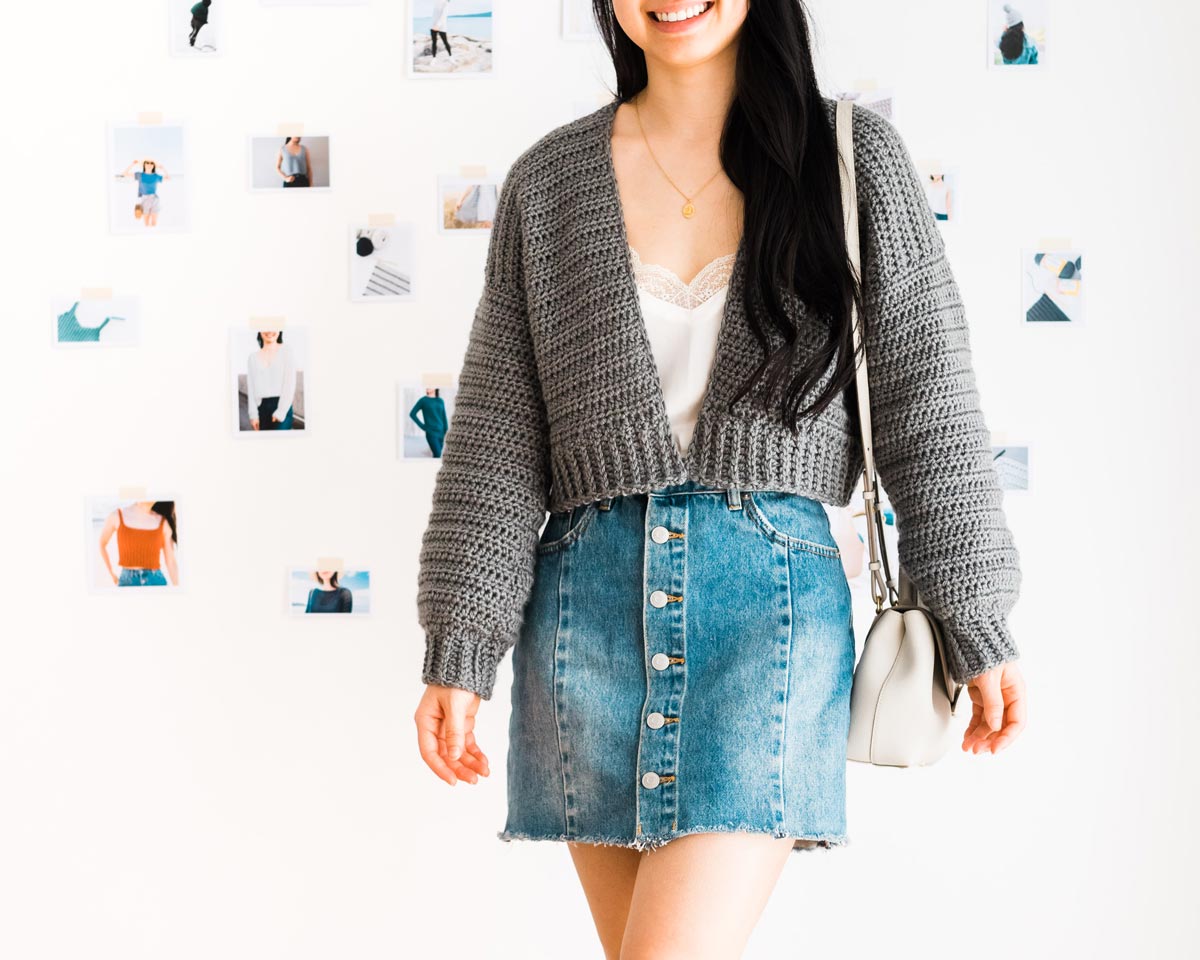
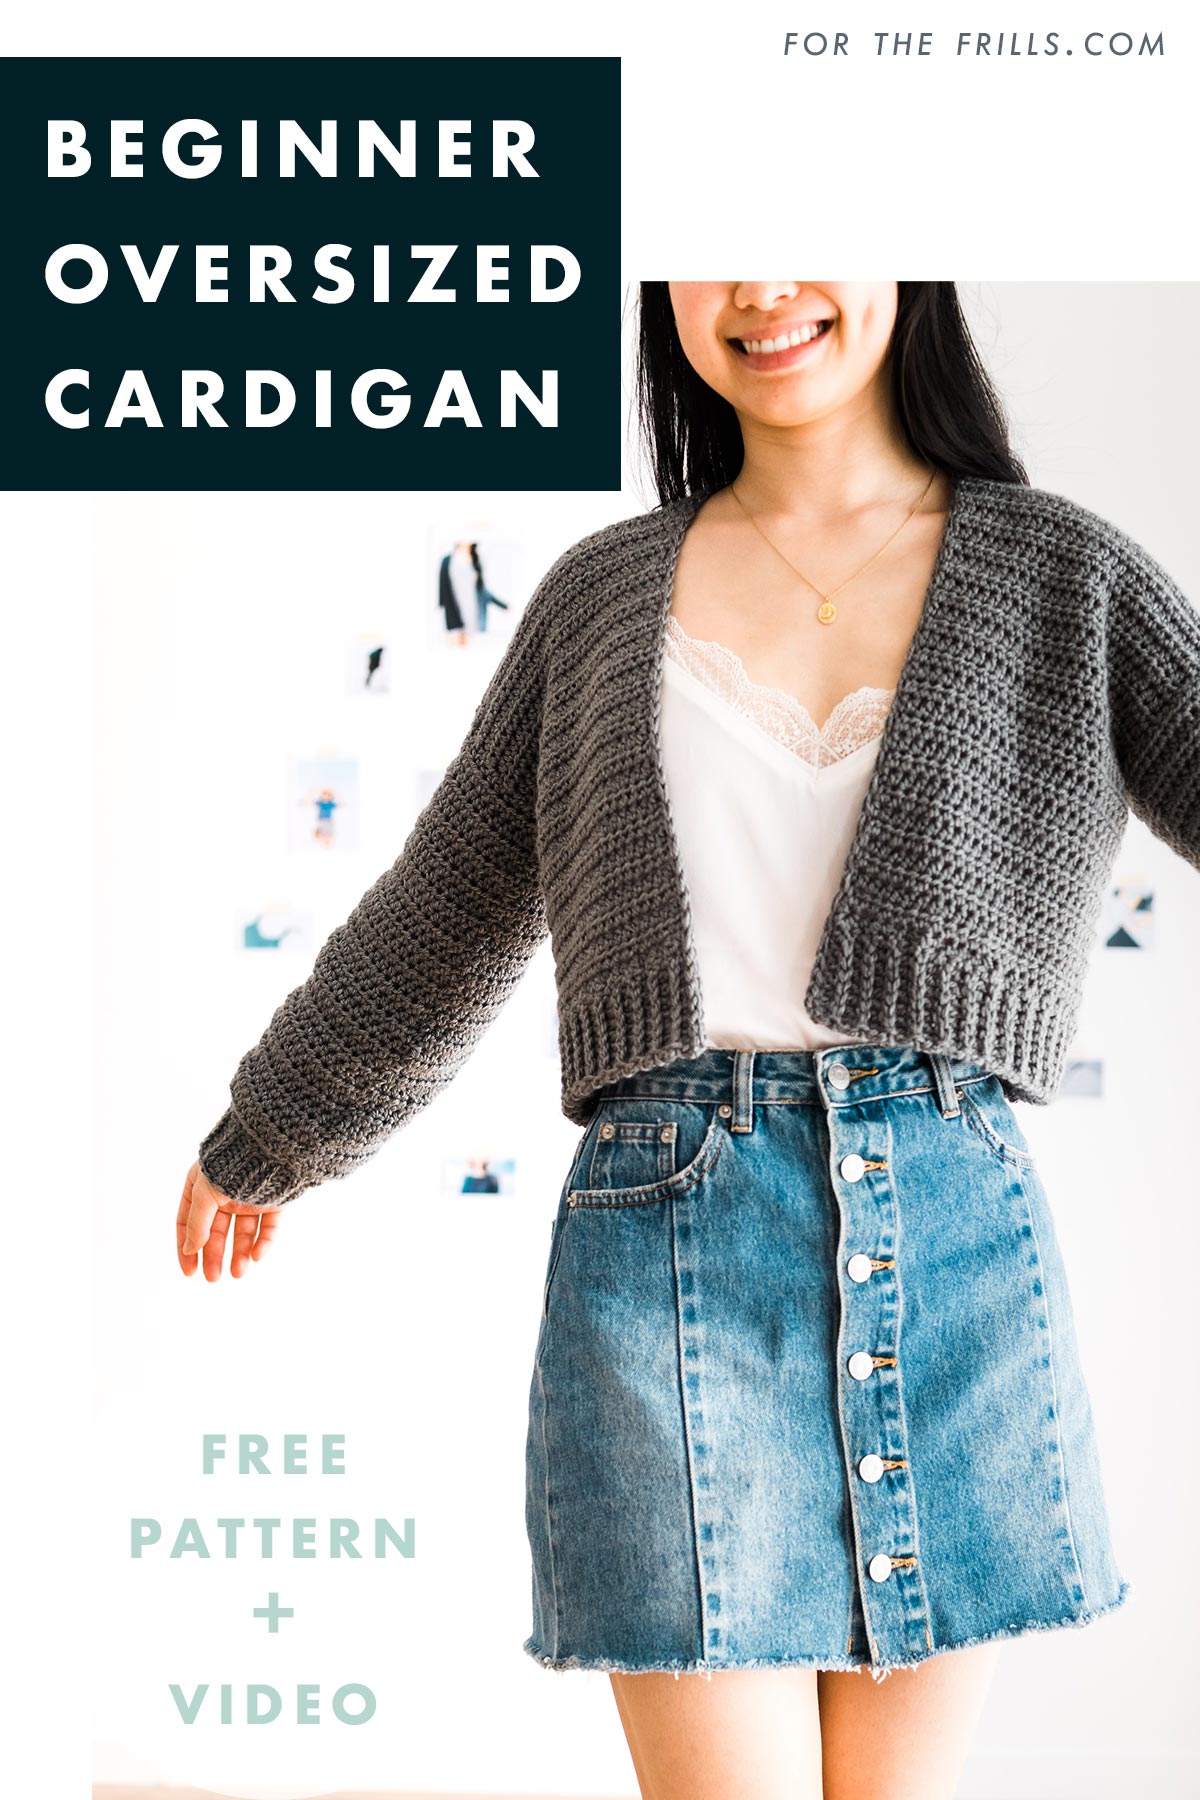
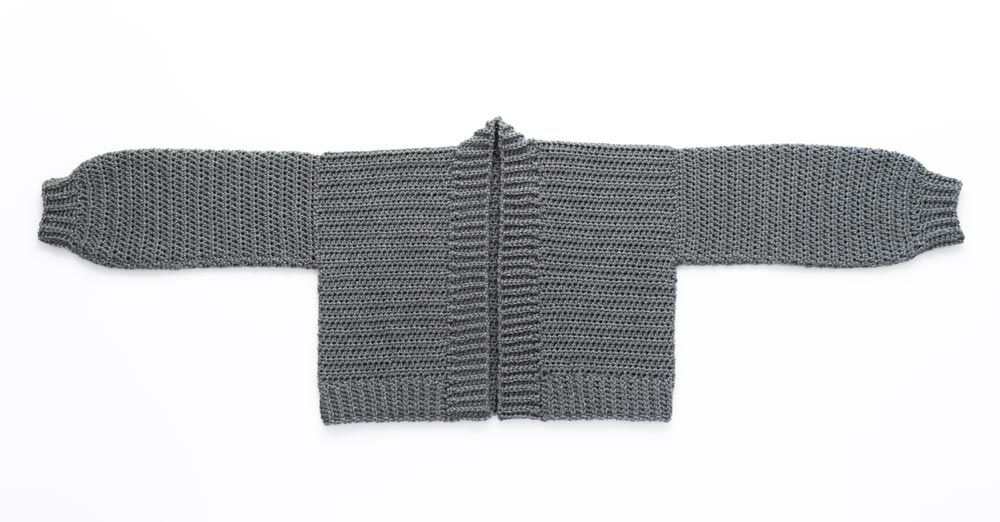
Oversized, cosy and so easy to crochet, the Doveport Cardigan is the crochet sweater you need in your wardrobe! This minimalist design is so versatile and beginner friendly you’ll want to crochet a cardi in every colour to wear in any season!
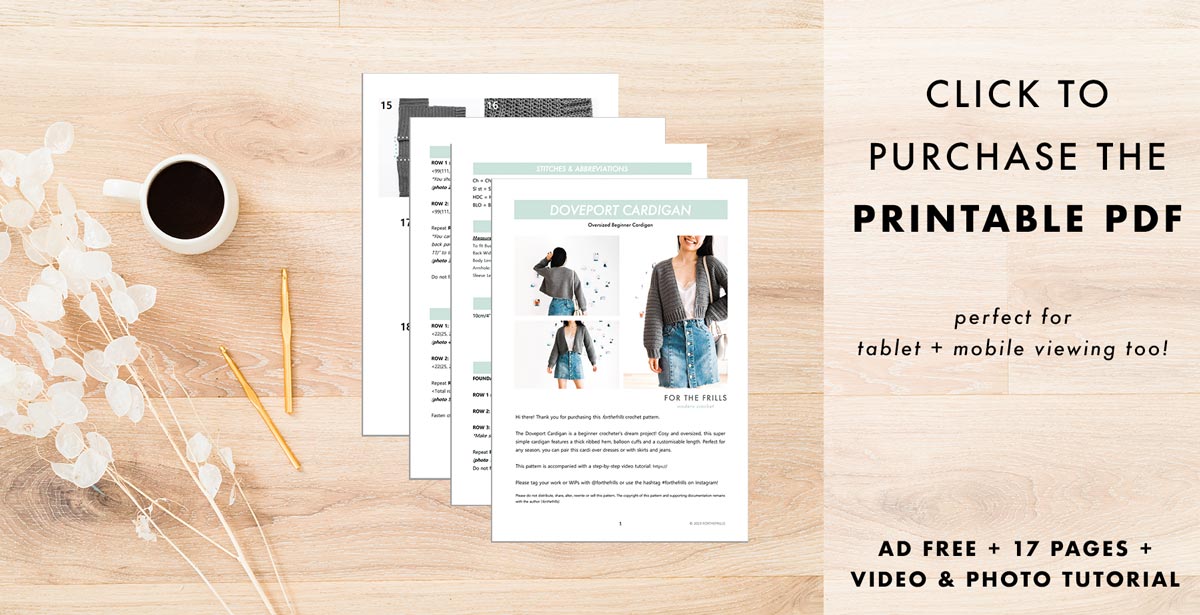
Scroll down for this free crochet cardigan pattern and step-by-step video tutorial or purchase the ad-free, printable PDF here.
This post may contain affiliate links, view our disclosure policy for details.
At the beginning of my crochet designing journey (I started designing in 2019, how time flies!) I released a pattern called the Briar Cardigan! Over the years, it’s been one of the most popular patterns on my blog!
I’ve often been asked to design a cropped version, but it’s such a simple pattern (you can easily remove rows from the back and front panels to alter the length) I felt like the alteration alone wasn’t enough to create a whole new pattern.
As I’ve gained more experience with crochet designing (Learn crochet pattern design tips here!) I thought it was time to design another oversized cardigan, but this time I decided to revisit this minimalist look with new and improved construction!
And yes – the body length is customisable and there are three different neckline edging options!
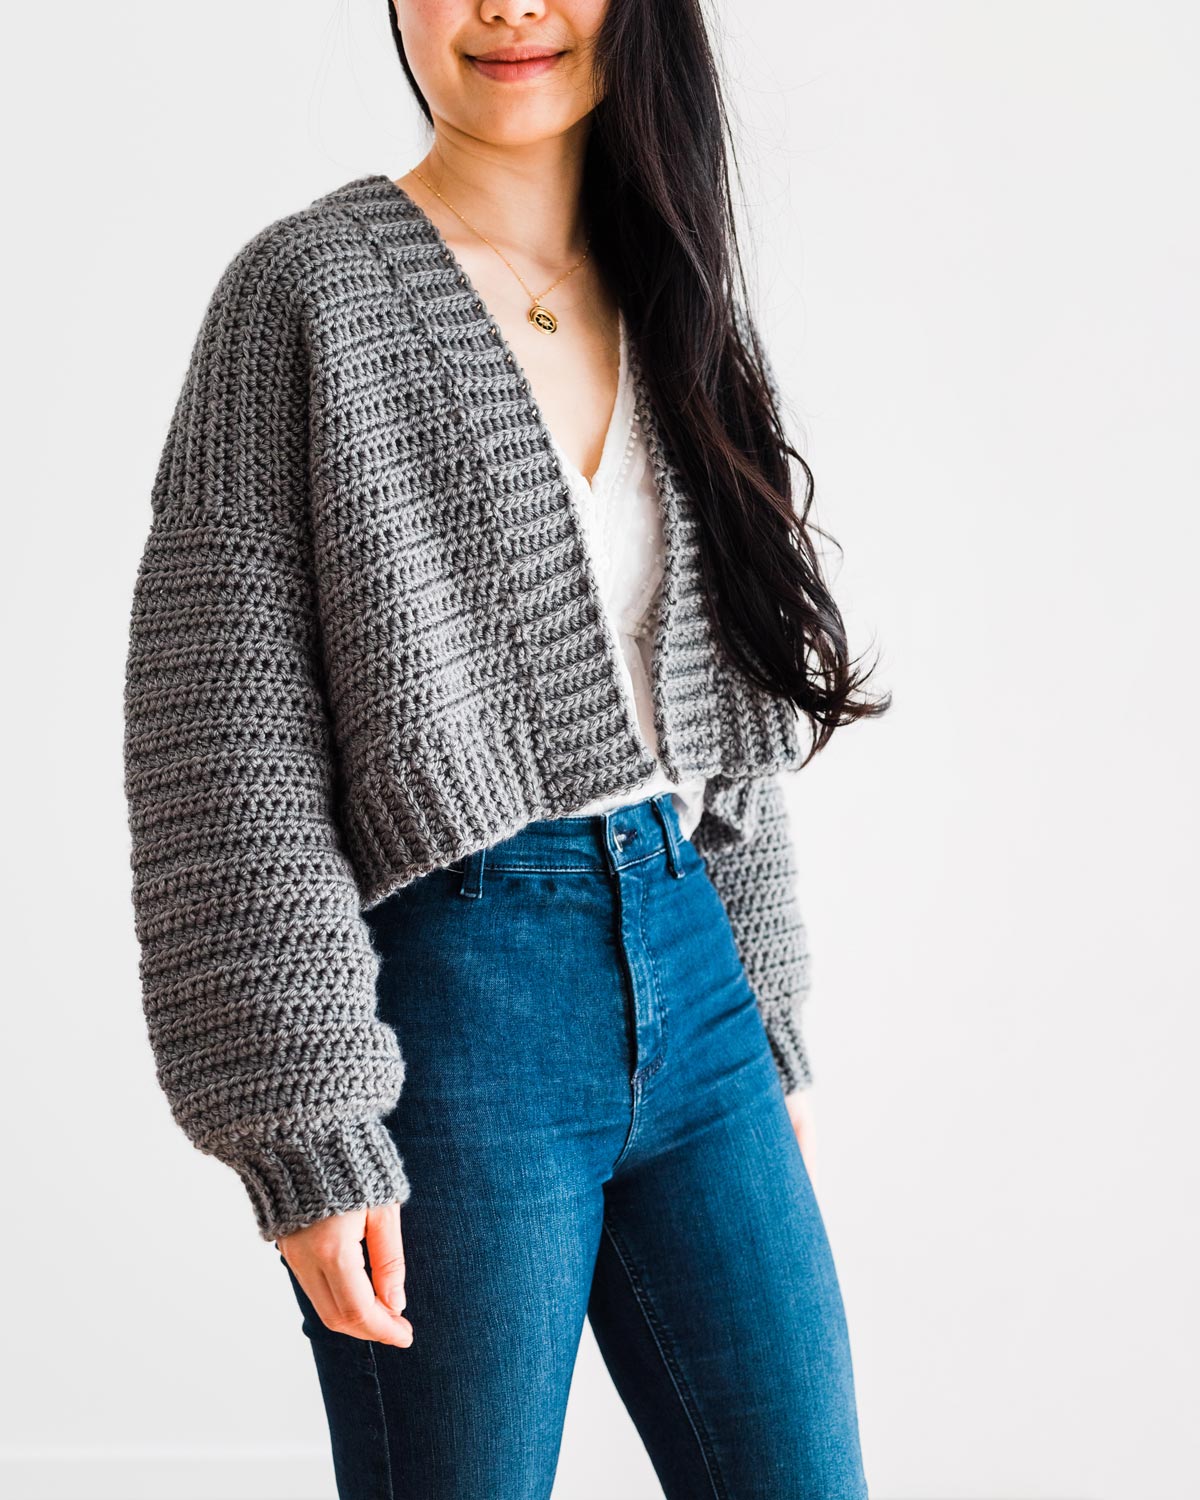
To start, I decided this cardi should still have that boxy fit and oversized balloon sleeves of the Briar Cardigan. However, I wanted to create a more streamlined look and finish. So, I replaced the front and back post stitches with a super simple knit-look ribbing.
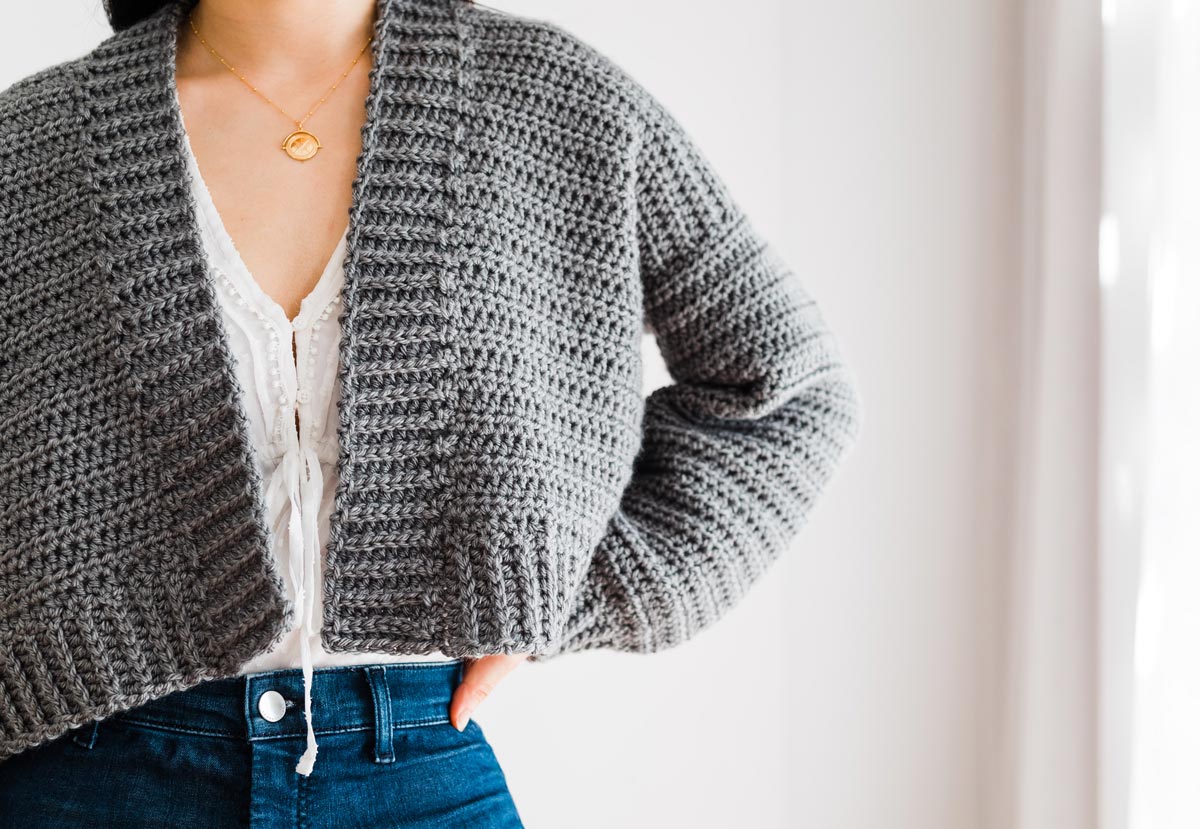
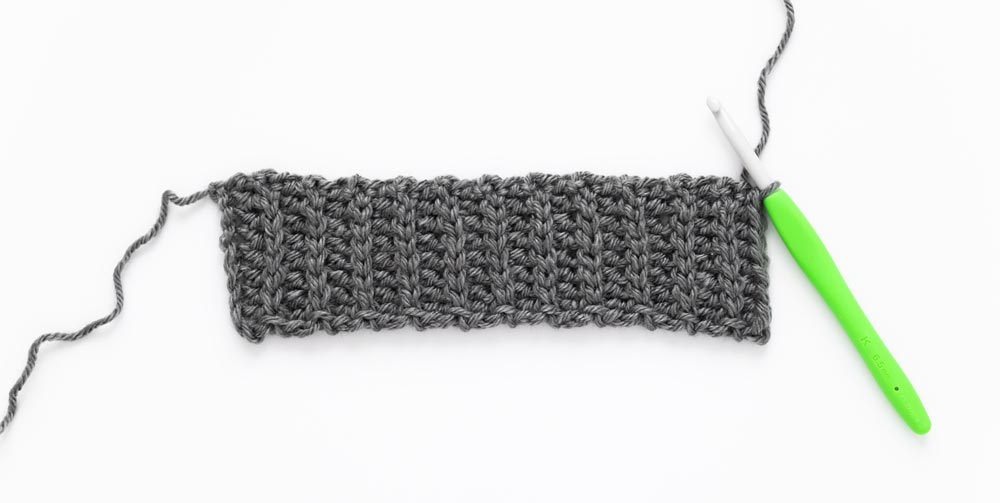
The hemline and cuffs are all crocheted with alternating rows of back loop half double crochets and back loop slip stitches. You all know how much I love back loop stitches (check out the Midnight Waffle Cardigan, Skylar Crop Top and Amalfi Sweater for more knit-like crochet projects!) and they finish off this cardigan with a polished look!
Construction
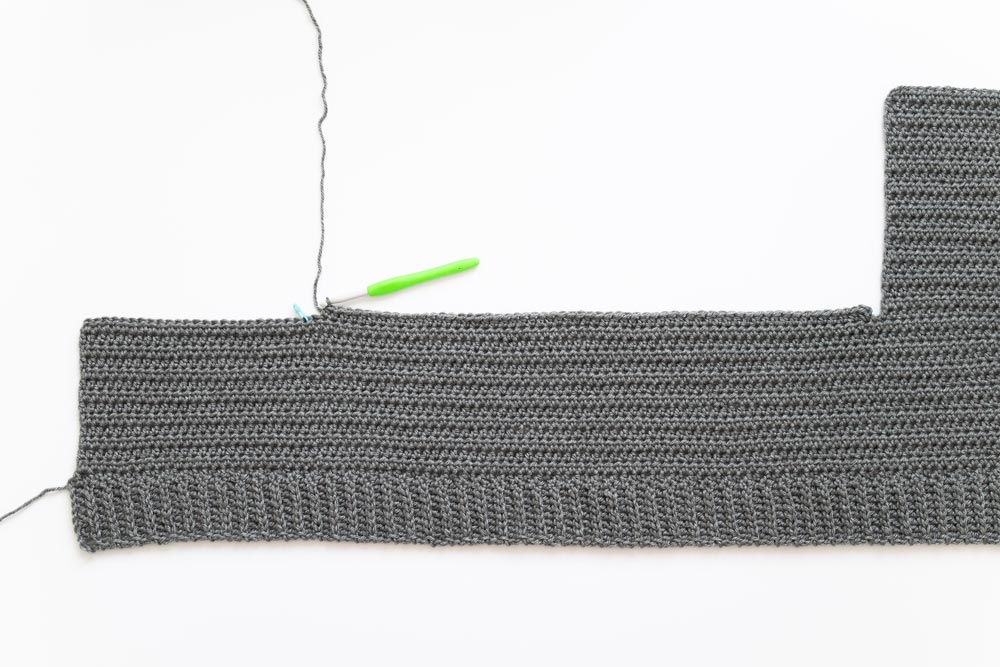
Since we’re using back loop stitches for the ribbing, we’ll start the body and sleeves with the hem/cuff ribbing. The body panel is worked entirely in one piece which means a lot less sewing at the end of the pattern – yay!
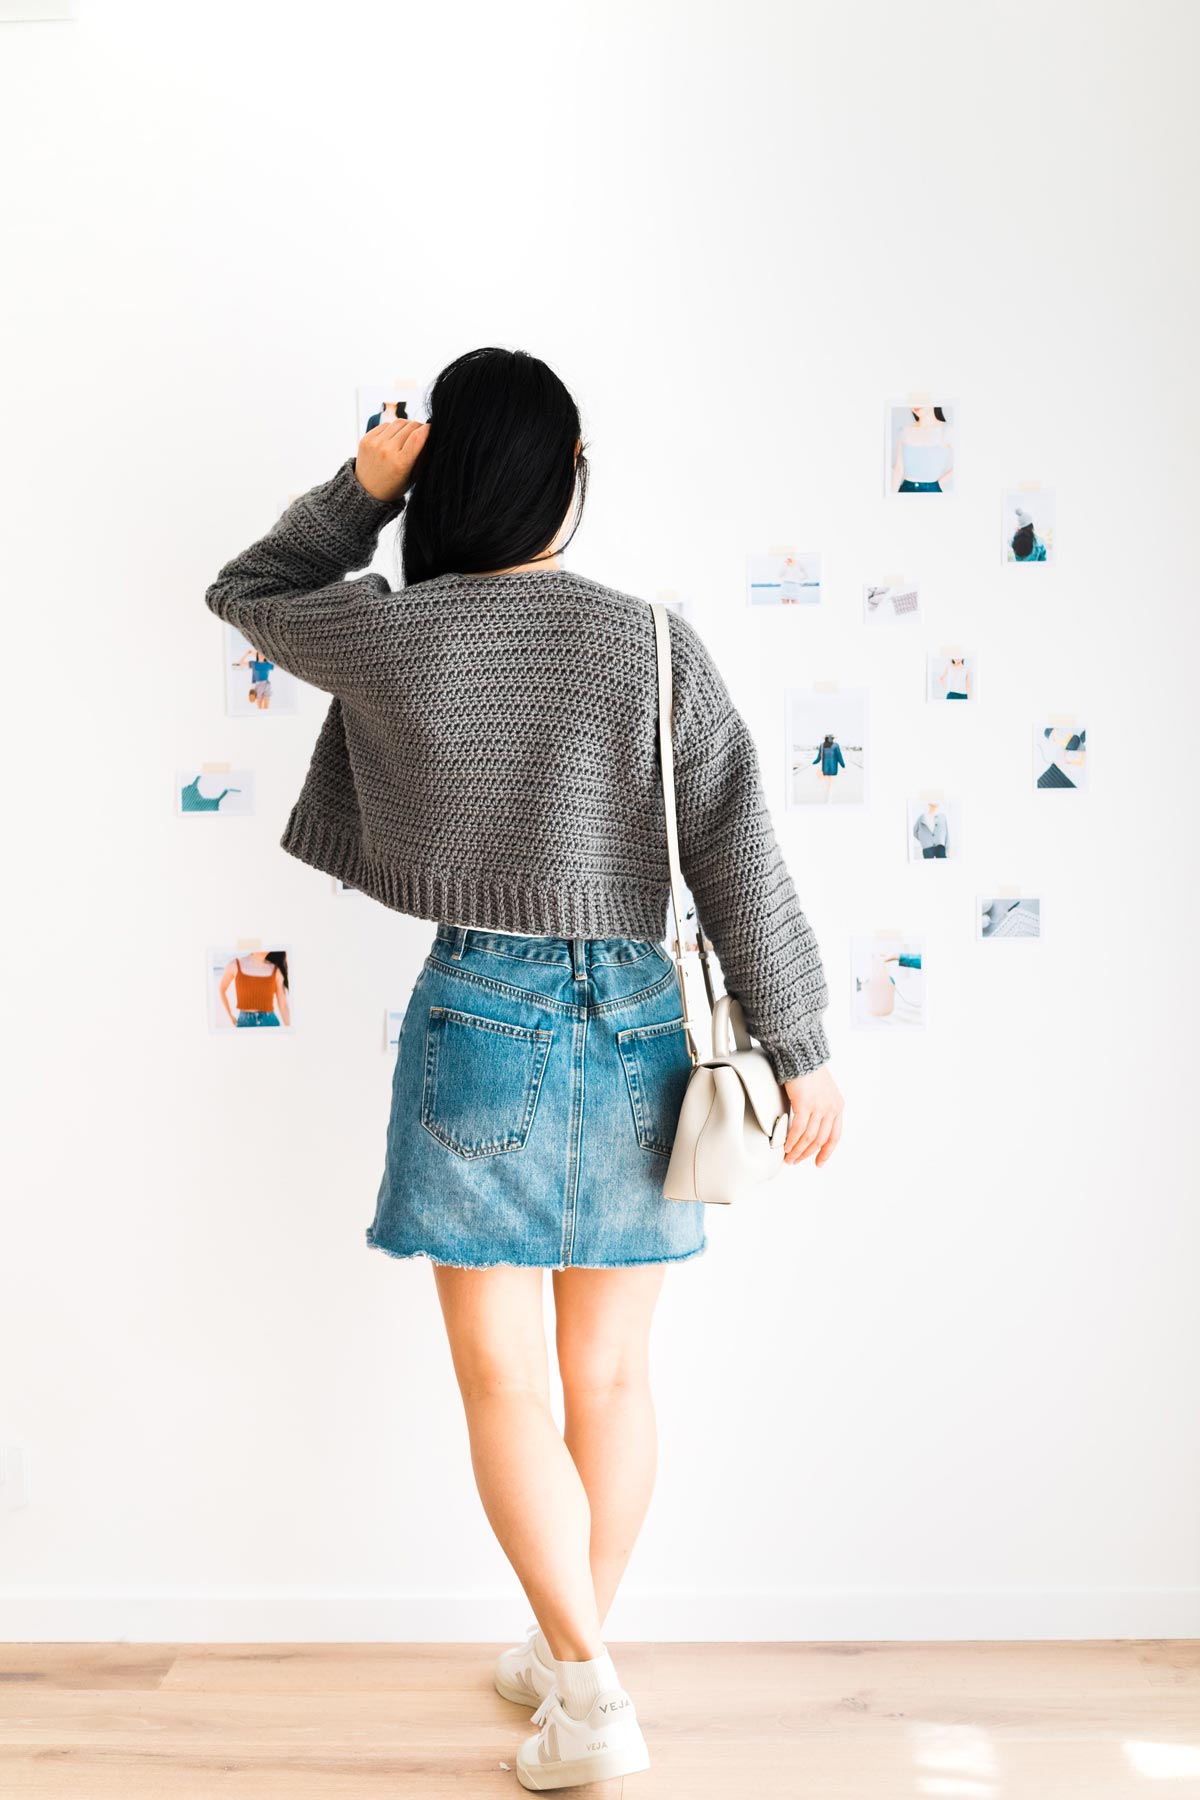
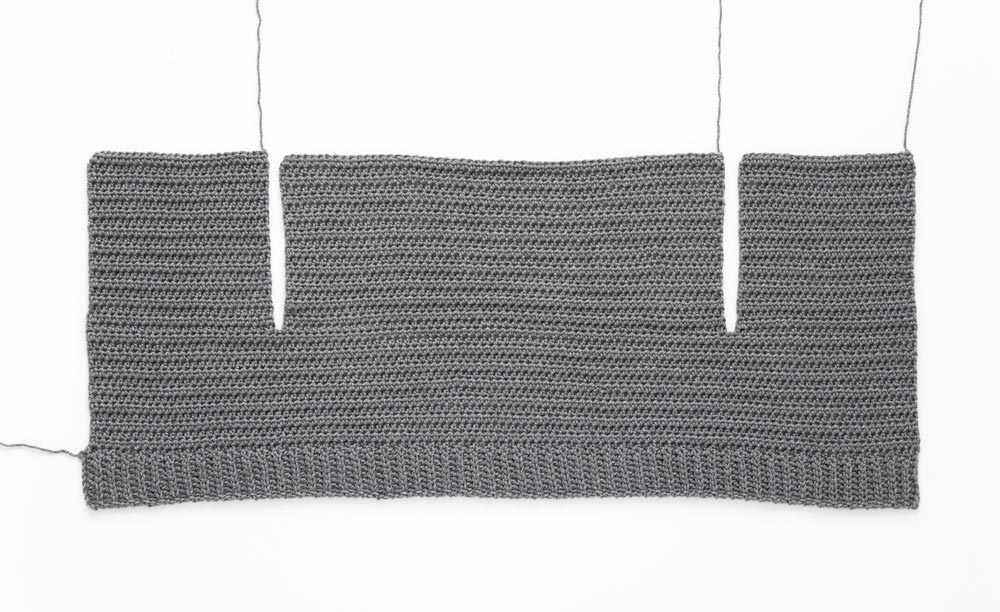
The body length of this cardi is entirely customisable. The sample is cropped, but you can easily crochet a hip length or knee length cardi by adding more rows to the main body panel. (Tips for perfect fitting crochet garments!) We’ll then separate the body panel into 3 sections – 2 front panels and a back panel to make openings of the sleeves to slot into.
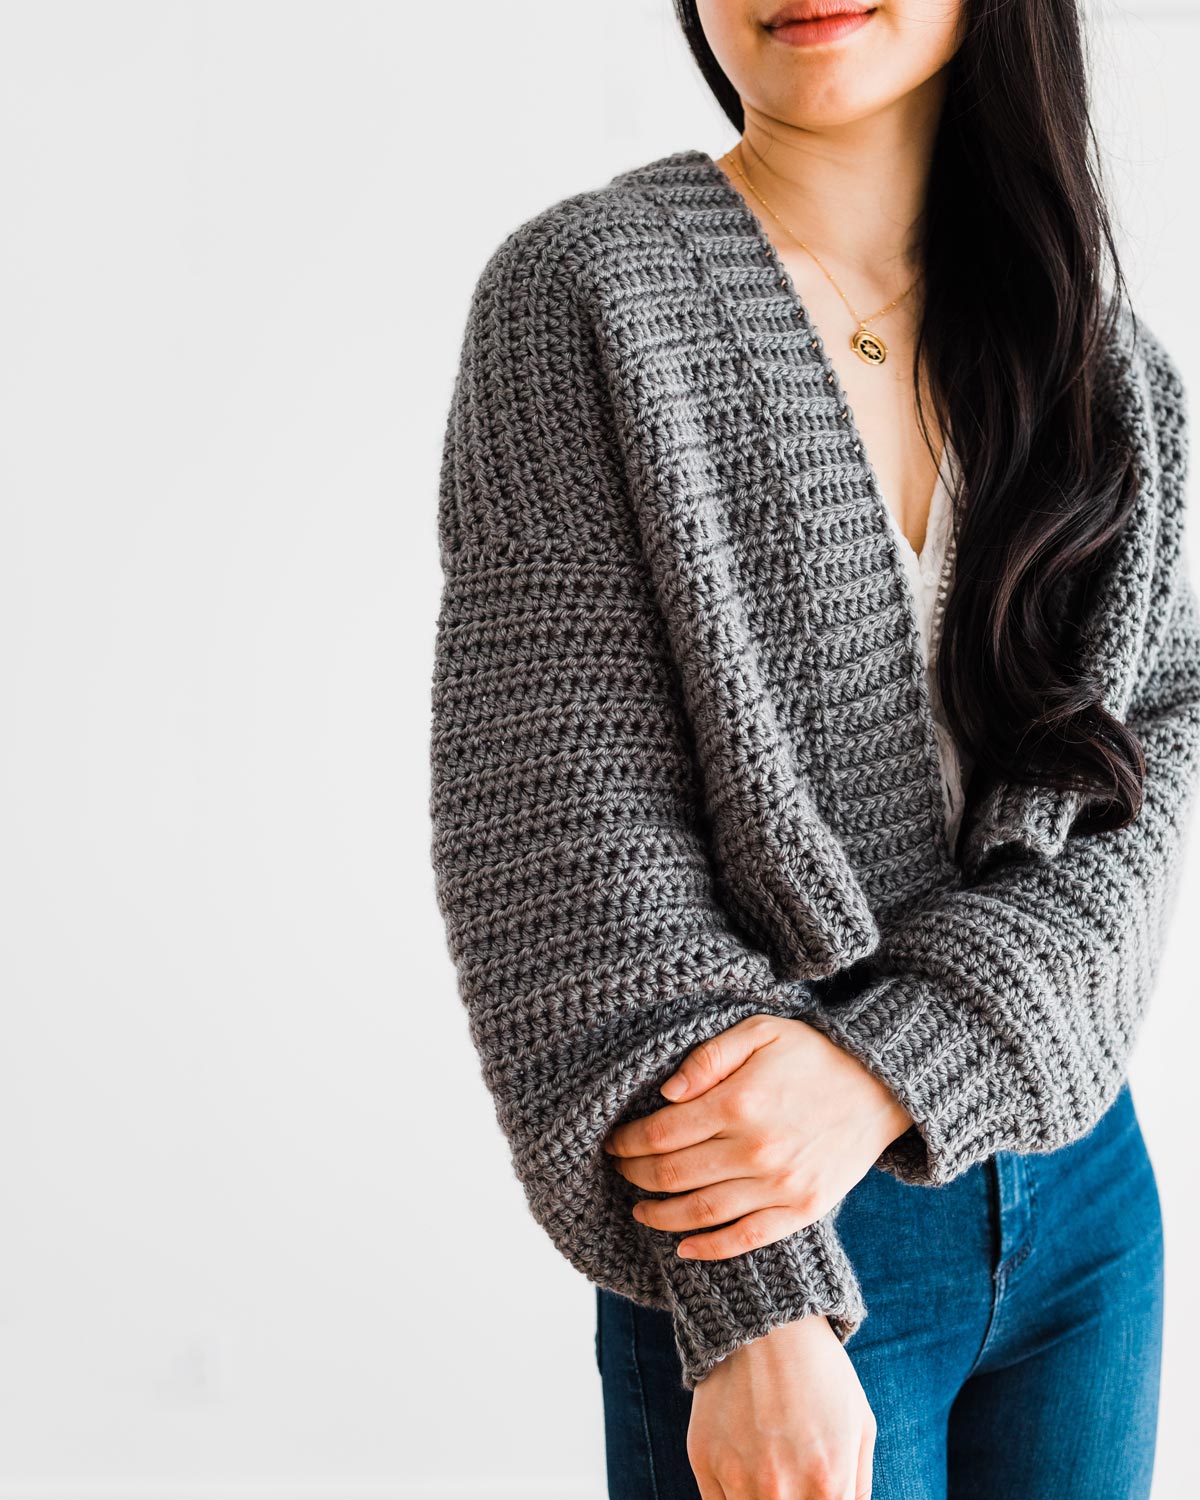
These oversized balloon sleeves are worked from the cuff up and the best thing about this sleeve shape you crochet only 2 rows of shaping in the entire pattern! The Doveport Cardigan is such a simple and mindless pattern, so it’s perfect for crocheting while watching Netflix.
If you want to minimise seaming even further, you could always work these sleeves in the round. To crochet balloon sleeves in the round, slip stitch the last row of the ribbing to the first row. Follow the sleeve instructions as per normal, but at the end of each round slip stitch into the first stitch to join and the turn your work.
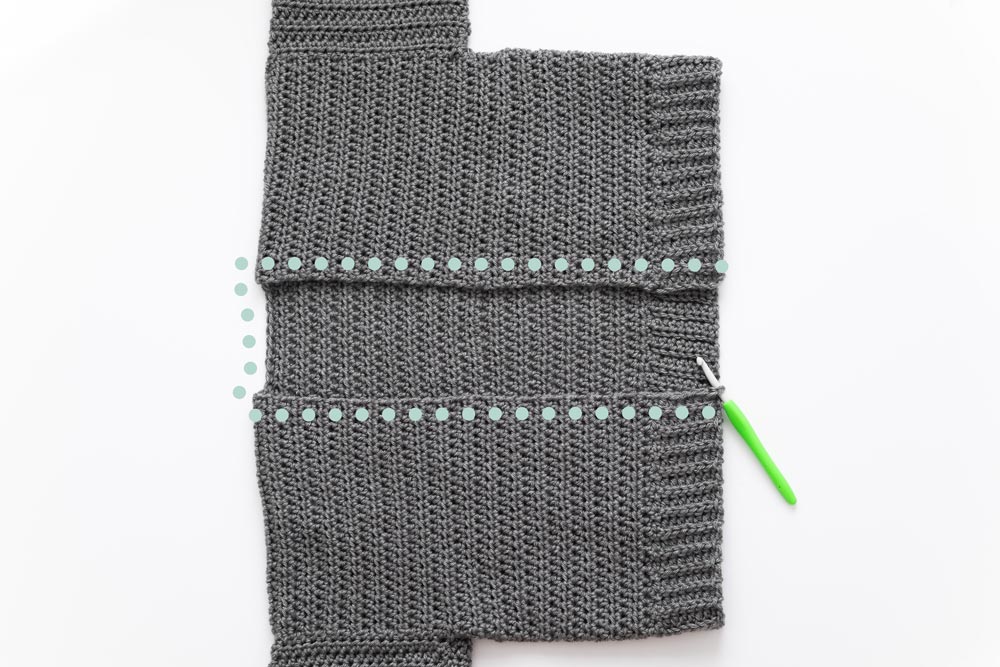
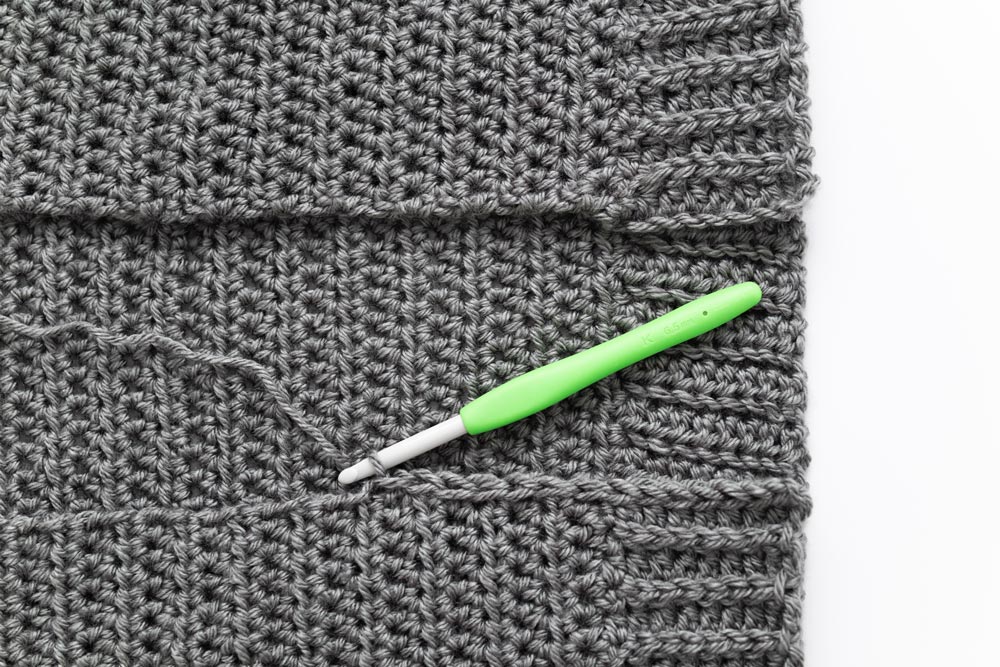
Once you have the body panel and 2 sleeves, simply fold the front panels on top of the back panel and sew the shoulder seams together. Then whip stitch the tops of the sleeves to the armholes.
Print and Crochet Offline!
Love to crochet on the couch? You can always find a low-cost printable PDF version of all my free patterns. Perfect for printing out or viewing offline on your tablet or phone. This nicely-formatted pdf contains 17 pages and photo tutorial. The pictures are also separated from the written pattern so you can save on ink! The printable pdf is a super useful upgrade that makes it even easier to crochet.
3 Neckline Finishes
One of the most frequently asked questions about the Briar Cardigan is, ‘Can I add neckline ribbing?’ With the Doveport Cardigan, I’ve provided instructions for 3 different neckline finishes!
1. Slip Stitch Edging
– This is great if you want a very clean finish and minimalist look to your design. It’s also the easiest option of the three and the best for beginners.
The key to crocheting neat slip stitch is to crochet with even tension and evenly space out your stitches. If your stitches are too far apart, your neckline will pucker and if you have too many stitches your neckline with ruffle and not lay flat.
2. BLO HDC + BLO sl st Ribbing crocheted separately
– If you like the look of thicker neckline ribbing this is a great option! Follow the exact ribbing instructions we used for the hem and sleeve cuffs and alternate between half double crochet and slip stitch rows until your ribbing measures the same length as the neckline and ship stitch it into place.
If you’re a beginner crocheter and want ribbing, this is the easiest and most forgiving option! This is my favourite way of adding neckline ribbing to my projects 🙂
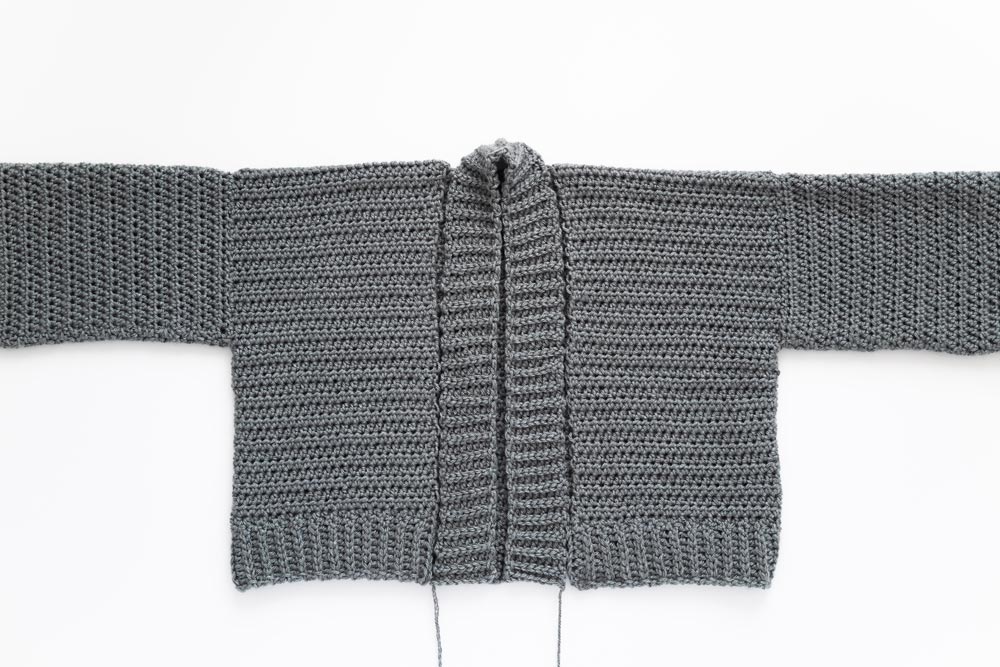
3. BLO HDC + BLO sl st crocheted onto the main body panel
(as pictured)
If you really don’t like sewing, this can be a good option if you’re a more experienced crocheter and comfortable with adjusting gauge. For this pattern, you can crochet the neckline ribbing directly on the neckline. However, you need to match your slip stitches with the height of the ribbing rows – not the rows along the body edge.
A common mistake with crocheting ribbing directly onto a main body panel is to think that 1 body panel row = 1 ribbing row, however this is often not the case! All stitches and yarns have a slightly different gauge.
For the Doveport Cardigan, I found that spacing out 4 ribbing rows along 3 body HDC rows worked well but you’ll need to experiment with your specific yarn and tension.
Crochet ribbing separately vs. worked in one piece
Many of you have asked me why I don’t often crochet ribbing directly onto the main project. The biggest reason is because of gauge!
With back loop ribbing, it can be tricky to match the ribbing gauge with the body stitches or rows. Due to this, the final result or look of the ribbing can vary widely depending on your crochet experience.
That’s why I usually recommend crocheting the ribbing separately and then sewing it on. The result is more consistent over different crocheting abilities and types of yarn.
The second reason is time! I find the time it takes me to crochet the ribbing separately and sew it on is quicker than crocheting the ribbing directly onto the neckline. When you work on an assembled garment, I find it takes of a lot of time to experiment and adjust your gauge and tension to make sure your ribbing lays flat.
On top of that, the entire garment can get really heavy and cumbersome as you work the ribbing and turn your rows. I also prefer the flat, ‘seamless’ look when whip stitching the neckline ribbing into place.
However, feel free to crochet ribbing in whichever way you prefer! After all, you’re the one crocheting the cardigan 🙂
Looking for more free crochet cardigan patterns?
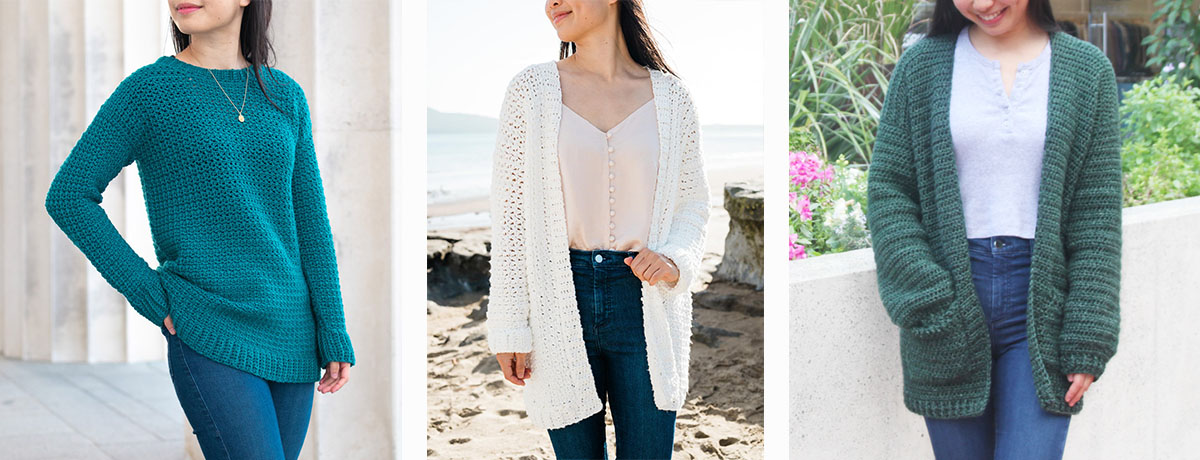
1. Weekend Snuggle Sweater / 2. In The Clouds Cardigan / 3. Briar Cardigan
Yarn
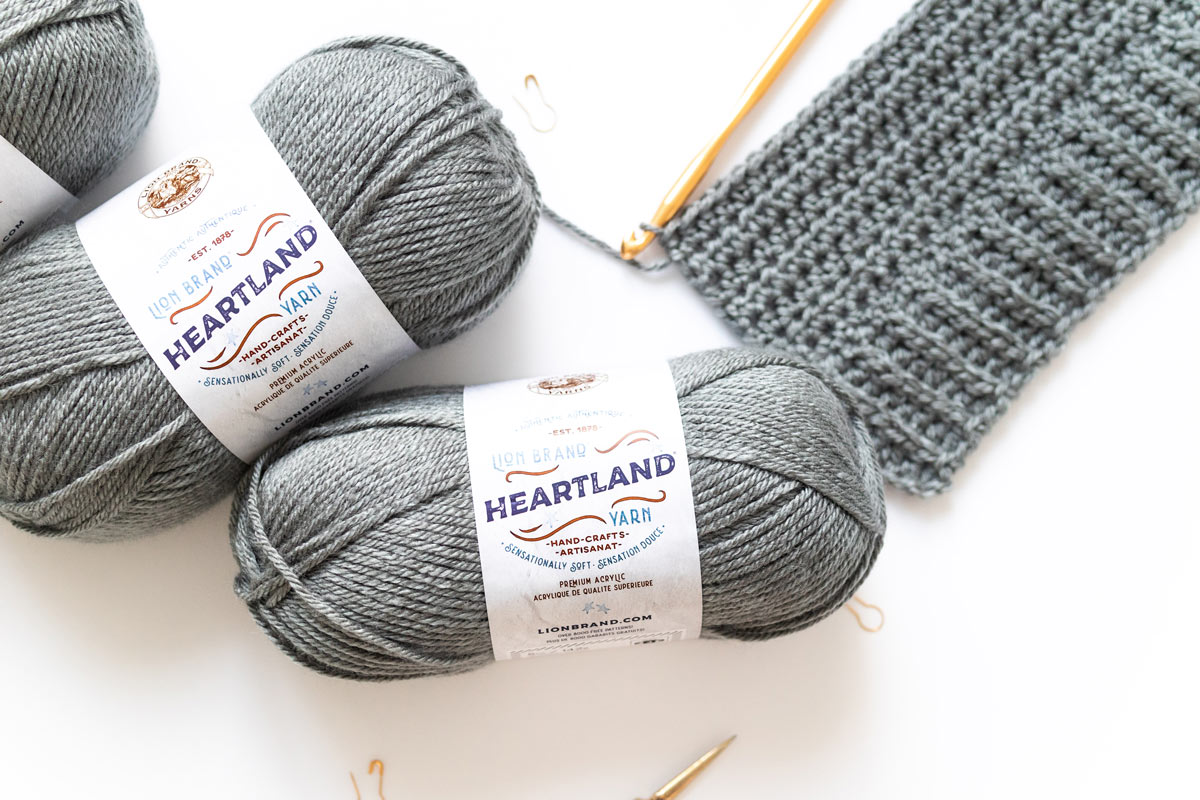
The Doveport Cardigan uses Lion Brand Heartland, a 100% acrylic yarn with a smooth, silky sheen. Heartland yarn has a good variety of colour ways (more than 30 different shades!), but what I love most about it is the heathered strands of yarn. The mix of similar toned colours in a few different shades, adds so much more dimension and interest to your garment as opposed to solid colours!
One thing to note, is that Lion Brand Heartland is on the thicker end of a worsted/aran/medium (4) yarn. If you’re looking for a substitute, make sure to pick a thicker aran yarn so you can easily match the gauge of the pattern.
Click to Pin me for later!
Video Tutorial
I love to see your finished projects! Use #forthefrills and tag me on Instagram @forthefrills for a chance to be featured!
Add the Doveport Cardigan to your Ravelry queue here!
Purchase the ad-free, printable version of the Doveport Cardigan here!
MINI EXPLANATION:
A simple oversized cardigan, perfect for beginner crocheters! Made with half double crochets and slip stitches, this crochet cardigan is worked flat – the body in one piece and then the sews are sewn on.
PATTERN NOTES:
*Sample is a size small shown on a 5’3” model with a 32” bust.
*The sizing guide follows size XS(S, M, L, XL)(2XL, 3XL, 4XL, 5XL). E.g. “HDC 99(111, 123, 135, 147)(159, 171, 183, 195) means HDC 99 for XS, HDC 111 for Small, HDC 123 for Medium, HDC 135 for Large, HDC 147 for XL, HDC 159 for 2XL, HDC 171 for 3XL, HDC 183 for 4XL and HDC 195 for 5XL.” If there is only one number, it applies to all sizes.
*”HDC 10” means HDC into the next 10 stitches.
*”2HDC” means place 2HDC into the same stitch.
*The turning chain, ch 1 does NOT count as a stitch.
*Total stitches are indicated between < >.
*This pattern uses US crochet terms.
*This crochet cardigan is constructed from 3 pieces – 1 main body panel and 2 sleeves.
*The body panel and sleeves are crocheted from the bottom up.
*The ribbing is crocheted lengthways and the body and sleeves are crocheted directly onto the long edge of the ribbing.
*The body is worked entirely in one piece. We’ll start with the hemline ribbing and then crochet the main body portion. We’ll separate the body panel into 3 sections, 2x front panels and back panel with openings for the sleeves.
*The sleeves are crocheted from the cuff ribbing up, sewn together and onto the body.
*There are 3 neckline finishing options – slip stitch edging, HDC ribbing crocheted separately and HDC ribbing crocheted directly onto the neckline.
*To make your sweater shorter/longer, simply remove/add rows (alteration instructions provided), just keep in mind for every 2cm/0.75” you’ll need an extra approx. 12(12, 14, 16, 18)(18, 20, 20, 22)g.
*All pieces are sewn together with the RS on the inside and the WS facing outwards.
*The sample cardigan uses Lion Brand Heartland which is classified as an Aran/Worsted/Medium (4). It’s on the thicker end of a worsted yarn, so if you want to substitute this yarn look for a yarn with a recommended hook size of 6mm (J) / 6.5mm (K).
LEVEL: Beginner+
Materials
Yarn – LionBrand Heartland – Aran/Worsted/Medium(4), 230m/142g, 251yds/5oz., 100% Acrylic, Petrified Forest
approx. 415(485, 545, 595, 670)(735, 805, 885, 955)g
6.5mm (US K) Crochet Hook
Darning Needle
Embroidery Scissors
1 x Stitch marker/Safety pin
Stitches & Abbreviations
Ch = Chain
Sl st = Slip Stitch
HDC = Half Double Crochet
BLO = Back Loop
St(s) = Stitch(es)
Rep = Repeat
RS = Right Side
WS = Wrong Side
Measurements
Measurements cm:
To fit Bust: 71(81, 91, 101, 112)(122, 132, 142, 152)
Back Width: 44(49, 54, 59, 64)(69, 74, 79, 84)
Body Length: 37(39, 41, 43, 45)(47, 49, 51, 53)
Armhole: 17(18, 19, 20, 21)(23, 24, 25, 26)
Sleeve Length: 37(39, 39, 39, 41)(41, 41, 43, 43)
Measurements inches:
To fit Bust: 28(32, 36, 40, 44)(48, 52, 56, 60)
Back Width: 17.5(19.5, 21.5, 23.5, 25.5)(27.5, 29, 31, 33)
Body Length: 14.5(15.5, 16, 17, 18)(18.5, 19, 20, 21)
Armhole: 6.5(7, 7.5, 8, 8.5)(9, 9.5, 10, 10.5)
Sleeve length: 14.5(15.5, 15.5, 15.5, 16)(16, 16, 17, 17)
GAUGE: 10cm/4” square = 12 stitches wide x 10 rows tall in half double crochet
Doveport Cardigan Crochet Pattern
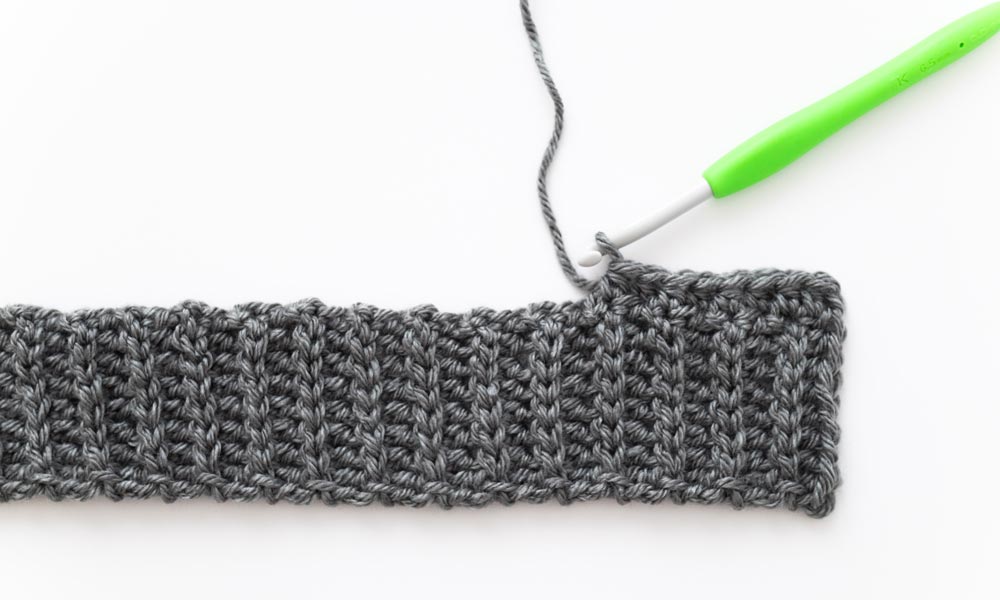
Body Hemline Ribbing
*The ribbing runs the of 2x front panels + back panel.
FOUNDATION CHAIN: Ch 9.
ROW 1 (RS): HDC into 2nd ch from the hook, HDC across, turn.
<8>
ROW 2: Ch 1, BLO sl st 7, sl st in last st, turn.
<8>
ROW 3: Ch 1, BLO HDC 7, HDC in last st, turn.
<8>
*Make sure the ch is loose and tall enough to match the height of the BLO HDCs.
Repeat ROWS 2 – 3 until ROW 99(111, 123, 135, 147)(159, 171, 183, 195).
<8>
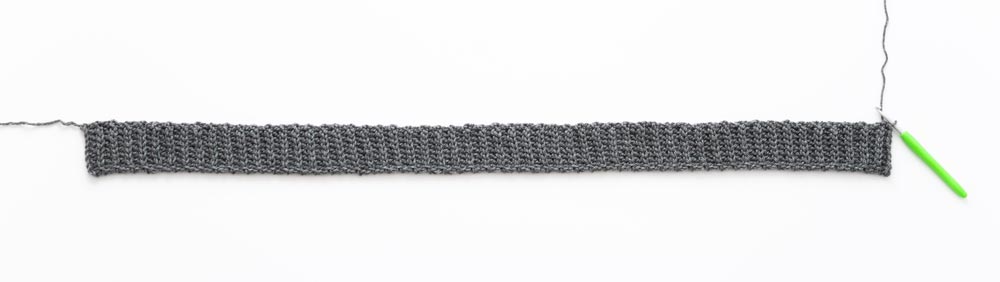
Do not fasten off! We will now work along the long edge of the ribbing.
Main Body Panel
ROW 1 (RS): Ch 1, HDC in each row until end, turn.
<99(111, 123, 135, 147)(159, 171, 183, 195)>
*You should have 1 HDC in each sl st and HDC row.
ROW 2: Ch 1, HDC across, turn.
<99(111, 123, 135, 147)(159, 171, 183, 195)>
Repeat ROW 2 until ROW 14(14, 16, 16, 18)(18, 18, 20, 20).
*You can add/remove rows to make your cardigan longer/shorter. Keep in mind that the front + back panel shaping adds approx. 18(20, 20, 22, 24)(24, 26, 26, 28)cm / 7(8, 8, 8.5, 9.5)(9.5, 10, 10, 11)“ to the current length of your cardigan.
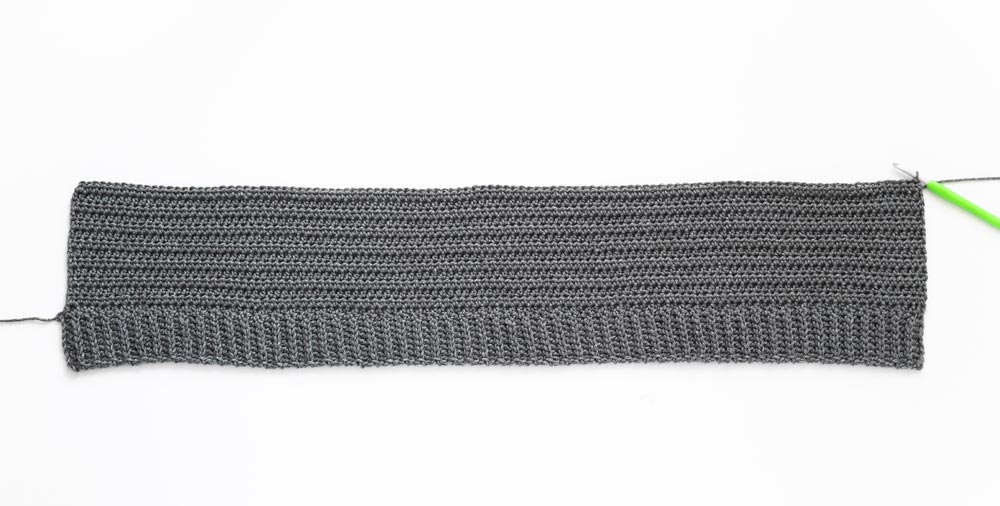
Do not fasten off! We will now crochet the FIRST FRONT PANEL.
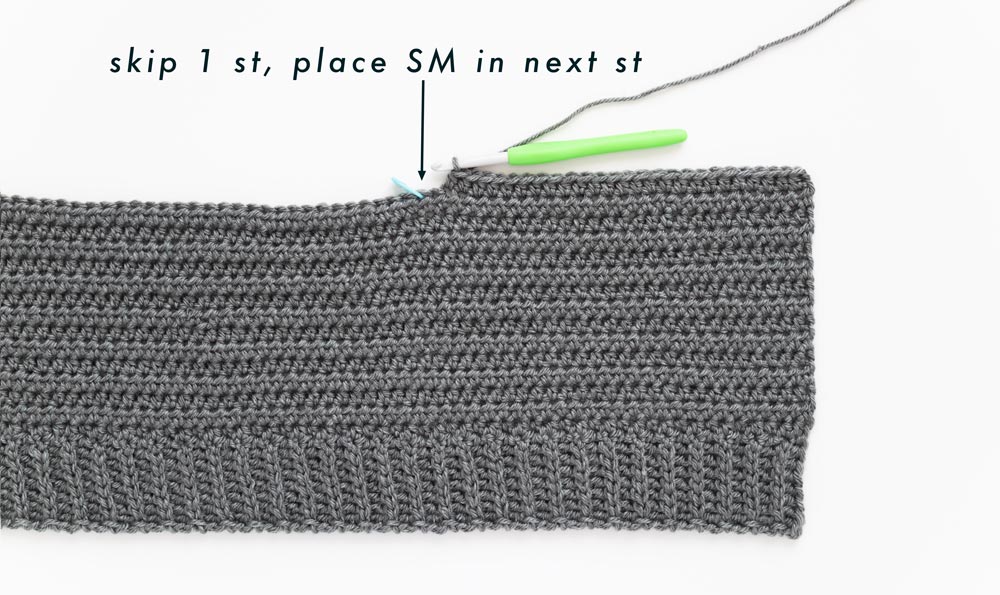
First Front Panel
ROW 1: Ch 1, HDC 22(25, 28, 31, 34)(37, 40, 43, 46), skip 1 st, place stitch marker in next st, turn.
<22(25, 28, 31, 34)(37, 40, 43, 46)>
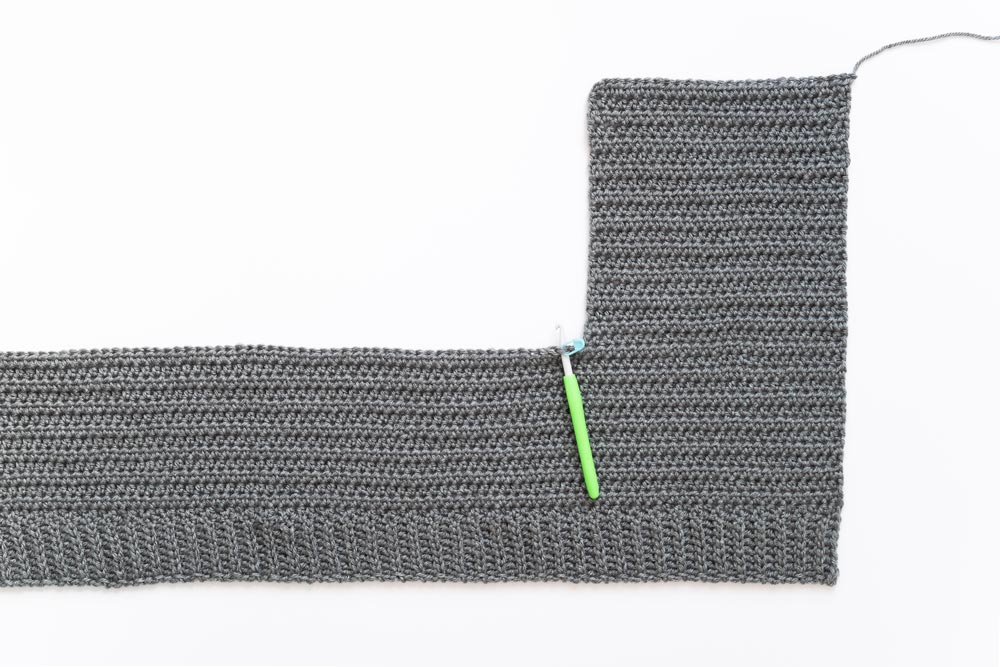
ROW 2: Ch 1 HDC across, turn.
<22(25, 28, 31, 34)(37, 40, 43, 46)>
Repeat ROW 2 until ROW 18(20, 20, 22, 22)(24, 26, 26, 28).
<Total rows: 32(34, 36, 38, 40)(42, 44, 46, 48)>
Fasten off.
Back Panel
With the RS facing you, insert crochet hook in st with a stitch marker. Secure your yarn and pull up a loop.
ROW 1: Ch 1, HDC 53(59, 65, 71, 77)(83, 89, 95, 101), skip 1 st, place stitch marker in next st, turn.
<53(59, 65, 71, 77)(83, 89, 95, 101)>
ROW 2: Ch 1, HDC across, turn.
<53(59, 65, 71, 77)(83, 89, 95, 101)>
Repeat ROW 2 until ROW 18(20, 20, 22, 22)(24, 26, 26, 28).
<Total rows: 32(34, 36, 38, 40)(42, 44, 46, 48)>
Fasten off.
Second Front Panel
With the RS facing you, insert crochet hook in st with a stitch marker. Secure your yarn and pull up a loop.
ROW 1: Ch 1, HDC across, turn.
<22(25, 28, 31, 34)(37, 40, 43, 46)>
Repeat ROW 1 until ROW 18(20, 20, 22, 22)(24, 26, 26, 28).
<Total rows: 32(34, 36, 38, 40)(42, 44, 46, 48)>
Fasten off.
Sleeve Ribbing
FOUNDATION CHAIN: Ch 9.
ROW 1 (RS): HDC into 2nd ch from the hook, HDC across, turn.
<8>
ROW 2: Ch 1, BLO sl st 7, sl st in last st, turn.
<8>
ROW 3: Ch 1, BLO HDC 7, HDC in last st, turn.
<8>
Repeat ROWS 2 – 3 until ROW 21(23, 25, 25, 27)(29, 31, 31, 33).
<8>
Do not fasten off! We will now work along the long edge of the ribbing.
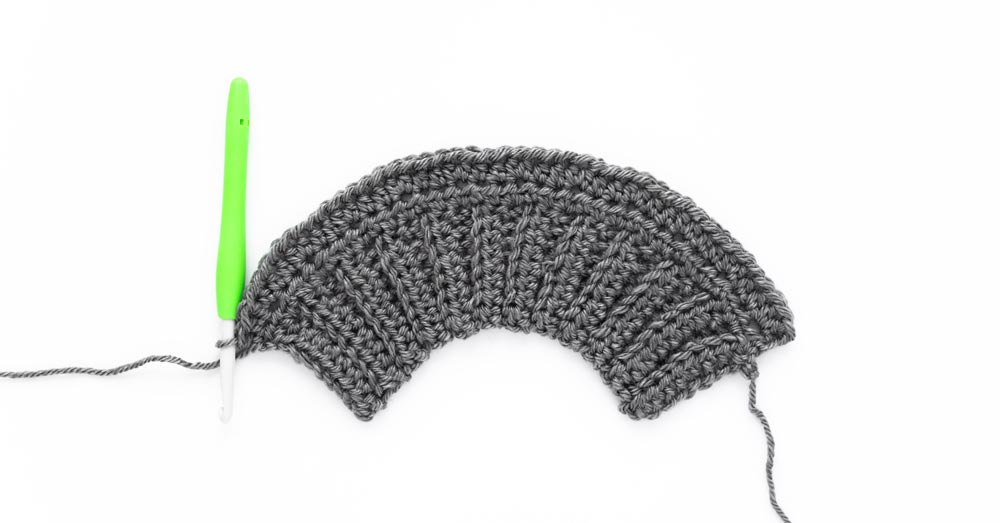
Sleeves
(make 2)
ROW 1 (RS): Ch 1, HDC in 1st row, HDC in sl st row, *2HDC in HDC row, HDC in sl st row; rep from * until last row, HDC in last row, turn.
<30(33, 36, 36, 39)(42, 45, 45, 48)>
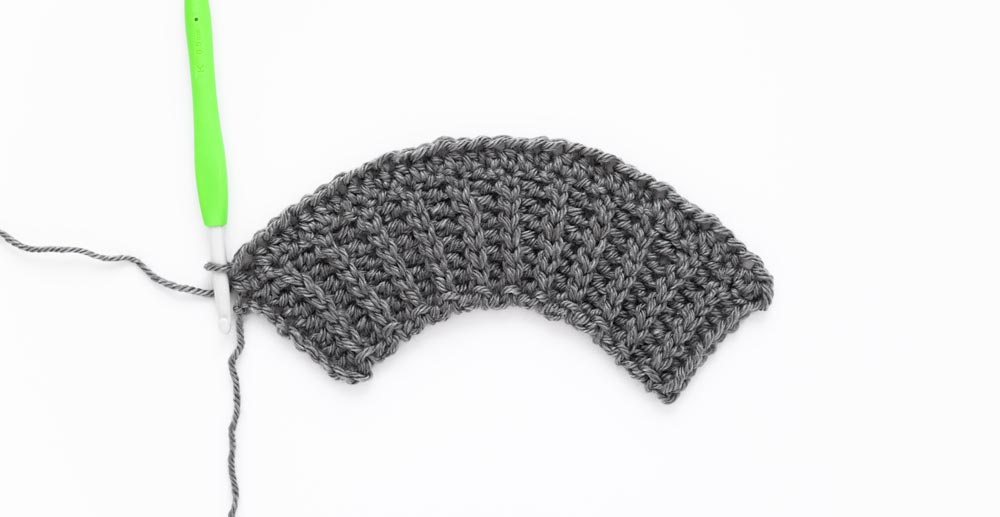
Sizes XS(S, M, XL)(2XL, 3XL, 5XL) only:
ROW 2: Ch 1, *2HDC, HDC 2; rep from * until end, turn.
<40(44, 48, 52)(56, 60, 64)>
Sizes (L, 4XL) only:
ROW 2: Ch 1, 2HDC 3, *2HDC, HDC 2; rep from * until end, turn.
<(50, 62)>
ALL SIZES:
ROW 3: Ch 1, HDC across, turn.
<40(44, 48, 50, 52)(56, 60, 62, 64)>
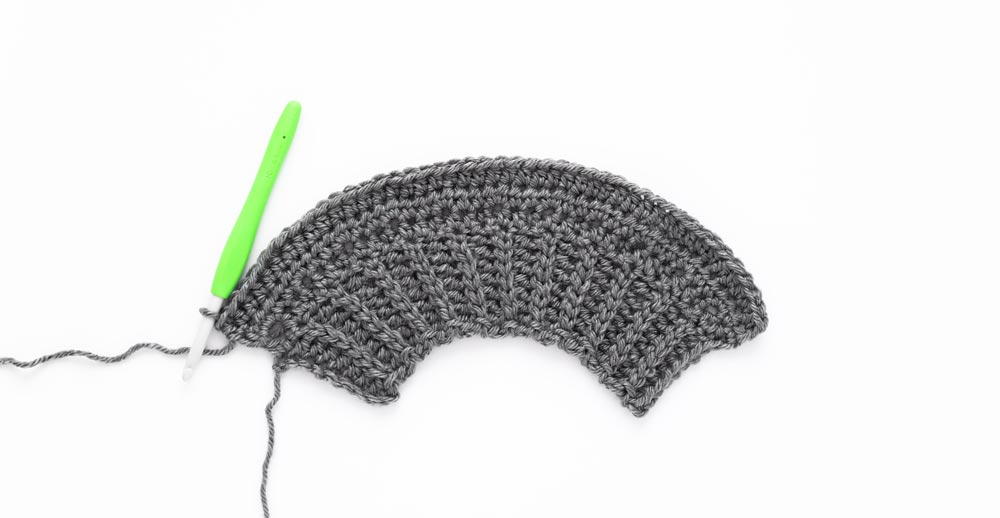
Repeat ROW 3 until sleeve measures 37(39, 39, 39, 41)(41, 41, 43, 43)cm/ 14.5(15.5, 15.5, 15.5, 16)(16, 16, 17, 17) “ approx. ROW 32(34, 34, 34, 36)(36, 36, 38, 38).
*You can add/remove rows to make your sleeve longer/shorter.
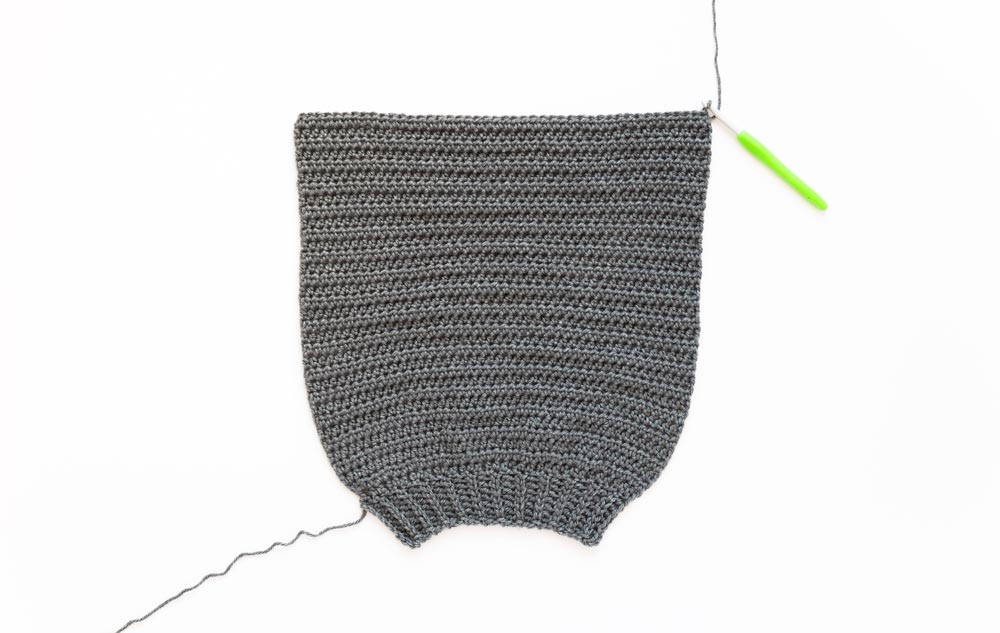
Fasten off.
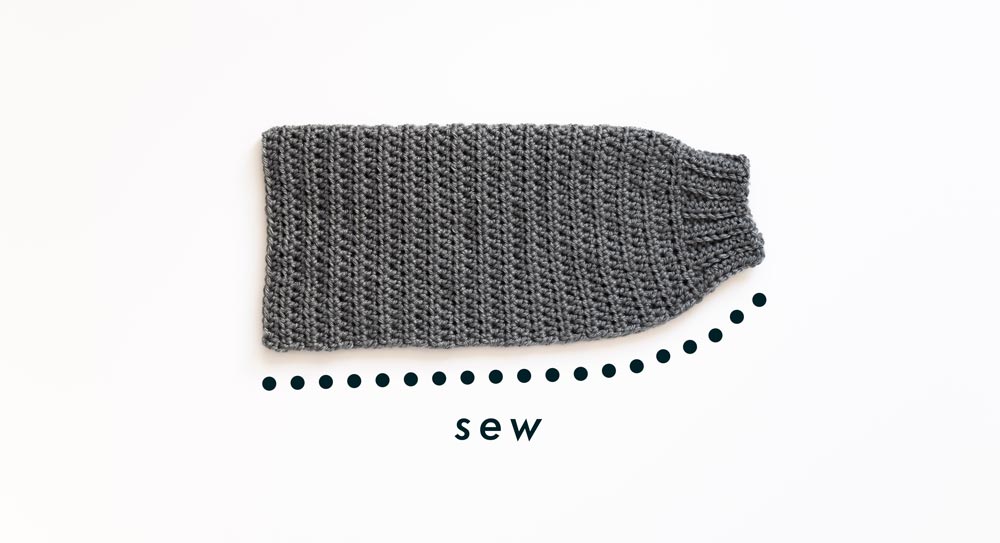
Fold sleeve in half lengthways and whip stitch the long edge of the sleeve together.
Assembly
Fold the front panels on top of the back panel. Whip stitch the shoulder seams together.
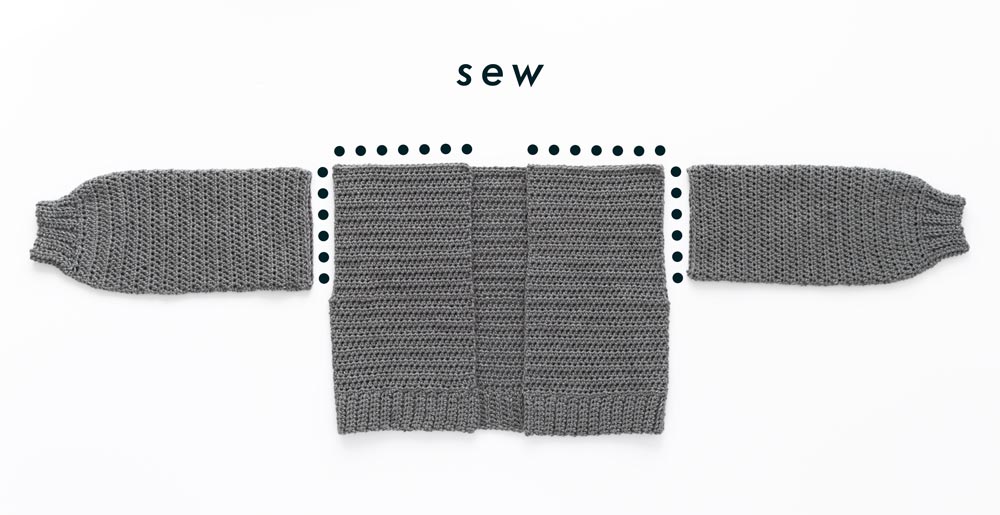
Whip stitch top of sleeves to armholes.
With the Doveport Cardigan, you can finish the neckline with a simple edging OR crochet matching neckline ribbing separately OR directly onto the neckline.
Neckline Edging
(beginner friendly)
With the RS facing you, insert your hook into the corner of the front panel. Secure your yarn and pull up a loop.
ROW 1: Ch 1, sl st evenly along the edge of the neckline.
*The exact number of stitches doesn’t matter, rather focus on spacing out your stitches evenly. If your neckline is ruffling you have too many stitches and if your neckline is puckering you have too few stitches.
Fasten off.
Neckline Ribbing - Crocheted Separately
(beginner friendly)
FOUNDATION CHAIN: Ch 9.
ROW 1 (RS): HDC into 2nd ch from the hook, HDC across, turn.
<8>
ROW 2: Ch 1, BLO sl st 7, sl st in last st, turn.
<8>
ROW 3: Ch 1, BLO HDC 7, HDC in last st, turn.
<8>
Repeat ROWS 2 – 3 until the ribbing measures the length of the entire neckline.
Fasten off.
Pin ribbing along neckline and whip stitch ribbing to neckline.
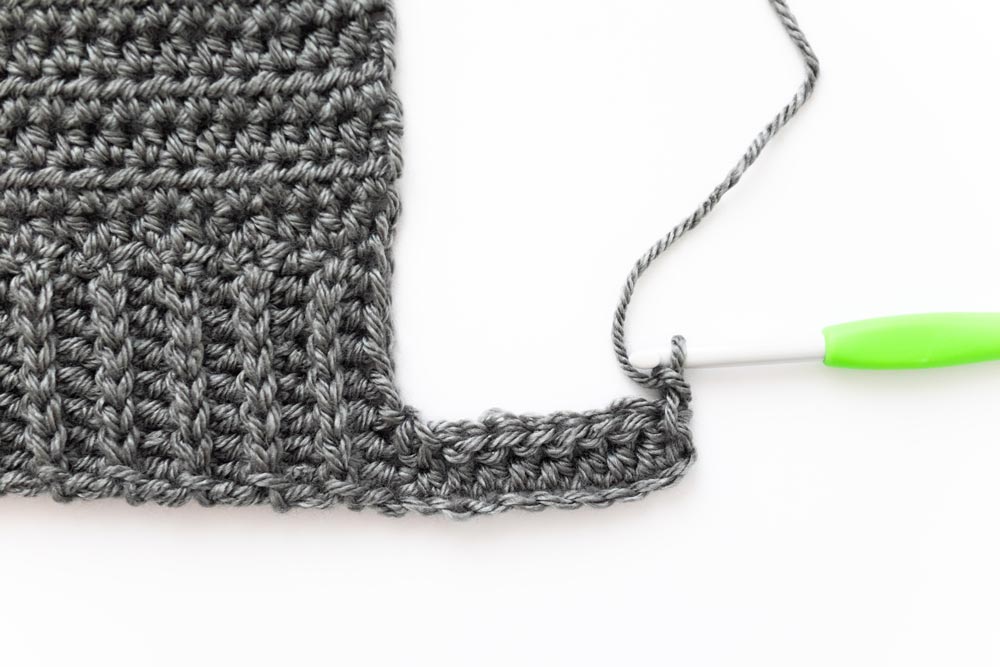
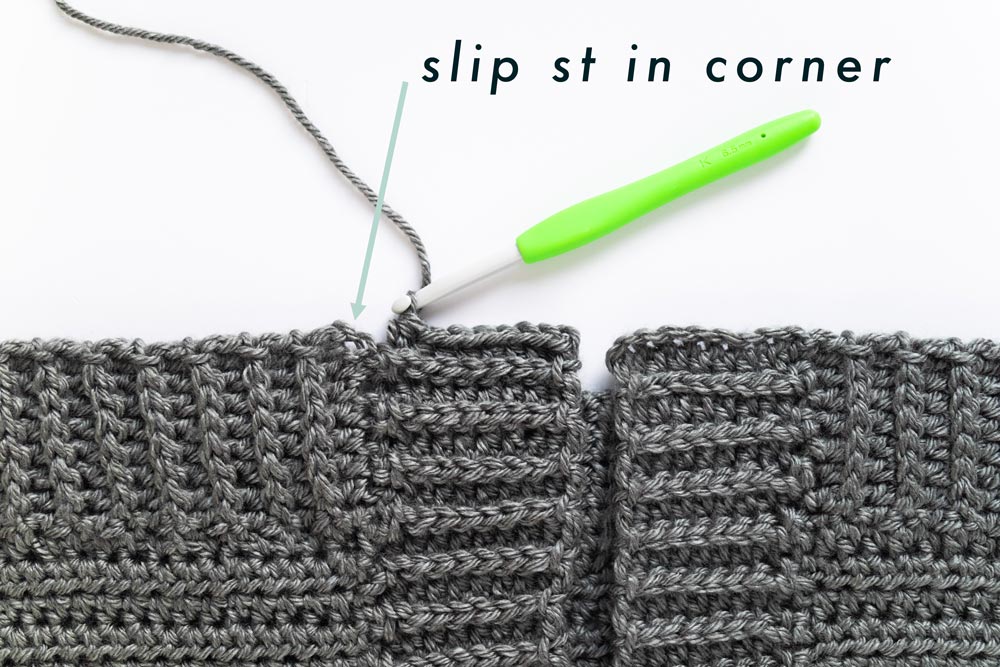
Neckline Ribbing - Crocheted onto Neckline
With the RS facing you, insert your hook into the corner of the front panel. Secure your yarn and pull up a loop.
FOUNDATION CHAIN: Ch 9.
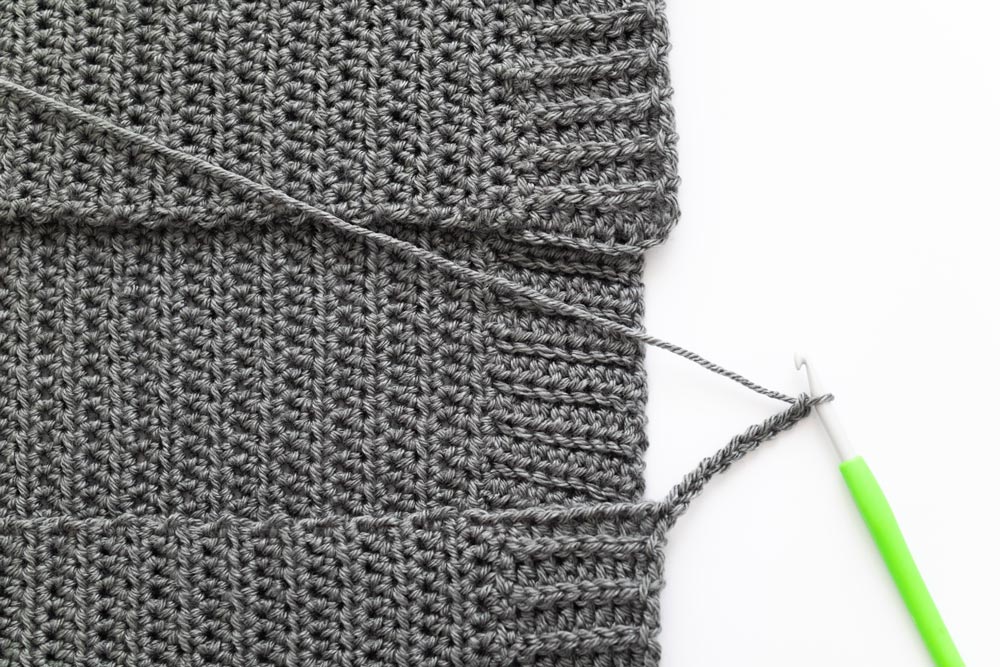
ROW 1: HDC in 2nd ch from the hook, HDC 7, sl st into next 2 sts on neckline edge, turn.
<8>
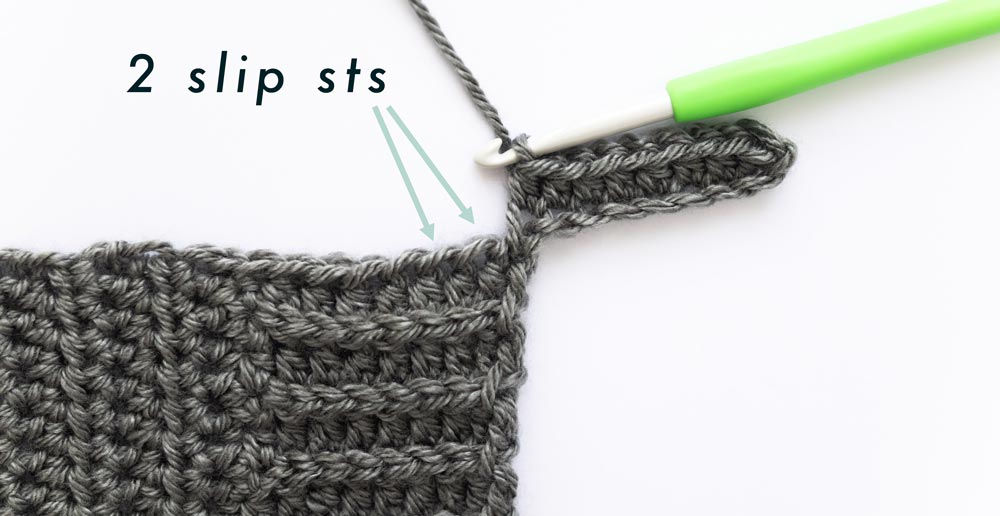
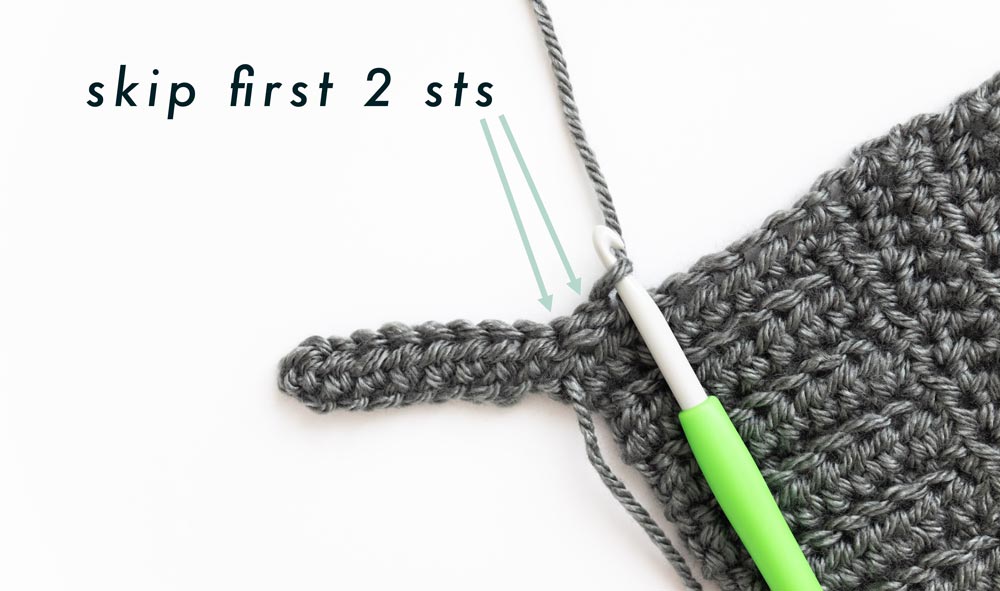
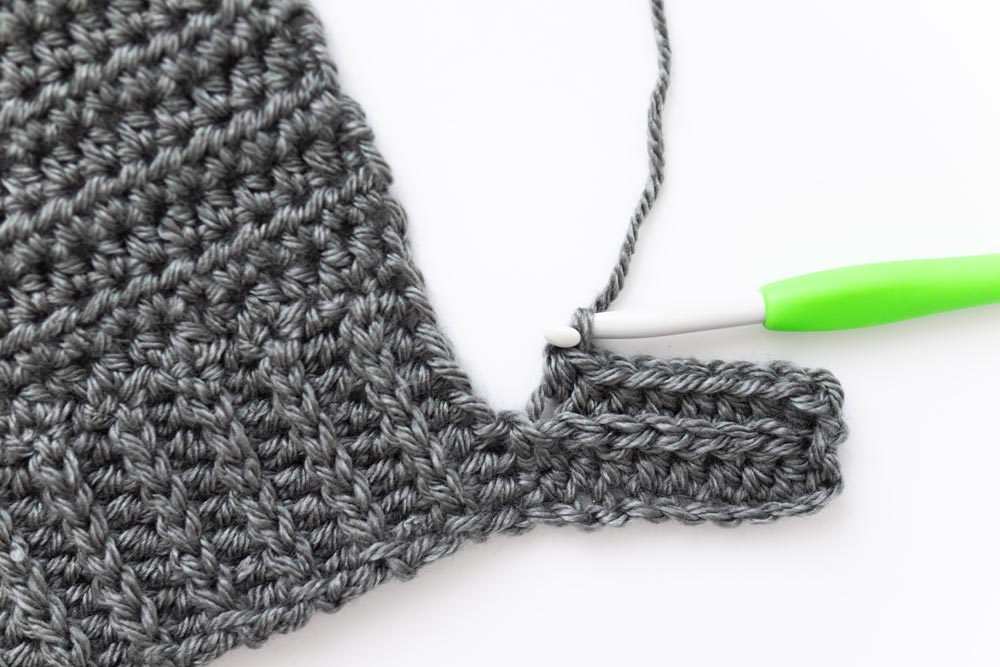
ROW 2: Skip first 2 sl sts, BLO sl st 7, sl st in last st, turn.
<8>

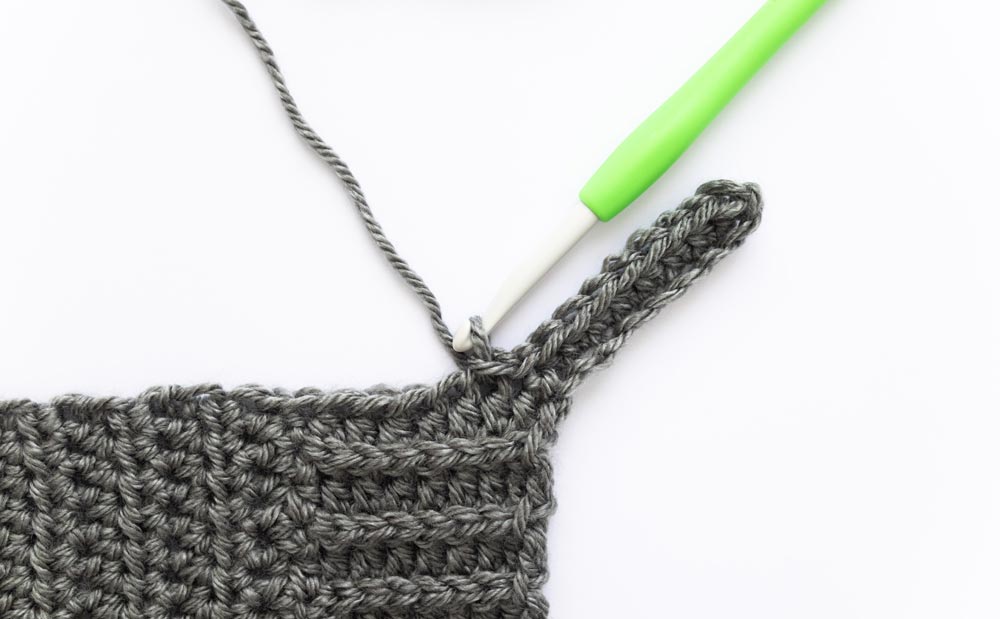
ROW 2: Ch 1, BLO HDC 8, sl st into next 2 sts on neckline edge, turn,
<8>
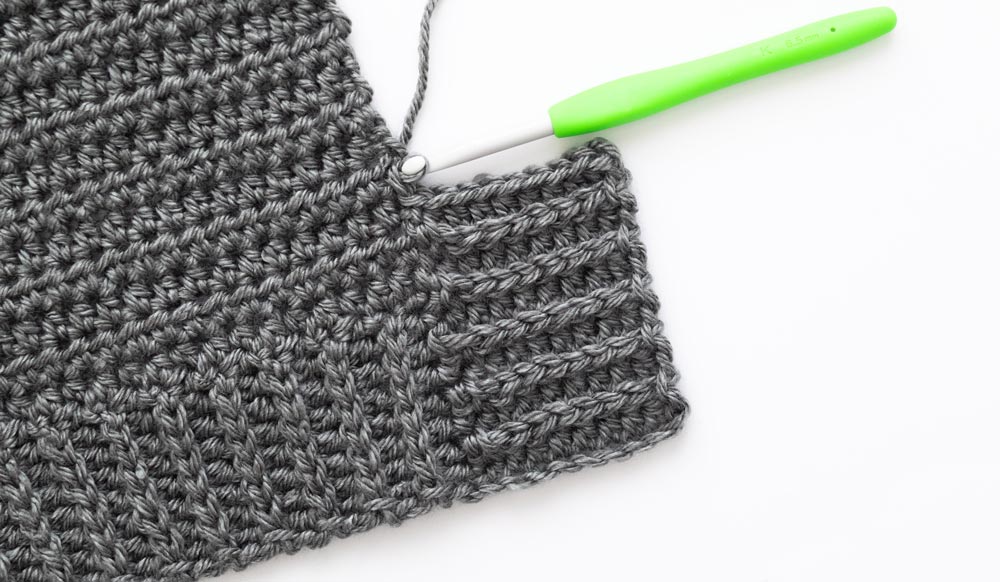
Repeat ROWS 2 – 3 until you make your way around to the opposite corner of the second front panel. End on a repeat of ROW 3 and place 1 sl st in the corner. Fasten off.
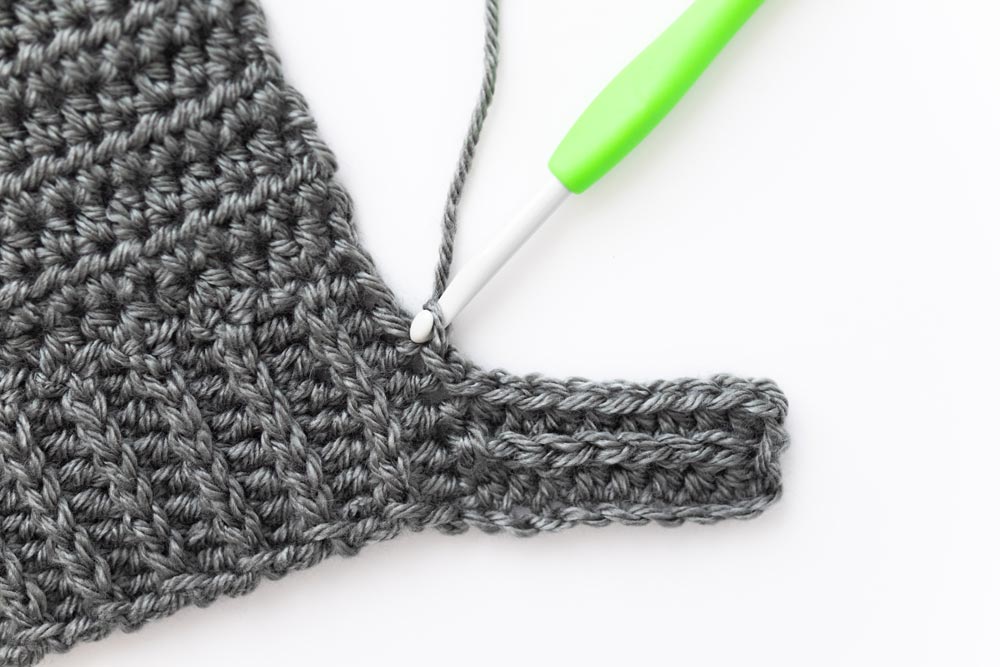
*When crocheting directly onto the raw edge of the HDC rows, space your slip stitches out evenly. If your slip stitches are too close together, the neckline will ruffle and if they are too far apart the ribbing will pucker and pull on the neckline.
*For even slip stitch spacing, I found that lining up the first slip stitch at the same height as the BLO HDCs works best and then placing the 2nd slip stitch slightly above it.
*In general, I found that I spaced out 4 ribbing rows for every 3 HDC body panel rows (instead of 1 slip stitch in each HDC row) the ribbing laid flat. But experiment with your specific yarn choice and crochet tension to find the best spacing.
Finishing
Weave in all of your ends. Steam block to measurements.
Voilà! You’ve finished your Doveport Cardigan.
Ready for your next crochet project?
Ahh thank you so much! This is honestly the first cardigan pattern which I understood at first reading! I have already started crocheting 🙂
Turned out so cute! Pattern is amazing!
Can't wait to purchase materials tomorrow and get started! Will send photos! I am a beginner.😊
Thank you for the pattern! This was my first time reading a crochet pattern and attempting a cardigan. After some googling, I found it fairly simple to understand. The only issue I had was regarding the size. I measured myself and consulted the size chart as instructed, but the first cardigan I crocheted turned out way too small; it wouldn't even fit me, let alone be oversized.
I now realize that the mistake I made was assuming that the sizes already accounted for the oversized aspect, which they did not.
I'm sharing this to help the next beginner avoid the same mistake I made. Since it was my very first crochet project, I didn't have much prior knowledge, and we all make silly mistakes in the beginning, I guess. I would suggest checking the measurements of an oversized cardigan that you already own and like, and starting from there.
I made this cardigan while I was sick and it has to be the easiest and quickest cardigan I have made yet! I think my gauge may have been off by a bit since mine ended up in more of a bomber-style fit but I love it so much. Thank you!
I would love to try to make this cardigan but would rather use a different fiber yarn like bamboo or something more natural. What yarns would you recommend ? I am a beginner and need help with this decision as I don’t quite understand gauge, sizing, etc.