Have you started your crochet designer journey? Or maybe you’re looking to make the leap and design your first pattern?
Crochet designing is a whole new ball game. Think of the difference between designing and crocheting a bit like a butterfly stroke versus freestyle. Are they both swimming? Yes – but the techniques and approaches are completely different!
When following a crochet pattern, normally, the trickiest parts are matching the designer’s gauge and yarn choice. However, when you’re a designer, you’re in control - which is equally exciting and terrifying! Today, I’ll walk you through some tips and tricks to help you along the designing process.
1. Start Simple
First and foremost – Start simple! Some of you might be advanced crocheters, while others might just be starting out. Regardless of your crocheting level, anyone can start designing but with crochet garments I recommend everyone to start with simple silhouettes and stitch patterns.
Simple silhouettes = boxy or oversized fit
Simple stitch patterns = single crochets, half double crochets, double crochets etc. (1-2 stitch multiples or 1 row repeats)
When you crocheted your first garment, you probably picked a beginner or easy level pattern, right? Think about the design features of that pattern. It probably had little to no shaping and used basic stitches with a simple neckline and silhouette.
When crochet designing, you want to start with the basics to build a strong foundation. This will make it easier for you to understand how garments are constructed and how to grade the pattern for different sizes.
Boxy or oversized silhouettes are a great place to start because they are forgiving. By forgiving, I mean the margin of error is (relatively) large. Even if you make small mistakes in sizing or with your stitch count, you’ll probably still be able to finish and wear the garment. Nothing is more satisfying than wearing something crocheted and designed by yourself, for yourself! 🙂
On the other hand, tight or fitted garments have a lot less wiggle room. In general, you need to crochet to very precise measurements so that the garment fits well. A few stitches too wide and your garment will look loose, a few stitches too small and you might not be able to get your sweater over your head!
Straight silhouettes also have the benefit of little to no shaping. A pattern that is easy to crochet isn’t necessarily an easy to design. When you’re designing creating curves or using complicated stitch patterns adds a lot of extra work and planning.
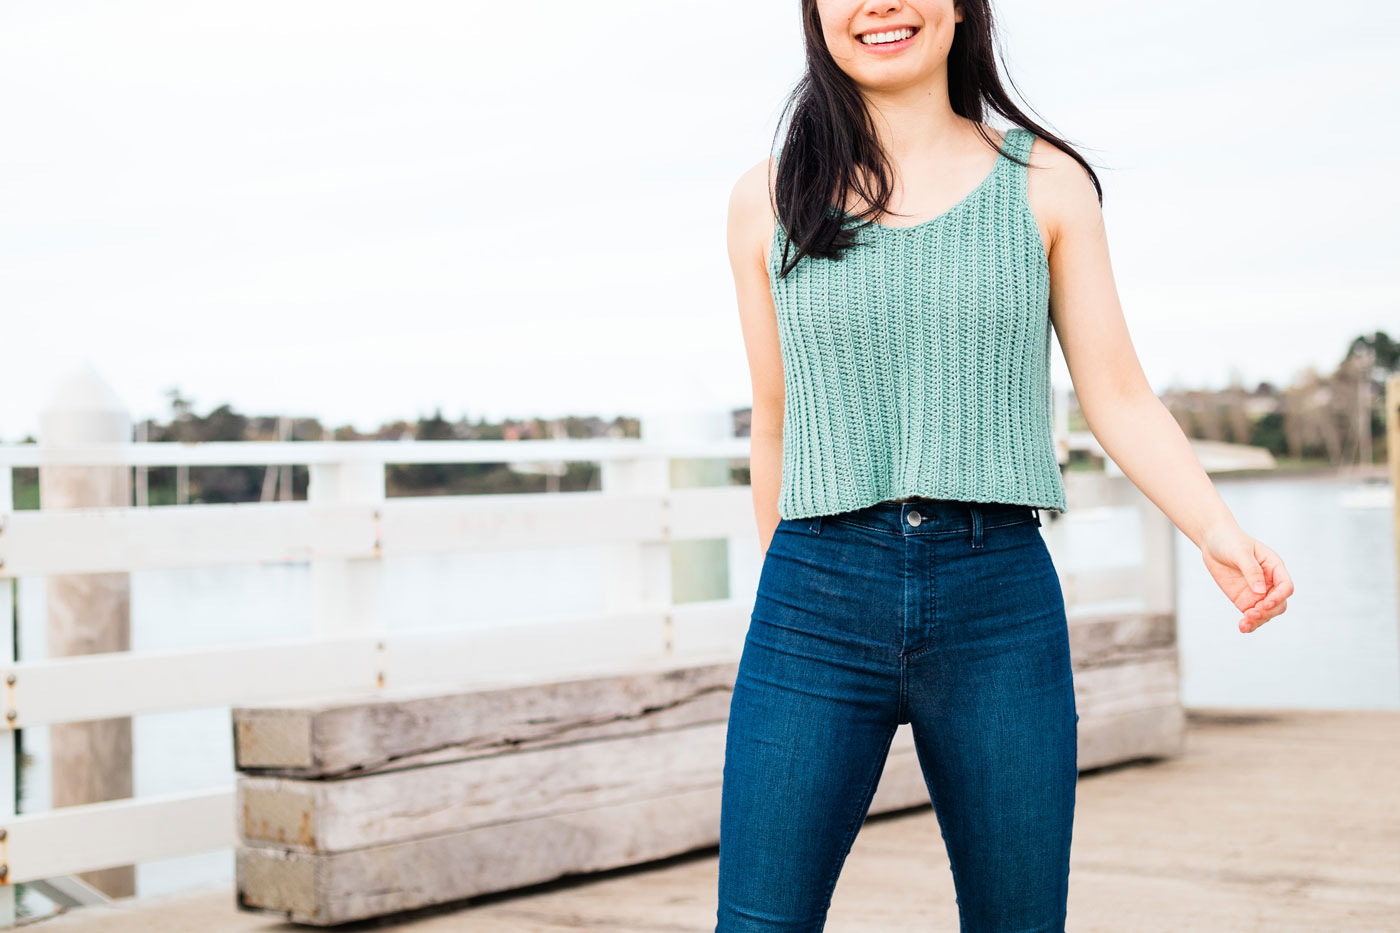
A great example of this is the Sagebrush Tank Top. It’s a simple pattern to follow, but since it has a scoop neck and curved armhole shaping, I had to re-crochet the sample four times to get the shaping right. On top of that, I crocheted the shaping portions for all 7 sizes before releasing the pattern to make sure that I maintained the same curve shape across the different sizes!
Shaping gets even more complicated if you use a complicated stitch with a large stitch repeat. A simple stitch and row repeat makes it easier to crochet to precise measurements.
For example, say you’ve figured out that you need exactly 42 stitches for your project. If you’re using a stitch that follows a 5 stitch repeat, you can only add stitches in multiples of 5. The closest numbers to 42 would be 40 or 45 – that means you either have to make your pattern slightly smaller or larger than you want.
As you get more confident with designing, feel free to branch out and try new techniques. But for your first design, be kind to yourself and save yourself a lot of frustration by picking a basic silhouette and a simple stitch. This is just your starting point 🙂
2. Use an existing garment as a guide
A common question is, ‘How do I know what size I should make my crochet garment?’
Yes, it’s important to measure yourself (learn more about finding your measurements) but another easy way to get started is to base your measurements on something you already own.
Grab your favourite sweater. It could be one you’ve crocheted or store-bought. Think about all the things you like about it.
Is it the colour? The stitch texture? Neckline? Maybe it’s the body length or the sleeves hit you perfectly at the wrist? Do you like the fit of it? How much ease does it have?
Take note of everything you like about it and try to incorporate a few of your favourite elements into your own design.
Measure the garment at all the key points (bust, sleeves, armhole length etc.) and use these measurements as a starting point for your first design.
Also, when you’re crocheting your design, you can compare it to your existing garment. Lay the existing garment on a flat surface and place your project over the top. It doesn’t need to be a perfect fit, but if it’s a lot smaller or larger, you probably need to make adjustments.
If your project and existing garment are roughly a similar size, then you’re on track to designing something that will fit!
3. Draw a Sketch + Choose Key Design Elements
Whenever I start a project I always like to draw a sketch of my idea. Again, make sure to incorporate all the key design elements such as neckline, body silhouette, sleeve shape, length etc.
Your sketch helps you to visualise your design and refine it before starting to crochet. This process also allows you to think through how you will create your garment and look for any potential issues in the design before crocheting. (To learn more about troubleshooting your crochet pattern with the Design Process Checklist PDF).
Now you don’t have to draw a design, but I highly recommend it! It’s so helpful to get the ideas you have in your head down on paper.
Drawing sketches for your own designs also makes great practice for a professional crochet designer! (Curious about earning money with crochet design? Click here to learn more)
If you want to work with yarn brands for sponsorships or crochet magazines for design commissions, a sketch is necessary for a design submission. Your sketches don’t need to be fashion-book level worthy, just make sure they highlight the key design elements and are easy to read.
And if your sketching skills aren’t the greatest, don’t worry! For extra help, you can find design templates on Etsy (search for ‘Flat fashion sketches’) and edit them in Procreate or print them off and adjust them to match your ideas.
4. Crochet a Swatch + Pick Your Construction
Swatching before you start your design is crucial to saving time, effort and yarn! I know I always talk about design preparation, but you can seriously solve 90% of any potential issues in the planning stage.
If there is one thing you should remember from this blog post, it is that - your swatch dictates your design.
Your swatch determines how many stitches and rows you need, the construction, the drape, and how easy or difficult it will be to create shaping or grade the pattern.
Once you’ve picked your favourite swatch, analyse the stitch pattern and how it’s constructed.
Is the stitch worked widthways, lengthways or both? Can both sides of the stitch be used as the right side, or is there only one right side? Is the stitch easy to increase or decrease?
Your swatch will determine which way you work and how you can construct your garment. Make sure you understand how the stitch works before you start crocheting your design.
5. Foundation Chain
Another super important tip is that you can’t alter your foundation chain!
Once you’ve crocheted your foundation chain, you can’t make any more adjustments to it. So, if you want to make your garment larger or smaller, the only way to fix your work is to undo it all and start again 🙁
This is why it’s essential to crochet a gauge swatch first and to crochet your project with the same tension and gauge as your swatch.
If you’re having issues with your stitch count and you don’t want to undo your project, there is one way to get around this. You can crochet along the raw edge or add ribbing to extend a portion.
However, this method will add an extra panel/section to your garment and it only works if you want to make your garment wider or longer. If your project is too big, you’ll have to frog it and start again.
6. Have fun!
Lastly and most importantly, remember to have fun! Crochet designing is all about experimenting and discovering new stitches, yarns and types of construction in order to create garments that you love 🙂
It’s ok to drop stitches, undo your projects, leave a design frustrated and return to it after you’ve gained more experience. Designing is a journey, so here’s a big pat on the back for getting started!
The best way to improve your designing skills to take note of your successes and mistakes (Grab the Pattern Notes PDF to help you). Analysing what went wrong or right will prevent you from making the same mistake twice, so you’ll have more time for the fun stuff!
And if you want to take a shortcut to crochet designing, check out my Modern Crochet Design course where I reveal all of my tips and tricks for designing and grading a pattern!
Pin me for later!
Leave a Reply