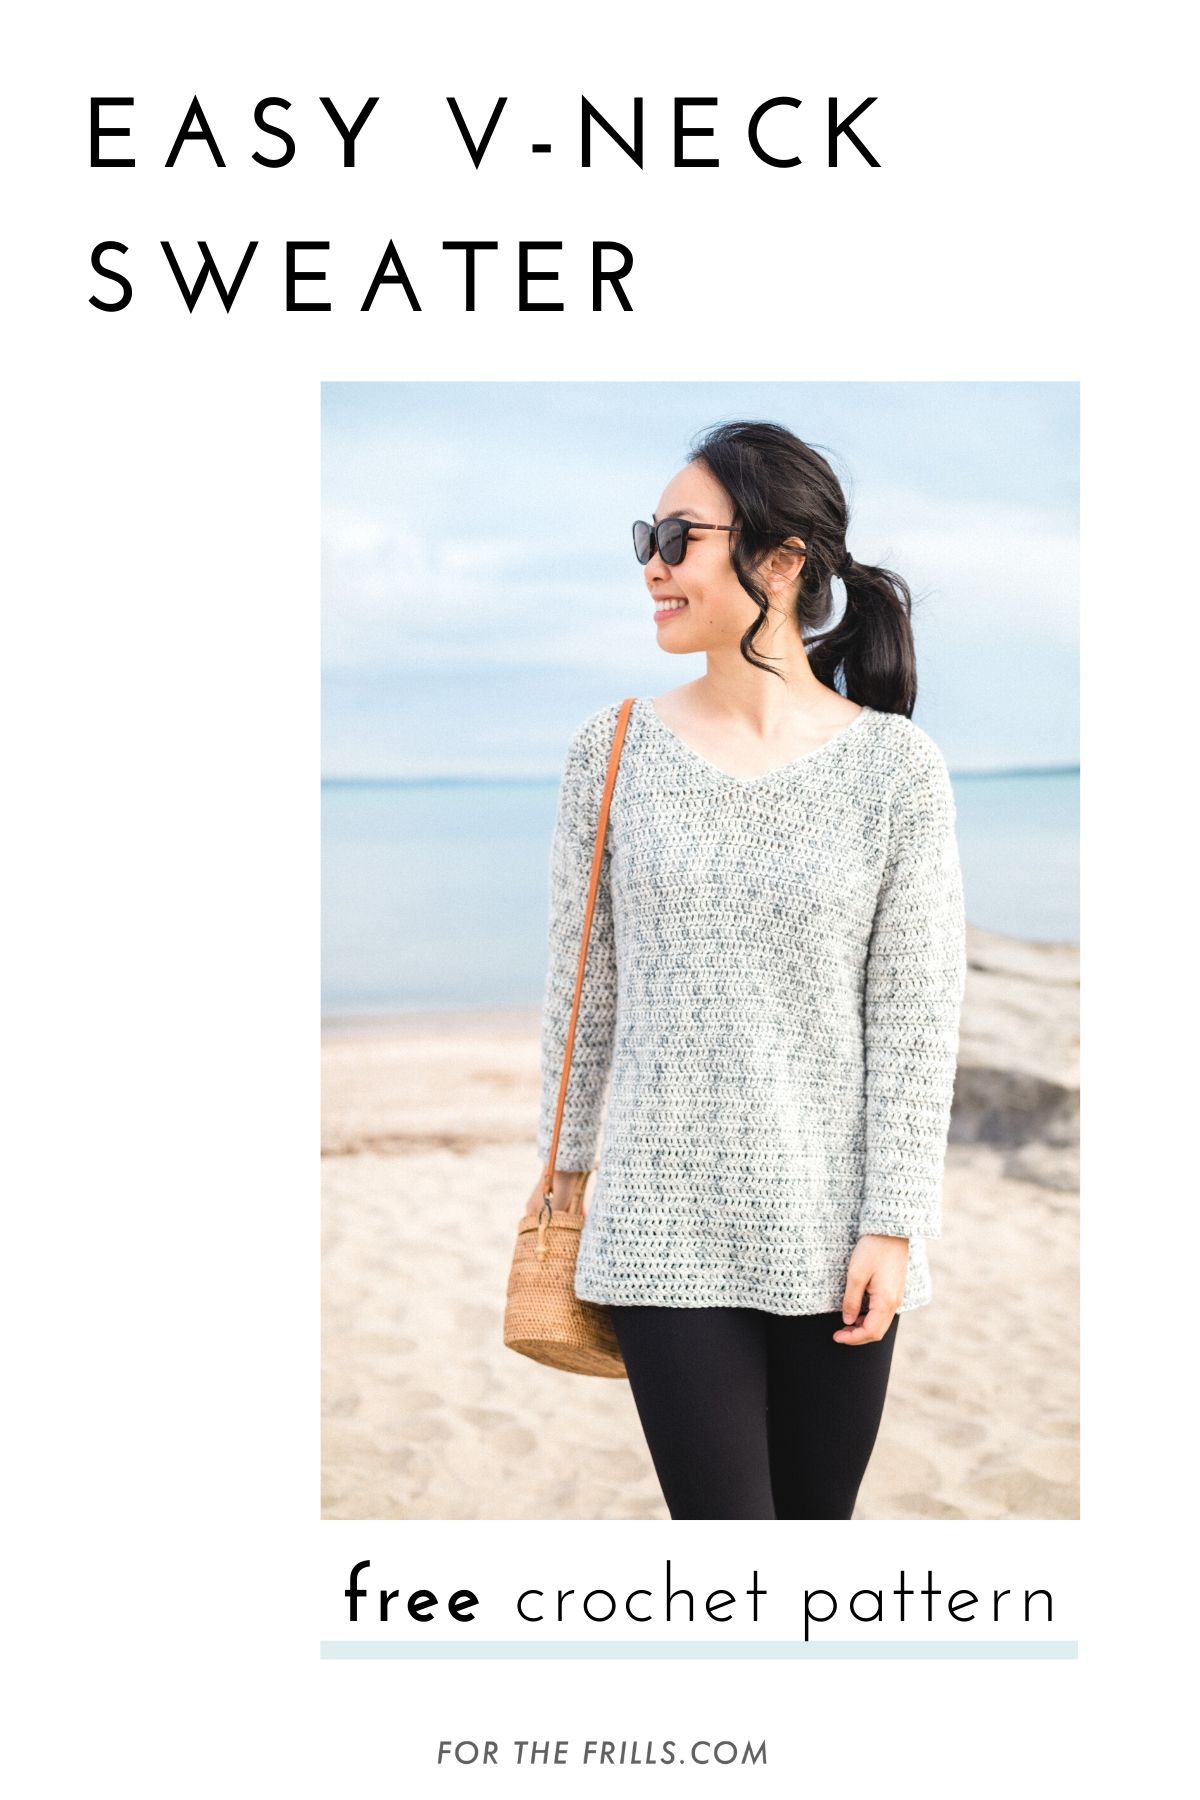
Looking for summer crochet inspiration? The Ocean Breeze Sweater is the perfect everyday crochet pullover!
This free crochet v-neck sweater pattern is accompanied by a video tutorial.
This post may contain affiliate links, view our disclosure policy for details.
Thank you to WeCrochet for sponsoring this free crochet sweater pattern! As always all thoughts and opinions are my own 🙂
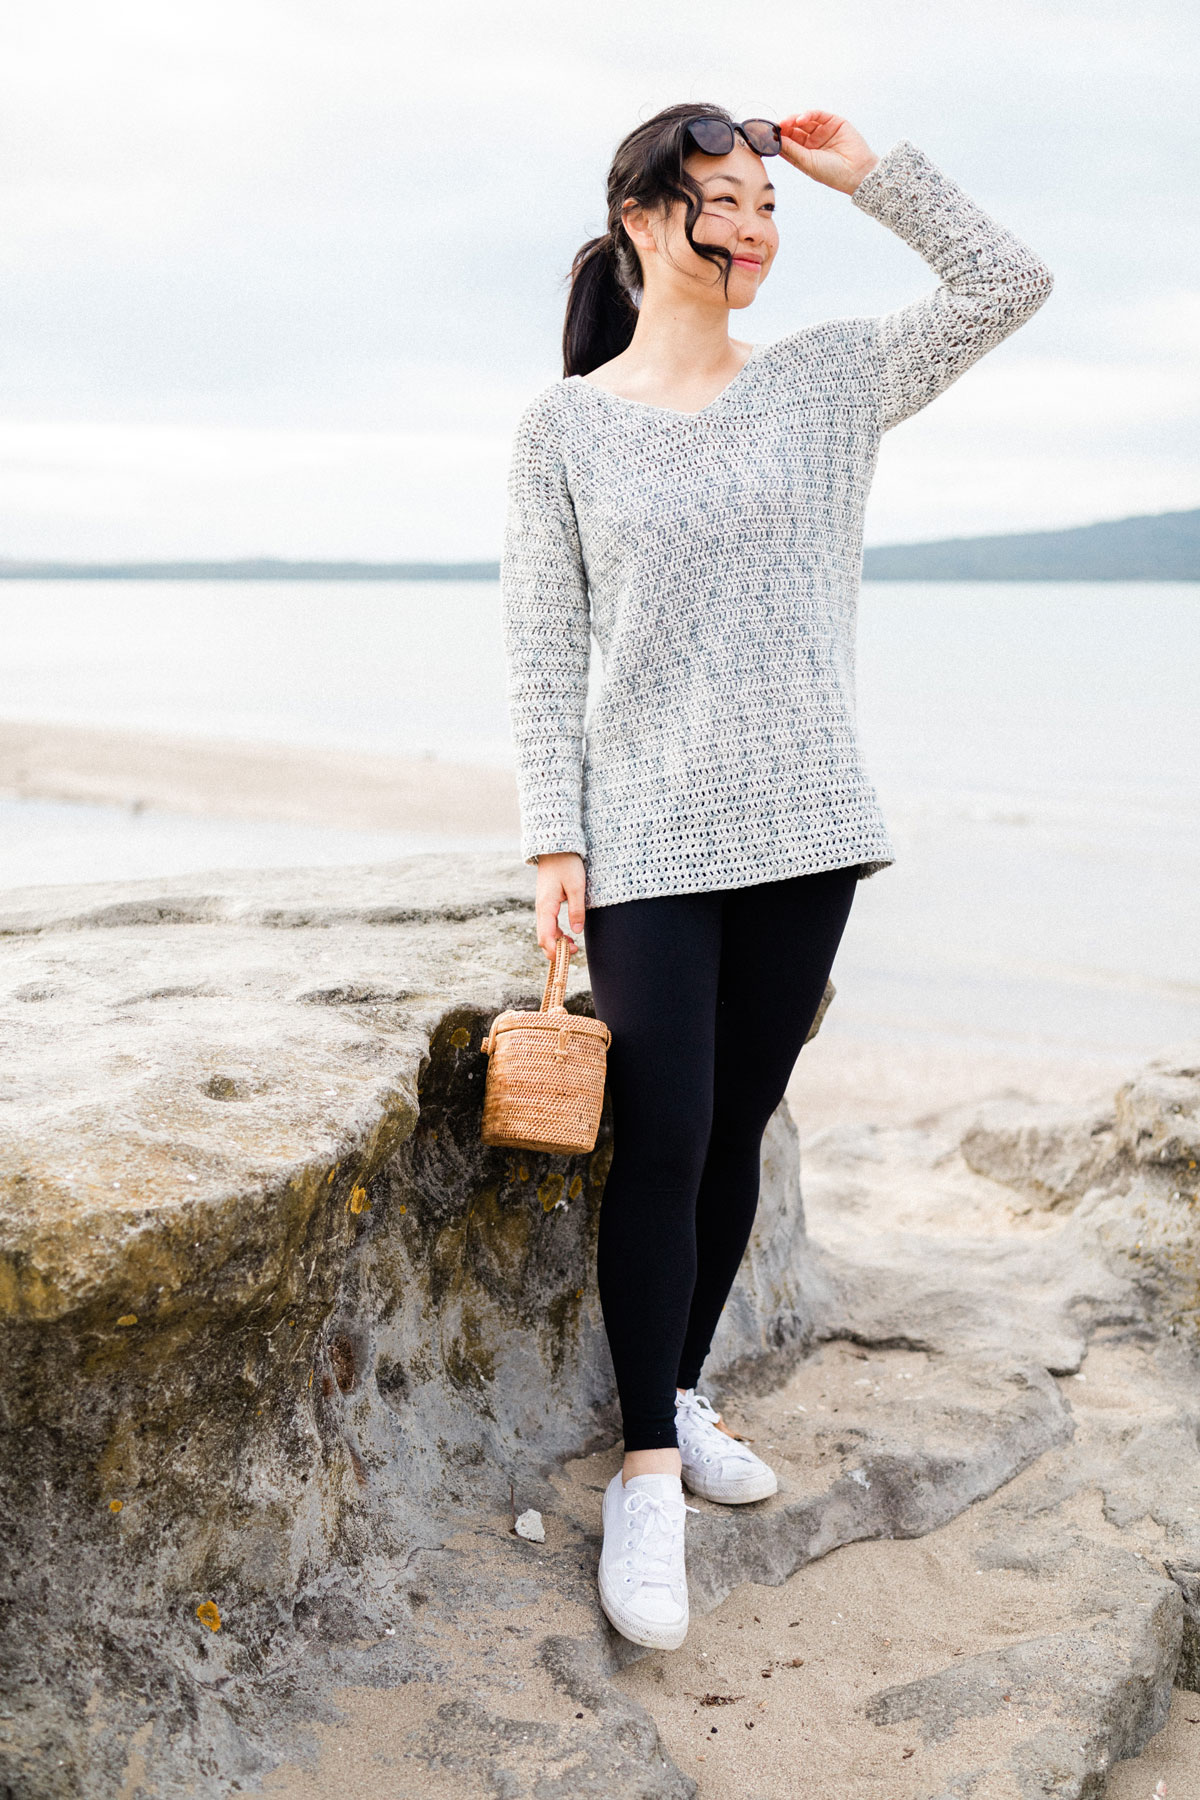
Whether you’re looking for a summer tunic or a fun cropped sweater, the Ocean Breeze Sweater fits the bill. Using only double crochet stitches in a super soft cotton-acrylic blend, this casual v-neck pullover drapes wonderfully over the body to create a light and airy summer sweater!
The construction of the Ocean Breeze Sweater is super simple! The body panels (front and back) are created from the shoulders down so you can customise it to any length you want.
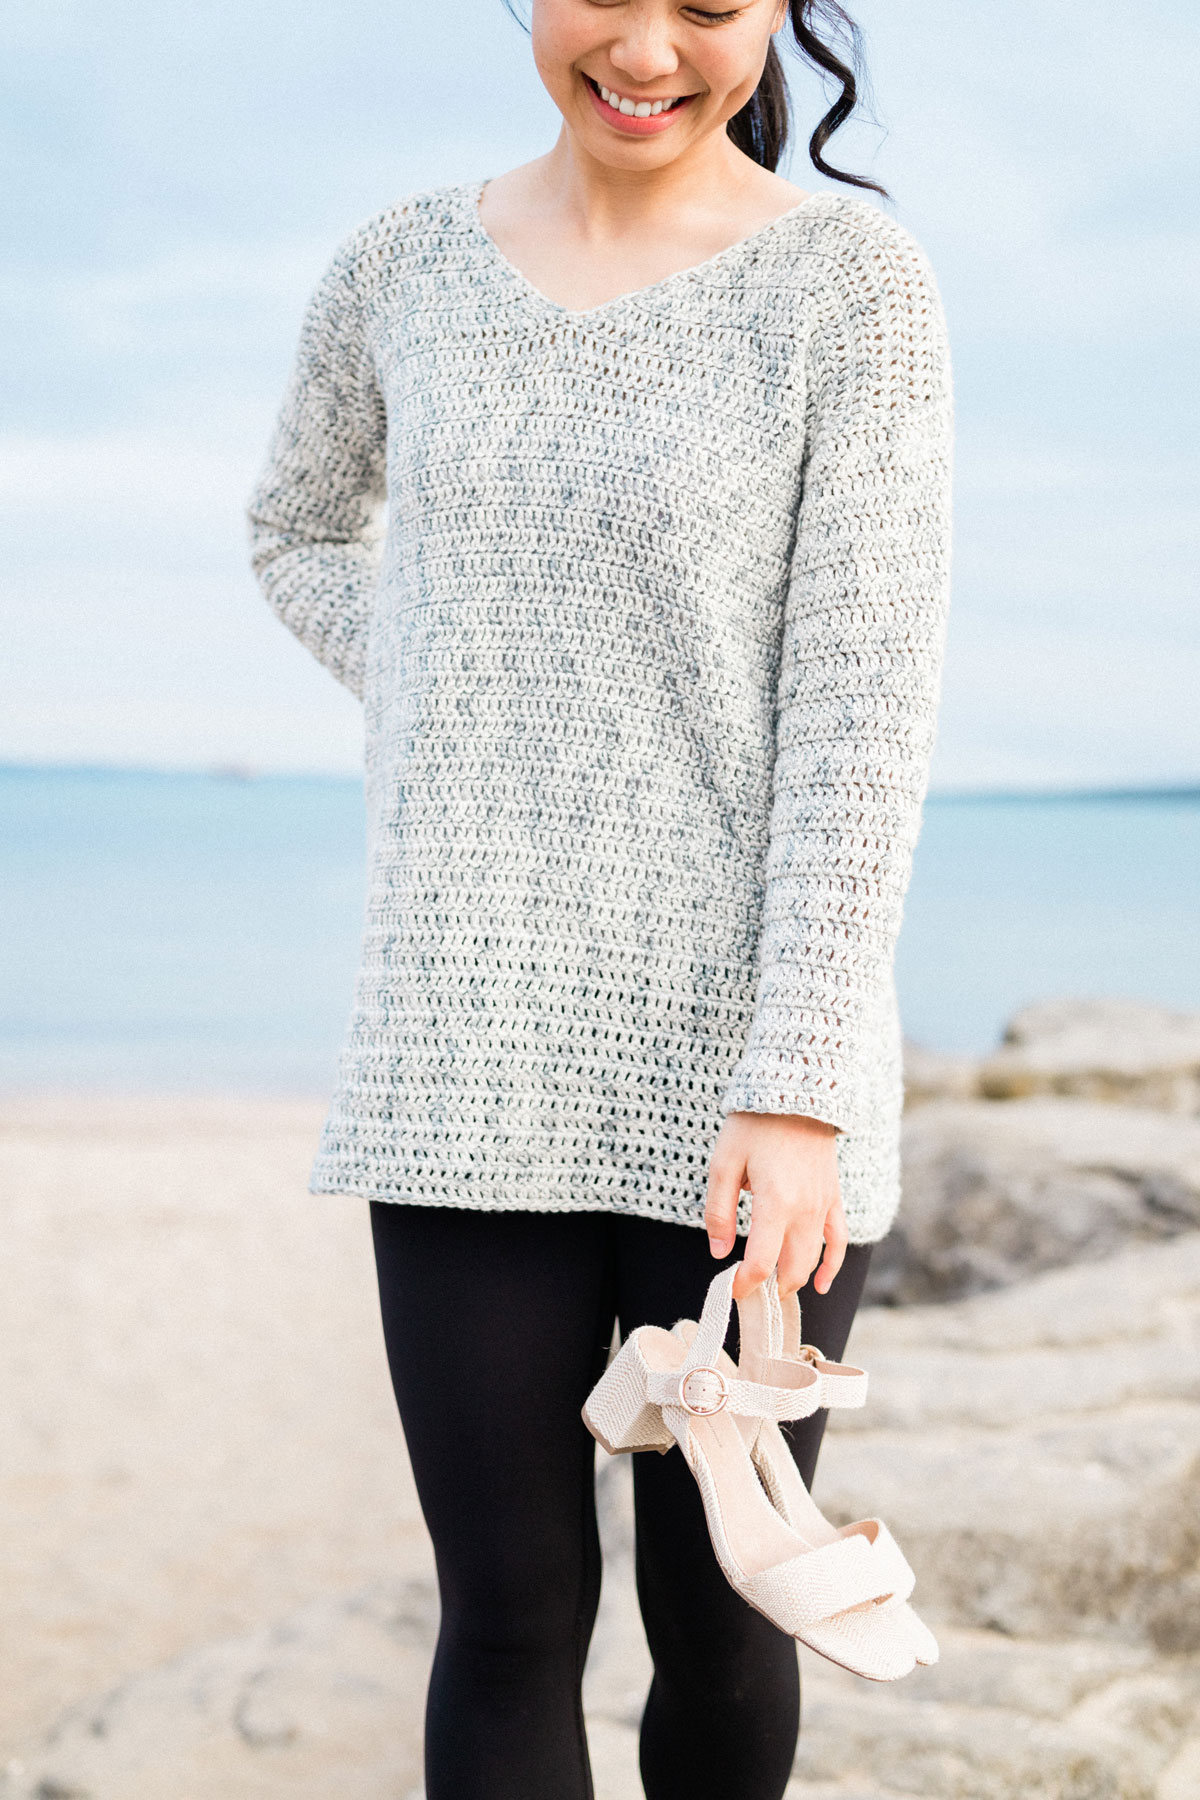
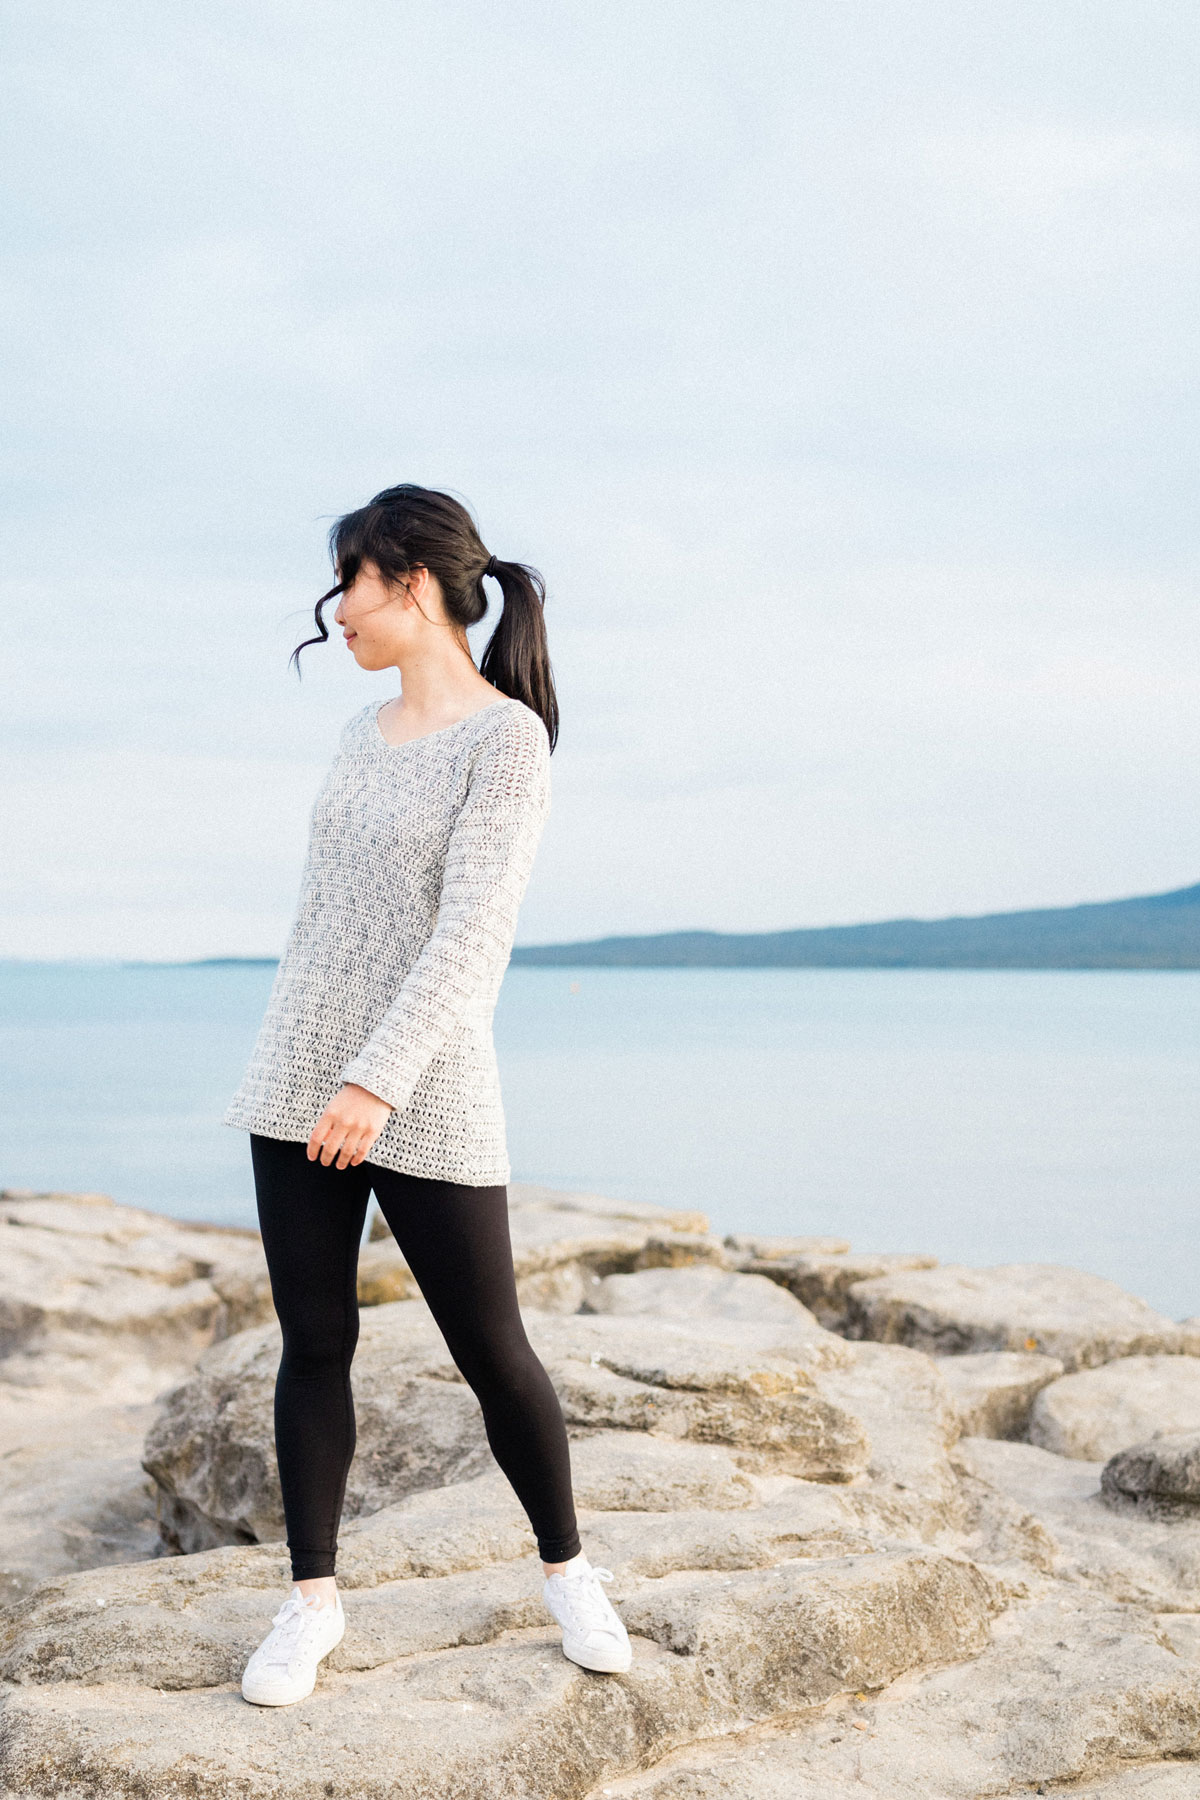
This makes the Ocean Breeze Sweater pattern wonderful for any season! Crochet a long pullover to wear over leggings in the fall, as a dress in spring or even a beach cover-up in the summer!
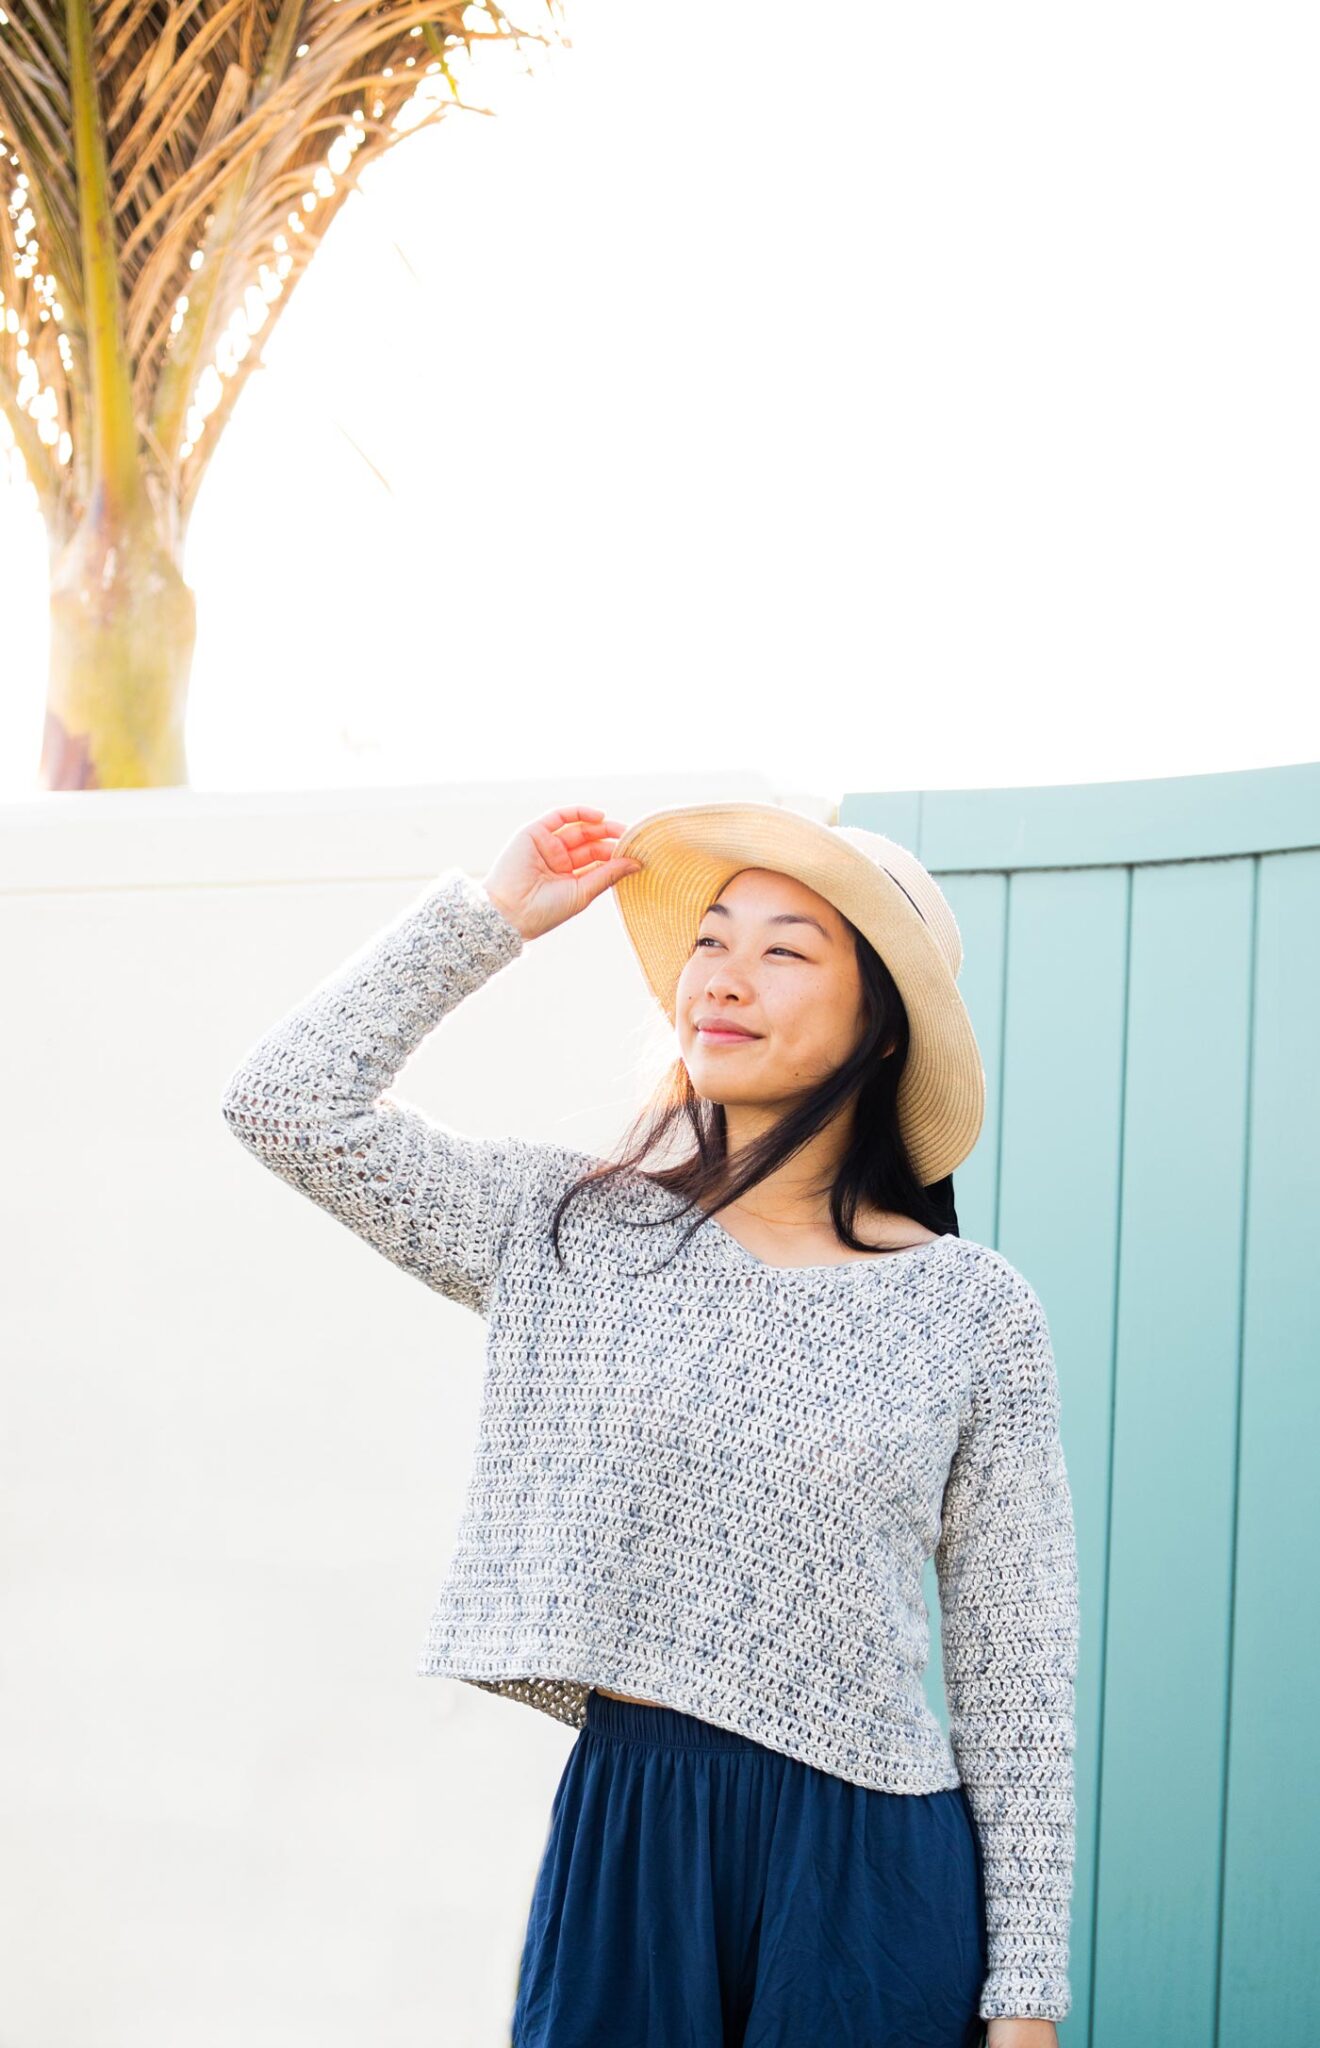
The cropped sweater version pairs effortlessly with high waisted jeans, shorts or over a swimsuit.
The v-neck is created by joining together 2 shoulder pieces together, so all of the shaping is done using ONLY double crochets. So you'll have a very flattering v-neck that isn’t too low or too wide – just right 🙂 The sleeves are worked in the round from the wrist up, so there’s less sewing to do at the end!
DESIGN INSPIRATION
The Ocean Breeze Sweater is the sister pattern to the Sea Breeze Tank and the Forest Breeze Tee. Last year I shared the Sea Breeze Tank Top on my blog and since then it has been one of my most popular patterns!
The 'Breeze' series are all cotton v-neck garments that are easy to crochet and designed for warm weather!
I’ve gotten a bunch of requests to make a v-neck sweater version so here it is! I couldn’t decide on the length so I decided to make 2 different versions but you can make this sweater to any length you want. Which one do you prefer? Cropped or full length? 🙂
YARN
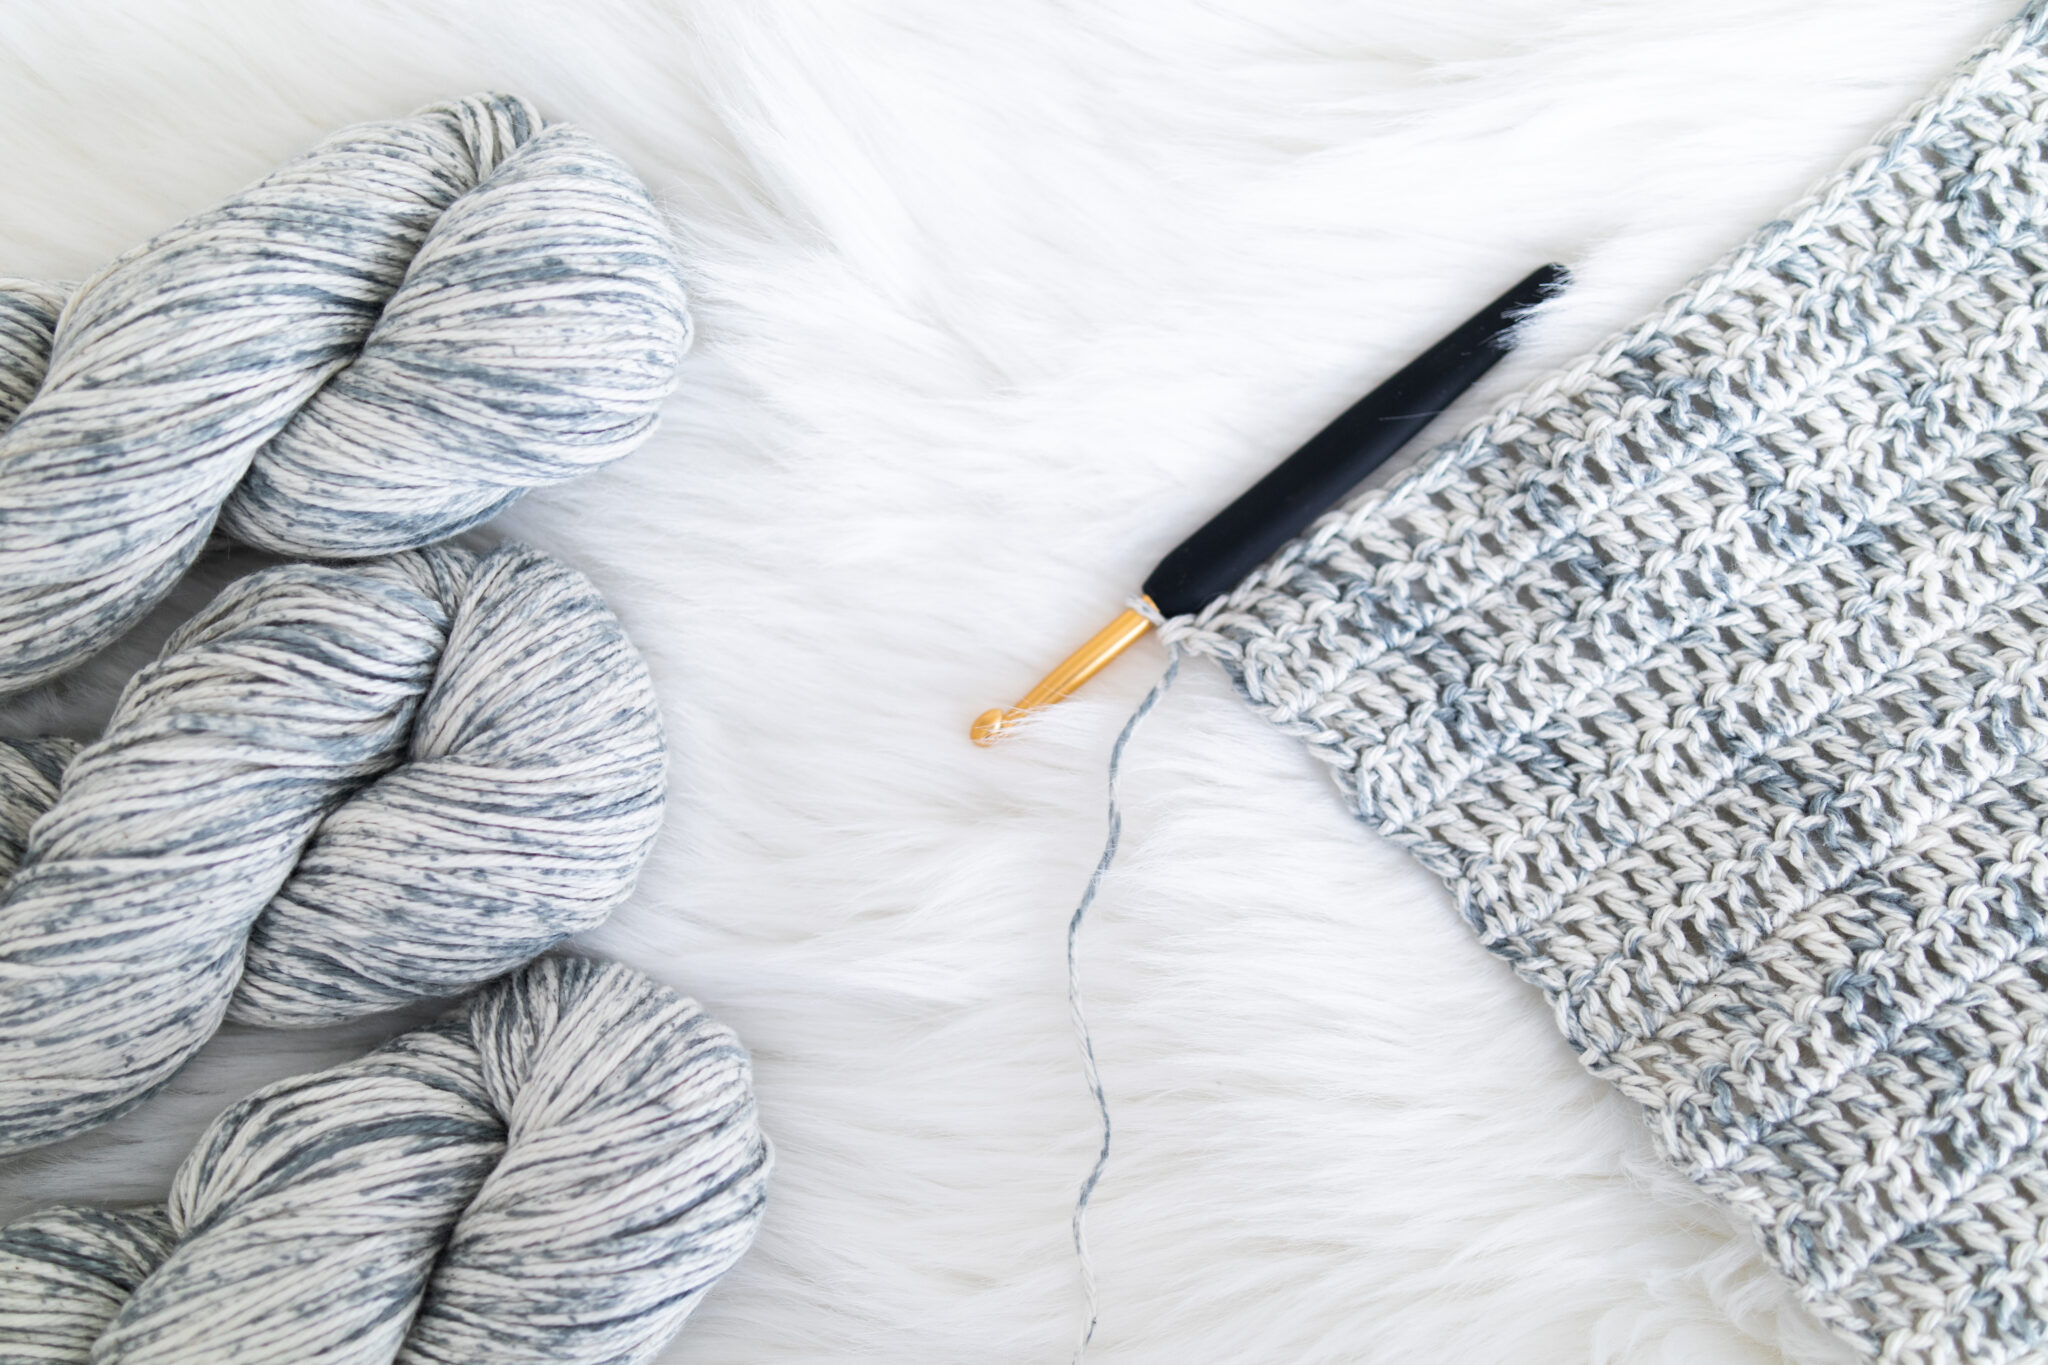
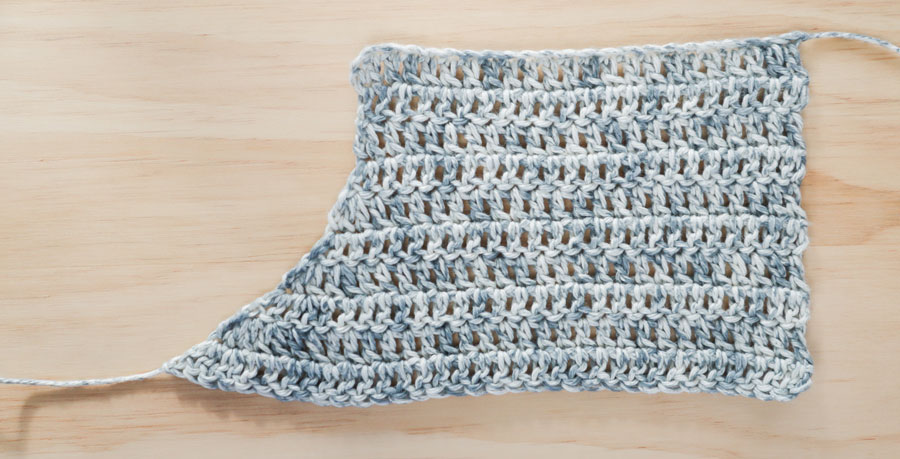
Comfy Color Mist from WeCrochet is a crocheter’s dream! This pima cotton and acrylic blend is so soft and downy with incredible drape. Unlike a normal cotton yarns, it isn’t stiff or brittle feeling and even though it isn’t tightly spun, it doesn’t split (miracle!).
The Comfy Color Mist range features a range of pastel and bright shades with a cream base and a sprinkle of colour.I used the shade ‘Tidewater’ which has light grey-blue speckles over the ivory base yarn that creates gorgeous texture when worked up. Speckled yarns add such a wonderful dimension to crochet items and the simple double crochet stitch really lets the yarn shine!
The Comfy Color Mist range comes in 100g hanks but you can also get Comfy Worsted Yarn, which is the exact same yarn but in over 30 different solid colours. The solid colours come in 50g skeins, so make sure to order the right amount for your size. You can also find a bare version in 100g hanks if you’d like to dye your very own colourway!
If you’re planning to make this sweater for colder weather, Brava yarn is a great affordable acrylic option or Swish is a cosy 100% merino yarn.
More free summer crochet patterns here!
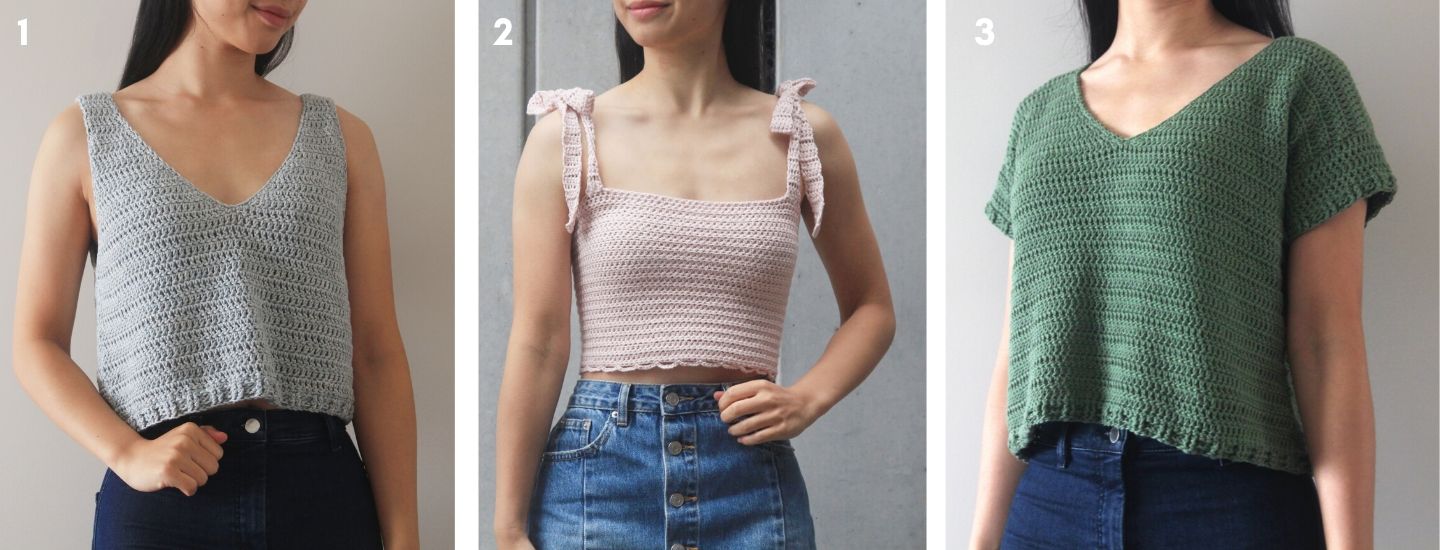
1. Sea Breeze Tank Top / 2. Leila Tie Strap Crop Top / 3. Forest Breeze Tee
Pin me for later!
CROCHET V-NECK SWEATER VIDEO TUTORIAL
Add to your Ravelry queue here!
Ad-free, printable version here!
*Sample is a size small shown on a 5’3” model with a 32” bust.
*The sizing guide follows size XS(S, M, L, XL, 2XL, 3XL). E.g. “Ch 62(68, 74, 82, 88, 94, 102) means Ch 62 for XS, Ch 68 for Small, Ch 74 for Medium, Ch 82 for Large, Ch 88 for XL, Ch 94 for 2XL and Ch 102 for 3XL.” If there is only one number, it applies to all sizes.
*"DC 10" means DC into the next 10 stitches.
*"2 DC" means place 2 DC into the same stitch.
*The turning chain ch 2 does NOT count as a stitch, unless otherwise noted.
*Total stitches are indicated between < >.
*This pattern uses US crochet terms.
*Body Panels are worked from the shoulders down so you can easily alter the length of your sweater.
*The V-neck of the Front Panel is worked in 2 separate panels that are joined together at the point of the V to form 1 Front Panel.
*Sleeves are worked in the round from the cuff up.
*All pieces – front, back, 2 sleeves - are seamed together and then the V-neck is finished off with a SC border.
LEVEL: Easy
MATERIALS
Yarn – We Crochet Comfy Color Mist – Aran/Worsted/Medium (4), 200m/100g, 219yds/3.5 oz, 75% Pima Cotton + 25% Acrylic, Tidewater
CROPPED LENGTH: 4(4, 4, 5, 5, 6, 6) skeins approx. 315(355, 400, 435, 485, 520, 560)g
FULL LENGTH: 4(5, 5, 6, 6, 7, 7) skeins approx. 395(445, 495, 540, 600, 640, 690)g
Measurements cm:
To fit Bust: 71(81, 91, 101, 112, 122, 132)
Bust Circumference: 84(92, 102, 112, 122, 132, 142)
Body Panel Width: 42(46, 51, 56, 61, 66, 71)
Cropped Length: 45(48, 48, 48, 50, 50, 50)
Full Length: 62(64, 64, 64, 67, 67, 67)
Sleeve length: 39(39, 41, 41, 42, 42, 43)
Measurements inches:
To fit Bust: 28(32, 36, 40, 44, 48, 52)
Bust Circumference: 33(36, 40, 44, 48, 52, 56)
Body Panel Width: 16.5(18, 20, 22, 24, 26, 28)
Cropped Length: 18(19, 19, 19, 20, 20, 20)
Full Length: 24.5(25.5, 25.5, 25.5, 26.5, 26.5, 26.5)
Sleeve length: 15.5(15.5, 16, 16, 16.5, 16.5, 17)
*If you’re crocheting the long pullover style (i.e. you want the sweater to fall past your hips), when choosing your size your hip measurement should be equal to or less than the bust circumference.
STITCHES & ABBREVIATIONS
Ch = Chain
Sl st = Slip Stitch
SC = Single Crochet
DC = Double Crochet
St(s) = Stitch(es)
Rep = Repeat
GAUGE
10cm/4” square = 14 sts wide x 8 rows tall in Double Crochet
Ocean Breeze V-Neck Pullover Free Crochet Pattern
FRONT BODY PANEL
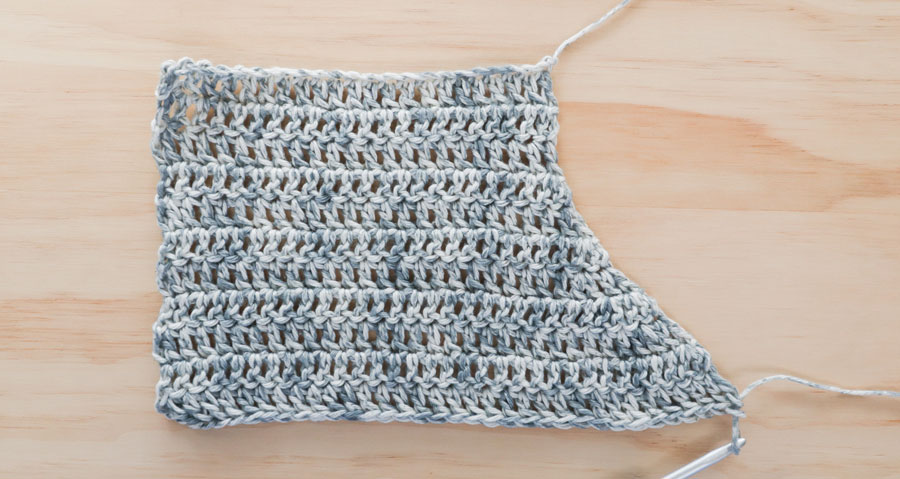
LEFT SHOULDER
FOUNDATION CHAIN: Ch 21(24, 27, 29, 32, 33, 37).
ROW 1: DC into 3rd ch from hook, DC across, turn.
<19(22, 25, 27, 30, 31, 35)>
ROW 2: Ch 2, DC across, turn.
<19(22, 25, 27, 30, 31, 35)>
ROW 3: Ch 2, DC across, turn.
<19(22, 25, 27, 30, 31, 35)>
ROW 4: Ch 2, DC in each st until last st, 2DC in last st, turn.
<20(23, 26, 28, 31, 32, 36)>
ROW 5: Ch 2, 2DC, DC across, turn.
<21(24, 27, 29, 32, 33, 37)>
ROW 6: Ch 2, DC in each st until last st, 2DC in last st, turn.
<22(25, 28, 30, 33, 34, 38)>
ROW 7: Ch 2, 2DC, 2DC, DC across, turn.
<24(27, 30, 32, 35, 36, 40)>
ROW 8: Ch 2, DC in each st until last 2 sts, 2DC, 2DC in last st, turn.
<26(29, 32, 34, 37, 38, 42)>
ROW 9: Ch 2, 2DC, 2DC, DC across, turn.
<28(31, 34, 36, 39, 40, 44)>
ROW 10: Ch 2, DC in each st until last st, 2DC in last st, turn.
<29(32, 35, 37, 40, 41, 45)>
Sizes XS, S, M - Fasten off.
Proceed to ‘RIGHT SHOULDER’ instructions.
Sizes L, XL
ROW 11: Ch 2, 2DC, DC across, turn.
<(38, 41)>
ROW 12: Ch 2, DC in each st until last st, 2DC in last st, turn.
<(39, 42)>
Fasten off. Proceed to ‘RIGHT SHOULDER’ instructions.
Sizes 2XL, 3XL
ROW 11: Ch 2, 2DC, 2DC, DC across, turn.
<(43, 47)>
ROW 12: Ch 2, DC in each st until last 2 sts, 2DC, 2DC in last st, turn.
<(45, 49)>
Fasten off. Proceed to ‘RIGHT SHOULDER’ instructions.
RIGHT SHOULDER
FOUNDATION CHAIN: Ch 21(24, 27, 29, 32, 33, 37).
ROW 1: DC into 3rd ch from hook, DC across, turn.
<19(22, 25, 27, 30, 31, 35)>
ROW 2: Ch 2, DC in each st across, turn.
<19(22, 25, 27, 30, 31, 35)>
ROW 3: Ch 2, DC across, turn.
<19(22, 25, 27, 30, 31, 35)>
ROW 4: Ch 2, 2DC, DC across, turn.
<20(23, 26, 28, 31, 32, 36)>
ROW 5: Ch 2, DC in each st until last st, 2DC in last st, turn.
<21(24, 27, 29, 32, 33, 37)>
ROW 6: Ch 2, 2DC, DC across, turn.
<22(25, 28, 30, 33, 34, 38)>
ROW 7: Ch 2, DC in each st until last 2 sts, 2DC, 2DC in last st, turn.
<24(27, 30, 32, 35, 36, 40)>
ROW 8: Ch 2, 2DC, 2DC, DC across, turn.
<26(29, 32, 34, 37, 38, 42)>
ROW 9: Ch 2, DC in each st until last 2 sts, 2DC, 2DC in last st, turn.
<28(31, 34, 36, 39, 40, 44)>
ROW 10: Ch 2, 2DC, DC across, turn.
<29(32, 35, 37, 40, 41, 45)>
Sizes XS, S, M - Do not fasten off! Proceed directly to ‘Joining Row’ instructions.
Sizes L, XL
ROW 11: Ch 2, DC in each st until last st, 2DC in last st, turn.
<(38, 41)>
ROW 12: Ch 2, 2DC, DC across, turn.
<(39, 42)>
Do not fasten off! Proceed directly to ‘Joining Row’ instructions.
Sizes 2XL, 3XL
ROW 11: Ch 2, DC in each st until last 2 sts, 2DC, 2DC in last st, turn.
<(43, 47)>
ROW 12: Ch 2, 2DC, 2DC, DC across, turn.
<(45, 49)>
Do not fasten off! Proceed directly to ‘Joining Row’ instructions.
JOINING ROW
JOINING ROW: Ch 2, DC 28(31, 34, 38, 41, 44, 48), 2DC in last st of 'RIGHT SHOULDER'.
<30(33, 36, 40, 43, 46, 50)>
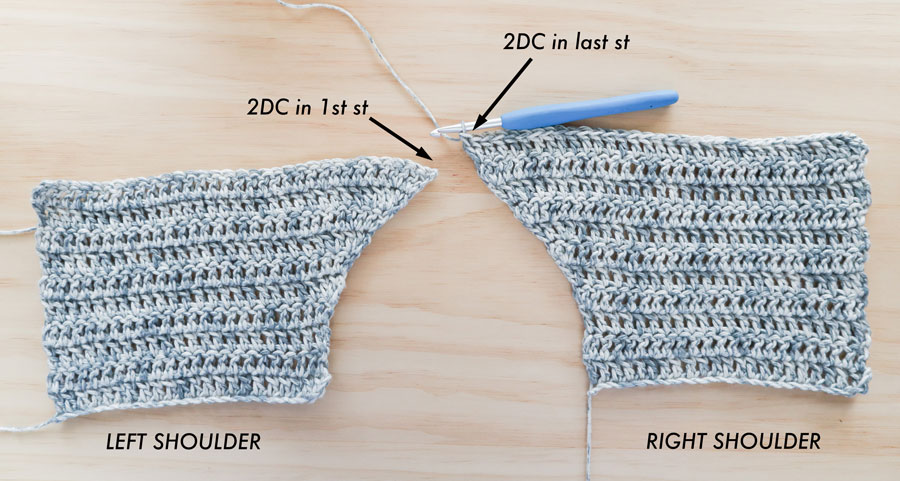
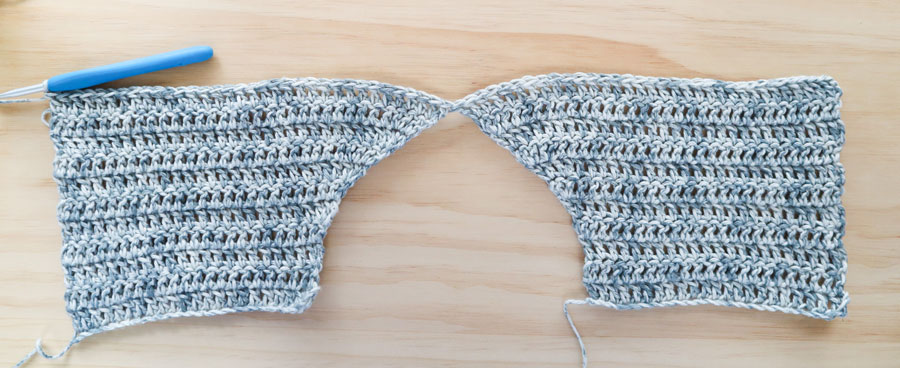
Place the ‘LEFT SHOULDER’ piece (with the right side facing up) to the left of the ‘RIGHT SHOULDER’ piece.
2DC in first st of ‘LEFT SHOULDER’, DC across, turn.
<60(66, 72, 80, 86, 92, 100)>
FRONT BODY PANEL
BODY ROW 1: Ch 2, DC across, turn.
<60(66, 72, 80, 86, 92, 100)>
CROPPED LENGTH: Repeat BODY ROW 1 until ROW 25(27, 27, 27, 29, 29, 29).
<Total Rows: 36(38, 38, 38, 40, 40, 40)>
FULL LENGTH: Repeat BODY ROW 1 until ROW 39(41, 41, 41, 43, 43, 43).
<Total Rows: 50(52, 52, 52, 54, 54, 54)>
Or repeat BODY ROW 1 until you reach your desired length.
Fasten off.
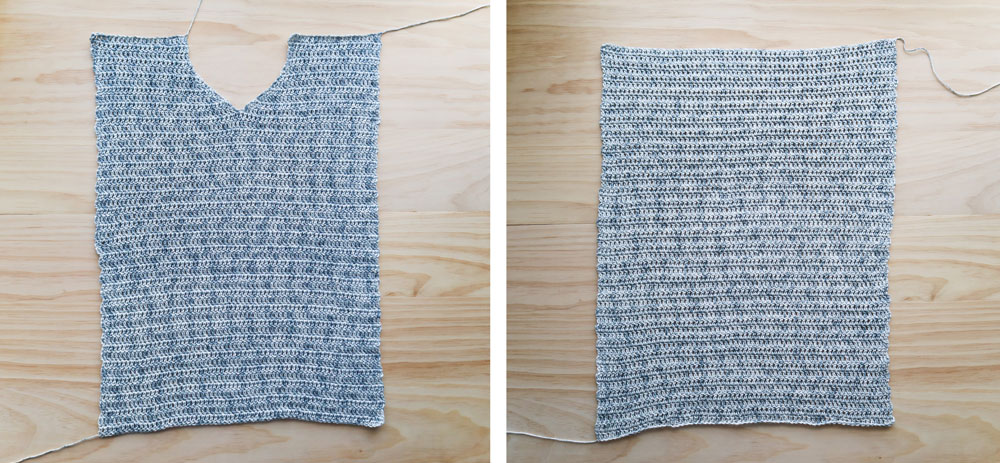
BACK BODY PANEL
FOUNDATION CHAIN: Ch 62(68, 74, 82, 88, 94, 102).
ROW 1: DC into 3rd ch from hook, DC across, turn.
<60(66, 72, 80, 86, 92, 100)>
ROW 2: Ch 2, DC across, turn.
<60(66, 72, 80, 86, 92, 100)>
Repeat ROW 2 until your BACK PANEL measures the same length/has the same number of rows as the FRONT PANEL.
CROPPED LENGTH: <Total Rows: 36(38, 38, 38, 40, 40, 40)>
FULL LENGTH: <Total Rows: 50(52, 52, 52, 54, 54, 54)>
Fasten off.
SLEEVES
FOUNDATION CHAIN: Ch 27(29, 32, 35, 35, 38, 38), sl st to join. Make sure that your ring isn’t twisted!
ROUND 1: Ch 2, DC in each ch around, sl st to join, turn.
<27(29, 32, 35, 35, 38, 38)>
ROUND 2: Ch 2, DC around, sl st to join, turn.
<27(29, 32, 35, 35, 38, 38)>
ROUND 3: Ch 2, 2DC, DC around, sl st to join, turn.
<28(30, 33, 36, 36, 39, 39)>
ROUND 4: Ch 2, DC around, sl st to join, turn.
<28(30, 33, 36, 36, 39, 39)>
ROUND 5: Ch 2, DC around until last st, 2DC in last st, sl st to join, turn.
<29(31, 34, 37, 37, 40, 40)>
Repeat ROUNDS 2-5 three more times until the end of ROUND 17.
ROUND 6: Ch 2, DC around, sl st to join, turn.
<29(31, 34, 37, 37, 40, 40)>
ROUND 7: Ch 2, 2DC, DC around, sl st to join, turn.
<30(32, 35, 38, 38, 41, 41)>
ROUND 8: Ch 2, DC around, sl st to join, turn.
<30(32, 35, 38, 38, 41, 41)>
ROUND 9: Ch 2, DC around until last st, 2DC in last st, sl st to join, turn.
<31(33, 36, 39, 39, 42, 42)>
ROUND 10: Ch 2, DC around, sl st to join, turn.
<31(33, 36, 39, 39, 42, 42)>
ROUND 11: Ch 2, 2DC, DC around, sl st to join, turn.
<32(34, 37, 40, 40, 43, 43)>
ROUND 12: Ch 2, DC around, sl st to join, turn.
<32(34, 37, 40, 40, 43, 43)>
ROUND 13: Ch 2, DC around until last st, 2DC in last st, sl st to join, turn.
<33(35, 38, 41, 41, 44, 44)>
ROUND 14: Ch 2, DC around, sl st to join, turn.
<33(35, 38, 41, 41, 44, 44)>
ROUND 15: Ch 2, 2DC, DC around, sl st to join, turn.
<34(36, 39, 42, 42, 45, 45)>
ROUND 16: Ch 2, DC around, sl st to join, turn.
<34(36, 39, 42, 42, 45, 45)>
ROUND 17: Ch 2, DC around until last st, 2DC in last st, sl st to join, turn.
<35(37, 40, 43, 43, 46, 46)>
Repeat ROUND 3 until sleeve measures 39(39, 41, 41, 42, 42, 43) cm / 15.5(15.5, 16, 16, 16.5, 16.5, 17)” long.
Fasten off.
Repeat for 2nd sleeve.
*Make sure you have the same number of rounds in each sleeve.

ASSEMBLY
Whip stitch the shoulder seams together.
Whip stitch up the sides of the body, making sure to leave a gap for the sleeve armholes.
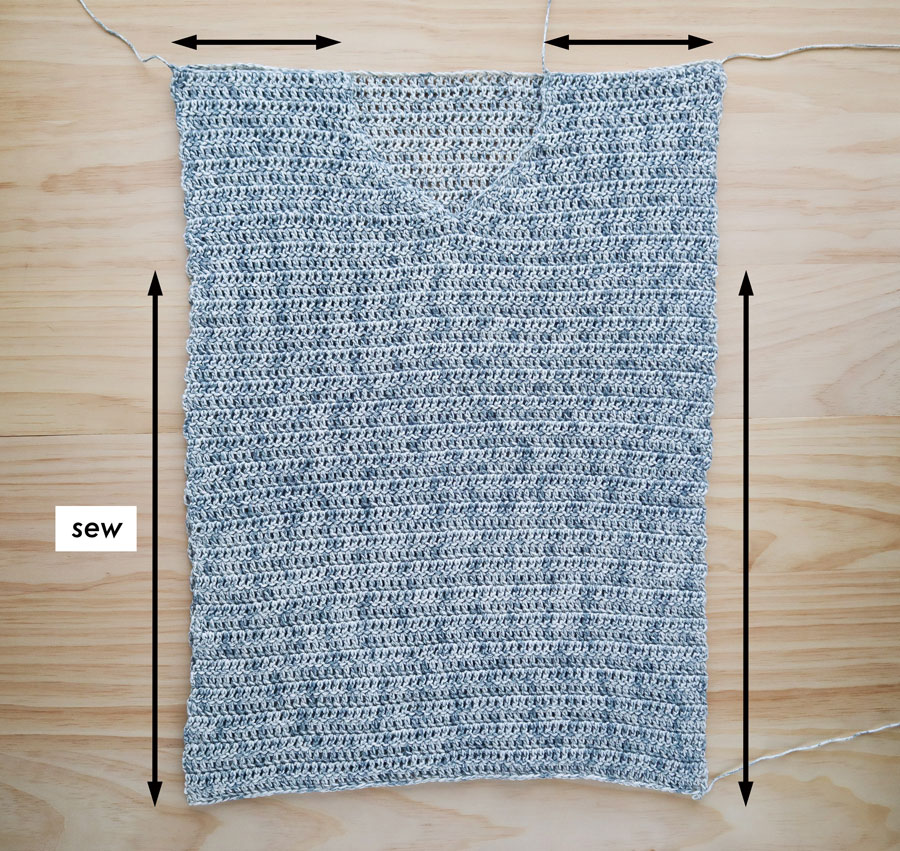
Whip stitch top of sleeves to the body.

FINISHING
Insert hook along neckline. Secure yarn and pull through a loop.
Ch 1, SC evenly along the edge of the V-neck, making sure that your stitches are not too tight.
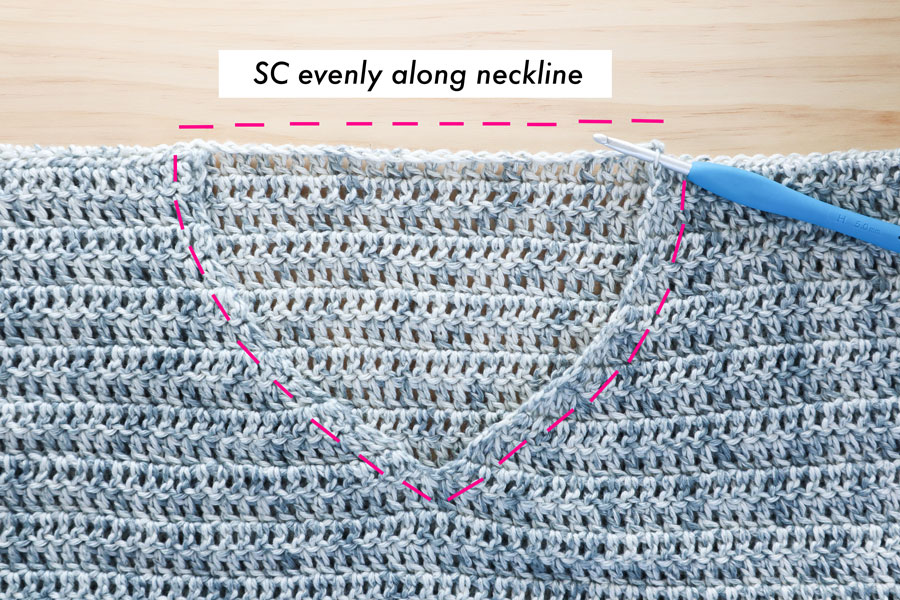
*The exact number of stitches isn't important, rather crochet evenly along the neckline.
If your neckline ruffles, you have too many stitches and if your neckline puckers you have too few stitches.
Sl st into first SC to join. Fasten off.
Weave in all of your ends.
Voilà! You’ve finished your Ocean Breeze Sweater 🙂
Thank you!! I have been using your forest breeze t shirt pattern and adding sleeves to make a sweater. I’m so happy with this full pattern , thanks so much!
Hi Sara, I'm so glad you enjoyed the Forest Breeze Tee and now the full sweater version too 🙂 Grace
Hi! Are the yardage measurements for the full or cropped length?
Hi Chloe, oh I just realised I missed out the yardage for cropped version! Thanks for letting me know - I've updated the pattern to include yardage for both cropped and full length 🙂
Grace
Hi Grace, what a beautiful sweater. I am here in the UK and cannot get the yarn suggested, is there a yarn you can suggest that is an excellent substitute that would give me the same beautiful drape as the one you used. I am able to get Scheepjes Stone Washed which is similar in it is cotton and acrylic, do you think this would okay, have you used this yarn before? Thank you for taking the time to read my message, I appreciate your help x
Hi Jacqueline, so glad you like the sweater! 🙂 I've never used Scheepjes Stone Washed but I think it's classified as a sport/baby yarn, do you mean Scheepjes Stone Washed XL. Since this pattern calls for an aran/worsted weight yarn, I think Scheepjes Stone Washed XL looks lovely. Just remember to swatch your yarn to see if you can meet the gauge. Grace
Thank you Grace, I do already have a small amount of Scheepjes Stone Washed Xl so I will swatch it first to see if it matches. It really is such a beautiful sweater and I look forward to making it. x
The button to pin this to Pinterest is not working. I have tried several times and it is just not working. Hope you can fix it soon. I love your patterns and though I am working a lot of hours now as a health care worker I hope to be able to get back to some crocheting soon.
Hi Jacqueline, thanks for letting me know! Just wondering what browser you're using? Unfortunately, if you're using Safari, Apple has now blocked the 'pin' button so you can't pin any images unless you're in the Pinterest website! Stay safe and thank you so much for your work 🙂 I hope you can get back to crocheting soon! x
I'm so excited to try making this! Thank you for sharing the pattern!
I love your thought / design process! I was gonna design my own little fall sweater, but I think I’m just going to use yours. I really like it.
Do you think this would translate in Lion Brands Feels Like Butter? It is polyester and much lighter than it is classified in my opinion.
Thanks!
Love the design, esp the method for the V-neck!
I’ll love to make a lighter version using DK yarn (weight3), but I’m so worried about how to form that v-neck. Would you be able to advise?
Hi Ivy,
You might be able to see if you can meet gauge with a slightly larger hook (but that will probably result in a 'holier' sweater). If not you'd need to crochet more rows and continue to increase along the edge before you join the two shoulder pieces together. Keep in mind that the front panel still needs to have the same number of stitches as the back panel. As I haven't tested this I can't guarantee it'll look like the sample sorry!
Grace
Hey Grace!
I’m making this sweater in medium and was wondering if I can make the sleeve longer than 41cm?
If so, then how do i go about doing it?
Hi Vanessa, Sure you can make the sleeves longer as long as you're adding less than 10cm/ 4" just repeat round 3 until you reach your desired length.
Grace 🙂
Thank you for this pattern!! This is the first sweater I’ve ever made, and you made it so easy to learn how. Fits perfectly! Really appreciate it!
I love this sweater! Super cute! But I am hoping to make it more of a fall sweater and so I was hoping to do a less "hole-y" stitch. Do you know if this would work with a different stitch, possible a herringbone half or double? Any suggestions would be great! Thank you!!
Hi Kortney, if you'd like to make a fall sweater choosing a thicker aran/worsted yarn that's made from acrylic or merino or wool should solve a lot the 'hole-y' issue. Otherwise sure, you can try a different stitch but follow the pattern as a guide - since the height of the stitch will change you'll need to probably add more rows for the v-neck and since you have more rows, increase fewer stitches per row.
I hope this helps, Grace 🙂
Hi Grace!
I have a question about this pattern! Can you add stripes to it? I love all of your patterns, and they are really amazing!
Hi Charvi,
Sure you can add stripes, just make sure to note down what rows you change colours so that the front and back both match!
Grace 🙂
I love this pattern! I’ve made this using blue and cream stripes and I’m now doing another one in green and white stripes. It fits so well and the pattern is so easy! Thanks for all your designs!
I’m a beginner crocheter and was wondering how to make this into a winter sweater. What weight wool blend would I look for to get the right drape?