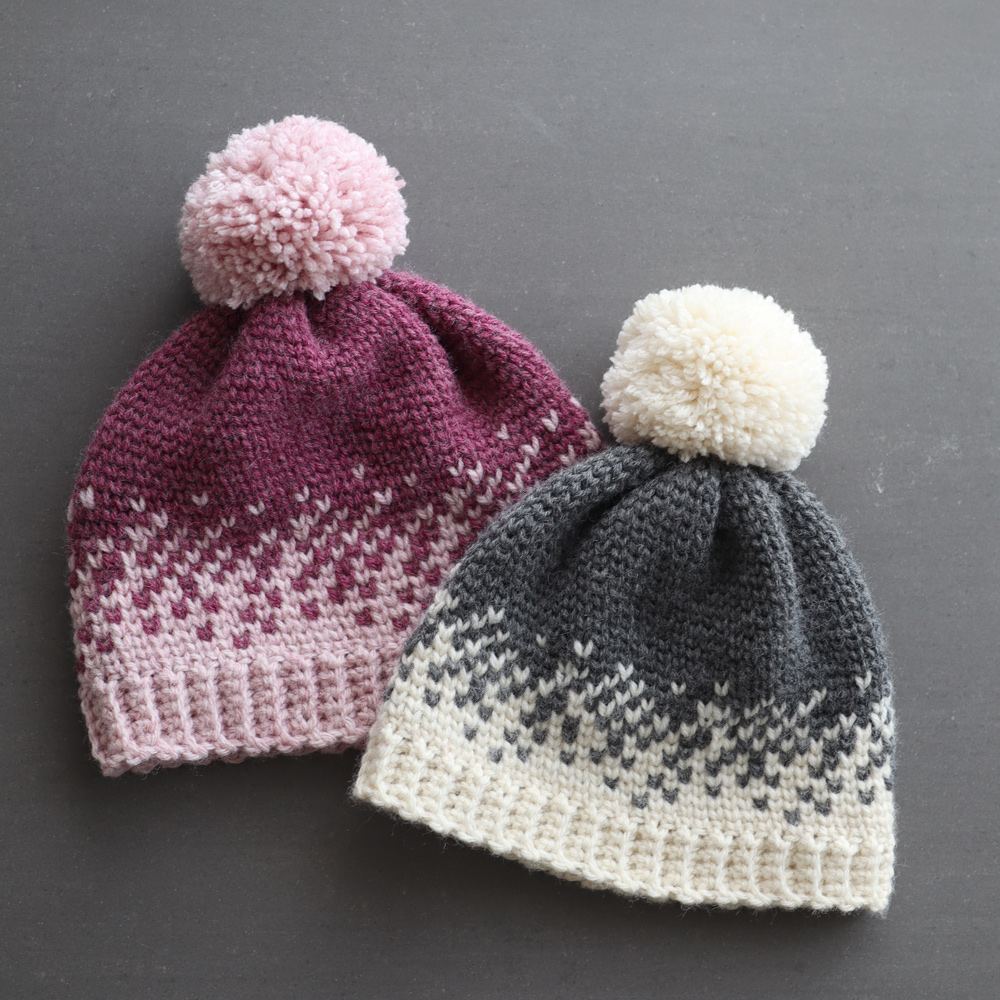
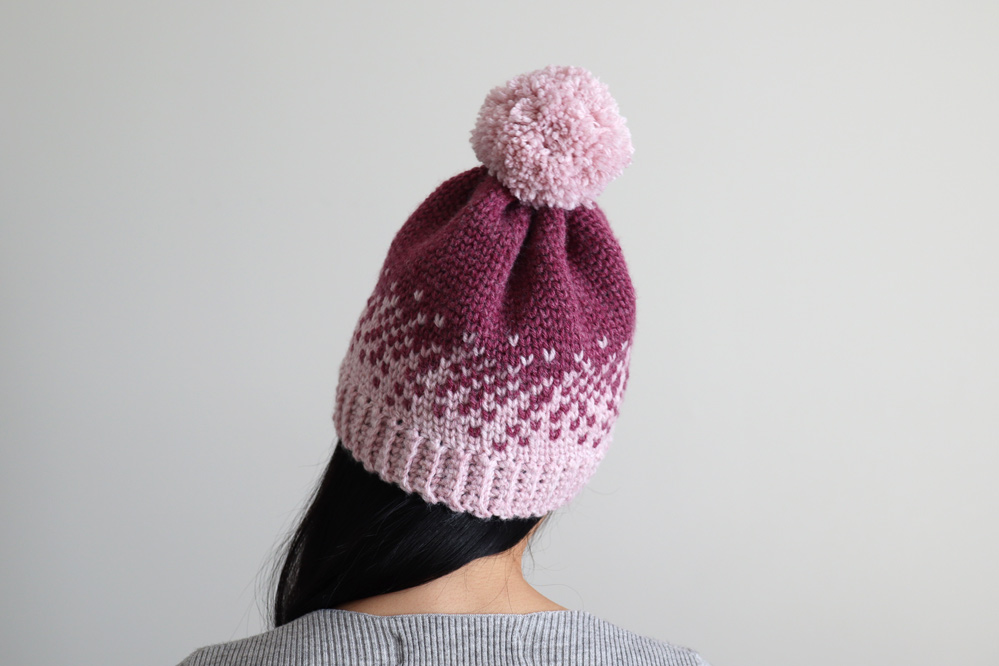
The Ombré Fair Isle Beanie has a knit look but it’s completely crochet!
This free crochet beanie pattern is accompanied by a video tutorial.
This post may contain affiliate links, view our disclosure policy for details.
Hi everyone! I’m so excited to share the Ombré Fair Isle Beanie with you!
Featuring lightly cascading stitches falling into a ribbed hem, this ombré fade effect creates a stylish and sophisticated take on the traditional fair isle style. The dense yet flexible stitches ensure that your head will stay cosy and snug all winter long!
Design inspiration
Fair Isle is one of my favourite knitting styles (to look at because I can’t knit haha). I love how the delicate little v’s stack up so neatly on top of each other and look like hearts! However, I find that we often lose this effect with crocheting especially when in the row, so I set to create a beanie that truly had the fair isle stitch texture!
This beanie is worked from the bottom up and then in a spiral so the beanie is seamless and the stitches line up perfectly. I really wanted the beanie to slowly fade from one colour to the other while making sure that the colour changes stayed crisp and clean. I tried many different methods trying to get the colour changes looking sharp and I’ve figured out a simple way to carry the yarn and not mix colours 🙂
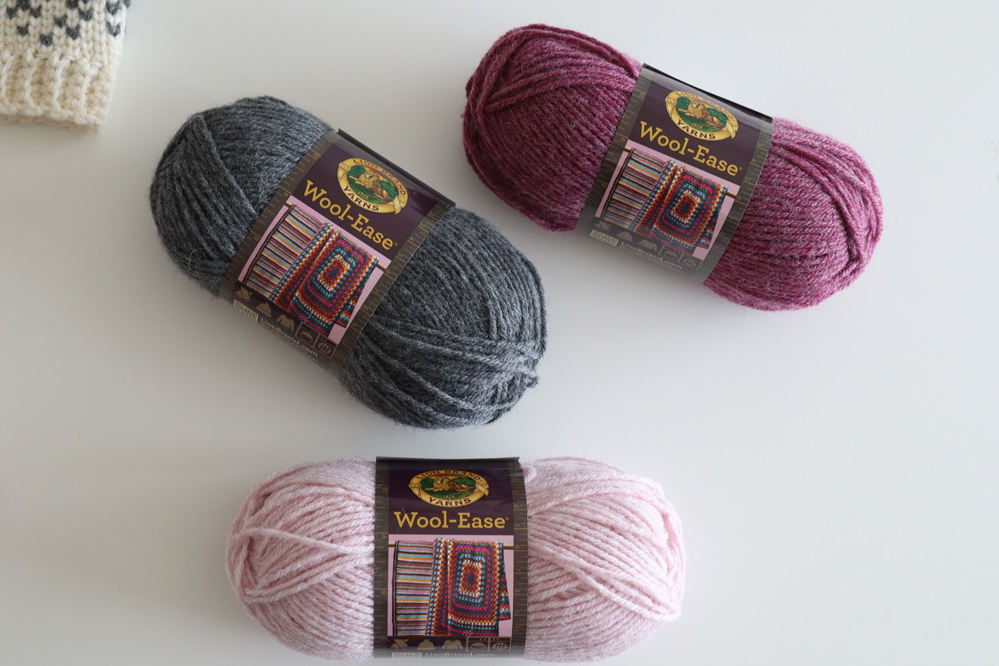
Yarn
Did you know that Lion Brand Wool-Ease Thick & Quick has an aran weight version? The Thick & Quick (super chunky) version is one of my favourite winter yarns, so when I visited the USA in the fall I spotted this yarn at Joann’s and squealed with delight! This yarn is a 20% Wool + 80% Acrylic blend and it comes in 18 beautiful shades of which half are heather! Heathered yarn is one of my absolute favourite effects, you get all the depth of having a beautiful mix of colours but it’s subtler than a coloured tweed. I think the Dark Rose Heather is literally me in a shade!
Check out more free crochet patterns!
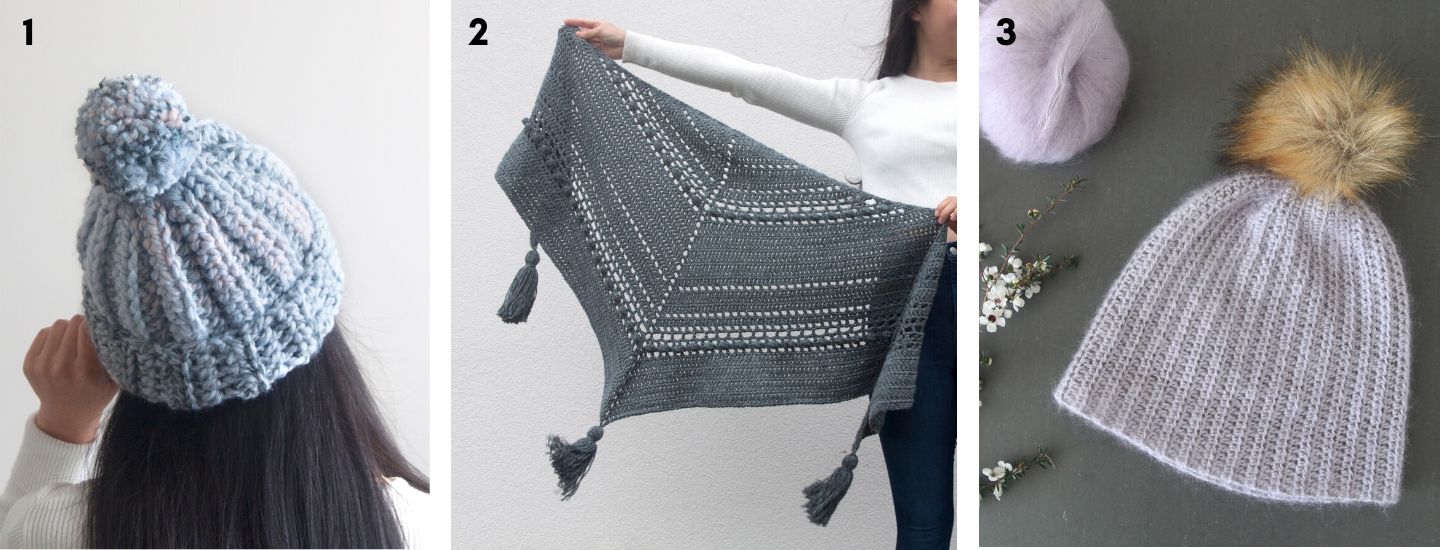
1. One Hour Crochet Beanie / 2. Stormborn Wrap / 3. Mohair Beanie
Pin me for later!

Fair Isle Crochet Beanie Video Tutorial
Add pattern to your Ravelry queue here!
Ad-free, printable pdf on Etsy or LoveCrafts!
(Includes 3 extended colour charts!)
Fair Isle Crochet Beanie Pattern
*This pattern follows sizes Toddler(Child, Adult). Eg. “SC 10(11, 12) means SC 10 for Toddler, SC 11 for Child and SC 12 for Adult. When there is only one number, it applies to all sizes.
*”SC 5” means SC into the next 5 stitches.
*The turning chain ch 1 does NOT count as a stitch.
*Total stitches are indicated between < >.
*This pattern uses US crochet terms.
*This beanie is crocheted from the bottom up. We’ll crochet the ribbing in rows, attach the ribbing together and work along the edge of the ribbing in rounds in a spiral.
LEVEL: Easy/Intermediate
MATERIALS
Yarn – Lion Brand Wool-Ease – 10ply/Aran/Worsted/Medium (4), 180m/85g, 80% Acrylic + 20% Wool, Rose Heather (138) + Dark Rose Heather (139)
Colour A (Rose Heather) – 1 skein (all sizes)
Colour B (Dark Rose Heather) – 1 skein (all sizes)
MEASUREMENTS
Toddler – Hat circumference: 43cm/17” Hat height: 18cm/7”
Child – Hat circumference: 48cm/19” Hat height: 20cm/8”
Adult – Hat circumference: 54cm/21” Hat height: 22cm/8.75”
STITCHES & ABBREVIATIONS
Ch = Chain
Sl st = Slip Stitch
SC = Single Crochet
SC2tog = Single Crochet 2 Stitches Together
FI = Fair Isle Stitch
FI2tog = Fair Isle Stitch 2 Stitches Together
BL = Back Loop
St(s) = Stitch(es)
Rep = Repeat
SPECIAL STITCHES
Fair Isle Stitch – Insert hook in between the 2 lines of the ‘V’ of the next stitch (the hook must go underneath both loops and the horizontal bar at the back of the stitch/in between the ‘ ⊼ ’ shape at the back of the stitch). Yarn over, pull up a loop (2 loops on hook), yarn over, pull through 2 loops on hook.
Fair Isle 2 Together – Insert hook in between the 2 lines of the ‘V’ of the next stitch (the hook must go underneath both loops and the horizontal bar at the back of the stitch/inside the triangle of the ‘ ⊼ ’ shape at the back of the stitch). Yarn over, pull up a loop (2 loops on hook). Insert hook in between the ‘V’ of the next stitch. Yarn over, pull up a loop (3 loops on your hook). Yarn over, pull through 3 loops on hook.
GAUGE: 10cm/4” square = 13 stitches wide x 16 rows tall in single crochet
Purchase the inexpensive ad-free printable pdf on Etsy or LoveCrafts!
COLOUR CHART

Each box in the chart represents 1 stitch.
The Colour Chart follows a 10-stitch repeat.
The last 9(7, 5) sts of the round are shown in the chart and are a repeat of stitch 1-9(1-7, 1-5).
Make sure to keep an eye on your stitch marker so you know when to begin a new round.
Your ‘dominant’ colour is the yarn colour you are holding in your hand while the ‘contrasting’ colour is the one that is carried along the project.
From ROUNDS 1 – 9, Colour A is the ‘dominant’ colour. From ROUNDS 10 – 14 Colour B is the ‘dominant’ colour. The swap at ROUND 10 ensures that the ‘secondary’ colour is less likely to ‘peek out’ from behind the stitches.
Fair Isle Crochet Tips
When crocheting fair isle, I recommend carrying the 'secondary' yarn behind your stitches. This means you crochet over the secondary yarn and you won’t have any loops hanging on the inside of your garment. Often the second colour of yarn can ‘peek’ through the stitches and the colour changes aren’t as crisp or clear. However, I find that this can be avoided if you 'tuck' the secondary yarn behind the stitch you're crocheting into, rather than letting it sit in the middle of the stitch (which makes it more visible). This also makes crocheting into the stitches easier as when inserting your hook into the 'v'.
(I recommend checking out the video tutorial if you have any doubts!)
RIBBING
FOUNDATION CHAIN: With Colour A, Ch 6(6, 7).
ROW 1: SC in 2nd ch from hook, SC in each chain until end, turn.
<5(5, 6)>
ROW 2: Ch 1, BL SC 4(4, 5), SC in last st, turn.
Repeat ROW 2 until ROW 59(67, 75).
*Ribbing Band should measure 43(48, 53)cm / 17(19, 21)”
Fold ribbing band in half, lengthways (right side is on the inside). Join the two ends of the ribbing together with a slip stitch – sl st 5(5, 6). You will now have a ring. Turn ribbing band inside out so the right side is facing you (sl sts will be visible on the wrong side). Do not fasten off.
BEANIE
We’ll now crochet the body of the Beanie across the edge of the band. The beanie is worked in a continuous spiral so there is no visible seam. Follow the Colour Chart for the appropriate stitch pattern for your size.
ROUND 1: Ch 1, place a SC in each row of the band.
<59(67, 75)>
ROUND 2: With Colour A as the ‘dominant’ colour, FI in 1st st of ROUND 1, to mark the beginning of the round place stitch marker in 1st st of ROUND 1. FI in each st of the round, following the chart for colour changes.
ROUNDS 3 - 9: FI in each st in the round, following the chart for the colour changes.
ROUND 10 - 14: With Colour B as the ‘dominant’ colour, FI in each st of the round, following the chart for colour changes.
ROUND 15: With Colour B, FI 10 while carrying Colour A behind the stitches to secure the yarn. Cut yarn of Colour A and place yarn aside. With Colour B, FI in each st until the end of the round.
<59(67, 75)>
ROUND 16: With Colour B, FI in each st in the round.
Repeat ROUND 16 until ROUND 25(28, 30).
<59(67, 75)>
*You can add rounds to make you beanie slouchier or remove rounds to make your beanie more fitted.
DECREASE ROUND 1: *FI, FI2tog; rep from * around.
Toddler: You will have 2 sts left over, FI2tog in last 2 sts.
Child: You will have 1 st left over, FI in last st.
<39(45, 50)>
DECREASE ROUND 2: SC2tog 19(22, 25)until end. If you have 1 st left over, SC in last st. Sl st into next 3 sts. Fasten off and leave a 30cm/12” long tail of yarn.
<20(23, 25)>
ASSEMBLY
Whip stitch around top opening of the beanie (approx. 1 stitch of each SC2tog).
Pull tight on the tail of yarn and sew the hole closed. Sew a pom pom to the top of the beanie.
*I used a 9cm/3.5” pom pom maker. You can use any size/type of pom pom you prefer.
Weave in all of your ends.
Voilà! You’ve finished your Crochet Fair Isle Beanie 🙂
This is so beautiful! Thank you so much for giving this to us.
Is there a full video tutorial? Ive tried to make per pattern and Im just not getting the right size. 75 seems to fit 2 heads
The full video tutorial is just above the pattern or you can watch it on youtube https://youtu.be/kMb6wPNakIo 🙂 Just wondering if you checked your gauge? Often if the gauge is off, the sizing will be off too. If you still find 75 rows too large, you can follow a smaller size or just crochet the band until it wraps around your head and follow the colour chart as per normal. I hope this helps!
It depends on the yarn you are using ; mine was much thicker so I just crocheted my band until it fit my head about 46 rows and 20” now I’m following the rest !
The beanie looks absolutely amazing! However, I am having a really hard time inserting the hook in between the v of the single crochet...what am I doing wrong? Too tight?
Hi Bianca, it sounds like your single crochets might be too tight or your crochet hook is too blunt - I find crochet hooks with more of a point work well for this stitch.
Grace 🙂
The hat is so pretty. Is the char has a multiple to work for? Thanks for sharing the great tutorial.
Hi Carmen,
The chart is in a multiple of 10 and then you follow along until you reach the end of your hat so the last 5 stitches of your round will be the same as stitches 1-5 on the chart.
Grace
When making the gauge swatch, it says single crochet but should I gauge by single crochet or the fair isle stitch? Thanks
Hi Kirsten,
Please follow the gauge as listed - so crochet your gauge swatch using single crochet
Grace 🙂
Beautiful hat! Did you use all 85gr of each colour? I have 50gr skeins and wondering if I need two of each colour or if one of each will do.
I made the adult size and followed the pattern for it, it's realllllly short, are my stitches too tight?
You might have used a hook that was too small for the project, or too thin yarn.
Hi, where can I have the colour chart for child size, can’t find it anywhere. I’ve got only the adult size. Waiting for your answer. Thank you very much.
I was wondering the same thing Monique, It would be nice to have the child size color chart.
Hello!
I’m crocheting the adult size. I’m using the same yarn and hook size as specified. I did up a swatch, and my gauge matches exactly.
Despite all this, the hat fits very loose on a 21” head size. I’m wondering if I should go down a hook size, or two, for the rib band, and then continue the hat body in the specified hook size. What are your thoughts on this, and getting the hat to fit a little more snug?
Hi Grace,
I love your hat pattern it’s beautiful and I am planning to make one for myself.
I would like to ask your opinion and advice of how to make the same design for a scarf? Thank you for sharing 😊
is the tutorial no longer available? i'm looking everywhere and cannot find a link. can you help?
Thank you,
Debbie