
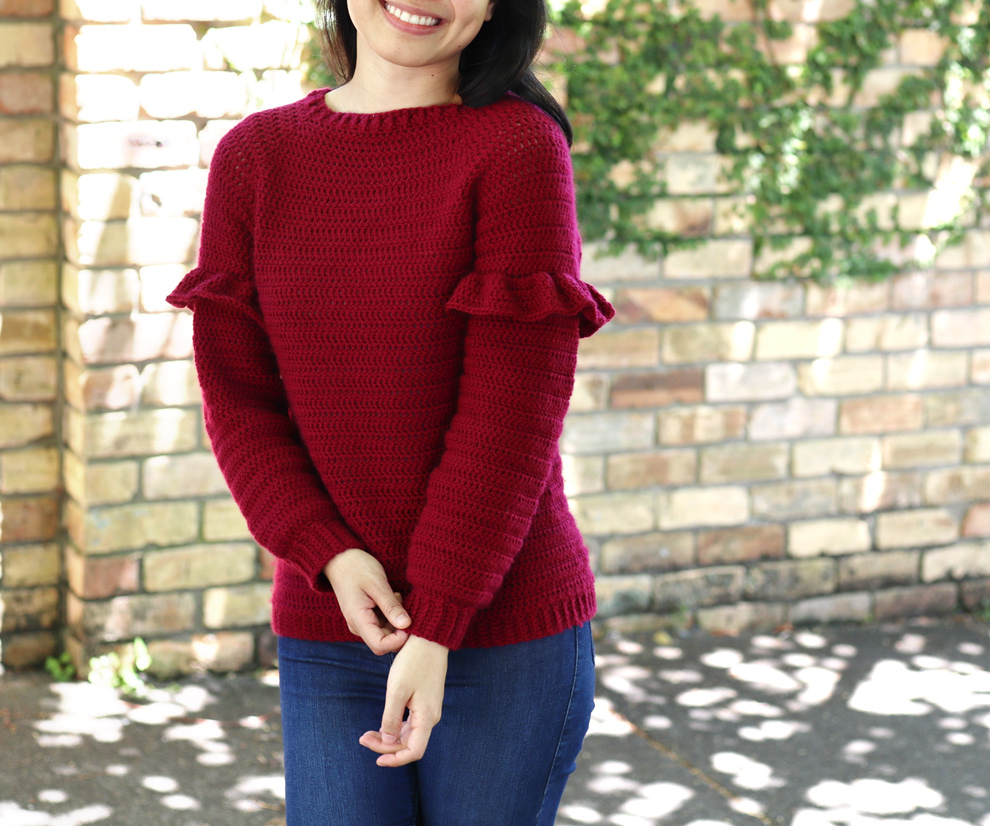
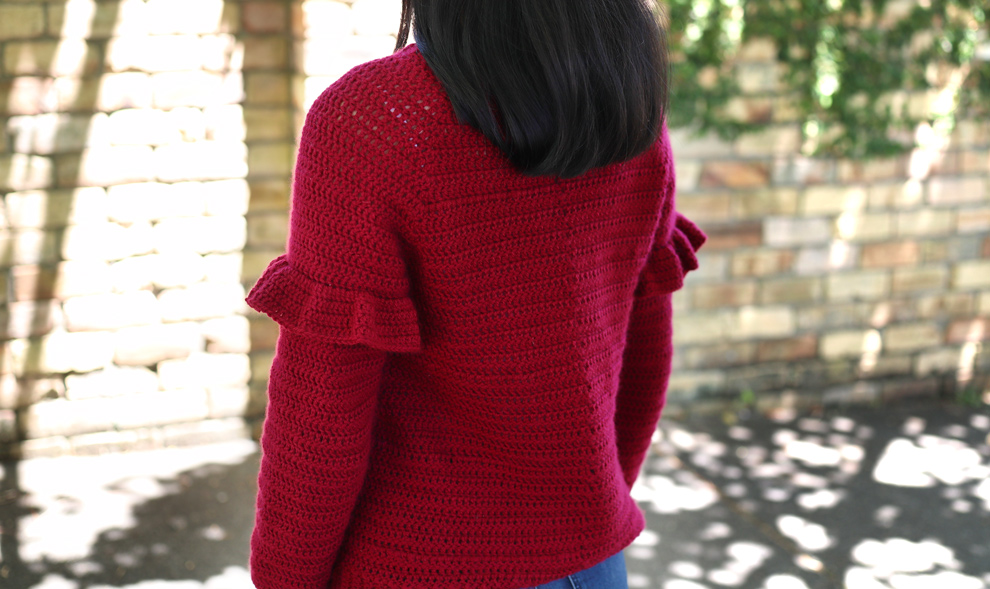
The Holly Berry Sweater is an easy, ruffle sweater that’s perfect for the festive season!
Learn how to crochet a top-down sweater with this free pattern and video tutorial!
This post may contain affiliate links, view our disclosure policy for details.
The Holly Berry sweater is festive, cosy and fun with whimsical ruffles and cuffed sleeves. If this is your first time crocheting a top-down sweater, don’t worry! This pattern is a simple raglan pullover and there is a video tutorial to help you along the way.
I love crocheting top down sweaters because they are entirely customisable and there’s isn’t hours of sewing at the end. You can try on the sweater as you crochet and pick the perfect sleeve and body length for you. This also means that you can avoid sewing all the pieces to together as the entire sweater (sleeves and ruffles too!) are worked directly onto each other.
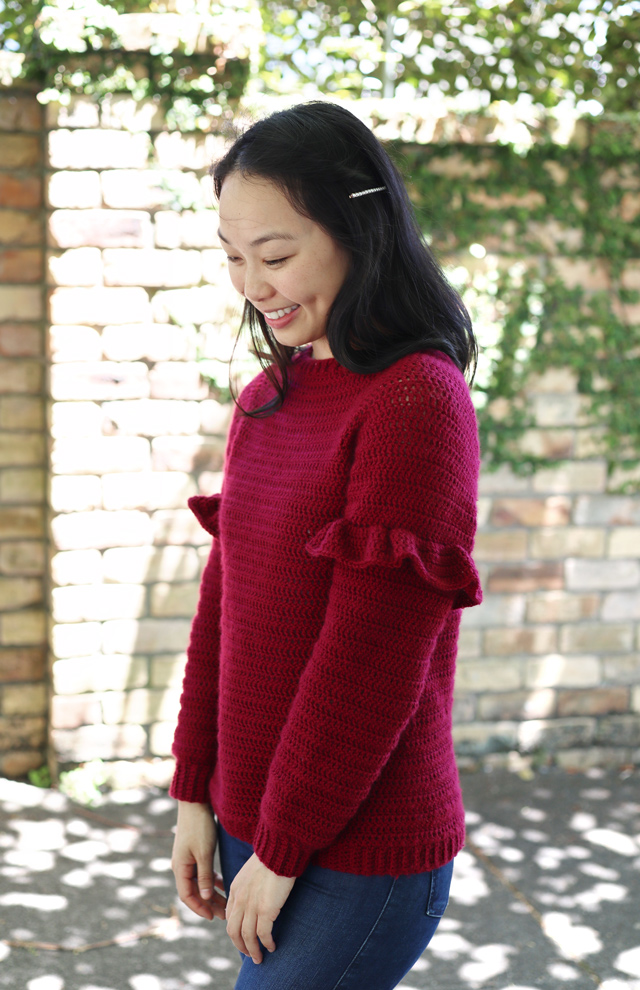
Normally I’d go for a cropped sweater, haha I doubt that’s a surprise (check out the Brooklyn Sweater and Béatrice Scallop Sweater - both have customisable lengths!) but I decided to go for a longer length (maybe a dress version will be arriving in the future 😉 ) and I can always tuck in the bottom!
I love how the final sweater looks very polished and put together but is still so comfy and wearable! As much as I love traditional Christmas Sweaters, the best thing about this design is that you can wear it year-round, it’s not a Christmas only piece!
DESIGN INSPIRATION
Christmas is just around the corner and I’ve been madly crocheting gifts as quickly as possible! It’s such a wonderful time of year to gift loved ones but sometimes it’s nice to make something just for yourself! (although you could easily gift this sweater as well 🙂 ) To me ruffles = festive season so I wanted to design a fun ruffle sweater that you could wear on Christmas day and any other day you want!
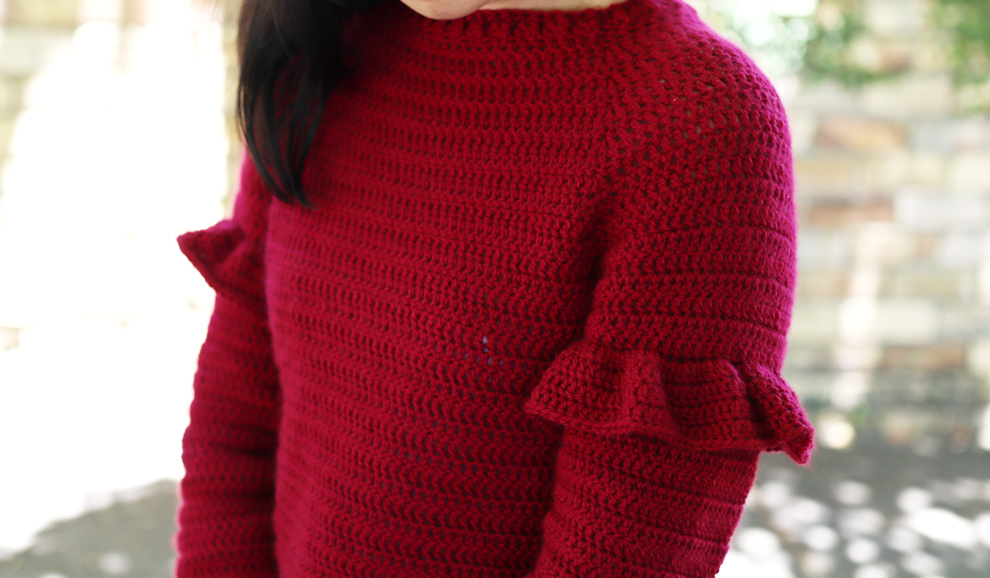
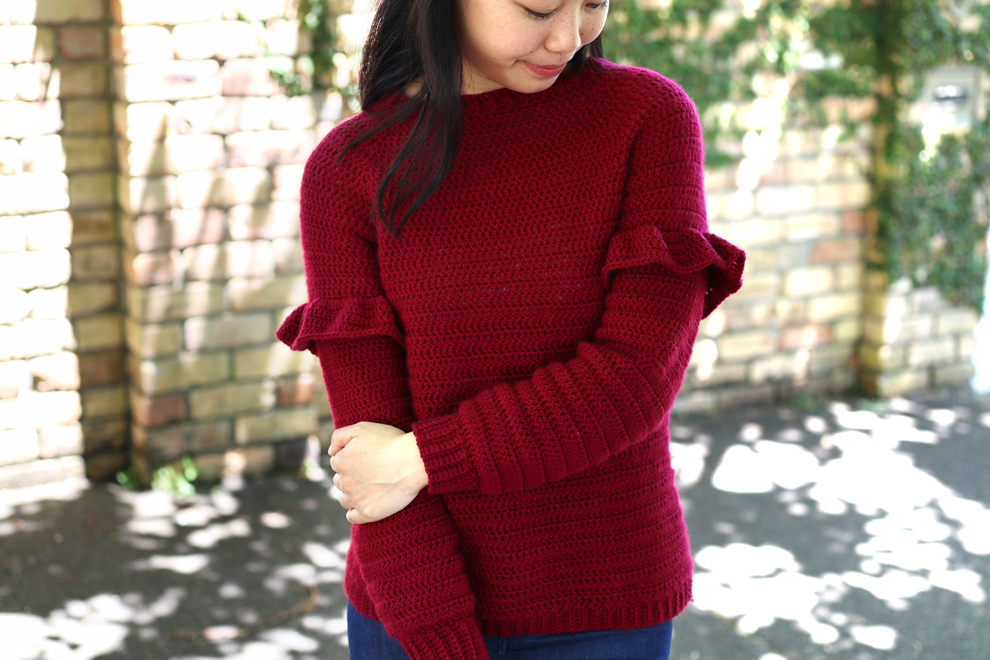
At first I wasn’t sure where I wanted the ruffles to go and I contemplated having ruffles on the body as well but there is such a thing as too much ruffle, even during Christmas haha. The ruffles are placed at the top of the sleeves for a flattering and festive statement without being too overwhelming as the sleeves slowly taper down and are cuffed. The relaxed body fit makes the Holly Berry Sweater super comfy to wear so you can enjoy Christmas dinner as much as you want!
YARN
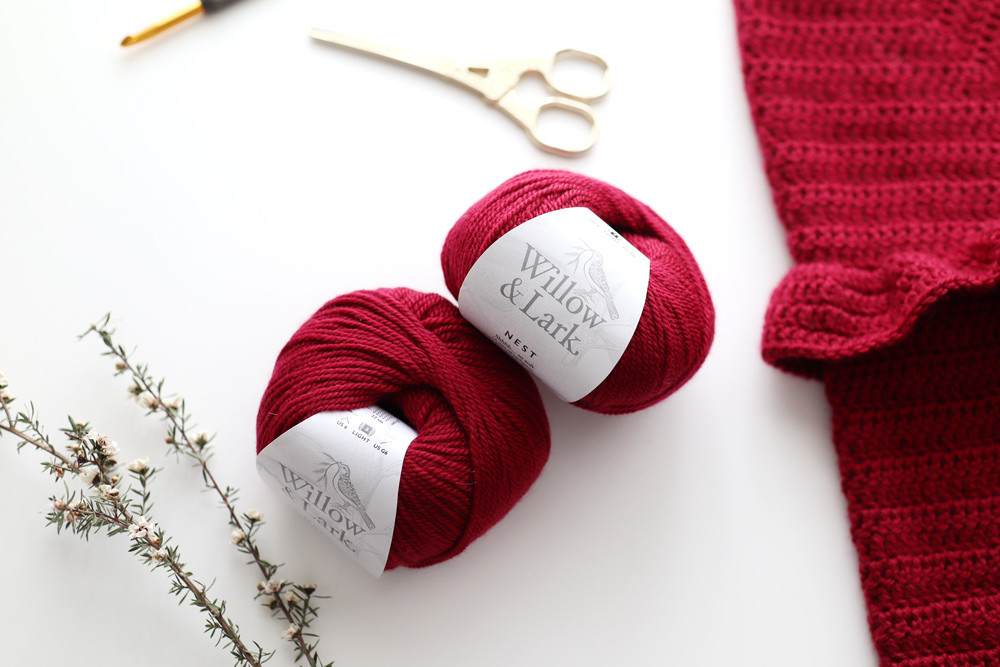
Since this design is Christmas themed I wanted to make the Holly Berry Sweater red or green. Deep forest green is one of my favourite colours but I thought that the dark red suited this whimsical design better. I used Willow & Lark Nest in the colour Garnet and it’s a wonderfully soft and squishy blend of cashmere, wool and tencel.
When I purchased this yarn there was over 30 colours but unfortunately now there are only a few shades left. You can use any DK weight yarn with a soft, stretchy drape like a cashmere blend, merino or high-quality acrylic.
I’d recommend a merino yarn like Lion Brand’s LB Collection Superwash Merino or Debbie Bliss Rialto DK. For a more affordable option, I love Paintbox Yarns Simply DK which has 49 shades!
Check out more free crochet patterns!
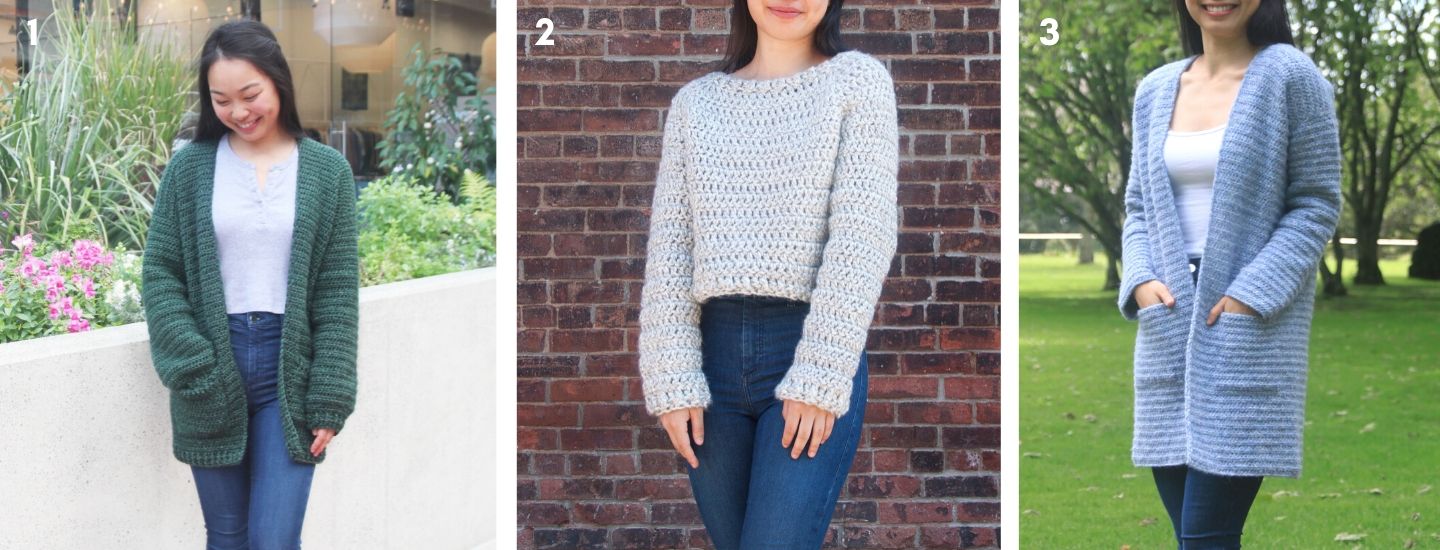
1. Briar Pocket Cardigan / 2. Chunky Sweater / 3. Stonewash Coatigan
Pin me for later!

Holly Berry Crochet Sweater Pattern
Add pattern to your Ravelry queue here!
Purchase the ad-free, printable pdf version on Etsy or LoveCrafts!
*Sample is a size small shown on a 5’3” model with a 32” bust.
*The sizing guide follows size XS(S, M, L, XL, 2XL, 3XL). E.g. “DC 132(140, 152, 168, 184, 200, 216) means DC 132 for XS, DC 140 for Small, DC 152 for Medium, DC 168 for Large, DC 184 for XL, DC 200 for 2XL and DC 216 for 3XL. Where there is only one number, it applies to all sizes.
*”DC 10” means DC into the next 10 stitches.
*”2DC” means place 2 DC into the same stitch.
*The turning chain ch 3 always counts as a stitch.
*To reduce the seam, ch 3 can be replaced by a no turning chain stitch.
*The turning chain ch 1 does NOT count as a stitch.
*Total stitches are indicated between < >.
*This pattern uses US crochet terms.
*This design is worked from the neck down, so you can try on the garment while working and customise the length and fit. Altering your sweater may change the stitch count for your sweater. Follow the general stitch patterns to achieve the same shape.
MATERIALS
Yarn – Willow & Lark Nest – 8ply/DK/Light (3), 115m/50g, 69% wool + 20% tencel + 11% cashmere, Garnet (229)
9(9, 11, 13, 15, 17, 19) skeins
LEVEL: Easy/Intermediate
Measurements cm:
Bust: 76(81, 89, 100, 111, 121, 132)
Length: 54(56, 59, 63, 67, 71, 75)
Armhole: 15(16, 18, 20, 23, 25, 28)
Sleeve Length: 38(38, 41, 41, 44, 44, 44)
Measurements inches:
Bust: 30(32, 35, 39.5, 44, 48, 52)
Length: 21(22, 23.5, 25, 26.5, 28, 29.5)
Armhole: 6(6.25, 7, 8, 9, 10, 11)
Sleeve Length: 15(15, 16, 16, 17.5, 17.5, 17.5)
STITCHES & ABBREVIATIONS
Ch = Chain
Sl st = Slip Stitch
SC = Single Crochet
FDC = Foundation Double Crochet
DC = Double Crochet
DC2tog = Double crochet 2 stitches together
FpDC = Front Post Double Crochet
BpDC = Back Post Double Crochet
FLO = Front Loop
BLO = Back Loop
SM = Stitch Marker
St(s) = Stitch(es)
Rep = Repeat
Sk = Skip
GAUGE: 10cm/4” square = 16/ stitches wide x 10 rows tall in double crochet
*Gauge swatch worked flat in rows.
Christmas Ruffle Sweater Video Tutorial
YOKE
ROUND 1: FDC 66, sl st into first st to join. Make sure your ring isn’t twisted!
<66>
*If the ring is too small, FDC 74. Follow instructions for ROUND 2, skip ROUND 3, and follow pattern from ROUND 4.
ROUND 2: Ch 3, FpDC, *BpDC, FpDC; rep from * until end, sl st to join.
<66>
ROUND 3: Ch 3, DC 10, 3DC – place SM on top 2nd DC of 3DC cluster,
DC 10, 3DC – place SM on top 2nd DC of 3DC cluster,
DC 21, 3DC – place SM on top 2nd DC of 3DC cluster,
DC 10, 3DC – place SM on top 2nd DC of 3DC cluster, DC 10, sl st to join, turn.
<74>
*When crocheting into the stitch with a stitch marker, remove the stitch marker and place it in the 2nd stitch of the 3DC cluster. The 3DC should always be placed in a stitch with a stitch marker.
ROUND 4: Ch 3, DC 11, 3DC, DC 12, 3DC, DC 23, 3 DC, DC 12, 3DC, DC 11, sl st to join, turn.
<82>
ROUND 5: Ch 3, *DC in each st until st with SM, 3 DC into the st with SM; rep from * three more times, DC in each st until the end of the round, sl st to join, turn.
<90>
Repeat ROUND 5 until ROUND 19(21, 24, 28, 32, 36, 40).
<202(218, 242, 274, 306, 338, 370)>
BODY
We’ll now separate the armholes from the body and join the body together.
ROUND 1 (JOINING ROUND): Ch 3, DC in each st until 1st SM, DC in st with SM, DC into next st with SM (skipped stitches form your 1st armhole), DC in each st until 3rd SM, DC in st with SM, DC into next st with SM, DC in each st until end, sl st to join, turn.
<114(122, 134, 150, 166, 182, 198)>
ROUND 2: Ch 3, DC in each st around, sl st to join, turn.
ROUND 3: Ch 3, DC in each st around, sl st to join, turn.
ROUND 4: Ch 3, DC in each st until underneath armhole, 2DC, DC in each st until underneath 2nd armhole, 2DC, DC in each st until end, sl st to join, turn.
<116(124, 136, 152, 168, 184, 200)>
Repeat ROUNDS 2 – 4 until ROUND 28.
<132(140, 152, 168, 184, 200, 216)>
*You can add or remove rounds to reach your desired length. Please keep in mind that the ribbing will add approx 5cm/2”.
ROUND 29: Ch 3, DC in each st around, sl st to join, turn.
<132(140, 152, 168, 184, 200, 216)>
ROUND 30: Ch 3, DC in each st around, sl st to join.
<132(140, 152, 168, 184, 200, 216)>
BODY RIBBING
ROW 1: Ch 7, SC into 2nd ch from hook, SC across, sl st in next 2 sts along the edge of body, turn.
<6>
ROW 2: Sk 2 sl sts, BLO SC 5, SC in last st, turn.
ROW 3: Ch 1, BLO SC 6, sl st in next 2 sts along edge of body, turn.
Alternate between ROWS 2 – 3 until ROW 132(140, 152, 168, 184, 200, 216).
*The number of ribbing rows = number of stitches in the Final Body Round.
Fasten off. Sew the edges of the ribbing together.
SLEEVES
Make sure the wrong side of your final yoke round is facing you. E.g. edge armhole stitches should have the wrong side facing up.
Insert hook along edge of the sleeve. Secure yarn and pull up a loop.
*I suggest inserting your hook into the stitch with a stitch marker that is closest to the seam running down the back. This will make the sleeve seam less noticeable.
ROUND 1: Ch 3, DC in each st around (including sts with SM), in between the 2 SMs space out 2 DC2tog, sl st to join, turn.
<48(52, 58, 66, 74, 82, 90)>
ROUND 2: Ch 3, FLO DC in each st around, sl st to join, turn.
ROUND 3: Ch 3, DC in each st around, sl st to join, turn.
ROUND 4: Ch 3, DC in each st around, sl st to join, turn.
ROUND 5: Ch 3, DC2tog, DC in remaining sts around, sl st to join, turn.
<47(51, 57, 65, 73, 82, 89)>
Repeat ROUNDS 3 – 5 until ROUND 32(32, 35, 35, 38, 38, 38).
<38(42, 47, 55, 62, 70, 78)>
*You can add/remove rounds to make sleeves longer/shorter. Please keep in mind that ribbing adds 6cm/2.5”.
FINAL ROUND: Ch 3, DC2tog, *DC, DC2tog; rep from * around,
If you have 2 stitches left (Sizes XS, M, XL): DC2tog last 2 sts,
1 stitch left (Sizes L & 2XL) DC in last st,
All sizes: sl st to join, turn.
<25(28, 31, 37, 41, 47, 52)>
SLEEVE RIBBING
ROW 1: Ch 9, SC into 2nd ch from hook, SC across, sl st in next 2 sts along the edge of body, turn.
<8>
ROW 2: Sk 2 sl sts, BLO SC 7, SC in last st, turn.
ROW 3: Ch 1, BLO SC 8, sl st in next 2 sts along edge of body, turn.
Alternate between ROWS 2 – 3 until ROW 25(28, 31, 37, 41, 47, 52).
*The number of ribbing rows = number of stitches in the Final Sleeve Round.
Fasten off. Sew the edges of the ribbing together.
RUFFLES
Insert hook into turning ch of SLEEVE ROUND 2. Secure yarn and pull through a loop.
ROUND 1: Ch 3, 2DC in each front loop of the round (previously the back loops of SLEEVE ROUND 2), sl st to join. (Do not turn!)
<95(103, 115, 131, 147, 163, 179)>
ROUNDS 2-4: Ch 3, DC in each st around, sl st to join.
*You can add or remove rounds to make the ruffles longer or shorter.
Fasten off.
ASSEMBLY
Sew the edges of the neckline ribbing together.
Weave in ends.
Steam and block your sweater.
Voilà! You’ve finished your Holly Berry Christmas Sweater 🙂
Hi Grace! I want to start by saying Thank you for sharing your beautiful work with many of us. Everything is absolutely beautiful. I also wanted to as you a question on the Christmas Sweater. At the beginning you say that if we need to make 74FDC instead of the 66 for a larger size.. But after I make the FPDC/ BPDC it doesn't give me 82 as you asked on roll 4 since you asked to skip roll 2. If i did have to make my FDC at 74 every how many DC do I make the 3 DC cluster to put my stitch marker on the second DC so it can be even to make my armholes? I'm all confused. Any help will be greatly appreciated. Thank you.
Hi Mary, Thank you for your kind words! 🙂
Regarding the Holly Berry Sweater, if you want the neck hole to be larger you can FDC 74. Follow the instructions for Round 2, and skip Round 3. At the end of Round 3 the stitch count is 74 stitches, (and since you have FDC 74) so you should be able to follow the instructions exactly for Round 4. Once you've followed the instructions for Round 4 you'll have 82 sts. I hope this helps!
Grace 🙂
Hello, thank you for sharing nice pattern and video tutorial that was really easy to follow.
I'm thinking to make this with bernat baby sport or lion brand ice cream, is it compatible?
Thank you.
Hi Adzra, I haven't used either of those yarns before but as long as they are a DK/Light (3) and you can meet gauge with them, you should be ok! Grace 🙂