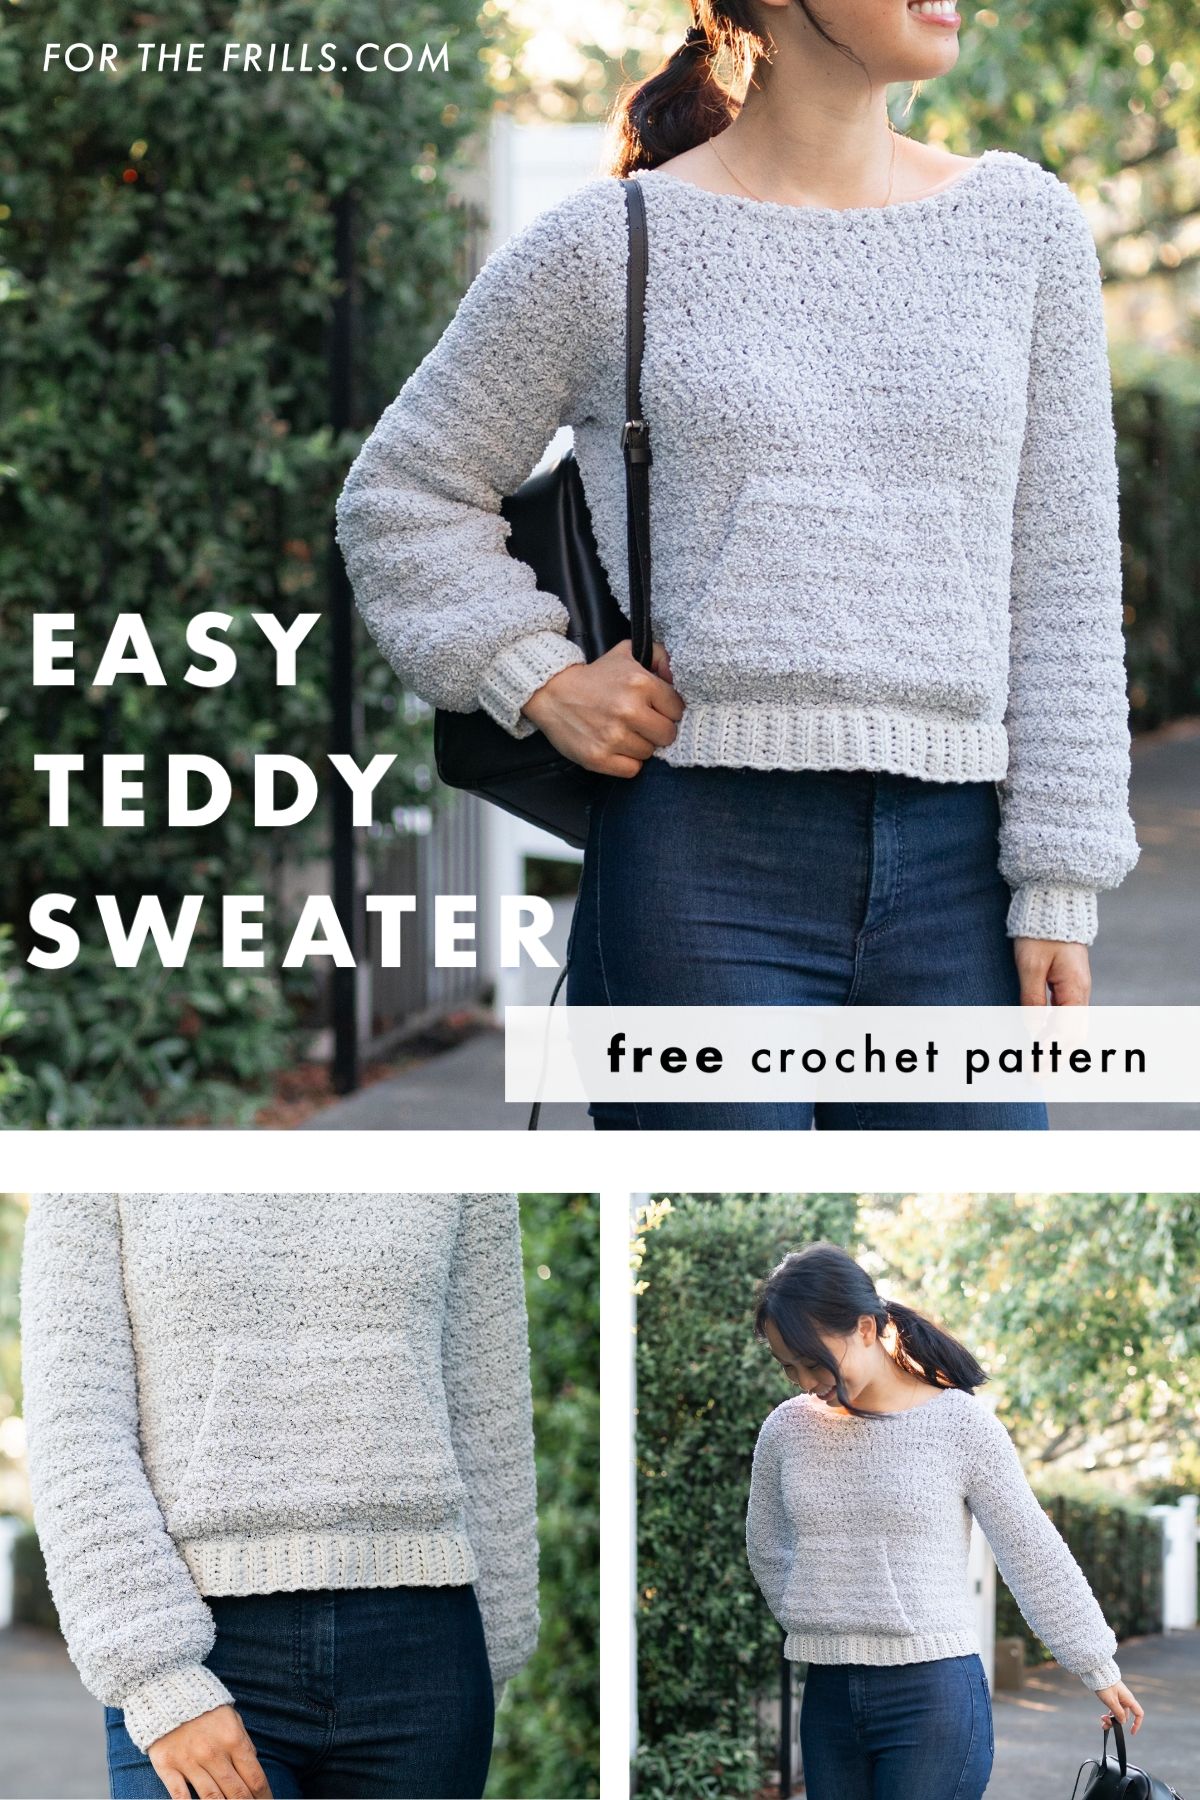
Learn how to crochet a teddy sweater with a front pocket! The Dreamer Sweater is the fuzzy sweater of your dreams!
This free crochet sweater pattern is accompanied by a photo tutorial.
This post may contain affiliate links, view our disclosure policy for details.
Thank you to Lion Brand Yarn for providing the yarn for this project!
As always all thoughts and opinions are 100% my own 🙂
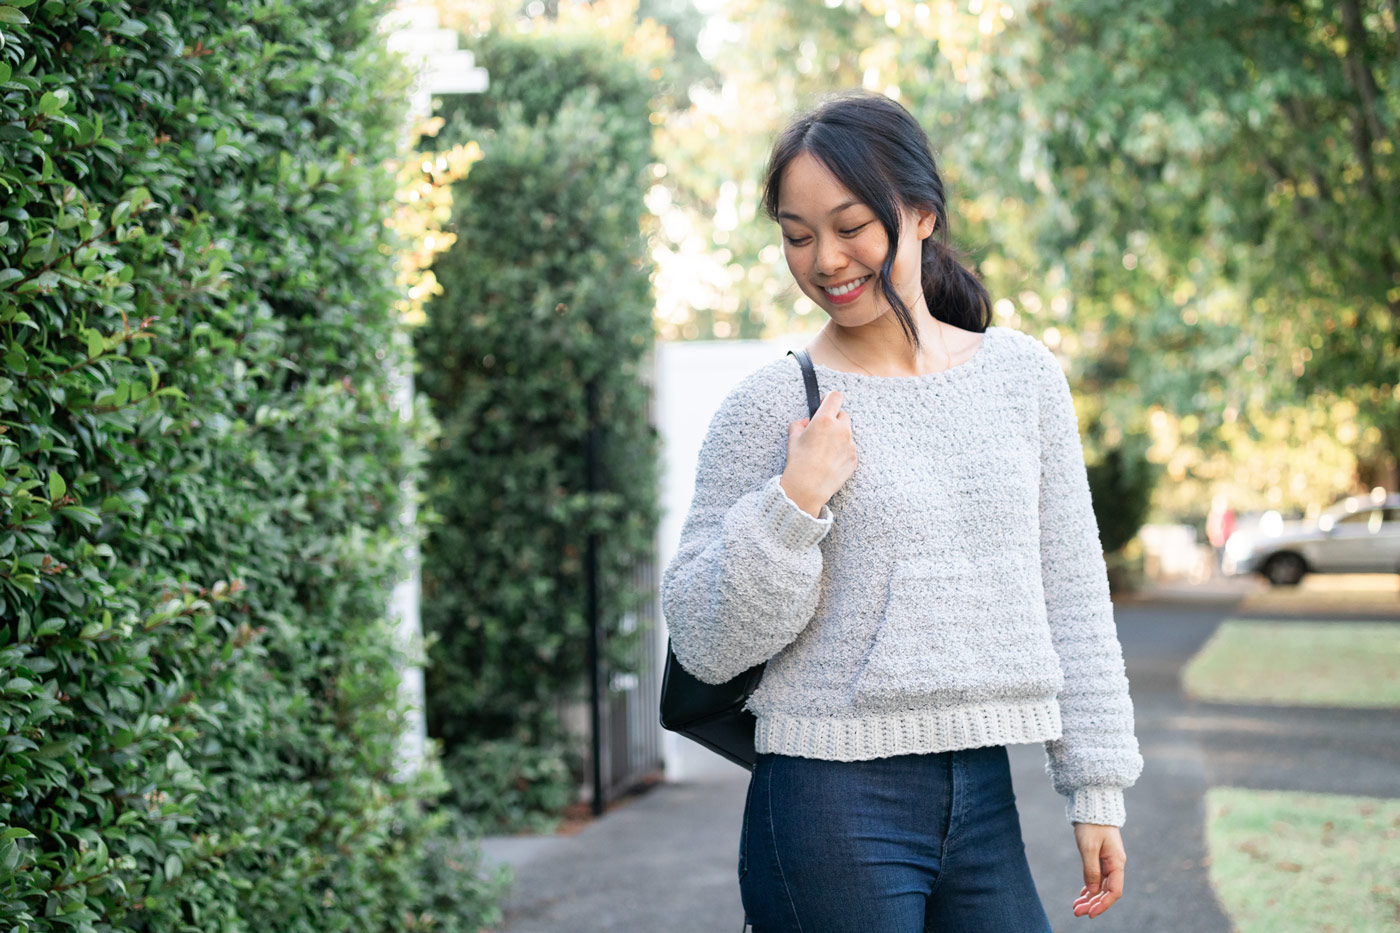
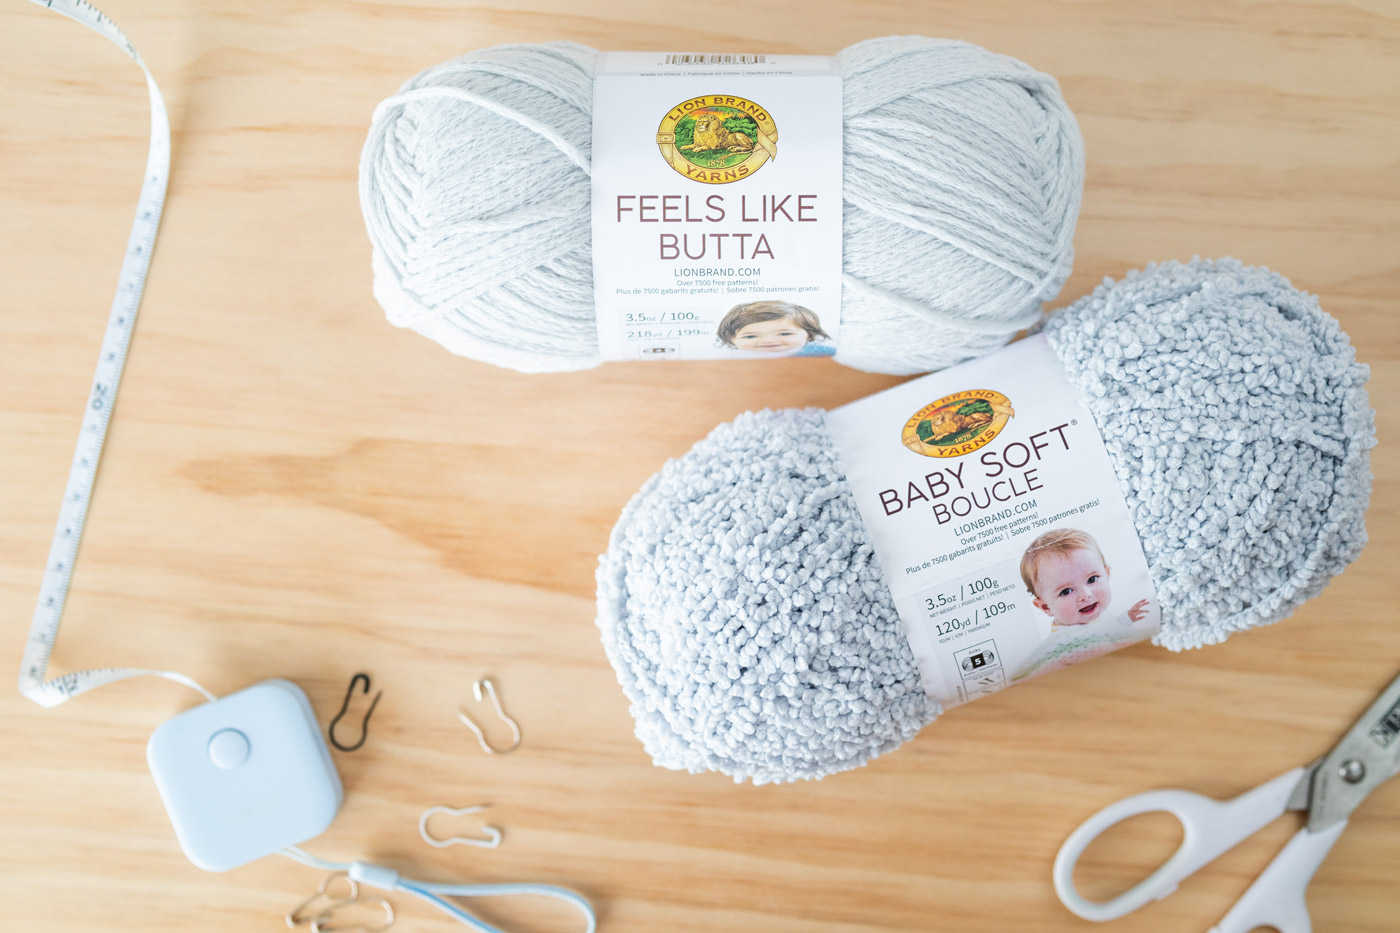
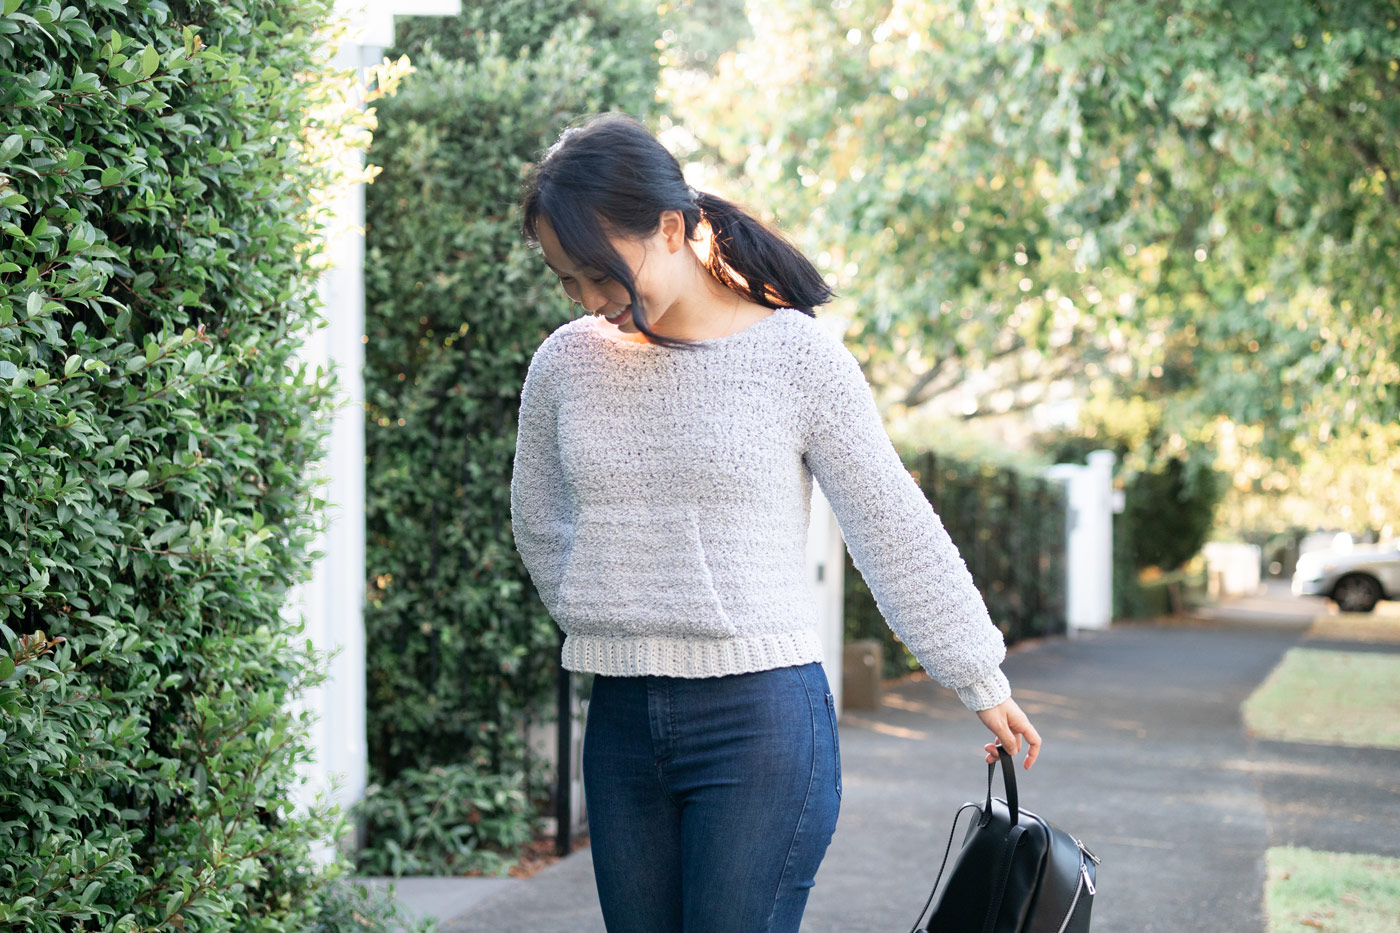
The Dreamer Sweater is the softest thing you'll ever wear! Crocheted using Lion Brand’s Baby Soft Boucle Yarn, this comfy crochet jumper has a stylish ‘sherpa fleece’ texture!
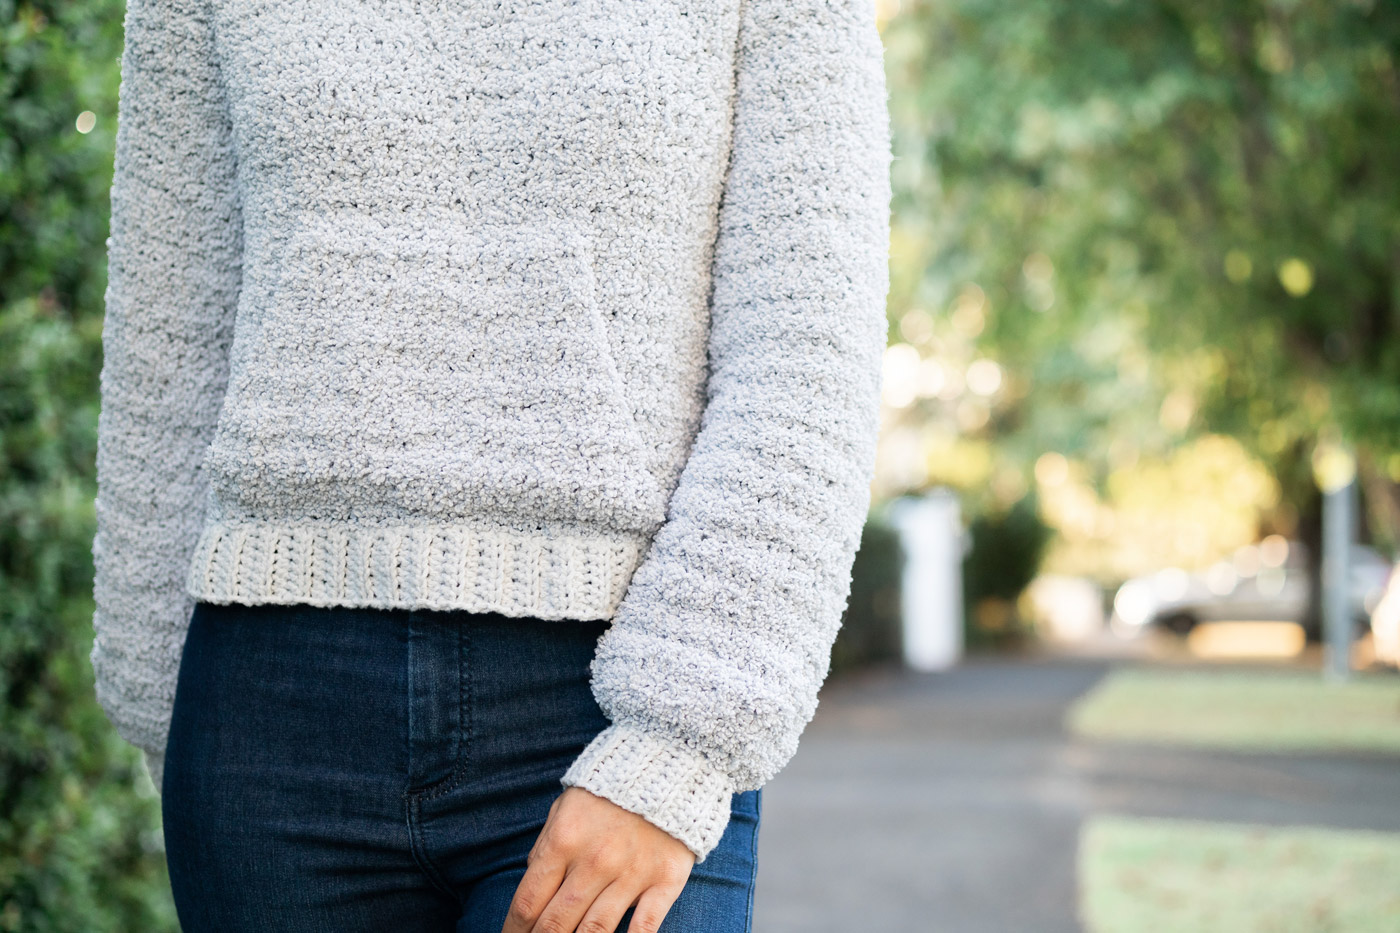
Modern and on-trend, the Dreamer Sweater is crocheted using half double crochets and then the ribbing is crocheted with back loop half double crochets in Lion Brand’s Feels Like Butta. The fun mix of textures – the boucle fleece contrasting with the smooth silky yarn – gives this sweater such a unique look!

The best thing about Baby Boucle Soft yarn is that the texture hides all of the stitches so you get a seamless look without having to sew perfect stitches!
You can also add an optional front pocket to keep your hands warm!
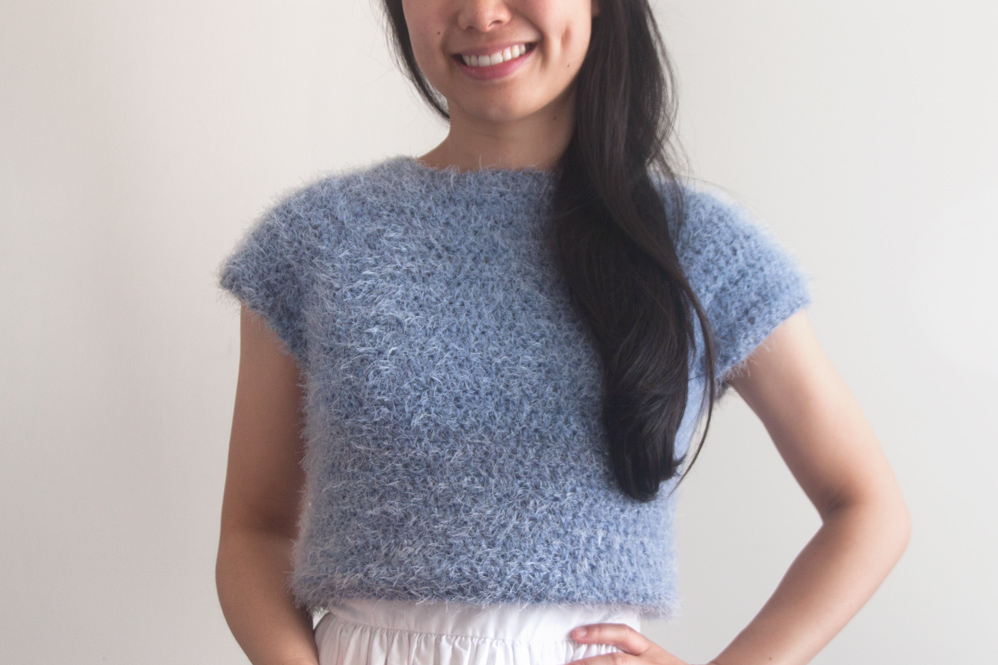
If you're looking for another fuzzy crochet project, check out the Fluffy Crochet Tee!
The bulk of teddy fleece Dreamer Sweater is made up of 5 panels – a back panel, front panel, 2 sleeves and an optional kangaroo front pocket. All of these panels are crocheted in Baby Soft Boucle Yarn to achieve the fuzzy sherpa sweater look.
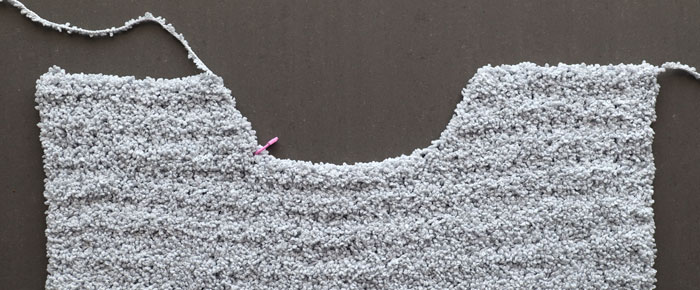
The body panels are crocheted from the bottom up so you can easily alter the length of your sweater. I’ve gone for a long cropped length but simply add or remove rows to make your sweater longer or shorter (all alteration instructions are provided in the free pattern below!) The back panel is just a rectangle and we’ll use half double crochet 2 together stitches along the top of the front panel to form the neckline.
The sleeves worked from the cuff up and only require two rows of shaping! The pocket is worked from the top down and we’ll increase along the edges to form the ‘kangaroo’ pocket shape.
We’ll then use Feels Like Butta to crochet back loop half double crochet ribbing for the sweater hemline and sleeves. All the crochet pieces are sewn together and then you’re done with your Dreamer Sweater!
Design Inspiration
I’ve been seeing teddy sweaters (or Sherpa fleece/shearling sweaters – anyone know the difference?) everywhere lately and I really wanted to make my own but I couldn’t quite find the right yarn. By the time I discovered Baby Soft Boucle I knew exactly what I wanted the jumper to look like!
I definitely imagined slight balloon sleeves, a front pocket and a cropped length (don’t worry there are instructions to help you extend this sweater to any length you want!) to create sporty vibes but with ultimate fuzziness.
However, I wasn’t 100% sure on what type of ribbing to use. I kept going back and forth between the sleek stitch definition of Feels Like Butta or the fuzziness of Baby Soft Boucle.
So, I took to Instagram and asked all of you! Hundreds of votes and dozens of DMs and the vote was tied at 50/50 haha. After revote with extra up-close pictures, the vote settled on 51% for the ribbing using Feels Like Butta!
It was so fun reading everyone’s point of view and I think the jumper would have looked great either way! I really love how the Feels Like Butta Yarn makes the ribbing stands out and look like an added design feature 🙂
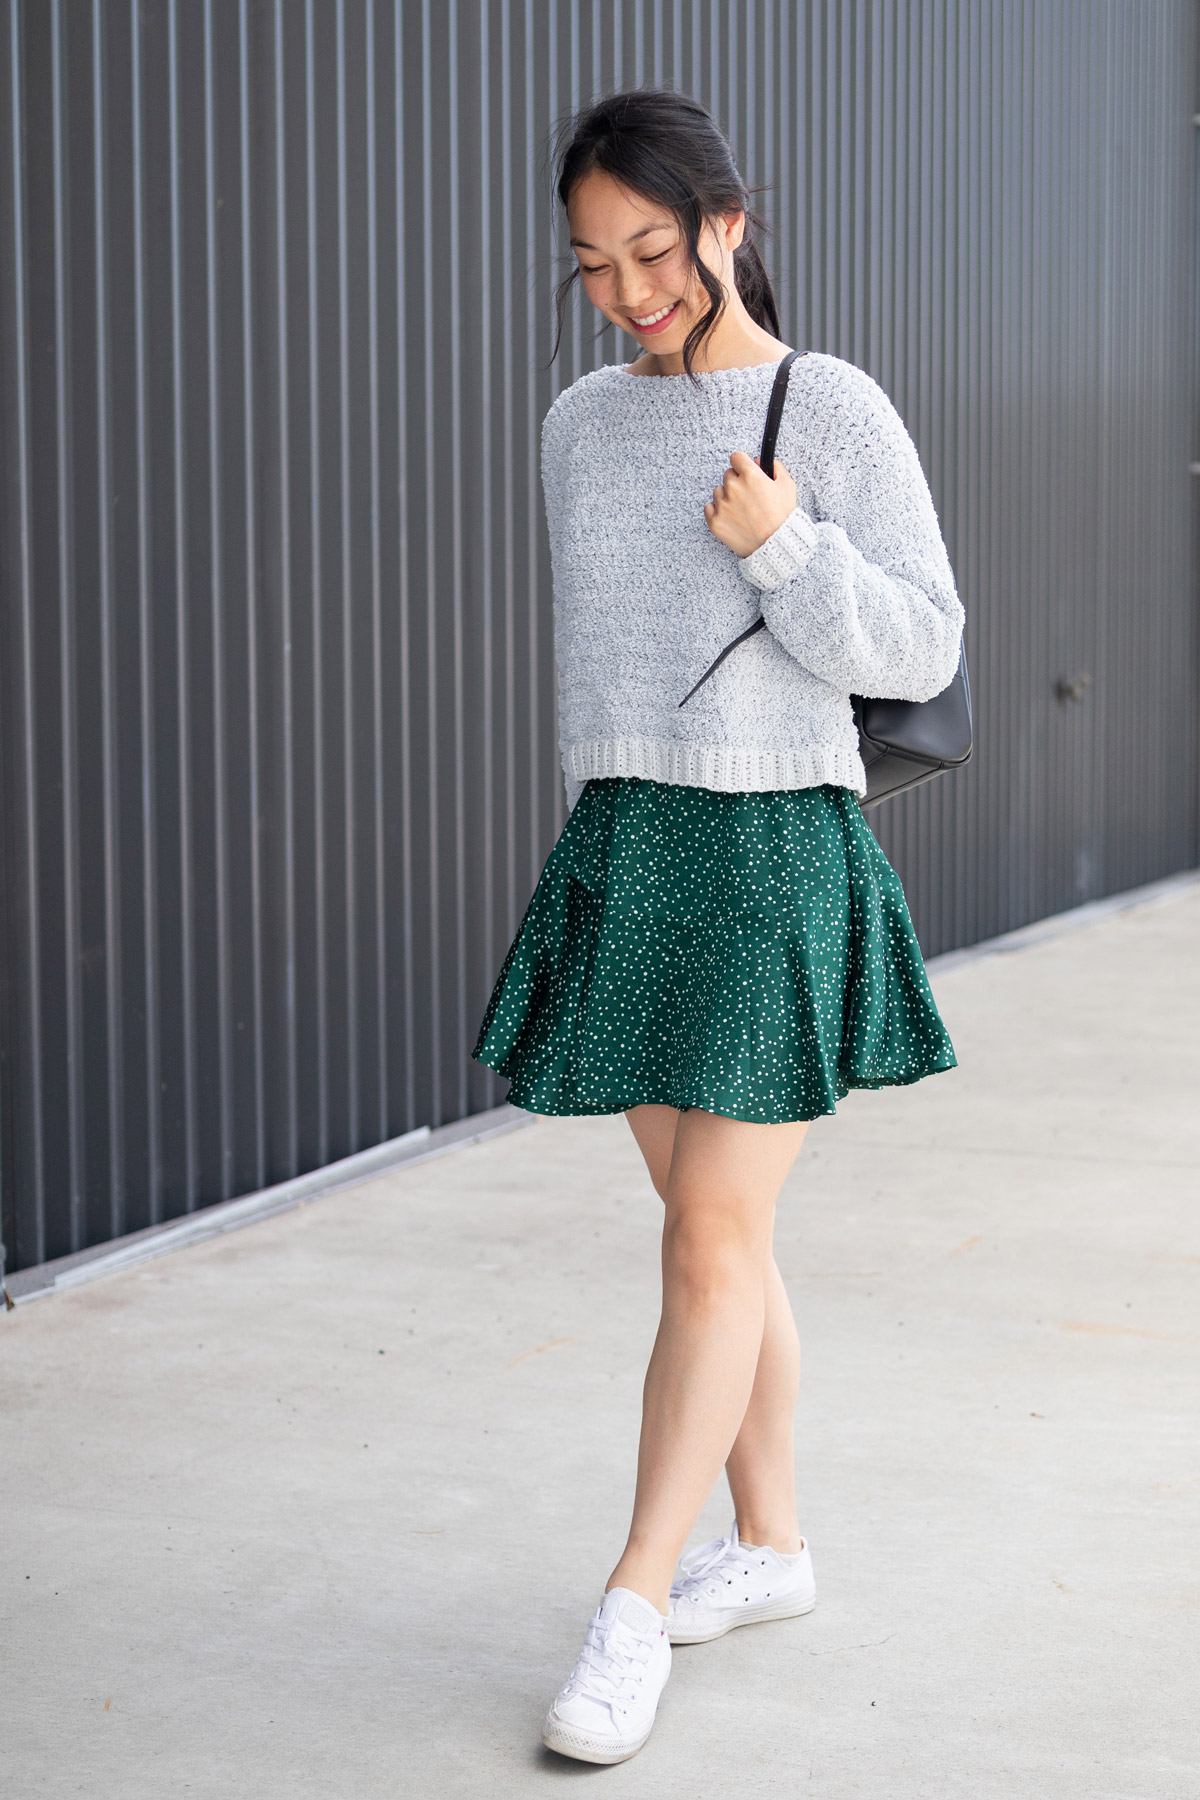
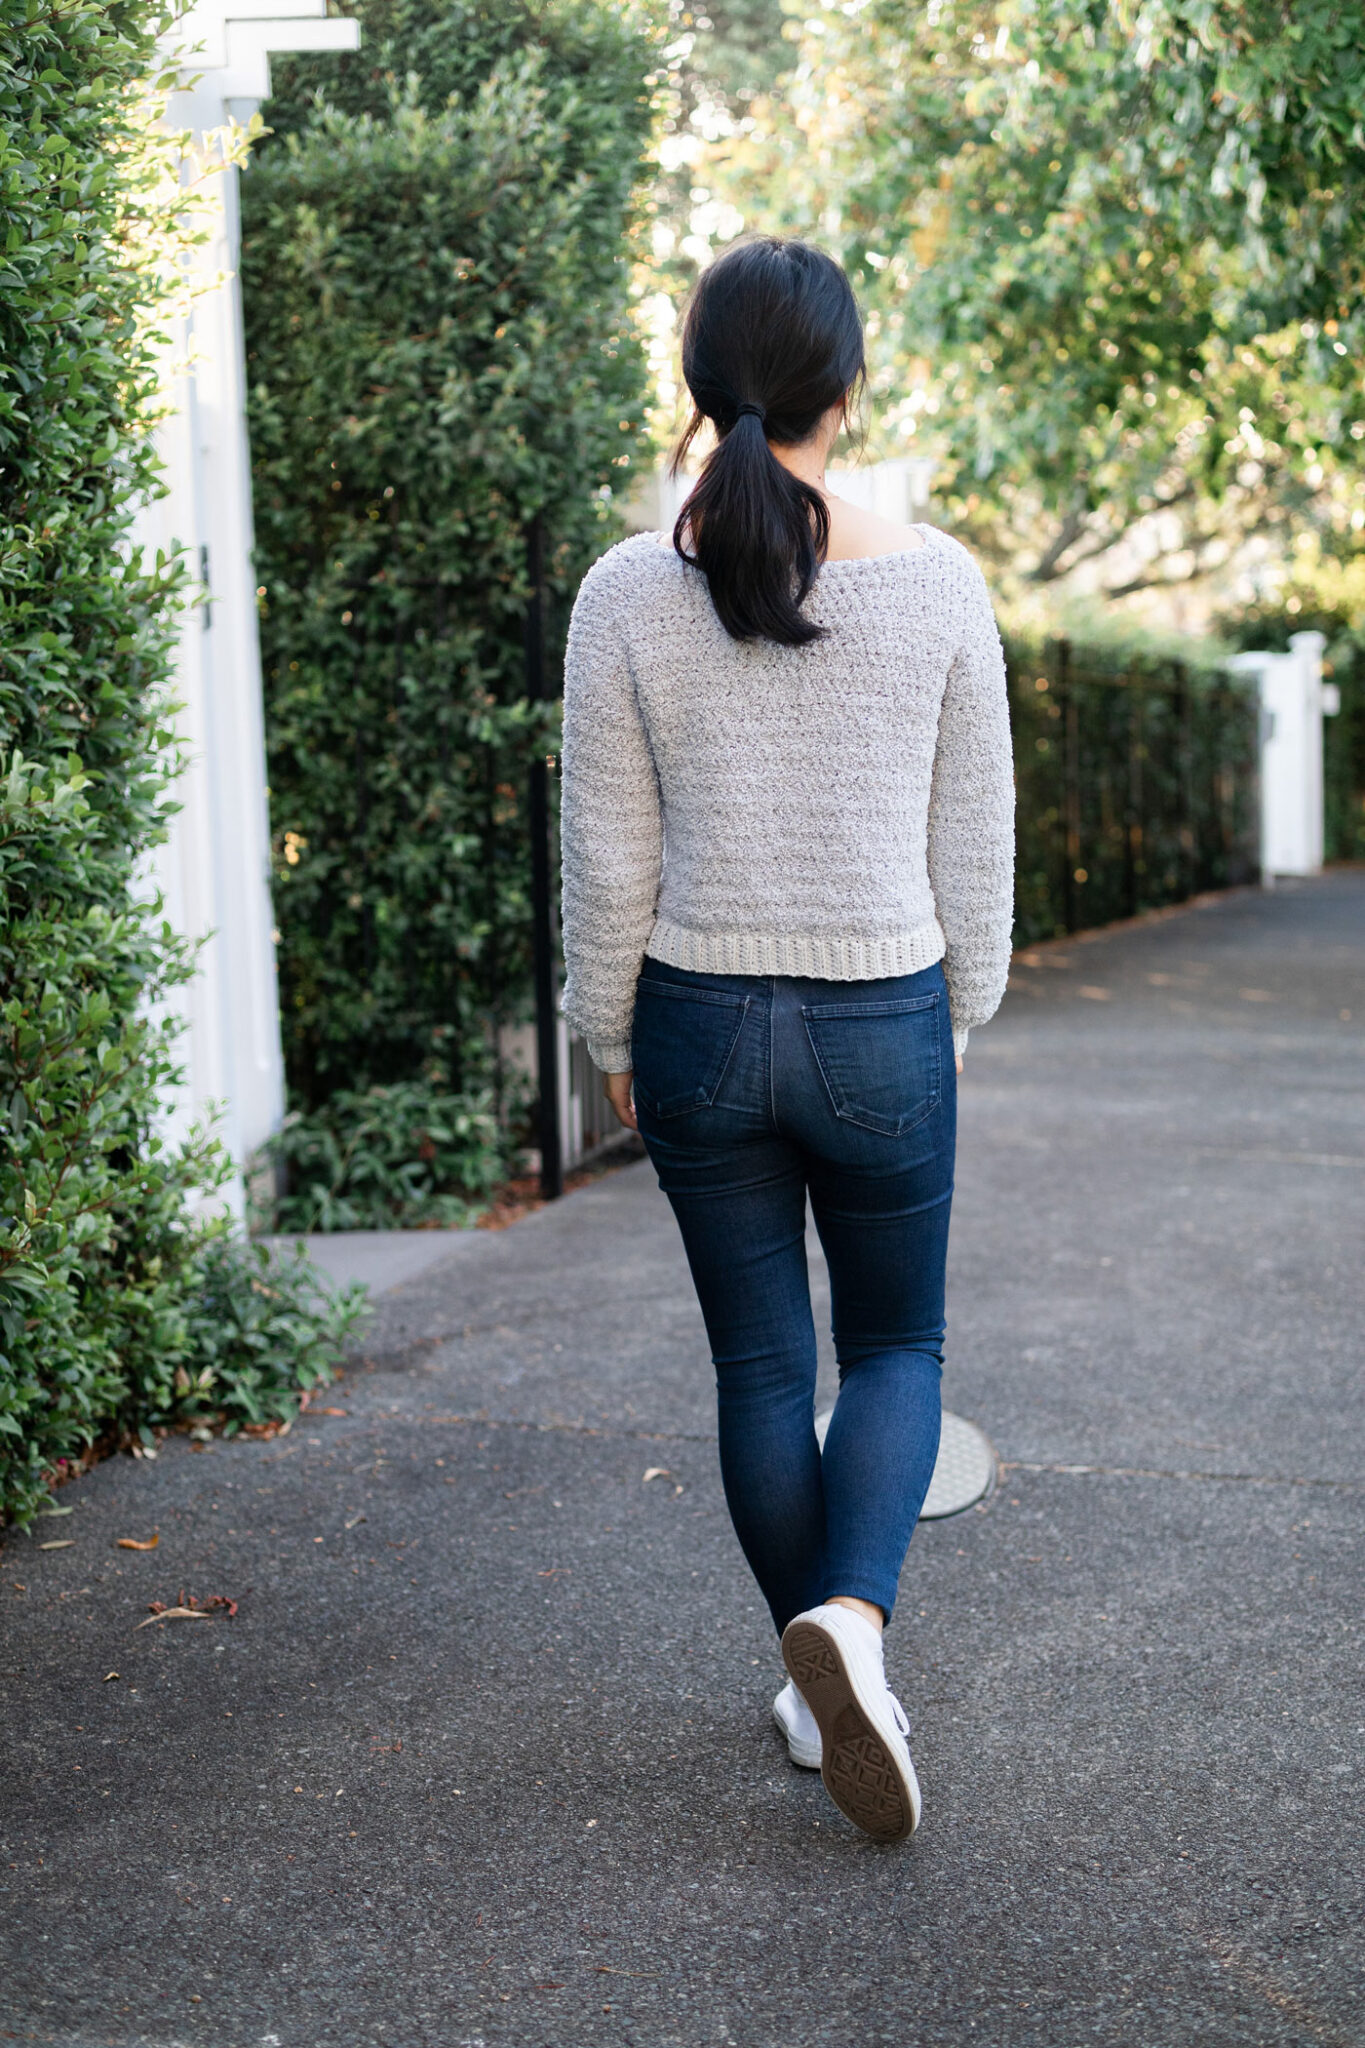
p.s. In this photo, I'm wearing the sweater backwards just to give you an idea of what the sweater looks like without the pocket 🙂
YARN
Lion Brand’s Baby Soft Boucle is key to getting the teddy fleece look for this jumper. Made from 100% polyester, it’s even softer than the Sherpa fleece jumpers you can find in store! It has a soft, smooth fluffy blanket feel whereas the in-store jumpers are made from a fleece fabric, closer to a chunky polar fleece texture.
Combined with the silky smoothness of Feels Like Butta, these two yarns work together to create the ultimate cosy jumper. Seriously, everyone will want to hug when you’re wearing this sweater! And the best part is – it’s just as soft on the inside as it is on the outside!
I used the shade ‘Cloud’ in Baby Soft Boucle and the shade ‘Pale Grey’ in Feels Like Butta. They aren’t an *exact* colour match (a point of much discussion in the Instagram poll haha) but since they are different textures you can barely tell unless you are staring right up close at the stitches.
Both Baby Soft Boucle and Feels Like Butta have a wide range of pastels with a few neutrals and bright shades that match together or you can use contrasting colours for a playful pop of colour! I think this teddy jumper in the baby pink would just be dreamy!
When using Baby Soft Boucle yarn, the texture can make it a bit tricky to see your stitches. I highly recommend ‘feeling’ for your stitches to count them.
When working into the foundation chain, take your time to make sure you have the right stitch count and after a couple of rows you’ll get the hang of ‘feeling’ for your next stitch.
In fact, after a while I got so used to ‘feeling’ the stitches I didn’t even need to look as I crocheted and watched Harry Potter at the same time 🙂 My favourite kind of project!
Check out more free crochet patterns here!
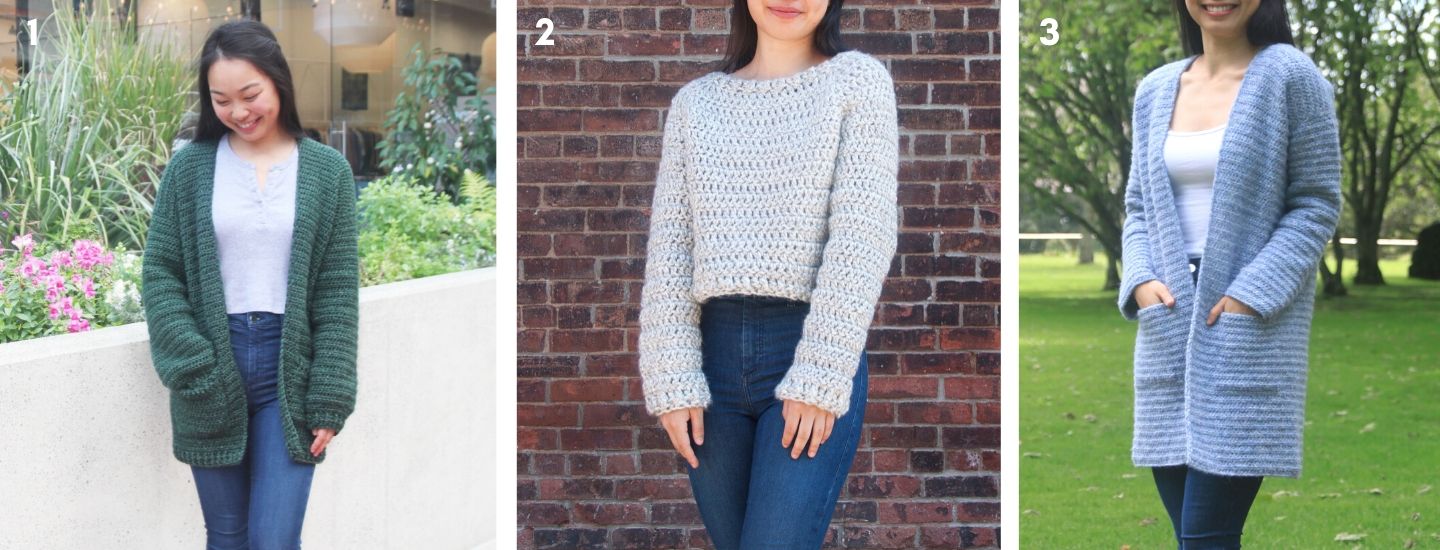
1. Briar Cardigan / 2. Brooklyn Sweater / 3. Stonewash Coatigan
PIN ME FOR LATER!
Add the Dreamer Sweater to your Ravelry queue!
Grab the ad-free, pdf printable version of the Dreamer Sweater!
*Sample is a size small shown on a 5’3” model with a 32” bust.
*The sizing guide follows size XS(S, M, L, XL, 2XL, 3XL). E.g. “Ch 71(79, 87, 95, 103, 111, 119) means Ch 71 for XS, Ch 79 for Small, Ch 87 for Medium, Ch 95 for Large, Ch 103 for XL, Ch 111 for 2XL and Ch 119 for 3XL.” If there is only one number, it applies to all sizes.
*"HDC 10" means HDC into the next 10 stitches.
*"2HDC" means place 2HDC into the same stitch.
*The turning chain ch 1 does NOT count as a stitch.
*Total stitches are indicated between < >.
*This pattern uses US crochet terms.
*This pattern is crocheted in 5 panels – Front, back, 2 sleeves and an optional pocket. The body and sleeve ribbing are crocheted separately and sewn on.
*Length alteration instructions are included in the pattern. Take in account that yardage will decrease/increase if you shorten/lengthen your sweater.
*When using Baby Soft Boucle yarn, the texture can make it a bit tricky to see your stitches. I highly recommend ‘feeling’ for your stitches to count them.
*When working into the foundation chain, take your time to make sure you have the right stitch count and after a couple of rows you’ll get the hang of ‘feeling’ for your next stitch.
LEVEL: Easy
Materials
Yarn A: Lion Brand Baby Soft Boucle – Chunky/Bulky (5), 109m/100g 120yd/3.5oz, 100% Polyester, Cloud
5(6, 6, 7, 8, 8, 9) skeins
approx. 470(515, 565, 655, 710, 800, 865)g
Yarn B: Lion Brand Feels Like Butta – Aran/Worsted/Medium (4), 119m/100g, 100% Polyester, Ice
All sizes - 1 skein
approx. 40(40, 45, 50, 55, 55, 60)g
6.5mm (US K) Crochet Hook
5mm (US H) Crochet Hook
Darning Needle
Scissors
1 Stitch Marker
Measurements cm:
Bust: 76(86, 96, 106, 117, 127, 137)
Width: 39(44, 49, 54, 59, 64, 69)
Length: 45(45, 48, 50, 53, 55, 57)
Armhole: 15(16, 16, 18, 18, 20, 20)
Sleeve length: 42(42, 42, 43, 43, 44, 44)
Measurements inches:
Bust: 30(34, 38, 42, 46, 50, 54)
Width: 15(17.5, 19, 21, 23, 25, 27)
Length: 17.5(17.5, 19, 19.5, 21, 21.5, 22.5)
Armhole: 6(6.5, 6.5, 7, 7, 8, 8)
Sleeve length: 16.5(16.5, 16.5, 17, 17, 17.5, 17.5)
*Measurements taken from the garment lying flat. If using Baby Soft Boucle, the sweater will stretch out slightly in length (approx. 2-5cm/1-2")
Stitches & Abbreviations
Ch = Chain
Sl st = Slip Stitch
HDC = Half Double Crochet
HDC2tog = Half Double Crochet 2 Stitches Together
BLO = Back Loop
St(s) = Stitch(es)
Rep = Repeat
Sk = Skip
GAUGE: 10cm/4” square = 10 stitches wide x 8.5 rows tall in half double crochet
*Using Baby Soft Boucle + 6.5mm (K) Hook
Dreamer Sweater Crochet Pattern
Back Panel
Using Yarn A and the 6.5mm (US K) hook,
FOUNDATION CHAIN: Ch 40(45, 50, 55, 60, 65, 70).
ROW 1: HDC into 2nd ch from hook, HDC across, turn.
<39(44, 49, 54, 59, 64, 69)>
ROW 2: Ch 1, HDC across, turn.
<39(44, 49, 54, 59, 64, 69)>
Repeat ROW 2 until ROW 34(34, 36, 38, 40, 42, 44).
ALTERATION NOTE: You can make your cardigan longer/shorter by adding/removing rows. Please keep in mind that the ribbing adds 5cm/2” to the body length.
Fasten off.
Front Panel
Repeat ‘BACK PANEL’ instructions until ROW 29(29, 31, 33, 35, 37, 39).
ALTERATION NOTE: If you altered the length of the back panel, crochet until you are 5 rows short of the total rows in your back panel. E.g. if you crocheted 40 rows for the back panel, crochet 35 rows for the front panel.
ROW 30(30, 32, 34, 36, 38, 40): Ch 1, HDC 15(17, 19, 21, 23, 26, 28), place st marker in last st, HDC across, turn.
<39(44, 49, 54, 59, 64, 69)>
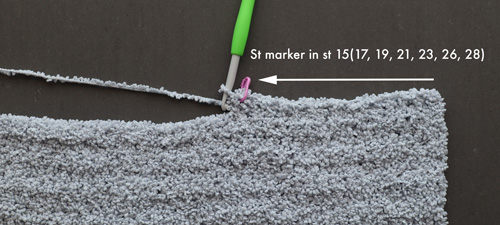
Do not fasten off! Proceed directly to ‘Shoulder Shaping’ instructions.
Shoulder Shaping
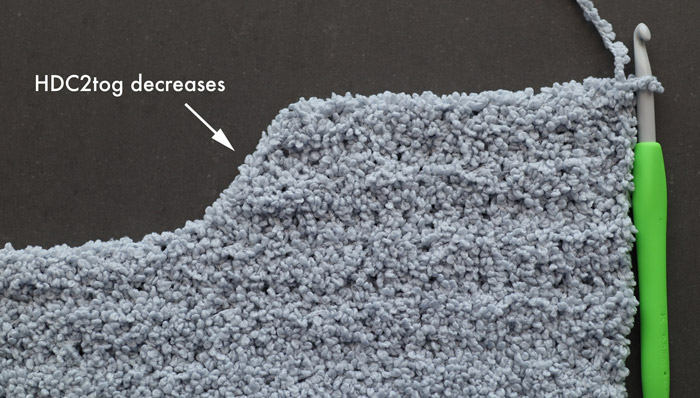
ROW 1: Ch 1, HDC 13(15, 17, 19, 21, 24, 26), HDC2tog, turn.
<14(16, 18, 20, 22, 25, 27)>
ROW 2: Ch 1, HDC2tog, HDC across, turn.
<13(15, 17, 19, 21, 24, 26)>
ROW 3: Ch 1, HDC 11(13, 15, 17, 19, 22, 24), HDC2tog, turn.
<12(14, 16, 18, 20, 23, 25)>
ROW 4: Ch 1, HDC across, turn.
<12(14, 16, 18, 20, 23, 25)>
Fasten off.
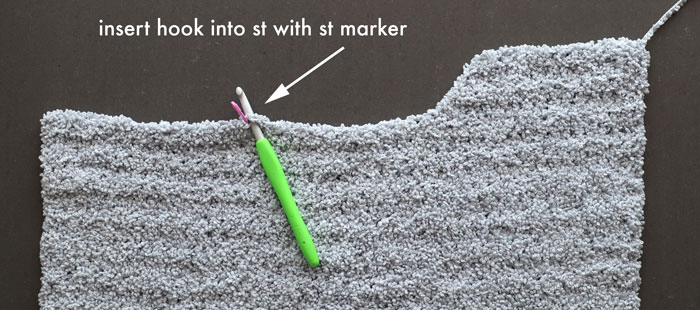
Insert hook into the st with a st marker. Secure yarn and pull up a loop.
ROW 1: Ch 1, HDC2tog, HDC across, turn.
<14(16, 18, 20, 22, 25, 27)>
ROW 2: Ch 1, HDC 12(14, 16, 19, 20, 23, 25), HDC2tog, turn.
<13(15, 17, 19, 21, 24, 26)>
ROW 3: Ch 1, HDC2tog, HDC across, turn.
<12(14, 16, 18, 20, 23, 25)>
ROW 4: Ch 1, HDC across, turn.
<12(14, 16, 18, 20, 23, 25)>
Fasten off.
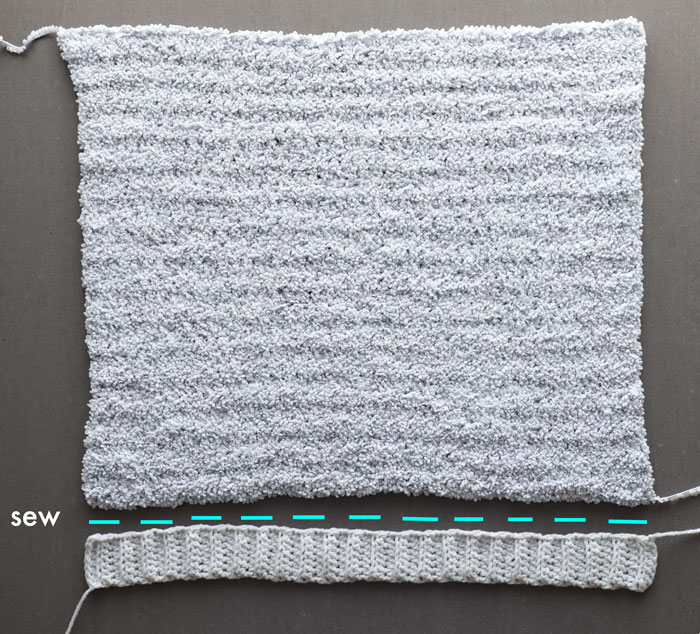
Body Ribbing
*Make 2
Using Yarn B and 5mm (US H) hook,
FOUNDATION CHAIN: Ch 8.
ROW 1: HDC in 2nd ch from hook, HDC across, turn.
<7>
ROW 2: Ch 1, BLO HDC until last st, HDC in last st, turn.
Repeat ROW 2 until ribbing measures width of body panel approx. 39(44, 49, 54, 59, 64, 69)cm / 15(17.5, 19, 21, 23, 25, 27)”
Whip stitch the body ribbing to the bottom of the front/back panel.
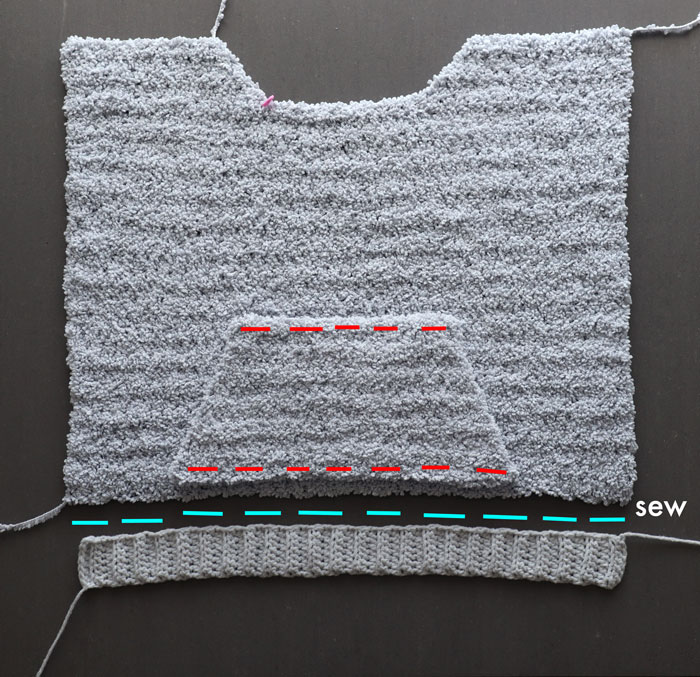
*optional
Using Yarn A and the 6.5mm (US K) hook,
FOUNDATION CHAIN: Ch 17(19, 19, 21, 21, 23, 23).
ROW 1: HDC in 2nd ch from hook, HDC across, turn.
<16(18, 18, 20, 20, 22, 22)>
ROWS 2 - 3: Ch 1, HDC across, turn.
<16(18, 18, 20, 20, 22, 22)>
ROW 4: Ch 1, 2HDC, HDC until last st, 2HDC in last st, turn.
<18(20, 20, 22, 22, 24, 24)>
ROW 5: Ch 1, HDC across, turn.
<18(20, 20, 22, 22, 24, 24)>
ROW 6: Ch 1, 2HDC, HDC until last st, 2HDC in last st, turn.
<20(22, 22, 24, 24, 26, 26)>
ROW 7: Ch 1, HDC across, turn.
<20(22, 22, 24, 24, 26, 26)>
ROW 8: Ch 1, 2HDC, HDC until last st, 2HDC in last st, turn.
<22(24, 24, 26, 26, 28, 28)>
ROW 9: Ch 1, HDC across, turn.
<22(24, 24, 26, 26, 28, 28)>
ROW 10: Ch 1, 2HDC, HDC until last st, 2HDC in last st, turn.
<24(26, 26, 28, 28, 30, 30)>
ROW 11: Ch 1, HDC across, turn.
<24(26, 26, 28, 28, 30, 30)>
ROW 12: Ch 1, 2HDC, HDC until last st, 2HDC in last st, turn.
<26(28, 28, 30, 30, 32, 32)>
Sizes XS(S, M) Fasten off.
Sizes (L, XL, 2XL, 3XL) only:
ROW 13: Ch 1, HDC across, turn.
<(30, 30, 32, 32)>
ROW 14: Ch 1, 2HDC, HDC until last st, 2HDC in last st, turn.
<(32, 32, 34, 34)>
Fasten off.
Whip stitch top and bottom of pocket to the front panel.
Sleeves
*Make 2
Using Yarn A and the 6.5mm (US K) hook,
SIZE XS
FOUNDATION CHAIN: Ch 17.
ROW 1: HDC into 2nd ch from hook, *HDC 2, 2HDC; rep from * across, turn.
<22>
ROW 2: Ch 1, HDC2, *HDC 2, 2HDC; rep from * across, turn.
<30>
ROW 3: Ch 1, HDC across, turn.
Rep ROW 3 until sleeve measures 42cm/16.5”.
Fasten off.
Sizes S/M
FOUNDATION CHAIN: Ch 19.
ROW 1: HDC into 2nd ch from hook, HDC, 2HDC, *HDC 2, 2HDC; rep from * across, turn.
<24>
ROW 2: Ch 1, *HDC 2, 2HDC; rep from * across, turn.
<32>
ROW 3: Ch 1, HDC across, turn.
Rep ROW 3 until sleeve measures 42cm/16.5”.
Fasten off.
Sizes L/XL
FOUNDATION CHAIN: Ch 21.
ROW 1: HDC into 2nd ch from hook, 2HDC, *HDC 2, 2HDC; rep from * across, turn.
<27>
ROW 2: Ch 1, *HDC 2, 2HDC; rep from * across, turn.
<35>
ROW 3: Ch 1, HDC across, turn.
Rep ROW 3 until sleeve measures 43cm/17”.
Fasten off.
Sizes 2XL/3XL
FOUNDATION CHAIN: Ch 22.
ROW 1: HDC into 2nd ch from hook, HDC, 2HDC, *HDC 2, 2HDC; rep from * across, turn.
<28>
ROW 2: Ch 1, HDC 2, *HDC 2, 2HDC; rep from * across, turn.
<38>
ROW 3: Ch 1, HDC across, turn.Rep ROW 3 until sleeve measures 45cm/17.5”.
Fasten off.
Sleeve Ribbing
*All Sizes
Using Yarn B and 5mm (US H) hook,
FOUNDATION CHAIN: Ch 8.
ROW 1: HDC in 2nd ch from hook, HDC across, turn.<7>
ROW 2: Ch 1, BLO HDC until last st, HDC in last st, turn.
Repeat ROW 2 until ribbing measures sleeve cuff width approx. 16(18, 18, 20, 20, 21, 21)cm / 6.5(7, 7, 8, 8, 8.5, 8.5)”
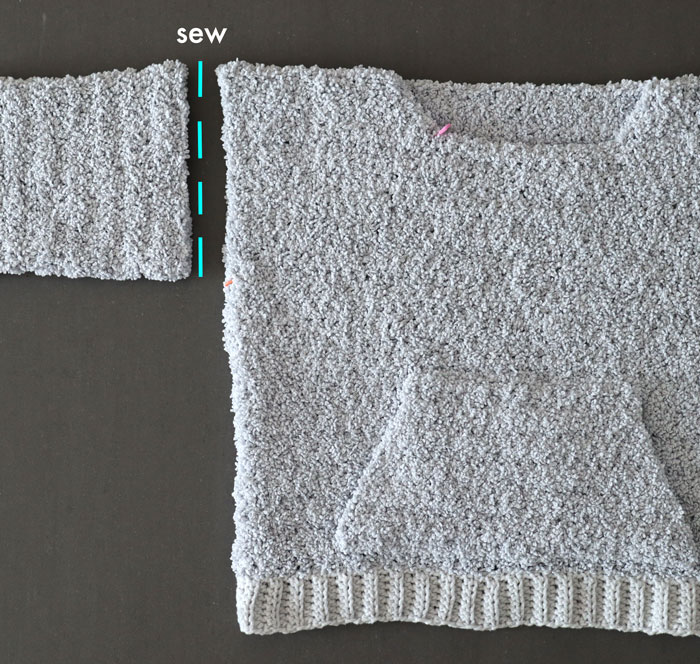
Whip stitch the sleeve ribbing to the sleeve cuff.
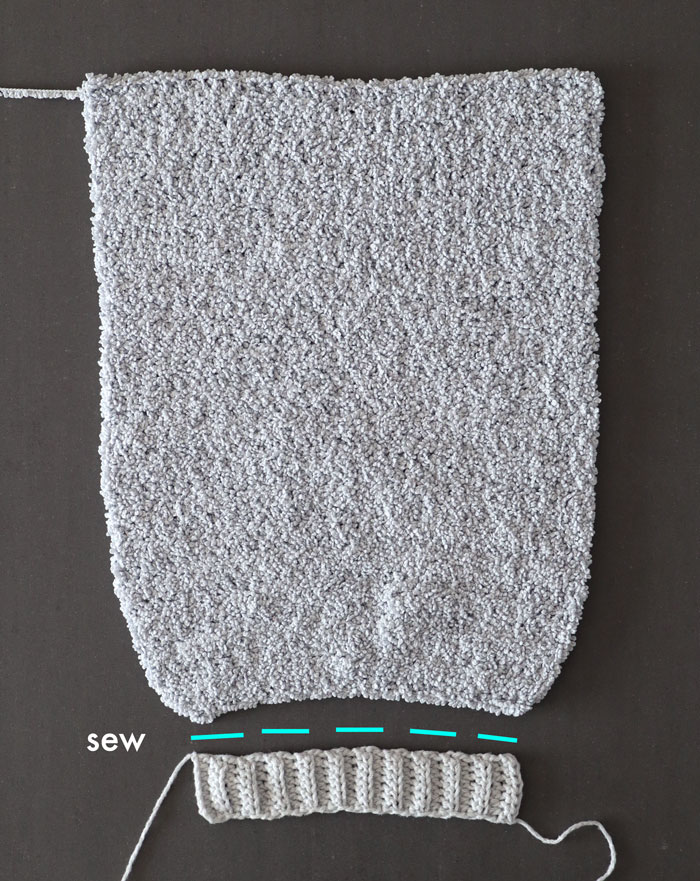
Fold sleeve in half lengthways and whip stitch sides together.

Assembly
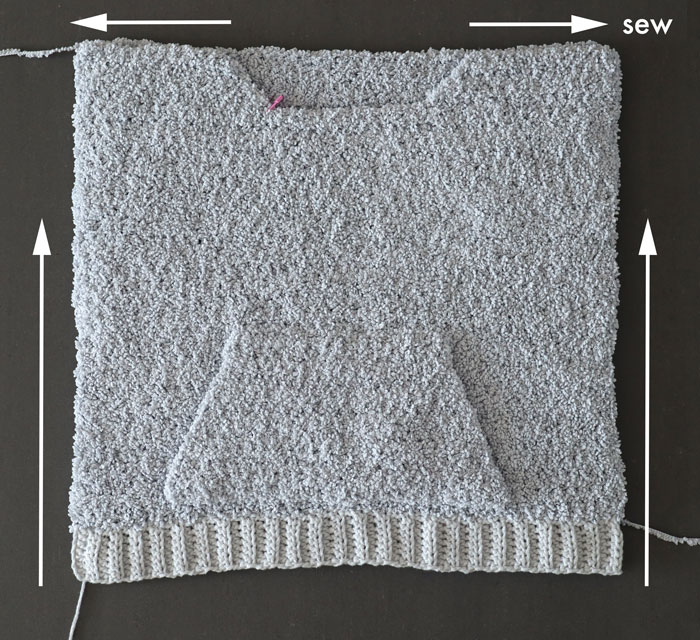
Lay the front panel on top of the back panel.
Whip stitch the shoulder seams together.
Whip stitch up the sides of the body, leaving a 15(16, 16, 18, 18, 20, 20)cm/6(6.5, 6.5, 7, 7, 8, 8)” armhole gap.
Whip stitch top of sleeves to arm holes.
Weave in all of your ends.
Voilà! You’ve finished your Dreamer Sweater 🙂
Hello! Thank you for the pattern. When do you recommend blocking this project? Also, would you recommend killing the acrylic with this pattern? I’m using red heart soft essentials stripes (linen), if that matters.
Thank you again!!
Hi Mary,
I didn't block my project because Lion Bran's Baby Soft Bouclé is so fuzzy, blocking doesn't really make a difference! In general, if you're happy with how your sweater looks and feels I don't block. If I want my sweater to be more relaxed and drapey I'll block it.
I hope this helps,
Grace
Hi! Loved this pattern, but I have a little doubt with the sleeve's. I'm knitting the xs size and I have a little question about de first 2 rows, probably I'm reading bad. But when it's HDC 2 i understand that I have to make two HDC and 2HDC Its both on the same stich. It's that ok? because no matter what I do, I never get the same amount of stitches as the pattern.
Thank you so much!! I love all you patterns
Hi Silvia,
Yes that's how to read the pattern - it might just be because the yarn is so fuzzy you can't 'see' your stitches properly and you're accidentally adding more or fewer stitches. I'd recommend always 'feeling' for the gaps and you can use your finger to gently pull apart the gaps to make sure you're working in the right stitch.
I hope this helps,
Grace 🙂
Hi!
This is a really great sweater? Just had a question: could it be possible to add a hood and make it almost like a hoodie?
Victoria
Hi!
I am so excited to make this sweater, but when I read the gauge, I wanted to know how I could make 8.5 rows -- How do I make that half a row? Since I'm making the swatch in hdc, should I make the last half a row in sc?
Thank you!!! ❤
Please disregard my comment, sorry, I misunderstood and I understand now. Thank you.
Hi, this is a super cute sweater! I wondered if you have any suggestions for a different yarn since the boucle was discontinued? Thanks so much for you patterns!!!