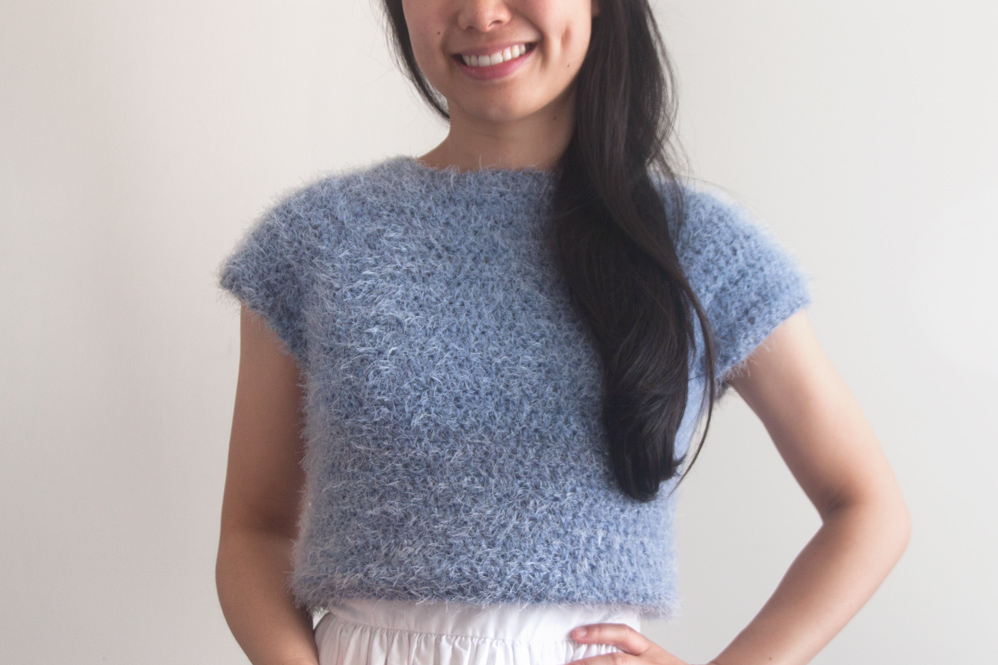
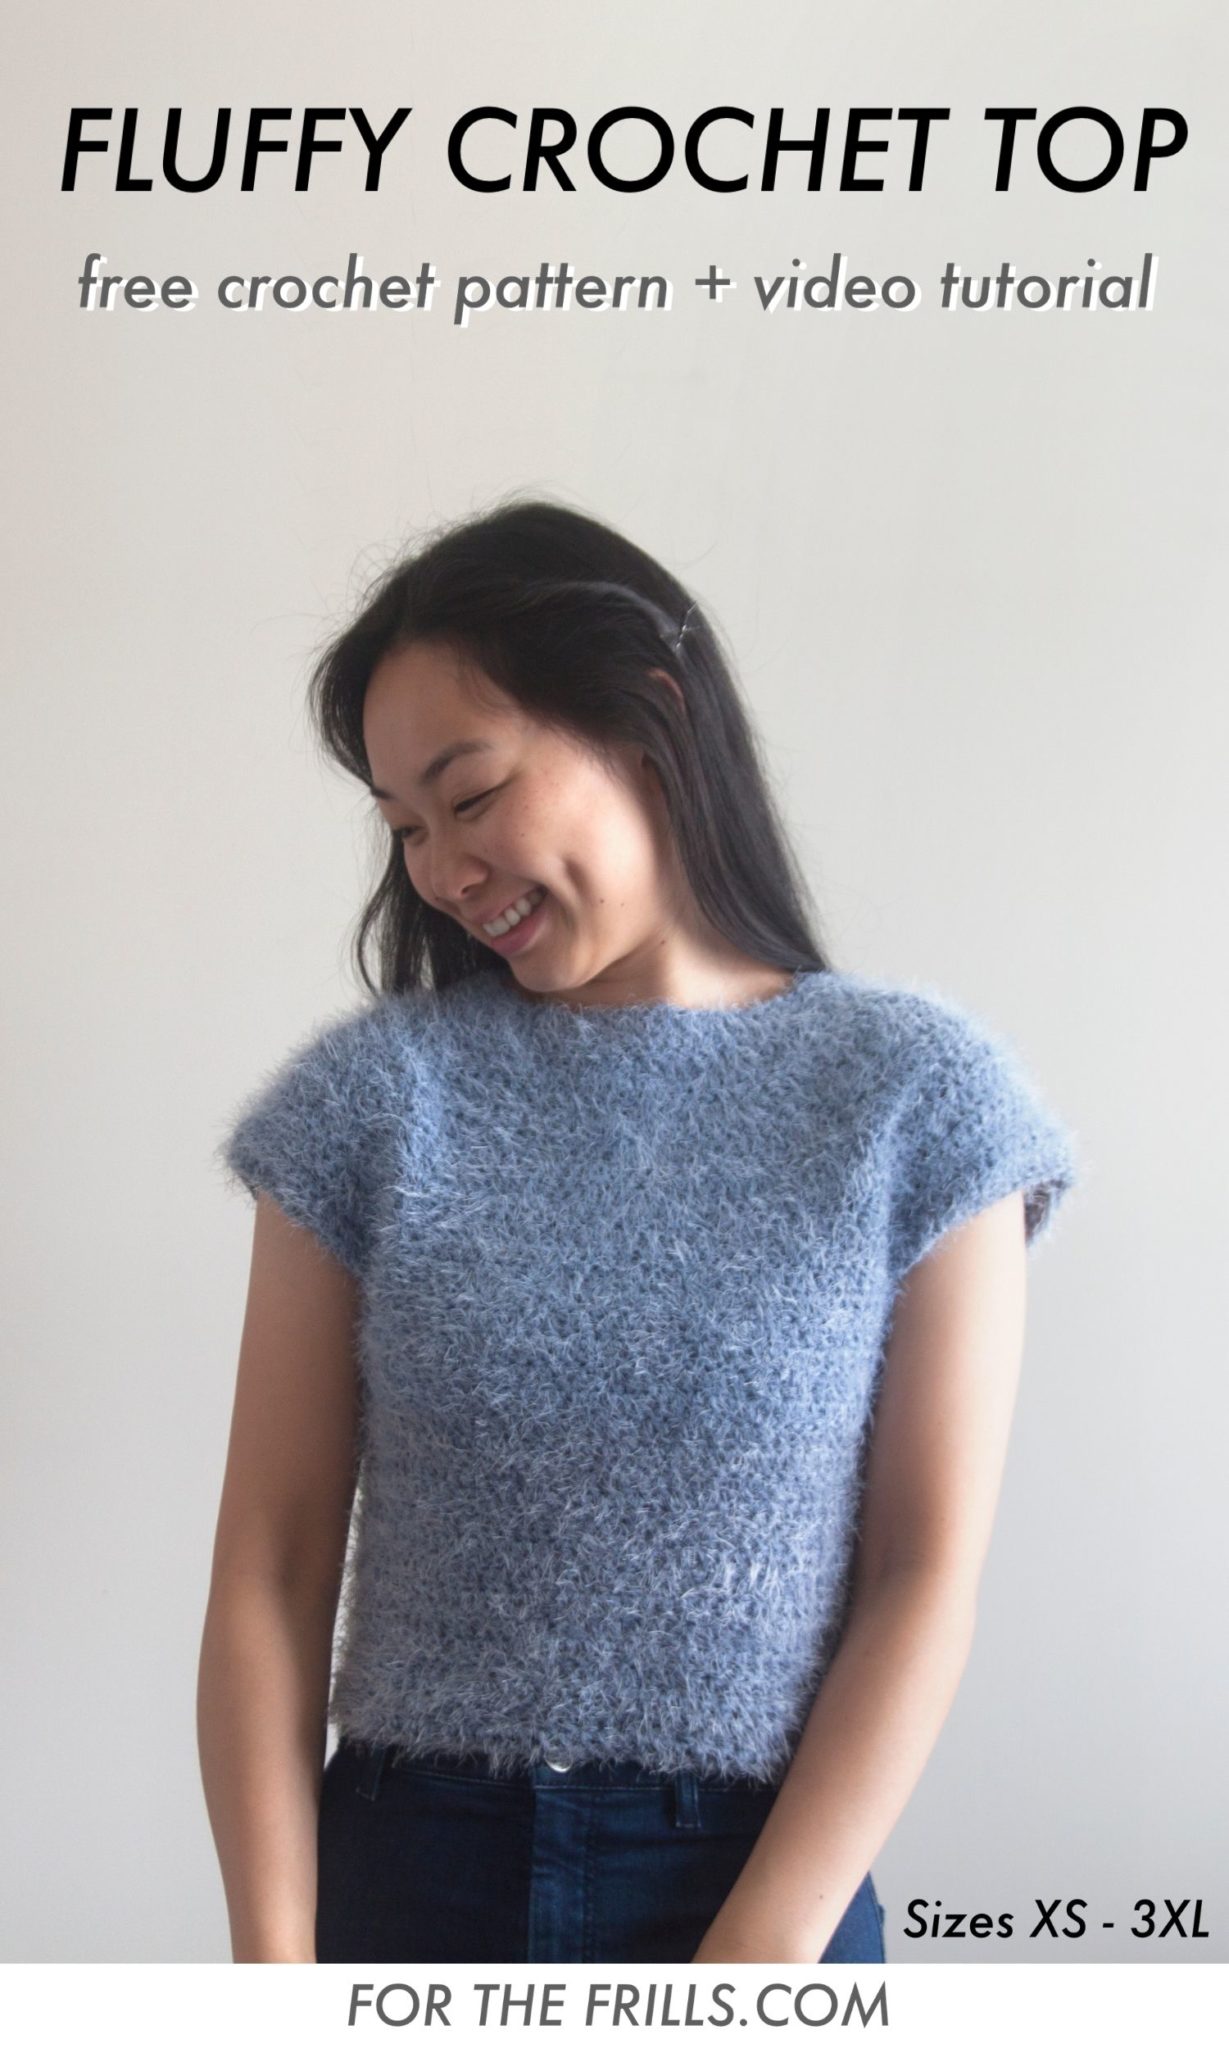
I’m so excited to share my latest free crochet pattern with you – the Fluffy Crochet Crop Top!
This free crochet crop top pattern is accompanied by a video tutorial.
This post may contain affiliate links, view our disclosure policy for details.
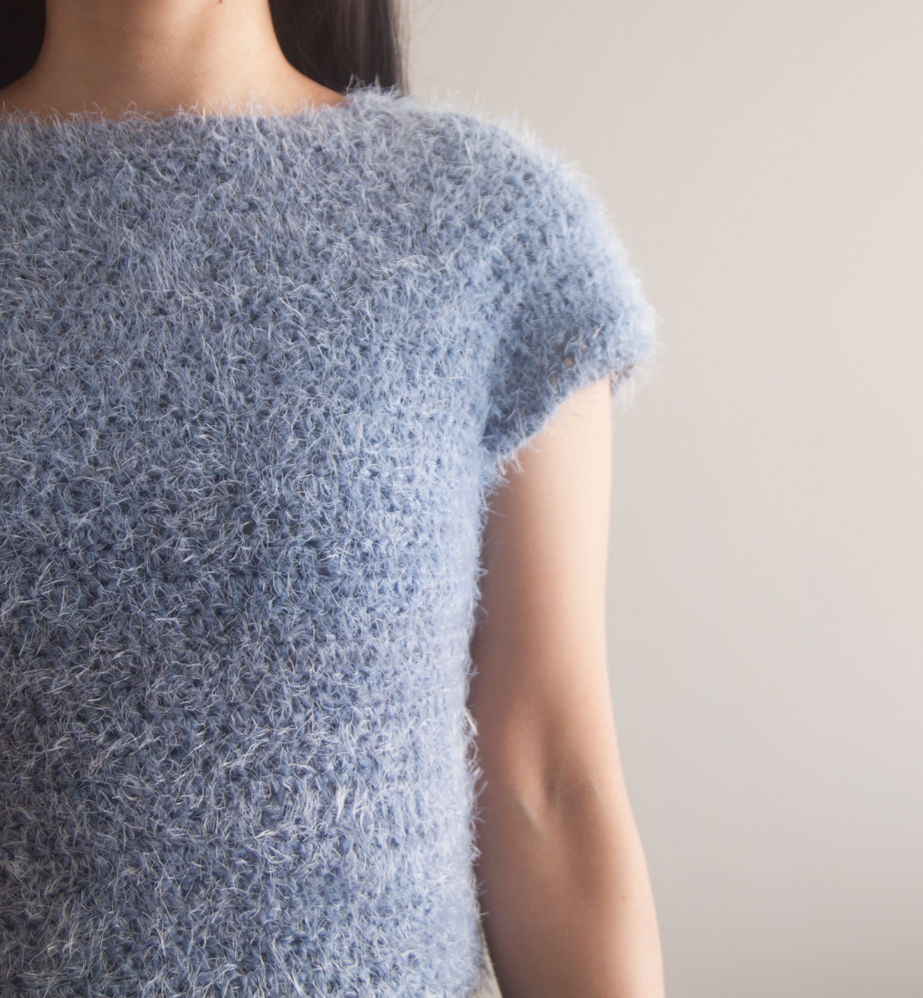
The Fluffy Crop Top is a top-down crochet pattern with short sleeves and a tapered body. It’s designed to be quite fitted so I’ve included lots of alteration instructions along the way so you can get the perfect fit! When creating this top, the most important thing is to try your top as you crochet. The ability to try on and alter your garment as you go is the best feature of top-down patterns 🙂
DESIGN INSPIRATION
I’m a 90’s kid and I have so many fond memories of this fluffy top trend! There’s been a huge resurgence of 90’s fashion lately, some things I love (and things I regretted wearing as a kid and would not wear again haha) but these fuzzy tops were always my favourite 🙂 I loved how they were super stretchy (anyone else remember those crinkle tops?), soft and cool to the touch!
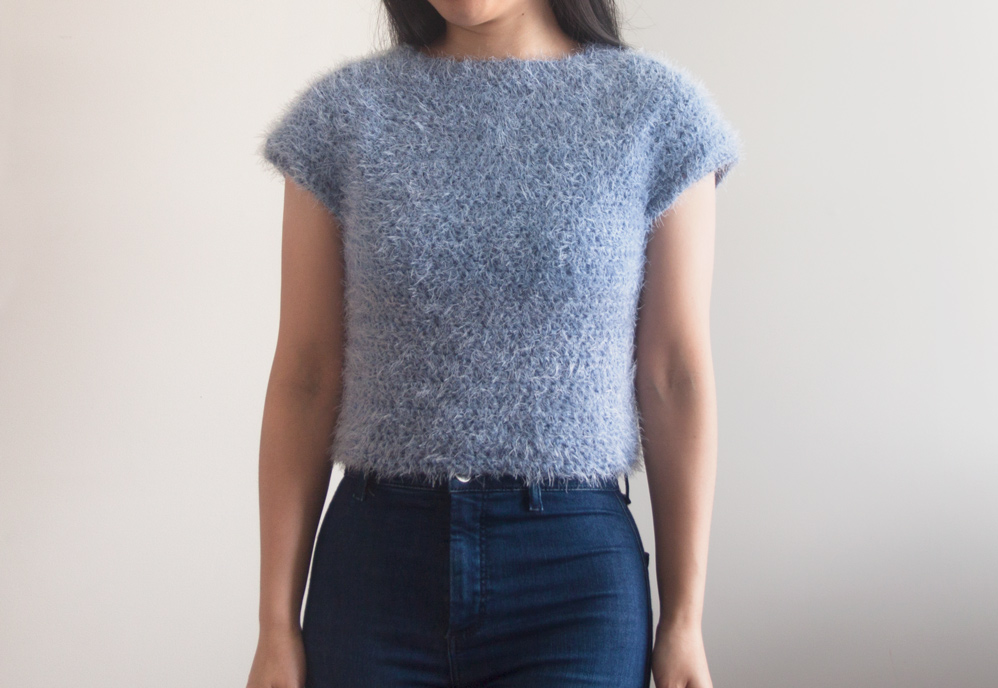
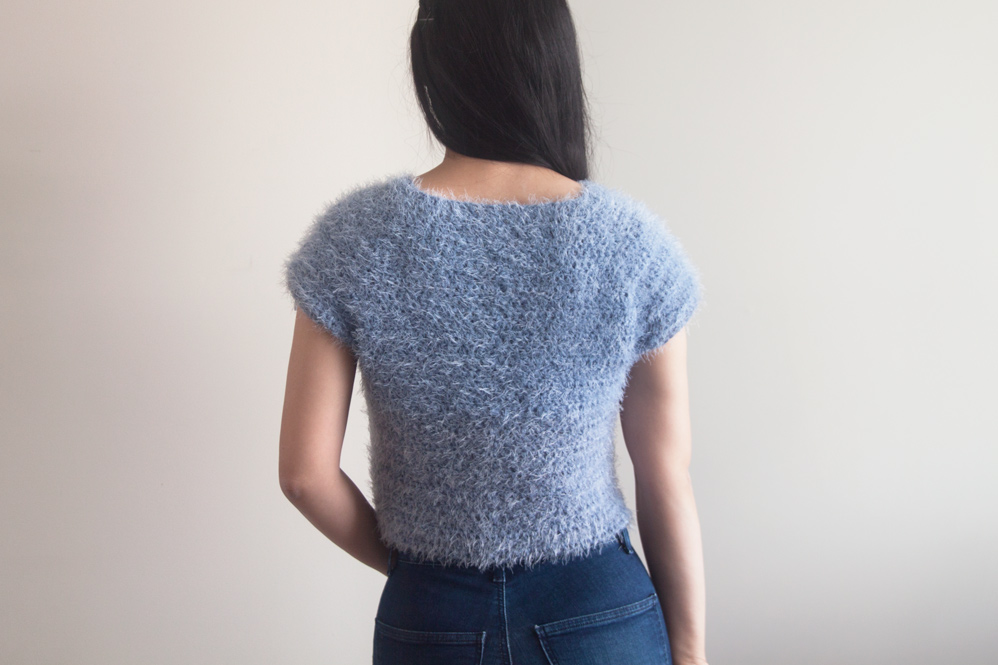
Since this yarn is definitely a statement piece I wanted to create a garment that would be more wearable and versatile. The clean, simple silhouette with cropped body and short sleeves let the yarn to be the star of the show! You can pair this top over dresses or collared shirts for more of a preppy look or pair it with jeans and a leather jacket for an edgy, urban vibe.
YARN
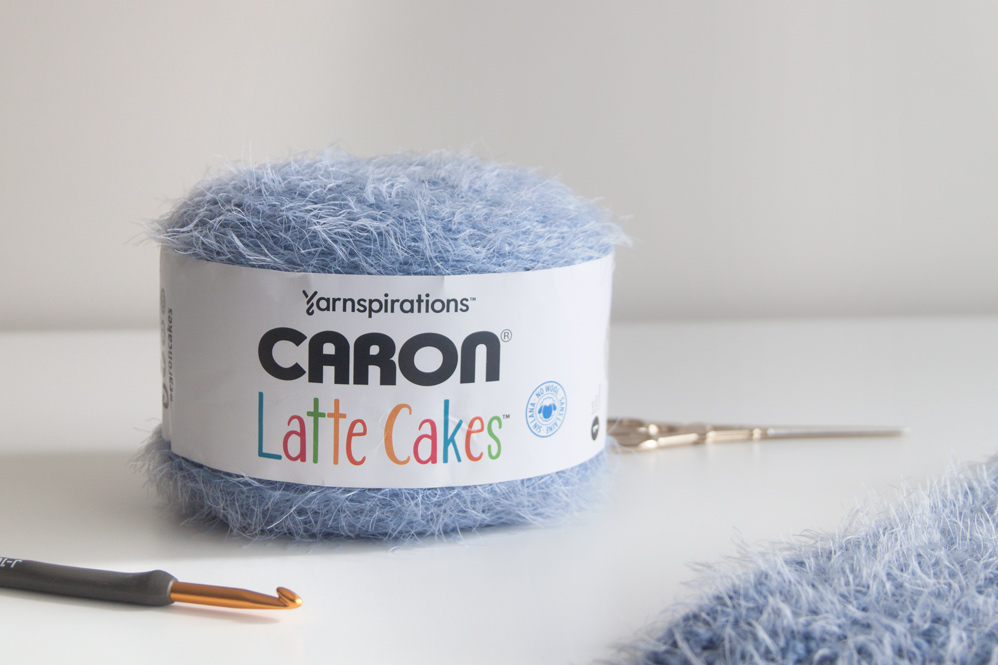
Caron Latte Cakes yarn was 100% the inspiration behind this design! When Caron Latte Cakes first came out I fell in love with the fuzzy, silky-soft feel (like mohair or suri alpaca) and how it’s 100% acrylic so anyone can wear it! However, the initial release only had self-striping cakes and while they are gorgeous, I’m a bit too pedantic with colour changes in garments to just wing it.
This year Caron released some solid colours and I was so excited to create a design with it! There are currently over 20 different shades of which 5 are solids. The 5 solids are roasted tomato, grinding teal, plum, grey velvet and blueberry mist (the colour used in the pattern!). I wish they’d come out with more solids, specifically neutrals and pastel colours! Can you imagine a pale mint colour in this yarn?
If you can’t find Caron Latte Cakes, Lion Brand Soft Spoken is a similar alternative or you can hold 1 strand of aran/worsted weight yarn with 1 or 2 strands of mohair. Just remember to swatch your yarn to make sure you meet gauge!
Check out more free crochet patterns!
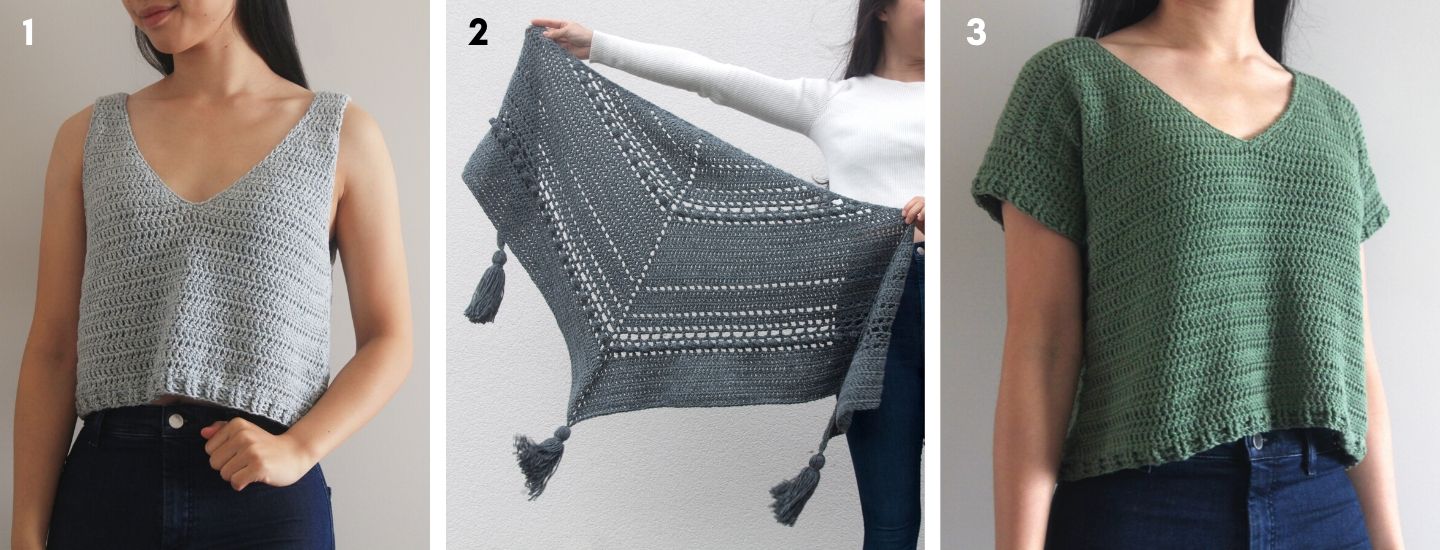
1. Sea Breeze Tank Top / 2. Stormborn Wrap / 3. Forest Breeze Tee
Pin me for later!
Fluffy Crochet Top Video Tutorial
Add this pattern to your Ravelry queue here!
Purchase the inexpensive ad-free, printable version on Etsy or LoveCrafts!
*The sizing guide follows size XS(S, M, L, XL, 2XL, 3XL). E.g. “DC 92(106, 120, 134, 148, 162, 176) means DC 92 for XS, DC 106 for Small, DC 120 for Medium, DC 134 for Large, DC 148 for XL, DC 162 for 2XL and DC 176 for 3XL.
*"DC 10" means DC into the next 10 stitches.
*"3DC" means place 3 DC into the same stitch.
* Ch 2 does NOT count as a stitch.
*Total stitches are indicated between < >.
*This pattern uses US crochet terms.
*Caron Latte Lakes is a very stretchy and forgiving yarn, thus this pattern is designed to be form fitting (0-10cm/0-4” negative ease).
*To replace Caron Latte Cakes I suggest pairing an aran/worsted weight merino or acrylic yarn that has a lot of stretch with 1 strand of mohair (for a more subtle effect) or 2 strands of mohair. If using an alternative yarn, swatch to meet gauge and change your hook size if needed.
*This pattern is created top down, so you can try on the project and alter as you wish (alteration suggestions provided throughout the pattern).
*Pictured sample is size S and on a 5’3” model with 32” bust.
LEVEL: EASY
MATERIALS:
Yarn – Caron Latte Cakes – Chunky/12 ply/Bulky (5), 485m/250g, 58% Acrylic + 42% Nylon, Blueberry Mist
1(1, 1, 1, 2, 2, 2) skeins
STITCHES & ABBREVIATIONS:
Ch = Chain
Sl st = Slip Stitch
DC = Double Crochet
DC2tog = Double Crochet 2 stitches together
St(s) = Stitch(es)
Rep = Repeat
GAUGE:10cm/4” square = 11.5 stitches wide x 8 rows tall in double crochet
*Gauge is measured from swatch crocheted in rows, not in the round.
Measurements cm
To fit Bust: 76(86, 94, 102, 112, 122, 132)
Bust: 76(81, 88, 97, 106, 114, 122)
Length: 41(43, 46, 48, 51, 54, 59)
Measurements inches
To fit Bust: 30(34, 37, 40, 44, 48, 52)
Bust: 30(32, 35, 38, 42, 45, 48)
Length: 16(17, 18, 19, 20, 21.5, 23)
FLUFFY CROP TOP CROCHET PATTERN
YOKE
FOUNDATION CHAIN: Ch 60(60, 60, 68, 68, 68, 68), sl st into 1st ch to join. Make sure your ring of chains isn’t twisted!
ROUND 1: Ch 2, DC 11(11, 11, 12, 12, 12, 12) – place st marker in last st, DC 10(10, 10, 12, 12, 12, 12) – place st marker in last st, DC 20(20, 20, 22, 22, 22, 22) – place st marker in last st, DC 10(10, 10, 12, 12, 12, 12) – place st marker in last st, DC 9(9, 9, 10, 10, 10), sl st to join, turn.
<60(60, 60, 68, 68, 68, 68)>
(Note: 3DC should always be placed in a st with st marker. After crocheting 3DC into the st with a st marker, remove the st marker and place it in the 2nd DC of the new 3DC cluster)
ROUND 2: Ch 2, DC 10(10, 10, 11, 11, 11, 11), 3DC in st with st marker, DC 9(9, 9, 11, 11, 11, 11), 3DC in st with st marker, DC 19(19, 19, 21, 21, 21), 3DC in st with st marker, DC 9(9, 9, 11, 11, 11, 11), 3DC in st with st marker, DC 9(9, 9, 10, 10, 10, 10), sl st to join, turn.
<68(68, 68, 76, 76, 76, 76)>
ROUND 3: Ch 2, DC 11(11, 11, 12, 12, 12, 12), 3DC, DC 11(11, 11, 13, 13, 13, 13), 3DC, DC 21(21, 21, 23, 23, 23, 23), 3DC, DC 11(11, 11, 13, 13, 13, 13), 3DC, DC 10(10, 10, 11, 11, 11), sl st to join, turn.
<76(76, 76, 84, 84, 84, 84)>
ROUND 4: Ch 2, *DC in each st until st with st marker, 3DC in st with st marker; rep from * three more times; DC in each remaining st, sl st to join, turn.
<84(84, 84, 92, 92, 92, 92)>
Repeat ROUND 4 until ROUND 13(14, 16, 18, 20, 22, 25).
<156(164, 180, 204, 220, 236, 260)>
JOINING ROUND: Ch 2, DC in each st until st with st marker, DC in st with st marker, DC into the next st with a st marker (skipped stitches form your 1st armhole), DC in each st until next st marker, DC in st with st marker, DC in last st with a st marker (skipped stitches form your 2nd armhole), DC in each st until end of round, sl st to join, turn.
<90(94, 102, 114, 122, 130, 142)>
*ALTERATION NOTE: I highly recommend trying on your top to check fit. You should be able to move your arms freely in the armholes and the bust should fit comfortably. To alter the top, remove the JOINING ROUND and remove/add repeats of ROUND 4 to make the top tighter/looser. Repeat the JOINING ROUND.
(Note: Altering the yoke will change the total number of stitches in your final round. Follow the pattern instructions for the size with the total stitch count that is closest to your number of stitches.)
Do not fasten off! Move directly to ‘BODY’ instructions.
BODY
BODY ROUND 1: Ch 2, DC in each st in the round, sl st to join, turn.
<90(94, 102, 114, 122, 130, 142)>
*OPTIONAL: This step isn’t necessary but I find that the st markers help to remind you to place a DC2tog underneath each armhole. With your top lying flat, place a st marker underneath each armhole (exact placement isn’t important). For BODY ROUND 2, when you reach a st marker, DC2tog. When crocheting into the st with the st marker remove it and replace place it on top of the new st.
BODY ROUND 2: Ch 2, DC around, DC2tog underneath armhole, DC around, DC2tog underneath armhole, DC in each st until end, sl st to join, turn.
<88(92, 100, 112, 120, 128, 140)>
Repeat BODY ROUNDS 1-2 until BODY ROUND 16.
<74(78, 86, 98, 106, 114, 126)>
Repeat BODY ROUND 1 until BODY ROUND 17(17, 18, 18, 19, 19, 20) or until you reach your desired length.
*ALTERATION NOTE: For a boxier fit, do not alternate between BODY ROUND 1 and 2. Repeat BODY ROUND 1 until you reach your desired length.
For a tighter fit, do not alternate between BODY ROUND 1 and 2. Repeat BODY ROUND 2 until you are 1.5cm/0.5” short of your desired length. For your final row repeat BODY ROUND 1.
As always I recommend trying your top on as you crochet and you can also use any mix of BODY ROUNDS 1 and 2 to achieve the perfect fit for your body.
Fasten off.
SLEEVES
Insert crochet hook in st along edge of the sleeve. Secure yarn and pull through a loop.
ROUND 1: Ch 2, *DC 3(4, 4, 5, 6, 7, 8), DC2tog; rep from * five more times, DC in each remaining st, space out 2 DC2tog in between the two st makers, sl st to join.
<31(33, 37, 43, 47, 51, 57)>
*ALTERATION NOTE: To extend the sleeves: ch 2, DC in each st in the round, sl st to join, turn. Repeat until you reach your desired length.
Fasten off.
Weave in your ends.
Voilà! You’ve finished your Fluffy Crop Top 🙂
Can you make this as a sleeveless?
Hi Debbie, since this pattern is worked top down it will have short cap sleeves sorry! If you'd like a sleeveless top you can check out the Sea Breeze Tank Top here - although it's a bit more of a summer project 🙂 Grace
Hi Grace. I just made your top and love how it turned out. I did add a row of ribbing at the bottom and also at the edges of the cap sleeves. I planned to give it as a gift but may keep it!
I love this pattern so much. Would it be possible to extend the sleeves to make a sweater?
Thank you Zikra! Sure you can extend the sleeves to make the top a sweater, just keep crocheting more rounds until you reach your wrists. You might want to decrease as you get closer to your wrist if you want fitted sleeves 🙂 I hope this helps, Grace
Thanks Grace! I’ll try this out
I made it with bell sleeves!
Im so glad you mentioned the Lion Brand Soft Spoken as an alternate yarn to use! I bought 3 skeins of it awhile back and as you know... it isnt cheap at $15.00 a cake! But I didnt know what o do with it. There wasnt enough for a huge project, and there was too much for a simple tank or sofa pillows. This design is perfect for it, and I am making it as I write this - just took a minute to say thanks for the suggestion. .
What is the yardage for the yarn? I really want to make this, it’s so pretty!
I’m a new crocheter and I love your patterns!
I live in a place with a pretty limited variety of yarn so I can’t find a fuzzy yarn like the one you’ve used. I was wondering if the project can be done with another regular acrylic yarn? Would any chunky/bulky weighted yarn work?
Thanks!
Hi, I absolutely love the look. I just started and now I'm at body round 4 (alternating between body round 1 and round 2).
I just read about sleeve and you say "insert hook along the edge of the sleeve". I'm confused - where is my sleeve supposed to be in my project. Also, I noticed that the stitch at the end of each row is not in the middle portion of the top (like in your video), rather it is on the side (along the sleeve part). I'm not sure where I went wrong. I would love to show you a picture if you could help.
Thanks a ton!
Hi Chloee,
It sounds like you might have connected the wrong sections together in the joining row. The sleeve portions should look like the sample sweater sweater - the openings will be a lot smaller than the body portion (since only your arm needs to fit through as opposed to your entire torso). I suggest trying on your sweater and it will be super obvious where all of the openings are!
Grace
Hello Grace, i am in the middle of making this pretty top (still in progress) if i want to turn it into a sweater, can i just continue to crotchet the sleeves until the length i desired? Any tips ie. to continue decrease every several stitches or increase stitches, etc ... ?
Hi Maggie,
Sure you can extend the sleeves of this sweater. If you want tapered sleeves as a starting point I'd try to decrease by 1 stitch every 3-4 rows but the best way would just be to try on the sweater after a couple of rows and decrease the sleeves as necessary.
I hope this helps,
Grace 🙂
Hi Grace!
How much of the cake did you use size small? I'm making a blanket with this yarn and I want to make sure I have enough to make this top too.
Thanks
Hi! I love all your patterns they’re so helpful and easy to follow! I hope you are well and staying safe.
I was wondering if you could help me. After I’m finished with the yoke, the back portion always folds and bunches. I’ve redone it a million times and I don’t know what to do. Do you have any advice you could give me? I would really appreciate it!
Hi Demi,
It sounds like either 1. your gauge doesn't match the pattern so the stitches aren't lying flat or 2. the stitch count might be off in the back portion - it should have the same number of stitches as the front portion. This happens if you've accidentally added an extra stitch at the end of each round. Remember that at the end of each round that final 'gap' isn't actually a stitch, it's connected to the turning chain.
I hope this helps,
Grace 🙂
Hey Grace..thanks for such great video and sharing your pattern. It’s quite hot here so the fuzzy yarn is a no no for me😅😅😅will try with an ordinary cotton or acrylic or a mercerized yarn.
What part of the body do I measure to get an accurate number of chains for my yoke. Somehow the measurements in the pattern don’t seem to fit.
Hi Elorm,
The chain for the yoke = the size of the neck opening whereas the measurements are using your bust for sizing. So that first foundation chain shouldn't match the bust measurements. If you're using a different yarn, please swatch to make sure you can meet gauge, if your gauge is off that could also be why your foundation chain is too small/large.
Grace
Thanks Grace
Hi Grace, I have a question. When you join rounds, do you slip stitch into the DV or the top of the chain 2? Thanks!
Gayle
Would it be possible to make a bell sleeve!? I love this pattern!