
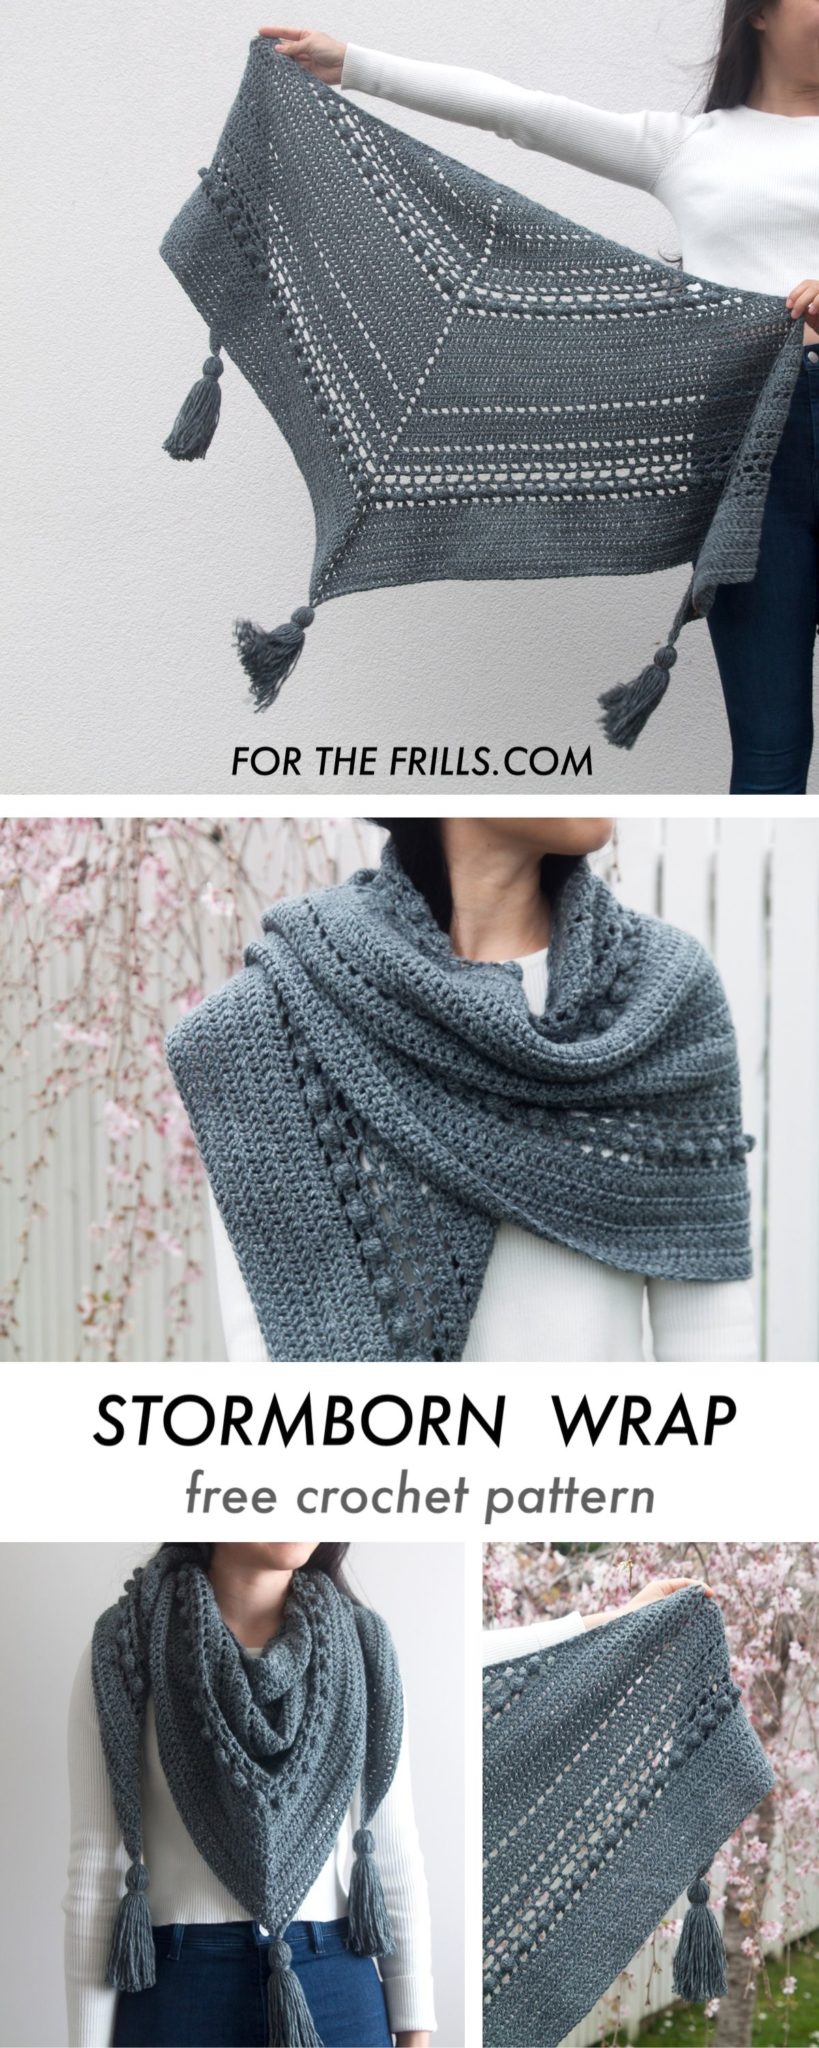
Looking for a modern crochet wrap pattern? The Stormborn Wrap is an elegant and understated triangle crochet shawl that instantly elevates any outfit! This free crochet wrap pattern uses simple stitches and chains to create a uniquely textured and wearable crochet accessory that’s perfect for fall and winter!
This post may contain affiliate links, view our disclosure policy for details.
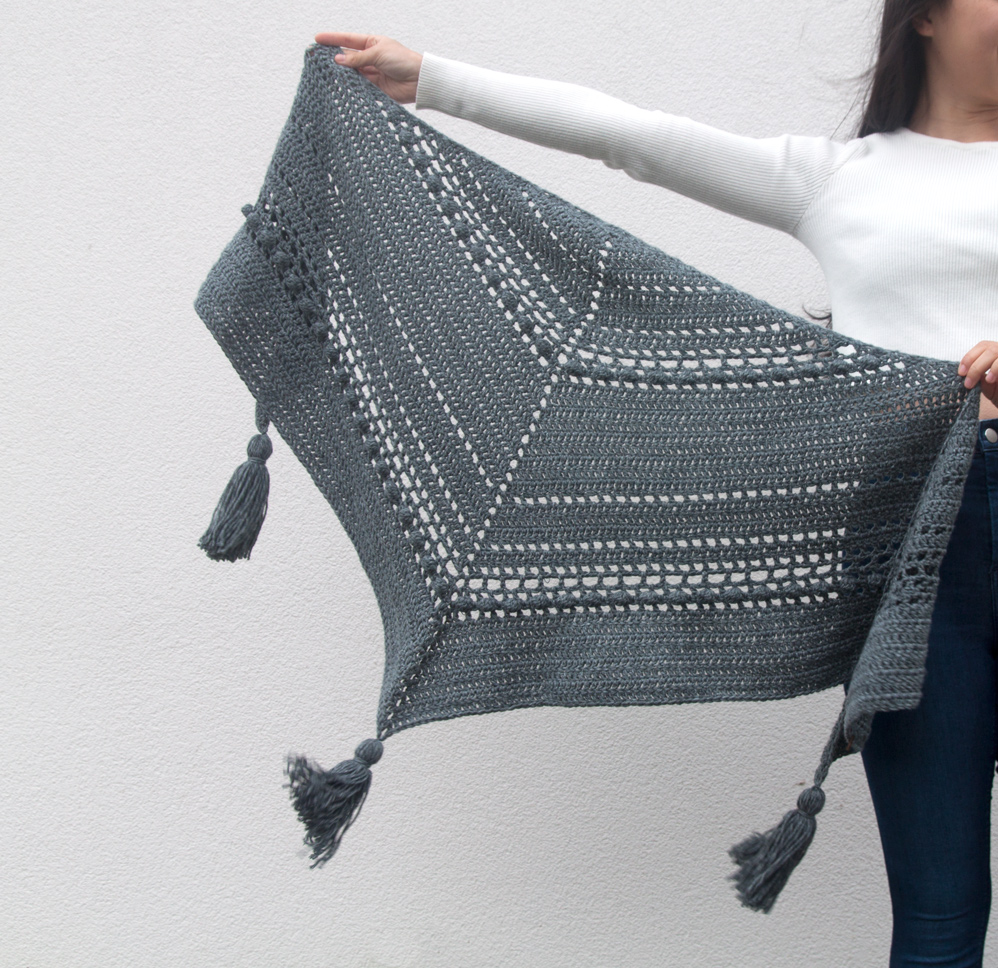
Keep yourself cosy on windy days with the Stormborn Wrap! Theis large, oversized triangle wrap is worked from the centre out so it can be customised to any size! Simply crochet fewer rows for a simple crochet scarf or crochet more rows to create a large and drapey crochet shawl.
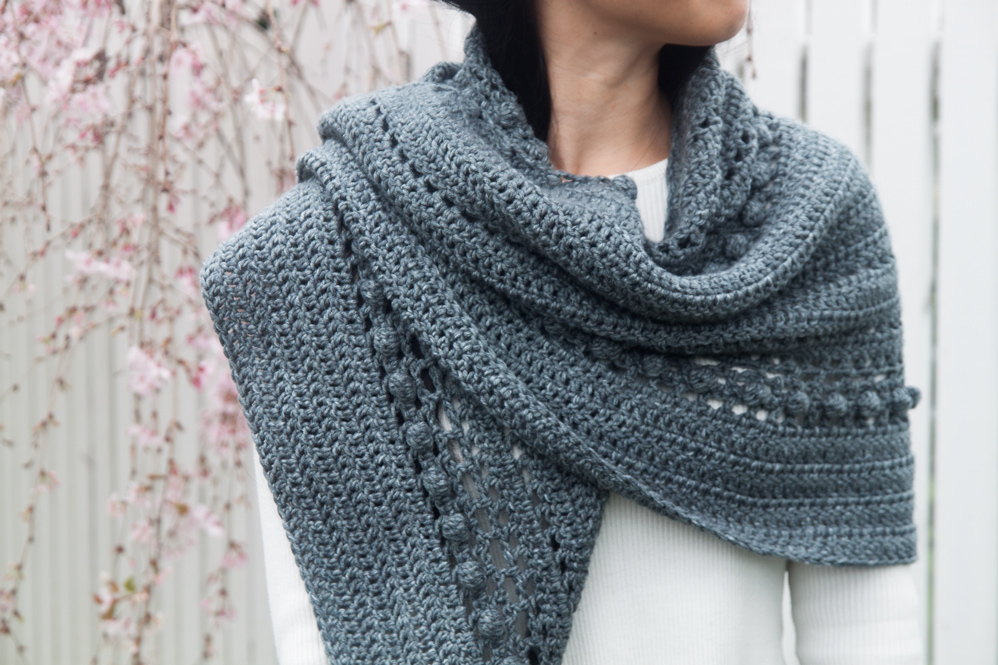
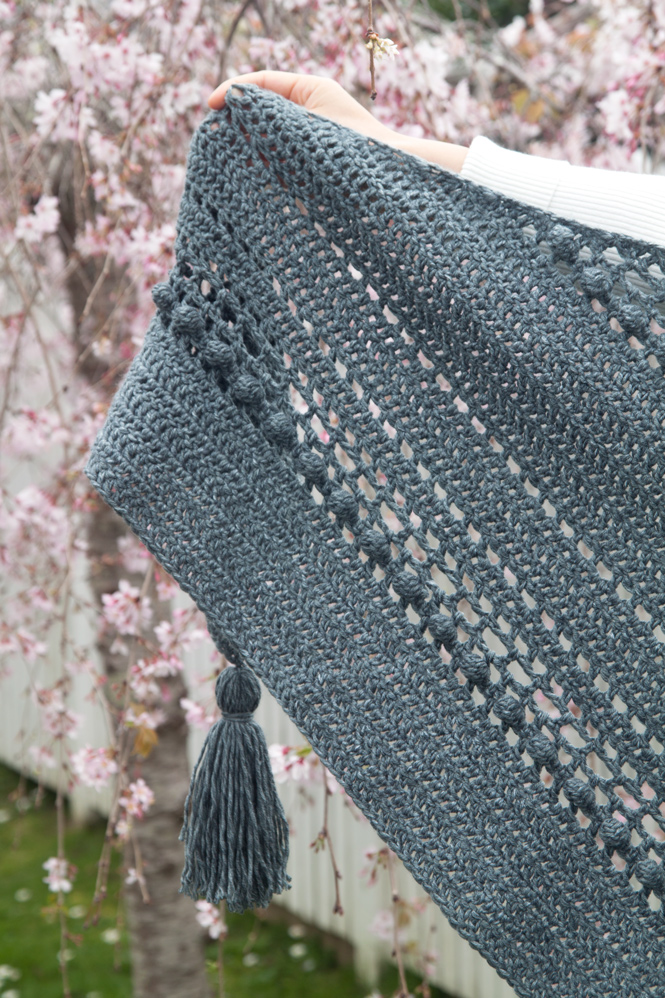
Despite the simple stitches, this design varies between basic stitch techniques so that this project has enough variety to keep you interested all throughout the pattern! The Stormborn Wrap uses double crochets and chains to create the ‘mesh’ portions on the wrap while there are a few rows of bobble stitch to create texture throughout the wrap.
I topped off this simple textured wrap with chunky tassels but you can easily leave off the tassels if you prefer 🙂
If you’ve never crocheted a triangle wrap before this style of wrap is worked in one piece from the centre out so that means there are absolutely no seams to sew together yay! The Stormborn Wrap starts by crocheting a small triangle inside a magic loop or ring of chains. We’ll then increase the Shawl at the 3 points – right, left and centre – and you’ll start to see your wrap grow!
One thing to keep track of when crocheting a triangle wraps is to make sure you have the right number of stitches at the end of every row. This is especially important for this pattern to make sure that the mesh and bobble sections work out properly!
Design Inspiration
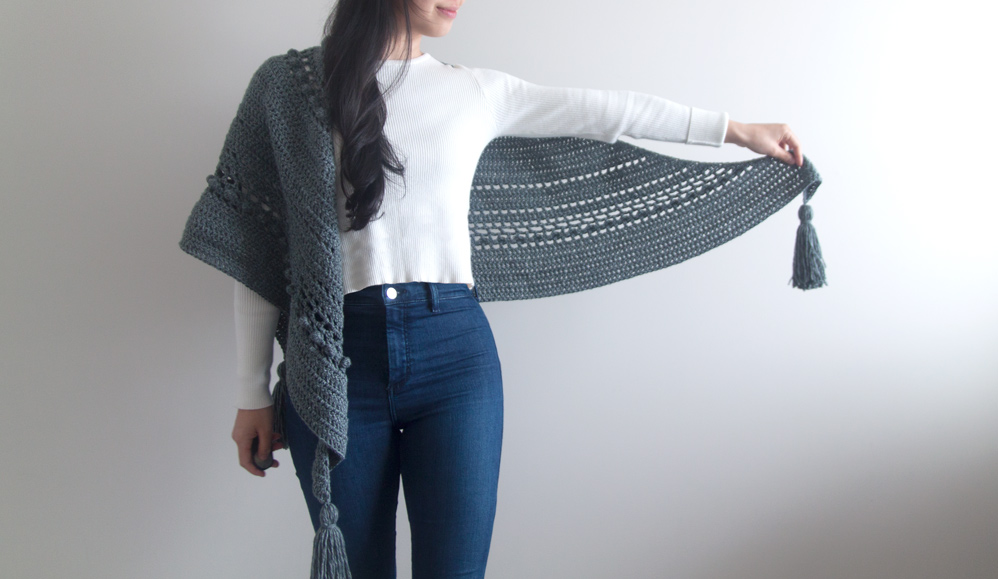
Scarves are my favourite fall accessory! I love how they are fashionable and functional and they can pair with a million different outfits. Since this crochet wrap/shawl/scarf/triangle is oversized you can wear it bundled around your neck for cosy feels or leave it open for an airy look.
To maximise versatility, I decided to make the wrap in a single colour and add interest to the scarf through texture and lace-mesh details. The overall look of this slate-grey wrap is modern and sleek, so I added bobbles and large chunky tassels for a bit of whimsy!
Yarn
Lion Brand Jeans is one of my all-time favourite acrylic yarns! It has a soft, downy, almost merino like squishiness but with a looser spin. Since the fibres aren’t as tightly wound together the Stormborn Wrap has amazing drape.
Despite the loose twist, I’ve never had issues with it splitting as I use Clover Crochet hooks. They are made of a polished aluminium with rubber handles. The secret to these hooks is definitely the polished aluminium - I've never tried a hook similar to it! Yarn glides so easily over the hook but once it's on it doesn't slip off! I swear by them and I’m convinced that they make me crochet faster! So, if you’re having splitting issues I’d recommend trying them out! The wrap was made in the colour ‘Vintage’ which is a very unique mid-dark grey. The teal undertone give this shade wonderful depth to create a gorgeous monochromatic shawl!
Lion Brand Jeans comes in mainly blue and grey shades but there is also a version of this yarn called Lion Brand Colors which features 6 different bright shades as well.
Lion Brand Jeans is classified as an aran / worsted / medium (4) yarn and I think the it’s the perfect worsted weight yarn. Not too thick or too thin – so it works up quickly but your crochet wrap won’t be bulky or chunky.
If you’re substituting this yarn any true worsted weight yarn will work and in almost any fibre. WeCrochet’s Shine is a pima cotton yarn that would make an incredibly soft and cool wrap for summer while Lion Brand’s Mandala Ombre will give you a gorgeous self-striping shawl.
Check out more free crochet patterns for fall!
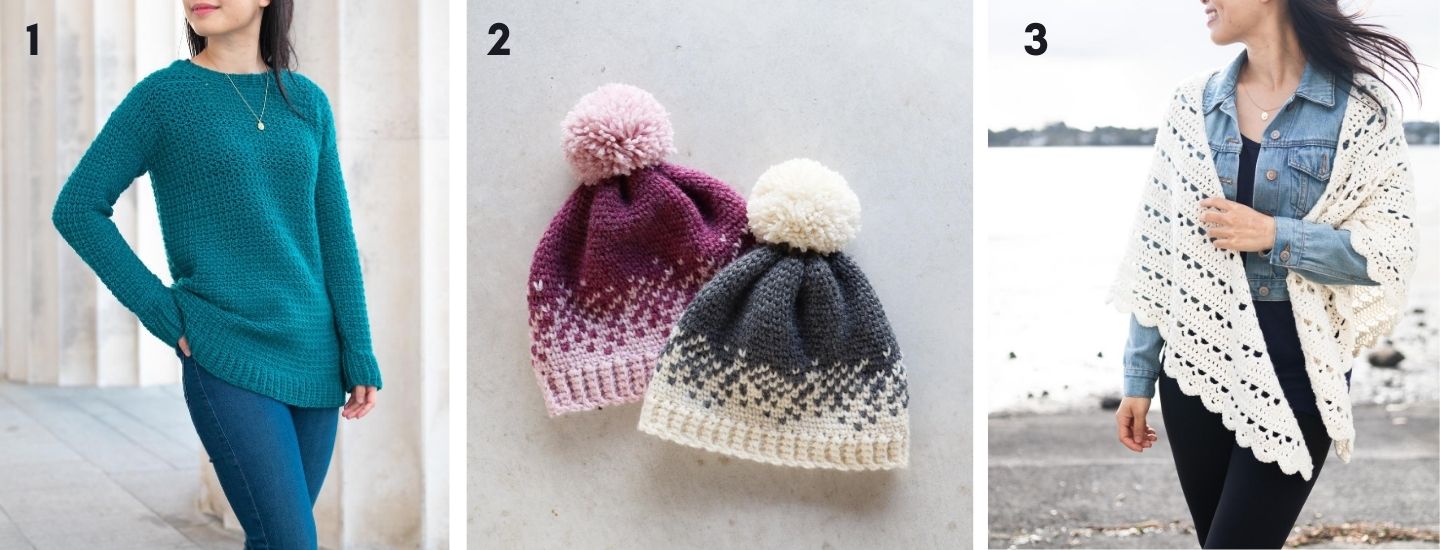
1. Easy Weekend Snuggle Sweater / 2. Fair Isle Ombré Crochet Beanie / 3. Dewdrop Scallop Wrap
Pin me for later!
Add this pattern to your Ravelry queue here!
Purchase the ad-free, printable version on Etsy or LoveCrafts! Includes a handy crochet stitch chart!
*This pattern is one size.
*"DC 10" means DC into the next 10 stitches.
*"2DC" means place 2 DC into the same stitch.
*The turning chain ch 3 always counts as a stitch.
*The turning chain ch 1 does NOT count as a stitch. Otherwise, each chain counts as 1 stitch.
*The centre ch 2 space does NOT count as a stitch. Otherwise ch 2 counts as 2 stitches e.g. each chain counts as 1 stitch.
*This pattern is worked from the centre out, with increases in the beginning, the centre ch 2 space and end of the row. Please pay close attention to st count as each long side of the triangle should have the same number of stitches.
*The wrap creates an obtuse triangle, the centre point is less pronounced than the left and right points.
*Total stitches are indicated between < >.
*This pattern uses US crochet terms.
LEVEL: Easy+
Click here to purchase the inexpensive ad-free printable pdf with a stitch chart!
Materials
Yarn - Lion Brand Jeans - 10plyAran/Worsted/Medium (4), 225m/100g, 100% Acrylic, Vintage (150)
4 skeins - Wrap (295g) + 3 tassels (20g)
6mm (J) Crochet Hook
Bent Tip Tapestry Needle
Scissors
Measurements:
173 x 74 cm/ 68 x 29”
GAUGE: 10cm/4” square = 13.5 stitches wide x 8 rows tall in double crochet
STITCHES & ABBREVIATIONS
Ch = Chain
Sl st = Slip Stitch
SC = Single Crochet
DC = Double Crochet
Bobble = Bobble Stitch
Ch-sp = Chain Space
St(s) = Stitch(es)
Rep = Repeat
Sk = Skip
SPECIAL STITCHES
Bobble Stitch = Yarn over, insert hook into st, yarn over and pull up a loop, yarn over and pull through 2 loops (2 loops on your hook). Yarn over, insert hook into the same st, yarn over and pull up a loop, yarn over and pull through 2 loops (3 loops on your hook). Yarn over, insert hook into the same st, yarn over and pull up a loop, yarn over and pull through 2 loops (4 loops on your hook). Yarn over, insert hook into the same st, yarn over and pull up a loop, yarn over and pull through 2 loops (5 loops on your hook). Yarn over, insert hook into the same st, yarn over and pull up a loop, yarn over and pull through 2 loops (6 loops on your hook). Yarn over and pull through all 6 loops on your hook.
Stormborn Wrap Crochet Pattern
To begin, ch 4 and sl st into 1st ch to form a ring, or create a magic loop or double magic loop.
ROW 1: Working into the loop, ch 3, DC 2, ch 2 (*centre ch-2 sp), DC 3, turn.
<6>
ROW 2: Ch 3, 2DC into first st, DC 2, [DC, ch 2, DC] in centre ch-2 sp, DC 2, 3DC in last st, turn.
<12>
ROW 3: Ch 3, 2DC into first st, DC 5, [DC, ch 2, DC] in centre ch-2 sp, DC 5, 3DC in last st, turn.
<18>
ROW 4: Ch 3, 2DC into first st, DC 8, [DC, ch 2, DC] in centre ch-2 sp, DC 8, 3DC in last st, turn.
<24>
ROW 5: Ch 3, 2DC into first st, DC 11, [DC, ch 2, DC] in centre ch-2 sp, DC 11, 3DC in last st, turn.
<30>
ROW 6: Ch 3, 2DC into first st, DC 14, [DC, ch 2, DC] in centre ch-2 sp, DC 14, 3DC in last st, turn.
<36>
ROW 7: Ch 3, 2DC into first st, DC, *ch 1, sk 1, DC; rep from * until centre ch-2 sp, [DC, ch 2, DC] in centre ch-2 sp, DC, *ch 1, sk 1, DC; rep from * until last st, 3DC in last st, turn.
<42>
ROW 8: Ch 3, 2DC into first st, DC in each st/ch-sp until centre ch-2 sp, [DC, ch 2, DC] in centre ch-2 sp, DC in each st/ch-sp until last st, 3DC in last st, turn.
<48>
ROW 9: Ch 3, 2DC into first st, DC 23, [DC, ch 2, DC] in centre ch-2 sp, DC 23, 3DC in last st, turn.
<54>
ROW 10: Ch 3, 2DC into first st, DC 26, [DC, ch 2, DC] in centre ch-2 sp, DC 26, 3DC in last st, turn.
<60>
ROW 11: Ch 3, 2DC into first st, DC, *ch 1, sk 1, DC; rep from * until centre ch-2 sp, [DC, ch 2, DC] in centre ch-2 sp, DC, *ch 1, sk 1, DC; rep from * until last st, 3DC in last st, turn.
<66>
ROW 12: Ch 3, 2DC into first st, DC in each st/ch-sp until centre ch-2 sp, [DC, ch 2, DC] in centre ch-2 sp, DC in each st/ch-sp until last st, 3DC in last st, turn.
<72>
ROW 13: Ch 3, 2DC into first st, DC, *ch 1, sk 1, DC; rep from * until centre ch-2 sp, [DC, ch 2, DC] in centre ch-2 sp, DC, *ch 1, sk 1, DC; rep from * until last st, 3DC in last st, turn.
<78>
ROW 14: Ch 3, 2DC into first st, ch 2, sk 2, *DC, ch 2 sk 2; rep from * until centre ch-2 sp, [DC, ch 2, DC] in centre ch-2 sp, ch 2, sk 2, *DC, ch 2, sk 2; rep from * until last st, 3DC in last st, turn.
<84>
ROW 15: Ch 3, 2DC into first st, DC, *ch 1, sk 1, DC; rep from * until centre ch-2 sp, [DC, ch 2, DC] in centre ch-2 sp, DC, *ch 1, sk 1, DC; rep from * until last st, 3DC in last st, turn.
<90>
ROW 16: Ch 1, 3SC into first st, SC 2, Bobble, *SC 3, Bobble; rep from * until last st before centre ch-2 sp, SC, [SC, ch 2, SC] in centre ch-2 sp, SC, Bobble, *SC 3, Bobble; rep from * until 3 sts left, SC 2, 3SC in last st, turn.
<96>
ROW 17: Ch 3, 2DC into first st, DC, *ch 1, sk 1, DC; rep from * until centre ch-2 sp, [DC, ch 2, DC] in centre ch-2 sp, DC, *ch 1, sk 1, DC; rep from * until last st, 3DC in last st, turn.
<102>
*1 DC should be on top of each bobble st.
ROW 18: Ch 3, 2DC into first st, DC in each st/ch-sp until centre ch-2 sp, [DC, ch2, DC] in centre ch-2 sp, DC in each st/ch-sp until last st, 3DC in last st, turn.
<108>
ROW 19: Ch 3, 2DC into first st, DC 53, [DC, ch 2, DC] in centre ch-2 sp, DC 53, 3DC in last st, turn.
<114>
ROW 20: Ch 3, 2DC into first st, DC 56, [DC, ch 2, DC] in centre ch-2 sp, DC 56, 3DC in last st, turn.
<120>
ROW 21: Ch 3, 2DC into first st, DC 59, [DC, ch 2, DC] in centre ch-2 sp, DC 59, 3DC in last st, turn.
<126>
ROW 22: Ch 3, 2DC into first st, DC 62, [DC, ch 2, DC] in centre ch-2 sp, DC 62, 3DC in last st, turn.
<132>
ROW 23: Ch 3, 2DC into first st, DC 65, [DC, ch 2, DC] in centre ch-2 sp, DC 65, 3DC in last st, turn.
<138>
ROW 24: Ch 3, 2DC into first st, DC 68, [DC, ch 2, DC] in centre ch-2 sp, DC 68, 3DC in last st, turn.
<144>
ROW 25: Ch 3, 2DC into first st, DC 71, [DC, ch 2, DC] in centre ch-2 sp, DC 71, 3DC in last st, turn.
<150>
ROW 26: Ch 3, 2DC into first st, DC 74, [DC, ch 2, DC] in centre ch-2 sp, DC 74, 3DC in last st, turn.
<156>
ROW 27: Ch 3, 2DC into first st, DC, *ch 1, sk 1, DC; rep from * until centre ch-2 sp, [DC, ch 2, DC] in centre ch-2 sp, DC, *ch 1, sk 1, DC; rep from * until last st, 3DC in last st, turn.
<162>
ROW 28: Ch 3, 2DC into first st, DC in each st/ch-sp until centre ch-2 sp, [DC, ch2, DC] in centre ch-2 sp, DC in each st/ch-sp until last st, 3DC in last st, turn.
<168>
ROW 29: Ch 3, 2DC into first st, DC 83, [DC, ch 2, DC] in centre ch-2 sp, DC 83, 3DC in last st, turn.
<174>
ROW 30: Ch 3, 2DC into first st, DC 86, [DC, ch 2, DC] in centre ch-2 sp, DC 86, 3DC in last st, turn.
<180>
ROW 31: Ch 3, 2DC into first st, DC, *ch 1, sk 1, DC; rep from * until centre ch-2 sp, [DC, ch 2, DC] in centre ch-2 sp, DC, *ch 1, sk 1, DC; rep from * until last st, 3DC in last st, turn.
<186>
ROW 32: Ch 3, 2DC into first st, DC in each st/ch-sp until centre ch-2 sp, [DC, ch2, DC] in centre ch-2 sp, DC in each st/ch-sp until last st, 3DC in last st, turn.
<192>
ROW 33: Ch 3, 2DC into first st, DC, *ch 1, sk 1, DC; rep from * until centre ch-2 sp, [DC, ch 2, DC] in centre ch-2 sp, DC, *ch 1, sk 1, DC; rep from * until last st, 3DC in last st, turn.
<198>
ROW 34: Ch 3, 2DC into first st, ch 2, sk 2, *DC, ch 2 sk 2; rep from * until centre ch-2 sp, [DC, ch 2, DC] in centre ch-2 sp, ch 2, sk 2, *DC, ch 2, sk 2; rep from * until last st, 3DC in last st, turn.
<204>
ROW 35: Ch 3, 2DC into first st, DC, *ch 1, sk 1, DC; rep from * until centre ch-2 sp, [DC, ch 2, DC] in centre ch-2 sp, DC, *ch 1, sk 1, DC; rep from * until last st, 3DC in last st, turn.
<210>
ROW 36: Ch 1, 3SC into first st, SC 2, Bobble, *SC 3, Bobble; rep from * until last st before centre ch-2 sp, SC, [SC, ch 2, SC] in centre ch-2 sp, SC, Bobble, *SC 3, Bobble; rep from * until 3 sts left, SC 2, 3SC in last st, turn.
<216>
ROW 37: Ch 3, 2DC into first st, DC, *ch 1, sk 1, DC; rep from * until centre ch-2 sp, [DC, ch 2, DC] in centre ch-2 sp, DC, *ch 1, sk 1, DC; rep from * until last st, 3DC in last st, turn.
<222>
*1 DC should be on top of each bobble st.
ROW 38: Ch 3, 2DC into first st, DC in each st/ch-sp until centre ch-2 sp, [DC, ch2, DC] in centre ch-2 sp, DC in each st/ch-sp until last st, 3DC in last st, turn.
<228>
ROW 39: Ch 3, 2DC into first st, DC 113, [DC, ch 2, DC] in centre ch-2 sp, DC 113, 3DC in last st, turn.
<234>
ROW 40: Ch 3, 2DC into first st, DC 116, [DC, ch 2, DC] in centre ch-2 sp, DC 116, 3DC in last st, turn.
<240>
ROW 41: Ch 3, 2DC into first st, DC 119, [DC, ch 2, DC] in centre ch-2 sp, DC 1109, 3DC in last st, turn.
<246>
ROW 42: Ch 3, 2DC into first st, DC 122, [DC, ch 2, DC] in centre ch-2 sp, DC 122, 3DC in last st, turn.
<252>
ROW 43: Ch 3, 2DC into first st, DC 125, [DC, ch 2, DC] in centre ch-2 sp, DC 125, 3DC in last st, turn.
<258>
ROW 44: Ch 3, 2DC into first st, DC 128, [DC, ch 2, DC] in centre ch-2 sp, DC 128, 3DC in last st, turn.
<264>
ROW 45: Ch 3, 2DC into first st, DC 131, [DC, ch 2, DC] in centre ch-2 sp, DC 131, 3DC in last st.
<270>
Fasten off.
Weave in all of your ends. Steam and block your wrap.
TASSELS
(make 3) *optional
o Thick piece of cardboard measuring 15cm/6” long.
o Yarn
o Scissors
Cut 2 x 40cm/16” pieces of yarn.
Wrap yarn around the length of the card 50 times, cut yarn.
Thread a piece of yarn through the centre of loop and tie a double knot. Cut the yarn at the other end of the card.
Tie the second piece of yarn around the tassel, about 2.5cm /1” from the top of the tassel. Trim tassels to desired length and steam to straighten.
Sew tassels onto the scarf and weave in ends to secure the tassel in place.
Voilà! You’ve finished your Stormborn Wrap 🙂
Wow I love this, how long did it take to make? I,m thinking this shawl would make nice gifts!
Thank you Debbie! It took me approximately 7 hours to make 🙂 It works up quite fast and shawls are so versatile so it would be a lovely gift!
I'm currently working on this and loving every bit of it. I seem to be getting more increase on the ends though so the straight side is now curving up a bit. This started happening between rows 14 and 15. Do you by any chance know what I may be doing incorrectly? Thanks!
Hi Lina,
I'm so glad you're enjoying the pattern! 🙂 Just wondering how sharp the curve is? If its less than 15 degrees you should be ok once you block the wrap and wear it. If the curve is really sharp, please keep an eye on your increases and stitch count - it's probably because you have too many stitches!
Happy crocheting, Grace 🙂
Is there a video tutorial on this? I’m a beginner but love this wrap. Thought I’d give it a shot and get stuck in row 7. Really want to make this though.
Hi Ashlynn,
I'm sorry but there isn't a video tutorial for this pattern. The purchasable pdf has a stitch chart that can help you visualise the stitches 🙂 For Row 7, are you getting stuck at the ch 1, sk 1 part? ch 1, sk 1 means make one chain, skip one stitch and then dc into the next stitch. So you have a ch 1 space in between two dc. I hope this helps!
Grace
It says free but you can’t download until payment is confirmed??
Hi Brenda,
The free pattern is available in the blog post and you can crochet while looking at the pattern online. If you'd like the printable version you can purchase the pdf from the link above 🙂
Grace
I’m falling into an issue at row 17. After the bobble stitch, 5 more stitches are added. After turning, I skip that initial stitch, 2DC, dc, chain 1, skip 1, then dc. At the end of the row instructions, you say the DC should be in the bobble stitch, but this doesn’t work. I’ve counted my stitches a number of times and have the correct amount of stitches on each side of the garment. I’m not sure what to do here.
Hi Lucy,
For Row 17, you shouldn't be skipping the first stitch of the row, the 2DC is placed in the first st - this is probably why your bobbles aren't lining up.
Grace 🙂
I had the same problem, but the shawl turned out fine for me. I counted again and again but I had counted right and I had the correct number of stitches. I was confused, but I went with it and it turned out fine.
I hope this helped!
I'm having the same issue. How many bobbles are expected in row 16? 22?
Hi, are you planning on doing a tutorial by any chance for this shawl. I love the pattern but I struggle a little with patterns so like to be able to watch as well as read.
Hi Jayne, sorry the video footage for this pattern was corrupted and I don't have any plans to film a video tutorial right now! The purchasable pdf pattern does have a stitch chart which many crocheters find very helpful!
Grace 🙂
Hi Grace,
What a beautiful shawl pattern! I am making it now, but I am stuck on row 14. When I chain 2, I end up putting the double crochet in the chain space- is that where the dc is suppose to go? Also do I count the chain 2s? (If I do, it is more than 84 stitches)
Thanks!
Hi Erica, the centre ch-2 space doesn't count as a stitch and yes you place the [DC, ch2, DC] in the centre ch-2 space. So [DC, ch2, dc] counts as 2 stitches.
Grace 🙂
Hi, I don't know what the other writer meant but I'm also stuck on row 14. But it's also a bit confusing where to put the stitches for the "*DC, ch 2 sk 2;" part.
Loving this pattern! It is written so well and very easy to follow. Such an easy pattern for a beautifully detailed shawl!! 🙂 Thank you Grace!
Dear Grace, just wanted to let you know I made this a couple months ago and I LOVE IT. It's so warm and comfy. I used a dark grey bulky acrylic, and it's so comfortable. Bought your pattern to make another one. Thanks so much for your patterns!
Hi Nienke,
I'm so glad you're enjoying your wrap and thank you so much for supporting my Etsy shop! 🙂
Happy crocheting,
Grace
So frustrated!!!
Row 14 the count is perfect.
But for the life of me I cannot get row 15 to come out to 90 stitches. I count 88 with every redo of the row!!
And that’s counting one for one in the center two Chan space.
I have repeatedly restitched rows to get counts correct. I’ve never had this much trouble before.
What suggestions do you have for row 15?
This pattern would be much easier with a
Video tutorial. Just begging. I had hoped to make 3 for gifts but am rethinking my plans if this doesn’t get any easier to accomplish. And yes I paid for your instructions so I could check off step by step.
Same problem with row 15. So frustrating. I may rip the whole thing out. Will try again tomorrow.
I love this pattern but I am having issues with row 15. I counted 84 stitches at the end of 14 but I seem to have 52 stitches on each side when I do the chain 1 skip 1. 104 total for row 15. Do I double crochet in the chain 2 space and double crochet in the double crochet below? Do I count 1 of the chain 2 spaces as a stitch when skipped? I hope this makes sense. Thank you
I’m having This same issue and designer does t seem to be replying now. I also can’t figure out how you dc chain 1 skip one and then dc when row before is all chain 2’s. I think I’m going to have to scarp this project there has to be some mistake. Blew my budget o. The yarn too!
Hey! I'm loving this pattern but im so confused. I cannot for the life understand how im supposed to do row 8?
Is it just one dc in each chain one space? If so then how on earth is the count supposed to be 48?
Hey I was just looking at your website on my Pure phone and I was thinking about how well it will work on the new ipad coming out . Fleeting thought. Anyway thanks!
It is such a lovely design, but please make a video for it because it gets confusing in the directions!
Was zipping along like crazy thinking I’d have this done by weekend but now row 15 doesn’t make any sense. Row 14 is chain 2 skip 2 dc in next. Fine I did that but then row 15 says to skip 1 then dc in next but the row before is the chain 2 row so what stitch am I skipping? The chain 2? Can’t possibly be chain 1 skip over the chain 2 completely and then dc I I. The next dc. Very frustrated now and I’ve been crocheting for 50 years. Can you help explain what stitch you’re skipping when row before is all chain 2 skip 2 So frustrated wanted this done for visiting sick friend on the weekend.