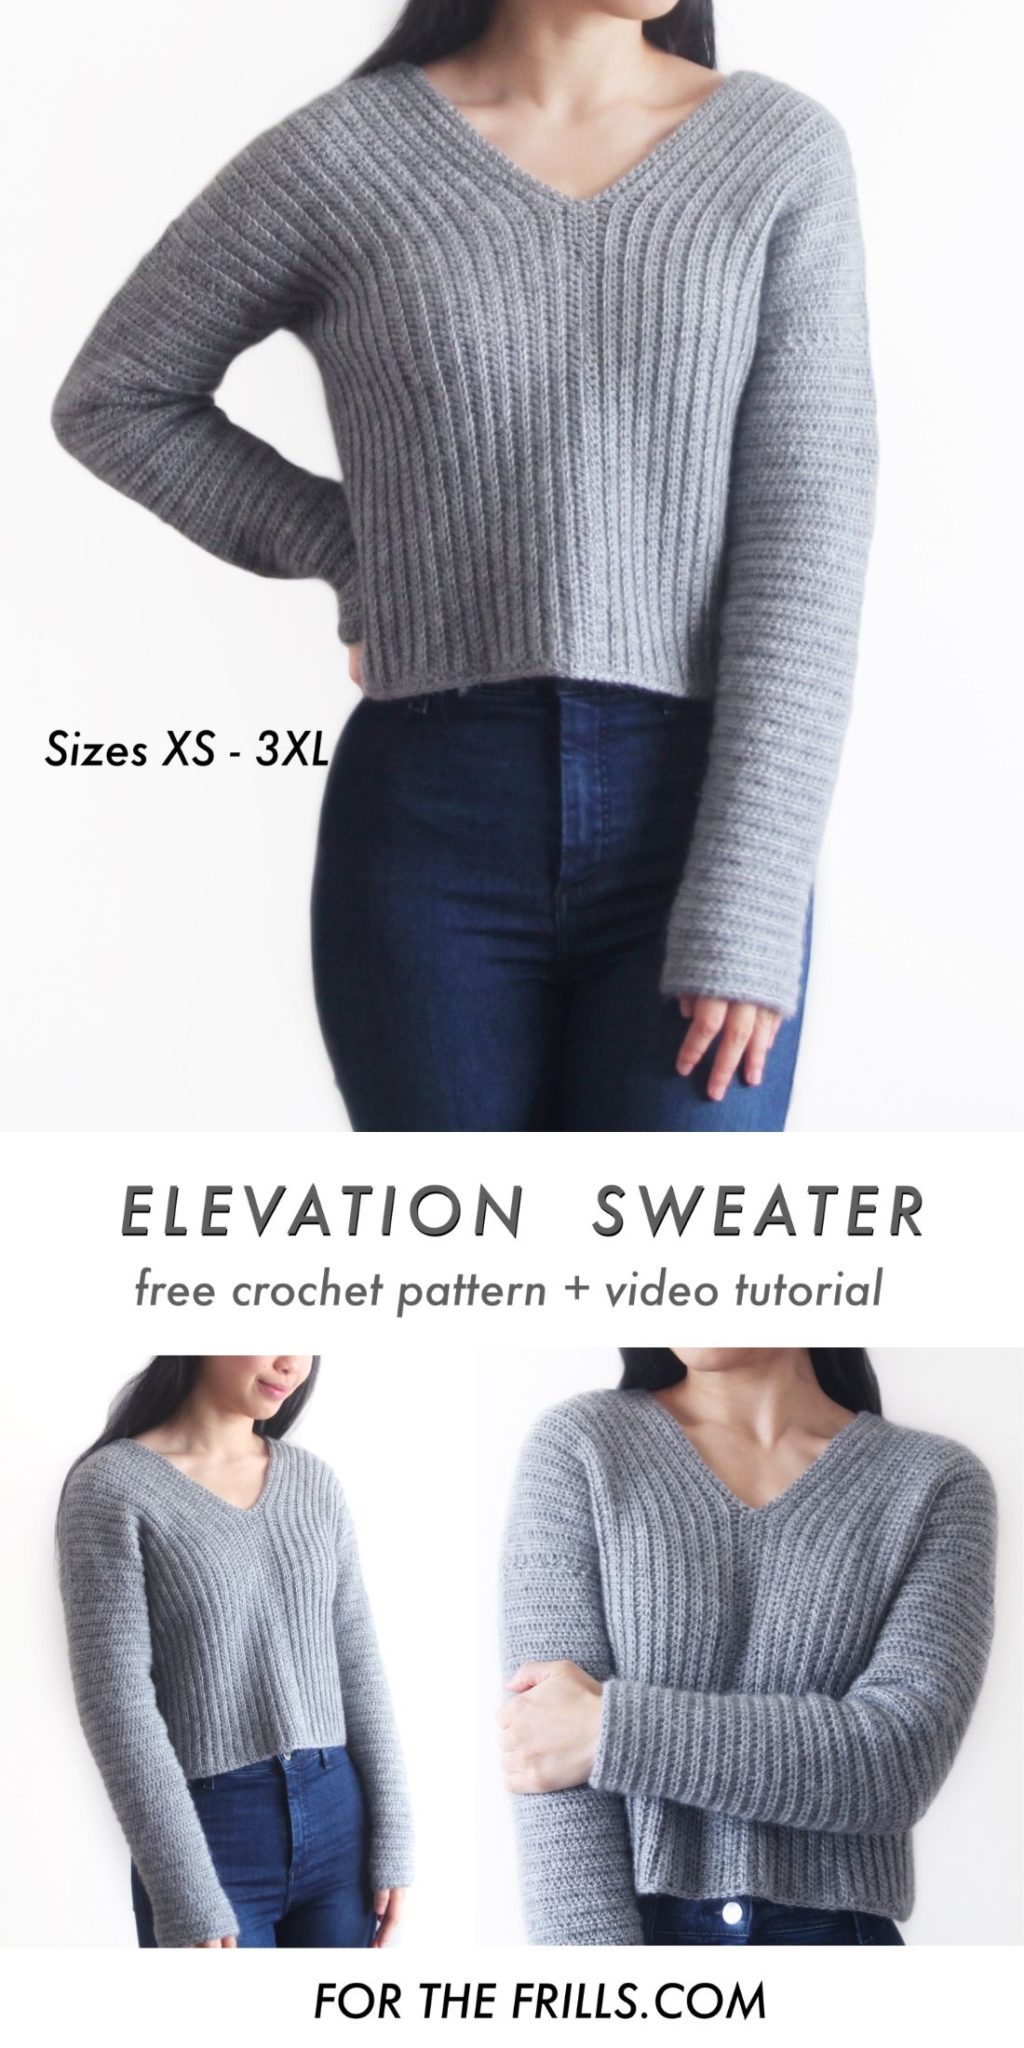
I’m so excited to share my latest free crochet pattern with you – the Elevation Sweater!
This free crochet sweater pattern is accompanied by a video tutorial.
This post may contain affiliate links, view our disclosure policy for details.
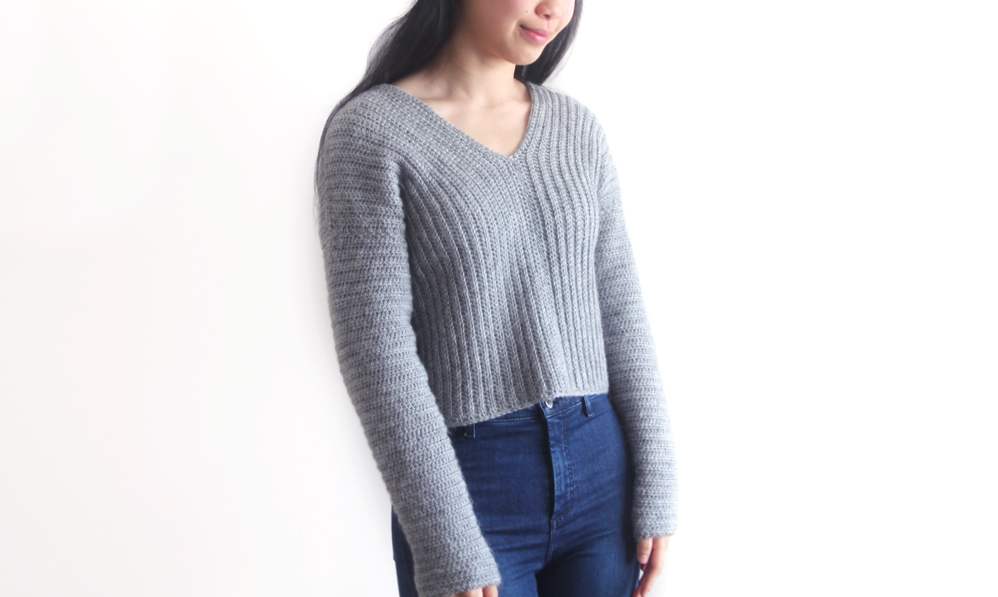
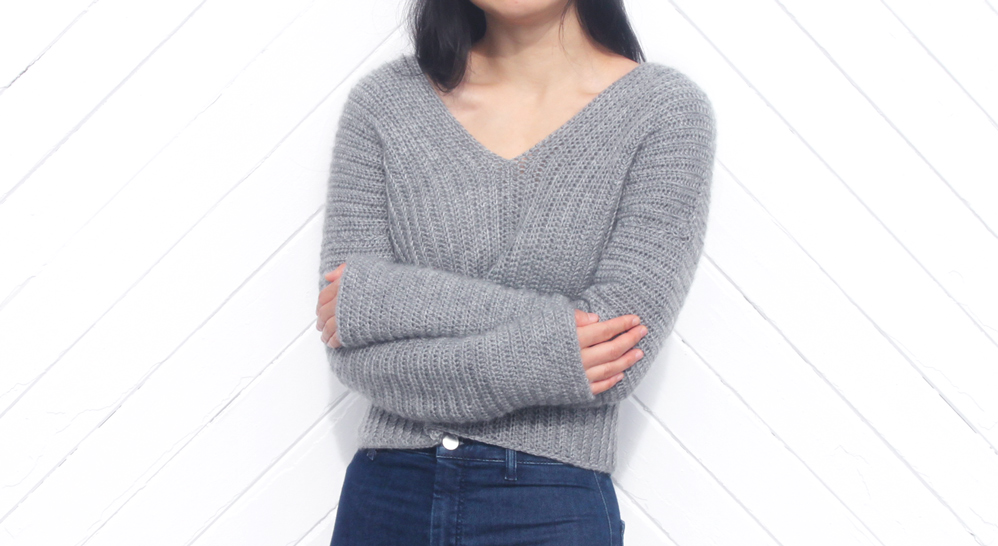
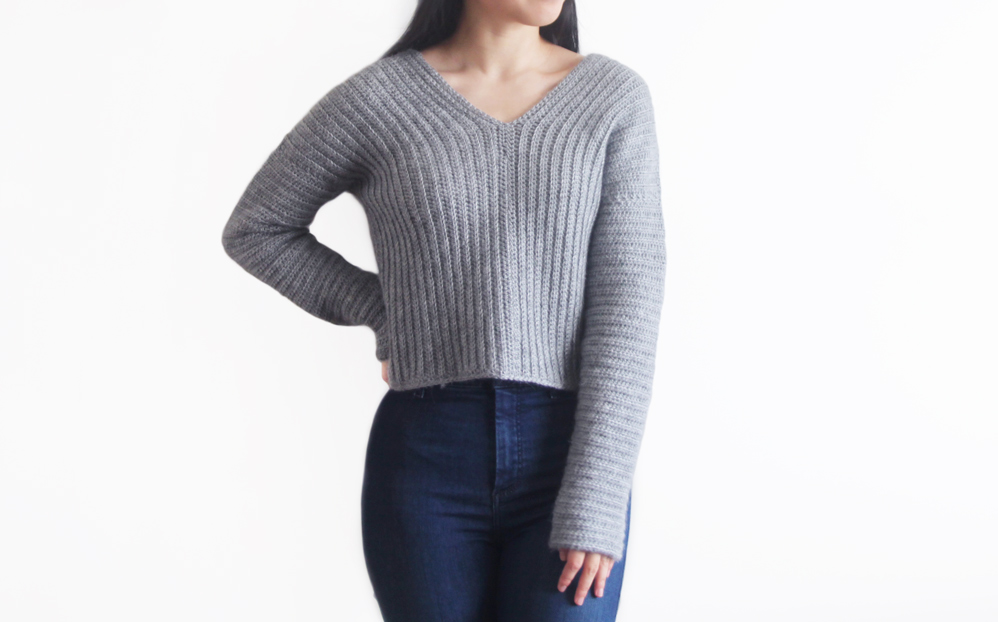
The Elevation Sweater is a v-neck sweater with a loose fit and long tapered, fitted sleeves. This design is worked up in half double crochet panels that create flattering vertical lines along the body. I love the modern, clean look of this design and its such a versatile transitional piece 🙂 It’s a great early fall layer and since the sleeves are fitted, you can easily layer it under a coat or a puffer jacket during winter!
DESIGN INSPIRATION
I’m so excited to be designing sweaters yay! Crochet crop tops are cute and quick to make but cosy jumpers are what made me fall in with crochet! I wanted to create a chic, modern, minimalist sweater that you could easily throw over a pair of jeans. I really wanted this jumper to exude casual, city vibes but still be comfy and cosy.
YARN
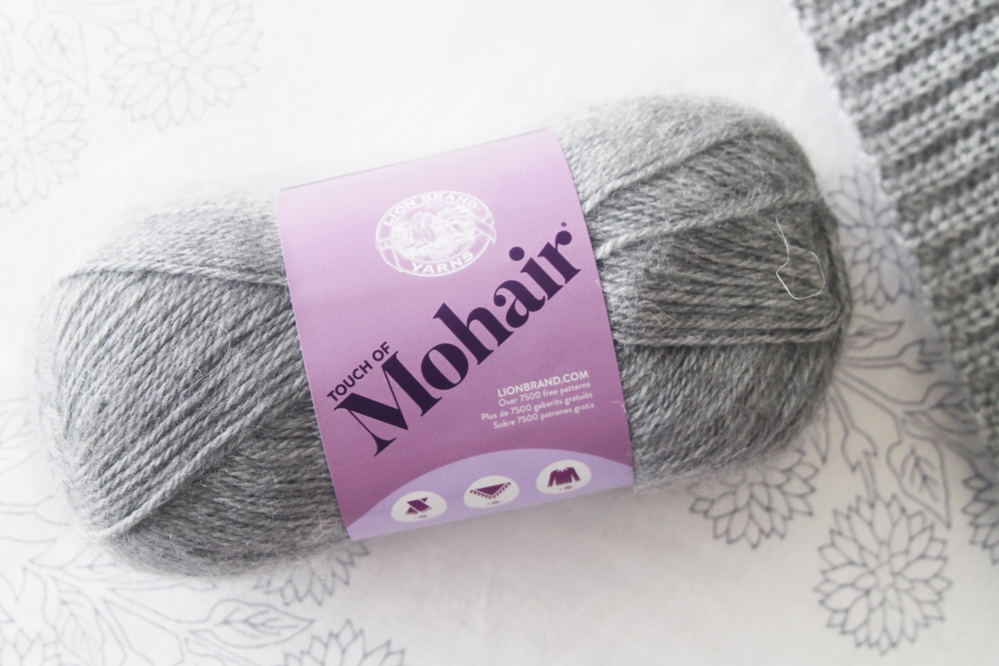
For this project I used Lion Brand Touch of Mohair in the colour Oxford grey. Touch of Mohair is an acrylic/mohair blend which allows you to have a bit of luxury fibre at a great price point 🙂 Normally you combine a strand of mohair yarn with another thicker yarn to create a sweater. However, Touch of Mohair has the characteristic fluffiness of mohair while being a DK weight yarn, so you get a similar effect without having the hassle of managing 2 different weight yarns at the same time!
This blend of 10% mohair and 90% acrylic also means that you can create a very light yet warm sweater! The acrylic does make this yarn a bit stiffer but I find that blocking and washing the sweater helped it soften and loosen up. The colour range currently features 8 shades – 5 neutrals and 3 brights, and so it has a nice balance of colours.
Check out more free crochet patterns!
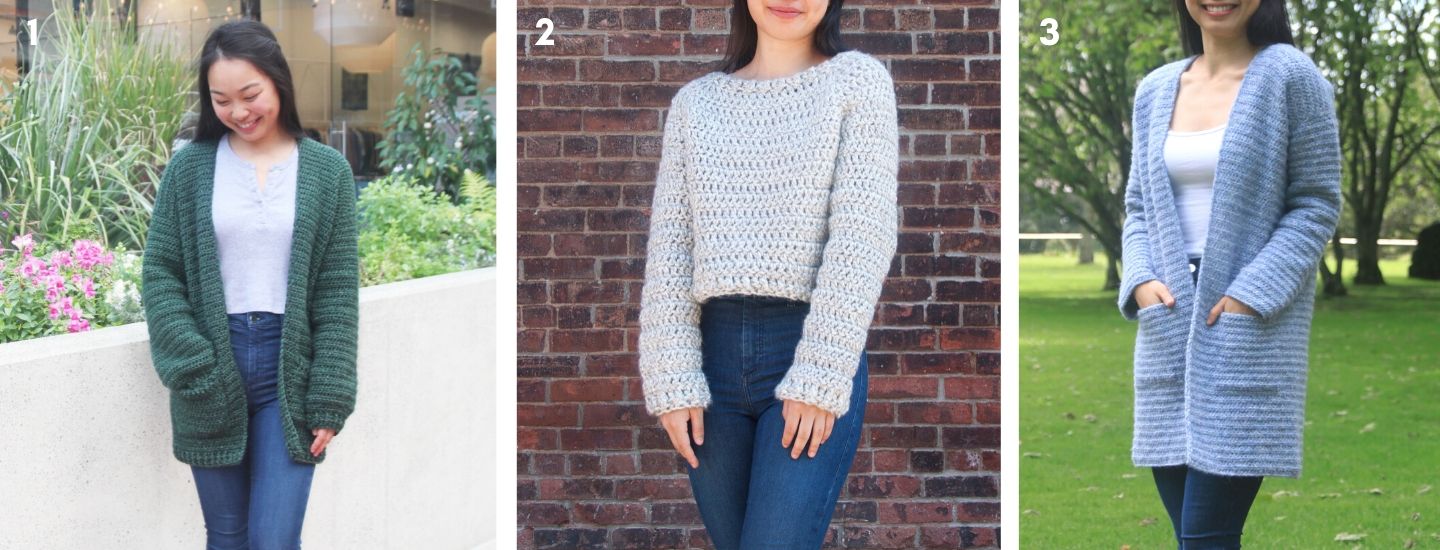
1. Briar Pocket Cardigan / 2. Brooklyn Chunky Sweater / 3. Stonewash Coatigan
Pin me for later!
Thank you to Lion Brand for providing the yarn for this crochet sweater pattern!
Add this pattern to your Ravelry queue here!
Ad-free, printable version here!
*The sizing guide follows size XS(S, M, L, XL, 2XL, 3XL). E.g. “Ch 90(90, 95, 95, 100, 100, 105). means Ch 90 for XS, Ch 90 for Small, Ch 95 for Medium, Ch 95 for Large, Ch 100 for XL, Ch 100 for 2XL and Ch 105 for 3XL.
*"HDC 10" means HDC into the next 10 stitches.
*"2HDC" means place 2 HDC into the same stitch.
*Ch 3 always counts as a stitch unless otherwise noted.
*Ch 1 and Ch 2 do NOT count as a stitch.
*Total stitches are indicated between < >.
*This pattern uses US crochet terms.
MATERIALS
Yarn – Lion Brand Touch of Mohair – DK/Light(3)/8 ply, 310m/100g, 90% Acrylic and 10% Mohair, Oxford Grey (150)
4(4, 5, 5, 6, 6, 7) skeins
STITCHES & ABBREVIATIONS
Ch = Chain
Sl st = Slip Stitch
HDC = Half Double Crochet
St(s) =Stitch(es)
BL = Back Loop only
GAUGE: 10cm/4” square = 20 stitches wide x 10 rows tall in half double crochet
LEVEL: Easy
Measurements cm:
Bust: 79(89, 99, 109, 119, 129, 140)
Length: 43(43, 46, 46, 48, 48, 50)
Armhole: 15(16.5, 18, 19, 20, 21.5, 23)
Sleeve length: 42(43, 43, 45, 45, 46, 46)
Measurements inches:
Bust: 31(35, 39, 43, 47, 51, 55)
Length: 17(17, 18, 18, 19, 19, 20)
Armhole: 6(6.5, 7, 7.5, 8, 8.5, 9)
Sleeve length: 16.5(17, 17, 17.5, 17.5, 18, 18)
V-Neck Crochet Sweater Video Tutorial
ELEVATION SWEATER CROCHET PATTERN
BODY
FOUNDATION CHAIN: Ch 90(90, 95, 95, 100, 100, 105).
*The body panels are worked horizontally. Add/reduce chains for a longer/shorter sweater.
ROW 1: HDC into the 2nd ch from the hook, HDC in each st until end.
<89(89, 94, 94, 99, 99, 104)>
ROW 2: Ch 1, turn, HDC in each st until end.
ROW 3: Ch 1, turn, HDC, BL HDC in each st until last st, HDC in last st.
<89(89, 94, 94, 99, 99, 104)>
ROW 4: Ch 1, turn, HDC in each st until end.
Repeat ROWS 3-4 until ROW 32(36, 40, 44, 48, 52, 56).
Fasten off.
Make 4 body panels.
*Note – if your rectangles are not the same size, steam and block before seaming.
SLEEVES
*Sleeves are worked from the cuff up.
FOUNDATION CHAIN: Ch 38(43, 48, 53, 58, 63, 68).
ROW 1: HDC into the 2nd ch from the hook, HDC in each st until end.
<37(42, 47, 52, 57, 62, 67)>
ROWS 2-4: Ch 1, turn, HDC in each st until end.
ROW 5: Ch 1, turn, 2HDC, HDC in each st until last st, 2HDC in last st.
<39(44, 49, 54, 59, 64, 69)>
ROWS 6-8: Ch 1, turn, HDC in each st until end.
Repeat ROWS 5-8 until ROW 40.
<55(60, 65, 70, 75, 80, 85)>
ROWS 41-52: Ch 1, turn, HDC in each st until end.
ROW 53: Ch 1, turn, 2HDC, HDC in each st until last st, 2HDC in last st.
<57(62, 67, 72, 77, 82, 87)>
ROWS 54-56: Ch 1, turn, HDC in each st until end.
ROW 57: Ch 1, turn, 2HDC, HDC in each st until last st, 2HDC in last st.
<59(64, 69, 74, 79, 84, 89)>
ROWS 58-60: Ch 1, turn, HDC in each st until end.
ROW 61: Ch 1, turn, 2HDC, HDC in each st until last st, 2HDC in last st.
<61, (66, 71, 76, 81, 86, 91)>
ROW 62: Ch 1, turn, HDC in each st until end.
Repeat ROW 62 until ROW 64(66, 66, 68, 68, 70, 70).
ASSEMBLY
With the right side facing, place 2 body panels side by side (lines fall vertically).
Using a mattress stitch, sew the panels together leaving a 17cm/6.5” gap at the top of the front panel.
Repeat with other 2 panels, sew them together leaving a 14cm/5.5” gap at the top. Sew the front panel and back panels together.
*Note - The fit of this sweater changes depending on the depth of the v. You can make the v lower or higher by altering the length of the gap.
Fold sleeves in half and line up the middle of the sleeve with the seam of the front and back panels. Sew the sleeves to the body.
Fold the top in half and sew along the sides of top and underneath the sleeves.
FINISHING
Insert hook along the edge of body. Secure yarn and pull up a loop. SC along the edge of the sweater. The exact stitch count is not important rather make sure to keep tension even. Too many stitches will cause the edge to ruffle and too few stitches will pull/pucker the edge.
Try on your sweater and alter the depth of the V as desired.
Weave in all of your ends. Steam and block your sweater.
Did you do the hdcs in the back loop only in the arms?
Hi Sandy, the sleeves are crocheted in normal HDCs 🙂
How is it the sleeves look like the rest of the sweater but are not done in BL?
Hi. Is there any reason I couldn't or shouldn't do the back piece as one full panel?? So just double the number of rows for the back? Cheers.
Hi Narelle, if the back is one full panel you won't be able to make the v-neck neckline. There will be no room for the V to 'open up' and fall off your shoulders. So I'd highly recommend making the 2 separate panels for the back. I hope this helps, Grace 🙂
When I crochet the sleeves in HDC it doesn't look the same as yours. I've watched the video as well and still it doesn't look the same when I crochet it. Please help.
Hi Liz, make sure that for the sleeves you're crocheting normal HDCs (so you're picking up both the front and the back loop) as opposed to the body which uses BLO HDCs. Grace 🙂
Hi! I’ve been working on the body panels and can’t seem to get the gauge right. When I have a section 20 stitches wide and 10 rows tall in half double crochet, it ends up about 12cm wide and 8cm tall. I’m using a 4mm hook with the same Lion Brand Touch of Mohair as you used, yet still it comes out too wide and not tall enough. Any suggestions?
Hi Hannah, since everyone holds yarn differently even if you have the same materials your gauge can still be different! To solve the issue of your swatch being too wide, I'd suggest sizing down a hook size. To get the right height of stitches I'd recommend looking for a 'Golden Loop Tutorial' on YouTube - there are heaps! - and you can learn how to adjust your stitch height.
I hope this helps,
Grace 🙂
Hi! I would like to ask about the sleeves. Did u do to two pieces for each arm and you just sew them? Because in your video the sleeves is just one piece for each arm so how you did it in order to be a round sleeve?
Ciao mi piacciono molto i tuoi lavori e devo dire che sei davvero brava . Mi potresti insegnare come si leggono le istruzioni per fare i modelli ?
Hi Vanessa,
If you're new to reading crochet patterns I'd recommend reading this article - https://www.craftyarncouncil.com/standards/how-to-read-crochet-pattern If you'd like to learn how to read crochet patterns.
I hope this helps,
Grace 🙂
Hello! Can you please suggest some yarn substitutes?
Hi Eiren, Touch of Merino is a true Dk yarn so any DK / Light (3) with a good amount of drape would work well. Acrylic or merino blends tend to have the nicest drape for sweaters.
I hope this helps,
Grace
Grazie mille per il consiglio 😊
Hi I was wondering how wide the body panels are in cm, I am using a slightly larger hook and don’t want to make the panels too big
Hi Lauren, the body panels for size XS are the panels should be approx. 45 x 20cm / 17.5 x 8" . If you're using a different size hook make sure to check gauge and compare it to the gauge stated in the pattern. That will give you an indication if your sweater will be larger, smaller or the same size.
Grace 🙂
If you’re using your gauge of a 4” square equaling 10 rows by 20 stitches, for your body panel to be only 8” tall wouldn’t it just be 20 rows high instead of the 32 rows your pattern has for an xs?
Hi Hannah, the gauge is worked in half double crochets but the body panels are worked in the back loop half double crochets. Since it's a different stitch the gauge is not the same. As long as you're crocheting with the same tension as stated in the gauge swatch, your sweater should be the right size.
I hope this helps,
Grace 🙂
I know this sounds weird but I only realized I used a 4.5mm hook instead of a 4mm one after a whole day of crocheting. I’d really hate to redo the whole thing. Should I be doing anything different considering I used a bigger needle?
Hi Doni, your sweater will probably turn out a bit longer and wider than the suggested measurements - it shouldn't be too noticeable but you might want to crochet 2 fewer rows per body panel if your rectangles are too wide.
I hope this helps,
Grace
Oh I see. How long should the sleeves be? Do I subtract 2 rows from them too?
Hi Doni, if you're not following the gauge in the pattern you'll need to experiment to see what measurements will fit you. As a starting point, crochet your sleeves to the same length as the measurements provided and then adjust if neccessary!
Grace
Perfecto.!
I only have enough yarn left to sew my panels together. Do you have to do the finishing edge of sc on the body or can you skip that? I'm trying to figure if I should go hunting for some matching yarn. Thanks
Hi Gail, if you're happy with the way your edge looks without the SC border you don't need to add it on.
Grace 🙂
hi! this is my first time making a big project. If I use 4 ply indophil yarn and I only had 200 grams, is it enough to make that sweater? btw, my size is large.
Hi Madeline, this pattern requires a DK/ Light (3) / 8 ply yarn - so a 4ply will be too thin. I recommend choosing a DK yarn and swatch to make sure you meet gauge. All the yarn amounts are provided in the pattern 🙂
Grace
okay thank you. this helps a lot. 🙂 Btw, your yt channel helps me a lot too.
Hi! Love this pattern - thank you for the simplicity! What should the dimensions of each panel be for size 2XL? I'm making it as a gift, so unfortunately I can't just hold it up against my body to test sizing:/ Thanks!!
Hello, I did BLO HDC in arms too.and i finished doing one arm and another is remaining, can i do the same in another too? I made a mistake there, so, do i have to redo it or I can continue with the same pattern ??suggest me please...
Hi Drishti,
You can continue with BLO HDCs but you'll probably need to crochet fewer rows since BLO HDCs are taller than HDCs and your sleeves will have a horizontal ribbed look to them.
Grace
Hi! I have 6mm yarn in my statch I would love to use for this (Lion Brand Heartland). I plan to make a size L but wondering if I should follow the directions for a size M? If this wouldn't work do you have any resources on how to adjust the gauge/pattern so that this will work?
Hi Deidre,
If your gauge doesn't match the pattern and you're willing to experiment, I'd suggest following the pattern as a guide and crocheting to the measurements (rather than following the stitch and row counts). However, if you have a different gauge, I can't guarantee that your sweater will look like the sample. You can search for 'crochet gauge' tutorials on YouTube to learn how to alter your gauge and 'golden loop' tutorials will teach you how to alter stitch height.
I hope this helps,
Grace
Hi there, I am currently creating the panels and hopefully soon will be able to move on to the sleeves! I was wondering if I wanted to do more of a slimmer cuff on the sleeves, do you have any recommendations for how to integrate that into the pattern? I was thinking about reducing the number of chains to start and making the rows out of single crochets to make it more distinct but I am unsure if that will look good.
Hi Sage,
Yes I'd start with fewer foundation chains and then increase more times to make sure the sleeves still fit at the armhole. Single crochets tend to be less stretchy so if you'll need to be careful with your cuff size (make sure your hand can fit comfortably through the cuff) or it'll be very difficult to out your arms through your sweater!
I hope this helps,
Grace
Hello! I’m really excited about making this jumper. I’m making the first body panel and it currently looks like it’s going to end up looking like a parallelogram rather than a rectangle. I keep checking the stitch count and that’s still as it should be. Is it just a case of needing to block it at the end? Will that sort the shape out? Thanks!
I love this pattern! This will be my first sweater. The pattern calls for a 3 gauge yarn weight. If I wanted to use a 4 gauge yarn weight how do I adjust the pattern? How much yarn do I need? Do I get the same amount in yards/meters?
In the information you provide, you state the hook size as 4mm (US H/8). All the H hooks I have are 5mm. I'm confused - should it be 4mm/G hook, or 5mm/H hook?
Nevermind. I purchased the ad-free pattern, and it shows 4mm (US G/6), so I am going to go with that. Hopefully it's the correct one. You might want to change it on your website to clarify the size.
Thanks.
If I am looking to add length to the sleeve, at what row would I do that? Shoulder seam to wrist for me is 25 in. I am tall and long in the bodice, and am adding 6 inches to the sweater as well. Thank you!
Curious if anyone has tried keeping the front two panels open and adding a trim to make it a cardigan?
Hi,
I’m making a large following this pattern. I wanted the sleeves to be a littler tighter and form fitting but I’m having trouble adjusting the pattern to achieve this. Any pointers?
I’m debating starting the foundation chain to fit my wrist and going from there.