
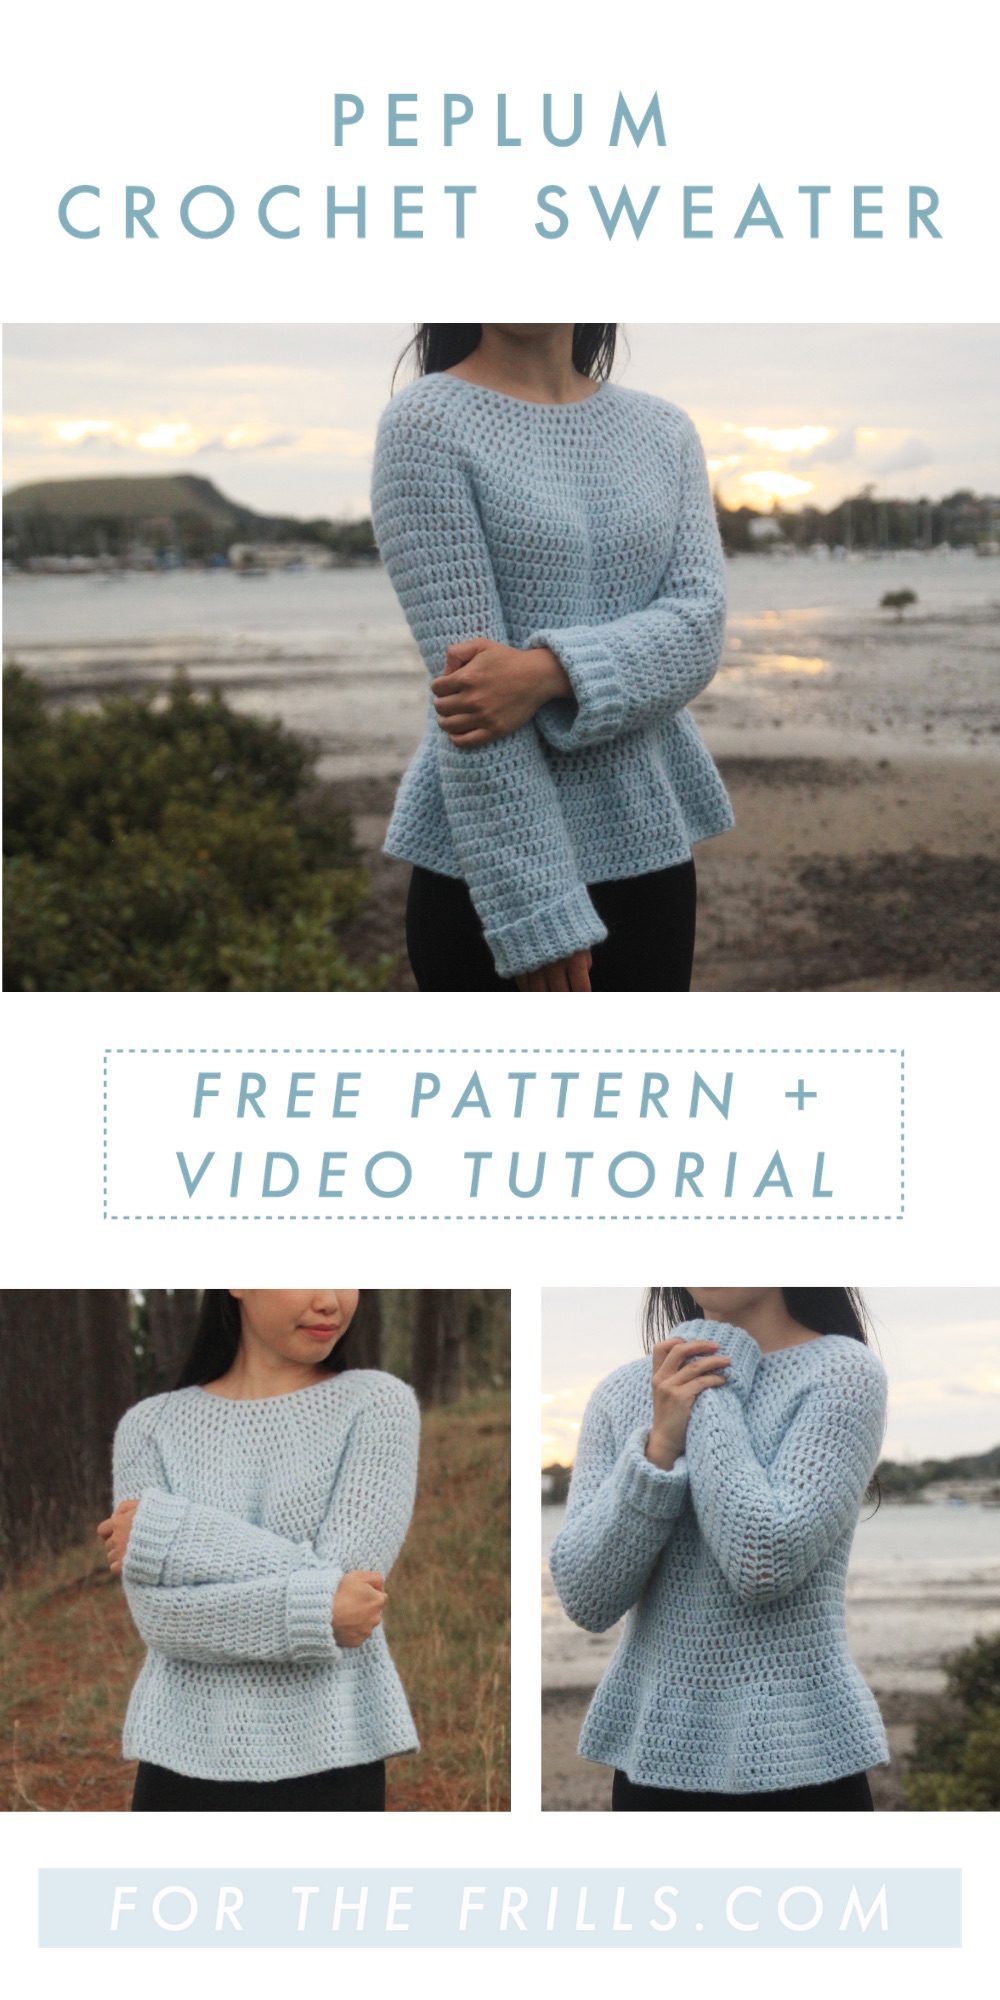
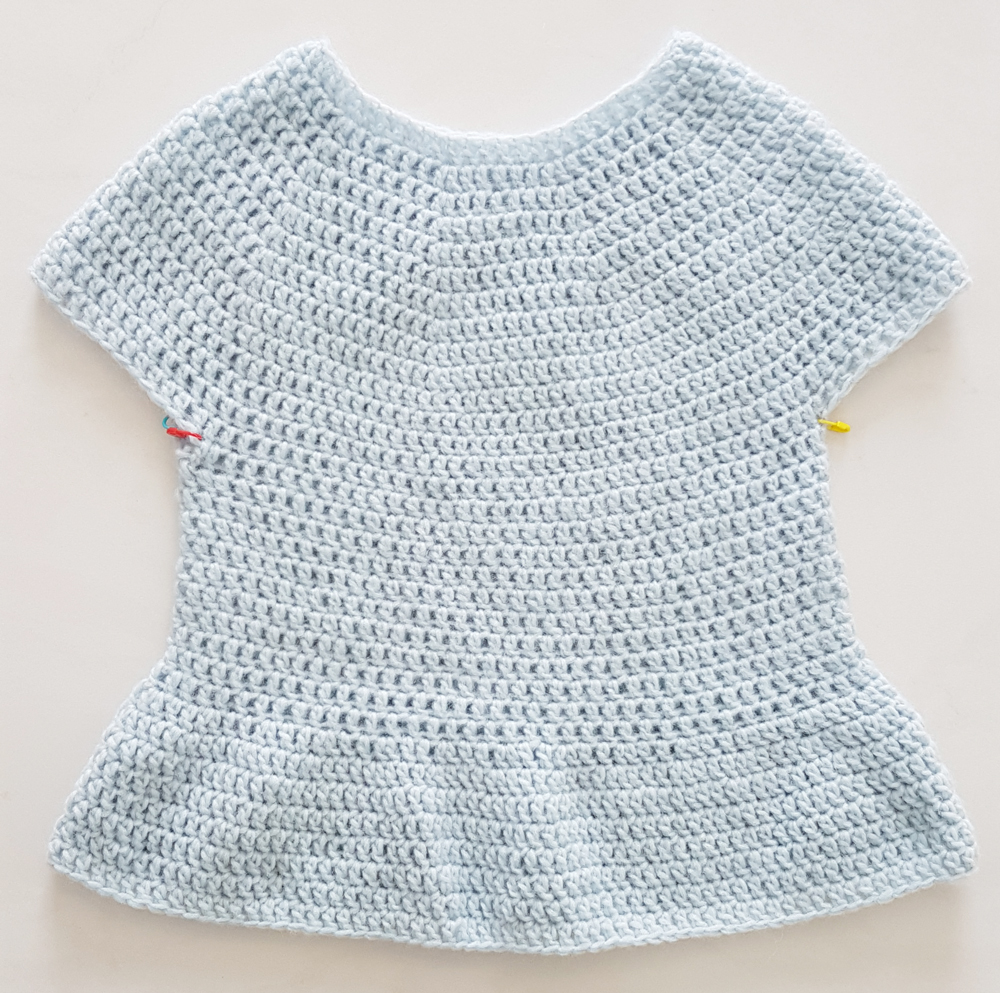
Hi everyone, here is my latest free crochet pattern! The Julia Peplum Sweater!
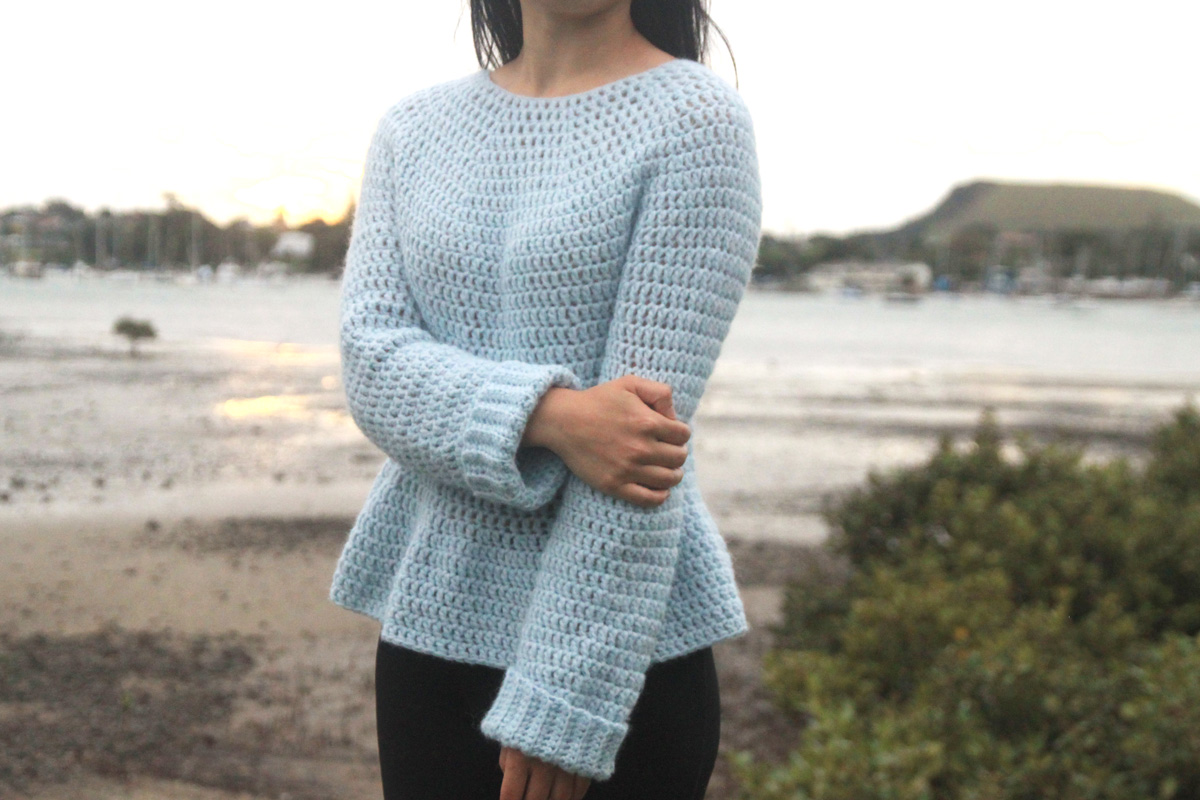
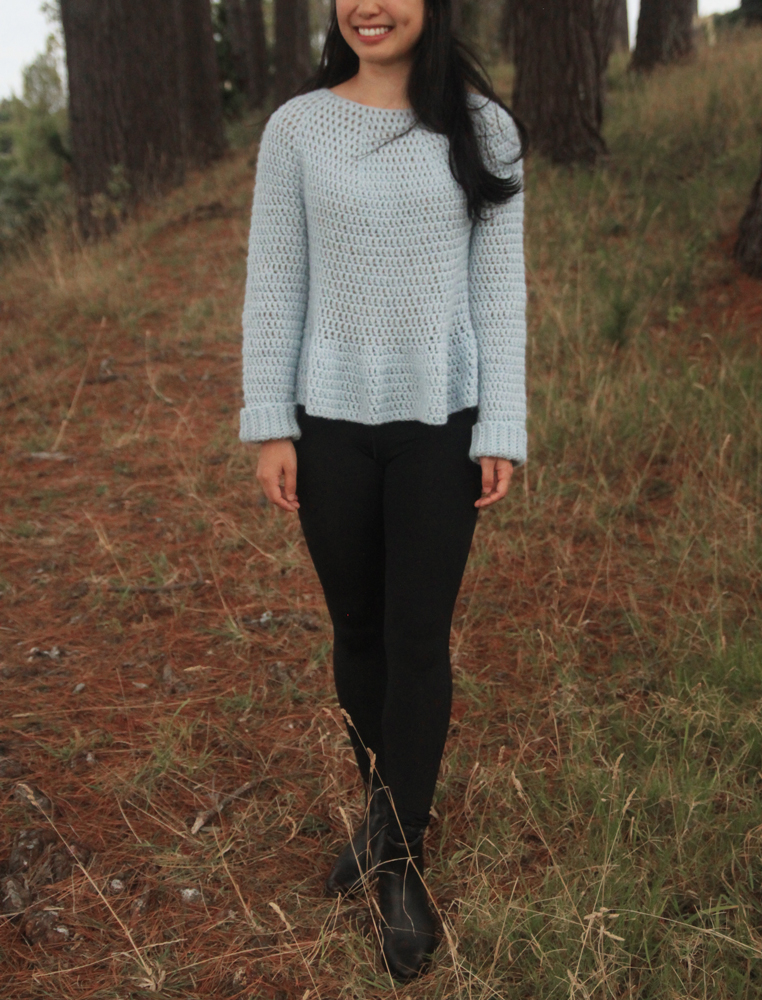
The Julia Peplum Sweater is the perfect lightweight crochet sweater to transition between seasons. This is an easy sweater is worked in the round from the neck down. The crochet pattern features a light, feminine peplum and has long sleeves with rolled rib cuffs.
Scroll down for the step-by-step video and free crochet pattern.
This post may contain affiliate links, view our disclosure policy for details.
Design Inspiration
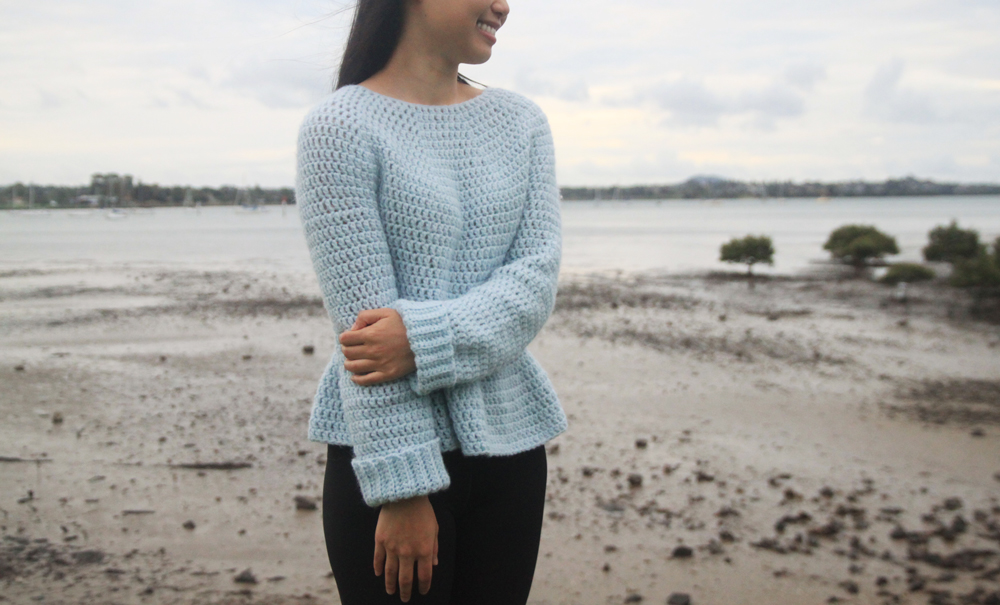
We’ve just had our first week of rainy weather so we’re finally moving into sweater season in New Zealand yay! I wanted a sweater that would keep you warm during chilly mornings but wouldn’t be too heavy after it rains and the air is muggy. This sweater is a wonderful layering piece, you can wear it by itself, over a top or under a coat and it’s also perfect for transitioning from winter to spring.
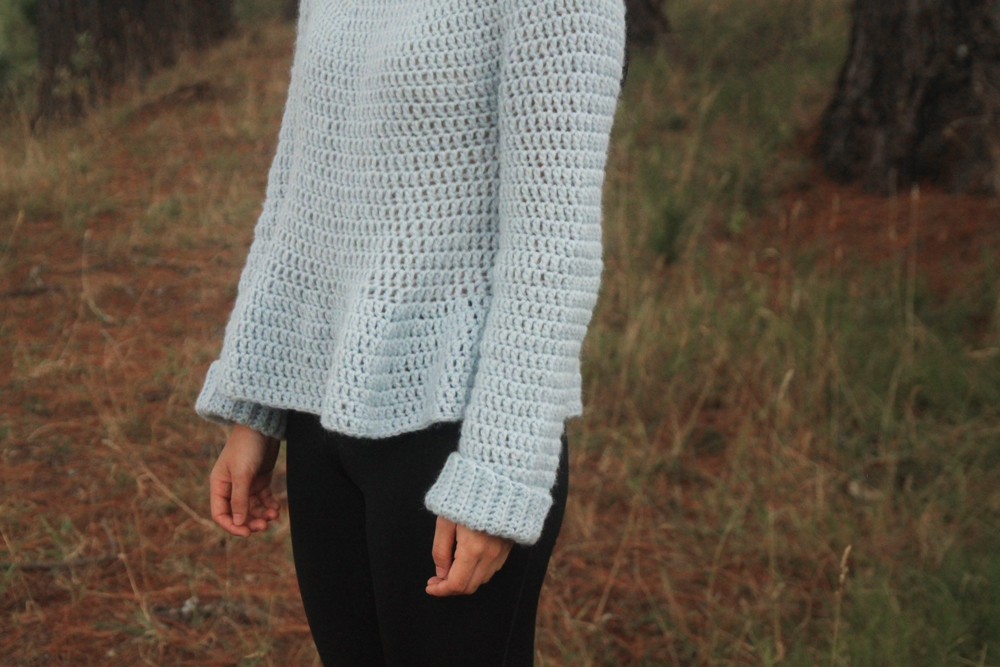
The peplum is super light and breezy and I think it gives the sweater a nice fun, feminine touch. The long sleeves are designed to be rolled up, so you can easily shorten the sleeves if you’d like to be cooler.
Yarn
I used Drops Air yarn which is an aran/worsted weight yarn. It’s an alpaca, wool and polyamide blend which makes it super light, soft and fluffy. Drops Air is also a blown yarn which means that the fibres are air blown into a tube together rather than being spun together. This makes it great for crochet as the yarn never splits and glides quickly over a crochet hook.
However, since the yarn is a bit fuzzy looking I find it a bit more difficult to see your stitches and the little fibres tend to cling to each other. This makes the finished garment very light and durable, but if you make mistakes the yarn has the tendency to ‘stick to itself’ if you need to frog it. Personally, the softness and light weight definitely outweigh the cons for me! I found my Drops air at WoolWarehouse UK.
*If you can't find Drops yarn where you live, Wool and the Gang - Feeling Good yarn has the same blown yarn effect!
Check out more free crochet patterns here!
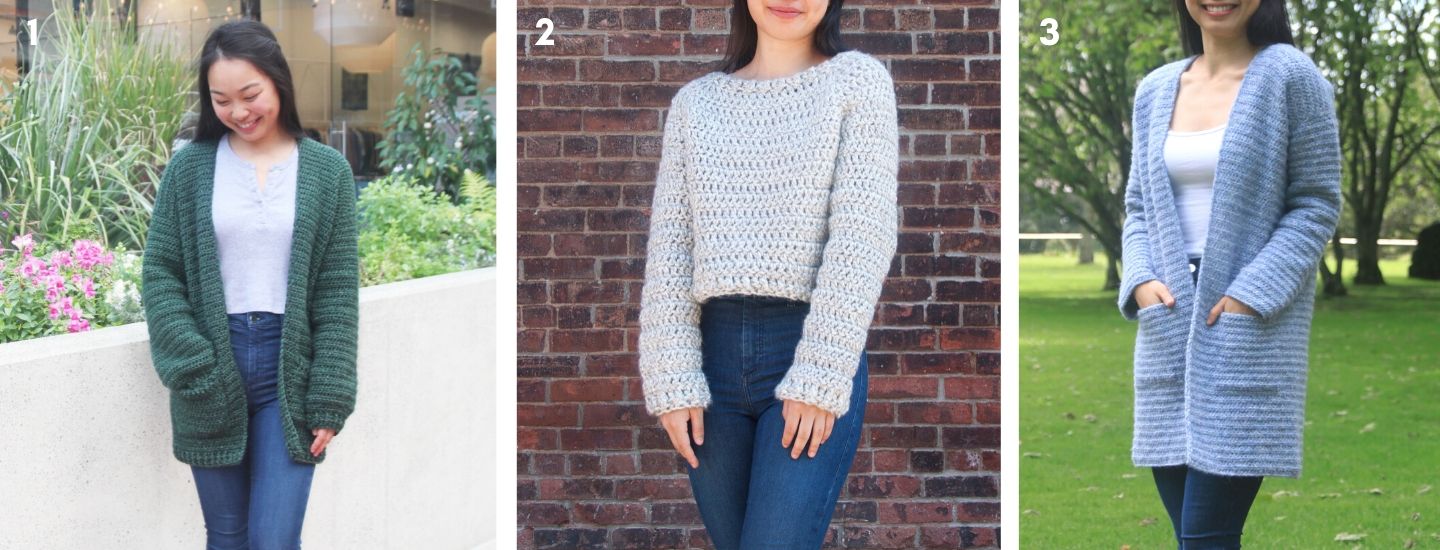
1. Briar Pocket Cardigan / 2. Brooklyn Sweater / 3. Stonewash Pocket Coatigan
Pin me for later!
Add the Julia Peplum Sweater to your Ravelry queue!
The ad-free, printable pdf version of the Julia Peplum Sweater is available on Etsy!
LEVEL: Easy
Pattern Notes:
*The sample in the video for this pattern is size XS.
*The sizing guide follows size XS(S, M, L, XL, 2XL, 3XL).
*This pattern was designed for the sleeves to be extra-long in order to roll the cuffs. If you would like normal length sleeves crochet 5 rows fewer than the pattern suggests.
*Ch 3 can be replaced with a no turning chain stitch to minimise the visible seam at the back of the top.
*Ch 3 always counts as a stitch.
*DC 10 means ‘DC into the next 10 stitches”, DC 47 = ‘DC into the next 47 stitches’ etc.
*2DC = ‘Place 2DC into the same stitch’
*Drops Air is a very stretchy, drapey yarn so when substituting it I would suggest looking for a yarn with a lot of stretch.
*This pattern uses US crochet terms
*To have more stretch in the neck opening, start with a row of 56 foundation double crochets, slip stitch to join and follow the pattern from ROW 2.
*To enlarge the neck opening even further, start with a row of 64 foundation double crochets, sl stitch to join and follow the pattern from ROW 3.
Materials
Yarn – Drops Air – Aran/Worsted (10 ply), 150m/50g, 65% Alpaca, 28% Polyamide, 7% Wool - Light Grey Green (18)
XS = 4.5 skeins, S = 5, M = 6, L = 6, XL = 7, 2XL = 9, 3XL = 10
5mm (US H/8) Crochet Hook
Darning needle
8 Stitch markers
Scissors
Stitches & Abbreviations
Ch = Chain
Sl st = Slip stitch
SC = Single crochet
DC = Double crochet
FINISHED GARMENT MEASUREMENTS:
Bust: 30(34, 38, 42, 46, 50, 54)”
Length: 21(22, 22.5, 23.5, 25, 27, 28.5)”
Sleeve (from underarm): 17(17, 17.5, 17.5, 18, 18, 18)”
Armhole: 10(10.5, 11, 11.5, 12, 12.5, 13)”
GAUGE: 10cm/4” square = 10 stitches wide x 7 rows tall in double crochet
Video Tutorial
Julia Peplum Sweater Crochet Pattern
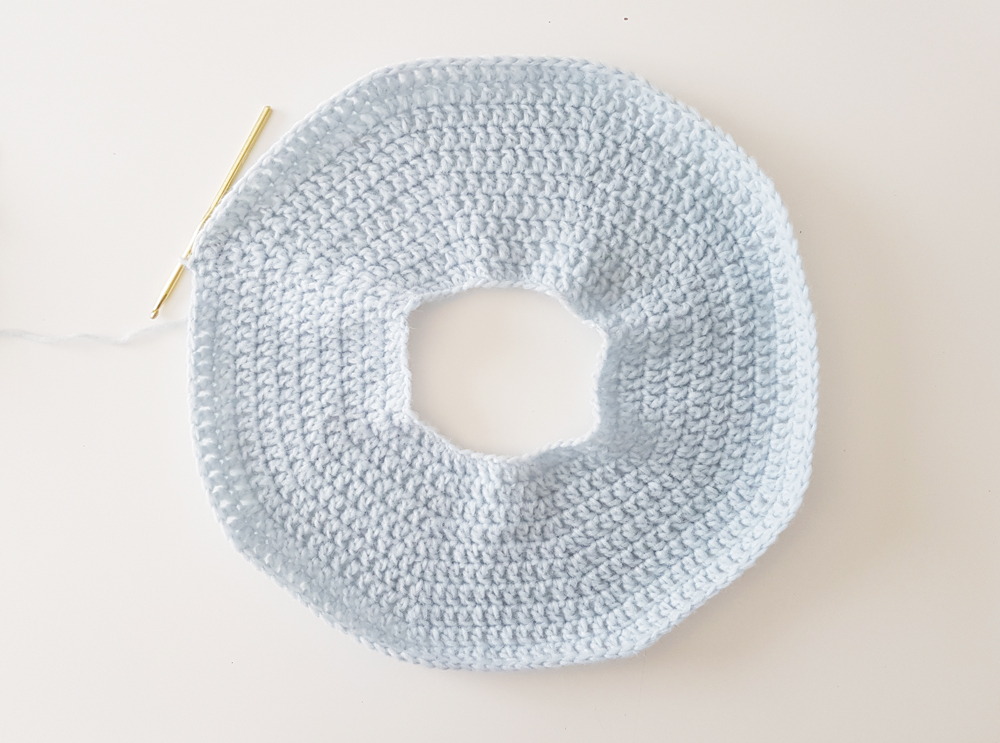
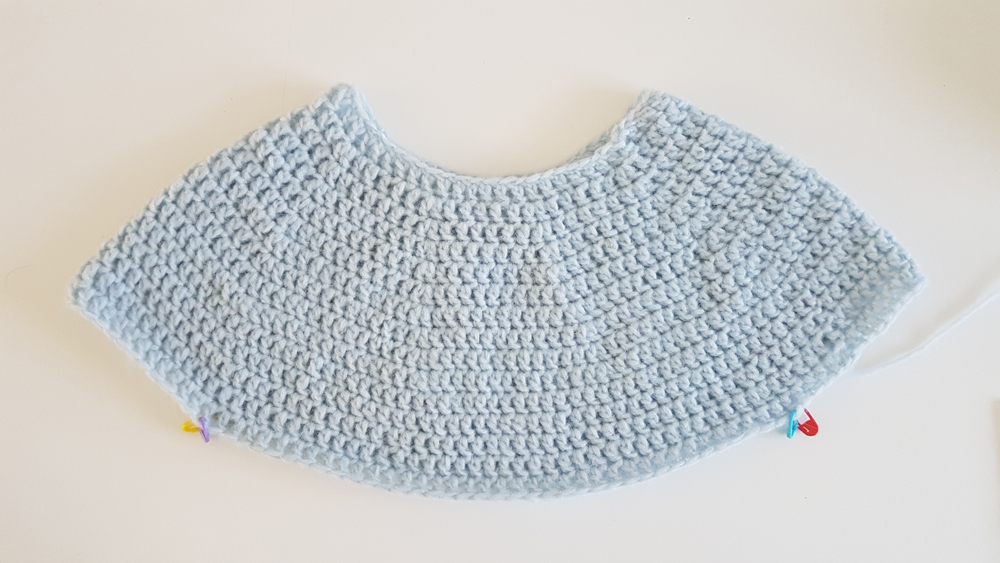
Neckline
This sweater is created from the neck down in the round. You will be able to customise the body length to fit your exact measurements.
ALL SIZES: FOUNDATION CHAIN: Ch 56. St st into the first chain. Please check that your chains aren’t twisted!
ROUND 1: Ch3, DC 55. Sl st into the 3rd chain at the start of the round.
<Total stitches: 56>
ROUND 2: Ch 3, DC 8, 2DC into the same stitch. *DC 5, 2DC*, repeat * - * 2 more times. DC 9, 2DC. Repeat * - * 3 more times. Sl st into the 3rd chain at the start of the round.
<Total stitches: 64> (You should have 8 sets of 2DC/’V’ in the same stitch).
ROUND 3: Ch 3, DC 9, 2DC into the same stitch. *DC 6, 2DC*, repeat * - * 2 more times. DC 10, 2DC. Repeat * - * 3 more times. Sl st into the 3rd chain at the start of the round.
<Total stitches: 72>
ROUND 4: Ch 3, DC 10, 2DC into the same stitch. *DC 7, 2DC*, repeat * - * 2 more times. DC 11, 2DC. Repeat * - * 3 more times. Sl st into the 3rd chain at the start of the round.
<Total stitches: 80>
ROUND 5: Ch 3, DC 11, 2DC into the same stitch. *DC 8, 2DC*, repeat * - * 2 more times. DC 12, 2DC. Repeat * - * 3 more times. Sl st into the 3rd chain at the start of the round.
<Total stitches: 88>
ROUND 6: Ch 3, DC 12, 2DC into the same stitch. *DC 9, 2DC*, repeat * - * 2 more times. DC 13, 2DC. Repeat * - * 3 more times. Sl st into the 3rd chain at the start of the round.
<Total stitches: 96>
ROUND 7: Ch 3, DC 13, 2DC into the same stitch. *DC 10, 2DC*, repeat * - * 2 more times. DC 14, 2DC. Repeat * - * 3 more times. Sl st into the 3rd chain at the start of the round.
<Total stitches: 104>
ROUND 8: Ch 3, DC 14, 2DC into the same stitch. *DC 11, 2DC*, repeat * - * 2 more times. DC 15, 2DC. Repeat * - * 3 more times. Sl st into the 3rd chain at the start of the round.
<Total stitches: 112>
ROUND 9: Ch 3, DC 15, 2DC into the same stitch. *DC 12, 2DC*, repeat * - * 2 more times. DC 16, 2DC. Repeat * - * 3 more times. Sl st into the 3rd chain at the start of the round.
<Total stitches: 120>
ROUND 10: Ch 3, DC 16, 2DC into the same stitch. *DC 13, 2DC*, repeat * - * 2 more times. DC 17, 2DC. Repeat * - * 3 more times. Sl st into the 3rd chain at the start of the round.
<Total stitches: 128>
Size XS only:
ROUNDS 11 - 14: Ch 3, DC 127 (in every stitch of the round). Sl st into the 3rd chain at the start of the round.
<Total stitches: 128>
ROUND 15: Ch 3, DC 21 – insert a stitch marker, DC 38 – insert a stitch marker, DC 26 – insert a stitch marker, DC 38 insert a stitch marker, DC 4 until the end of the round.
(Your stitch markers should be placed in the 22nd, 60th, 86th and 124th stitches.)
Sl st into the 3rd chain at the start of the round. Fasten off.
<Total stitches: 128>
*Proceed to ‘BODY’ instructions.*
Sizes S, M, L, XL, 2XL and 3XL only:
ROUND 11: Ch 3, DC 17, 2DC into the same stitch. *DC 14, 2DC*, repeat * - * 2 more times. DC 18, 2DC. Repeat * - * 3 more times. Sl st into the 3rd chain at the start of the round.
<Total stitches: 136>
ROUND 12: Ch 3, DC 18, 2DC into the same stitch. *DC 15, 2DC*, repeat * - * 2 more times. DC 19, 2DC. Repeat * - * 3 more times. Sl st into the 3rd chain at the start of the round.
<Total stitches: 144>
Size S only:
ROUNDS 13 – 15: Ch 3, DC 143 (in every stitch of the round).
Sl st into the 3rd chain at the start of the round.
<Total stitches: 144>
ROUND 16: Ch 3, DC 23 – insert a stitch marker, DC 44 – insert a stitch marker, DC 28 – insert a stitch marker, DC 44 – insert a stitch marker, DC 4 until the end of the round.
(Your stitch markers should be placed in the 24th, 68th, 96th and 140th stitches.)
Sl st into the 3rd chain at the start of the round. Fasten off.
<Total stitches: 144>
*Proceed to ‘BODY’ instructions.*
Sizes M, L, XL, 2XL and 3XL only:
ROUND 13: Ch 3, DC 19, 2DC into the same stitch. *DC 16, 2DC*, repeat * - * 2 more times. DC 20, 2DC. Repeat * - * 3 more times. Sl st into the 3rd chain at the start of the round.
<Total stitches: 152>
ROUND 14: Ch 3, DC 20, 2DC into the same stitch. *DC 17, 2DC*, repeat * - * 2 more times. DC 21, 2DC. Repeat * - * 3 more times. Sl st into the 3rd chain at the start of the round.
<Total stitches: 160>
Size M only:
ROUNDS 15 – 16: Ch 3, DC 159 (in every stitch of the round).
Sl st into the 3rd chain at the start of the round.
<Total stitches: 160>
ROUND 17: Ch 3, DC 25 – insert a stitch marker, DC 50 – insert a stitch marker, DC 30 – insert a stitch marker, DC 50 – insert a stitch marker, DC 4 until the end of the round.
(Your stitch markers should be placed in the 26th, 76th, 106th and 156th stitches.)
Sl st into the 3rd chain at the start of the round. Fasten off.
<Total stitches: 160>
*Proceed to ‘BODY’ instructions.*
Sizes L, XL, 2XL and 3XL only:
ROUND 15: Ch 3, DC 21, 2DC into the same stitch. *DC 18, 2DC*, repeat * - * 2 more times. DC 22, 2DC. Repeat * - * 3 more times. Sl st into the 3rd chain at the start of the round.
<Total stitches: 168>
ROUND 16: Ch 3, DC 22, 2DC into the same stitch. *DC 19, 2DC*, repeat * - * 2 more times. DC 23, 2DC. Repeat * - * 3 more times. Sl st into the 3rd chain at the start of the round.
<Total stitches: 176>
Size L only:
ROUND 17: Ch 3, DC in every stitch of the round.
Sl st into the 3rd chain at the start of the round.
<Total stitches: 176>
ROUND 18: Ch 3, DC 27 – insert a stitch marker, DC 56 – insert a stitch marker, DC 32 – insert a stitch marker, DC 56 – insert a stitch marker, DC 4 until the end of the round.
(Your stitch markers should be placed in the 28th, 84th, 116th and 172nd stitches.)
Sl st into the 3rd chain at the start of the round. Fasten off.
<Total stitches: 176>
*Proceed to ‘BODY’ instructions.*
Sizes XL, 2XL and 3XL only:
ROUND 17: Ch 3, DC 23, 2DC into the same stitch. *DC 20, 2DC*, repeat * - * 2 more times. DC 24, 2DC. Repeat * - * 3 more times. Sl st into the 3rd chain at the start of the round.
<Total stitches: 184>
ROUND 18: Ch 3, DC 24, 2DC into the same stitch. *DC 21, 2DC*, repeat * - * 2 more times. DC 25, 2DC. Repeat * - * 3 more times. Sl st into the 3rd chain at the start of the round.
<Total stitches: 192>
Size XL only:
ROUND 19-20: Ch 3, DC 191 (in every stitch of the round).
Sl st into the 3rd chain at the start of the round.
<Total stitches: 192>
ROUND 21: Ch 3, DC 29 – insert a stitch marker, DC 62 – insert a stitch marker, DC 34 – insert a stitch marker, DC 62 – insert a stitch marker, DC 4 until the end of the round.
(Your stitch markers should be placed in the 30th, 92nd, 126th and 188th stitches.)
Sl st into the 3rd chain at the start of the round. Fasten off.
<Total stitches: 192>
*Proceed to ‘BODY’ instructions.*
Sizes 2XL and 3XL only:
ROUND 19: Ch 3, DC 25, 2DC into the same stitch. *DC 22, 2DC*, repeat * - * 2 more times. DC 26, 2DC. Repeat * - * 3 more times. Sl st into the 3rd chain at the start of the round.
<Total stitches: 200>
ROUND 20: Ch 3, DC 26, 2DC into the same stitch. *DC 23, 2DC*, repeat * - * 2 more times. DC 27, 2DC. Repeat * - * 3 more times. Sl st into the 3rd chain at the start of the round.
<Total stitches: 208>
Size 2XL only:
ROUND 21-23: Ch 3, DC 207 (in every stitch of the round).
Sl st into the 3rd chain at the start of the round.
<Total stitches: 208>
ROUND 24: Ch 3, DC 31 – insert a stitch marker, DC 68 – insert a stitch marker, DC 36 – insert a stitch marker, DC 68 – insert a stitch marker, DC 4 until the end of the round.
(Your stitch markers should be placed in the 32nd, 100th, 136th and 204th stitches.)
Sl st into the 3rd chain at the start of the round. Fasten off.
<Total stitches: 208>
*Proceed to ‘BODY’ instructions.*
Size 3XL only:
ROUND 21: Ch 3, DC 27, 2DC into the same stitch. *DC 24, 2DC*, repeat * - * 2 more times. DC 28, 2DC. Repeat * - * 3 more times. Sl st into the 3rd chain at the start of the round.
<Total stitches: 216>
ROUND 22: Ch 3, DC 28, 2DC into the same stitch. *DC 25, 2DC*, repeat * - * 2 more times. DC 29, 2DC. Repeat * - * 3 more times. Sl st into the 3rd chain at the start of the round.
<Total stitches: 224>
ROUND 23-26: Ch 3, DC 223 (in every stitch of the round).
Sl st into the 3rd chain at the start of the round.
<Total stitches: 224>
ROUND 27: Ch 3, DC 33 – insert a stitch marker, DC 74 – insert a stitch marker, DC 368– insert a stitch marker, DC 74 – insert a stitch marker, DC 4 until the end of the round.
(Your stitch markers should be placed in the 34th, 108th, 146th and 220th stitches.)
Sl st into the 3rd chain at the start of the round. Fasten off.
<Total stitches: 224>
*Proceed to ‘BODY’ instructions.*
Body
ALL SIZES
Lay the garment on a flat surface and line up the stitch markers so they fall directly on top of each other. If they don’t please double check and count your stitches to ensure that you have placed your stitch markers in the right stitches for your size.
Now you can try on the top. The stitch markers should meet underneath your armpits on both sides (e.g. the front left stitch marker should be able to reach the back left stitch marker and the same for the right side). Your arms should be able to move easily within the arm holes. The top should also be able to fit over your bust. If the top is too tight you can add more rounds of DC.
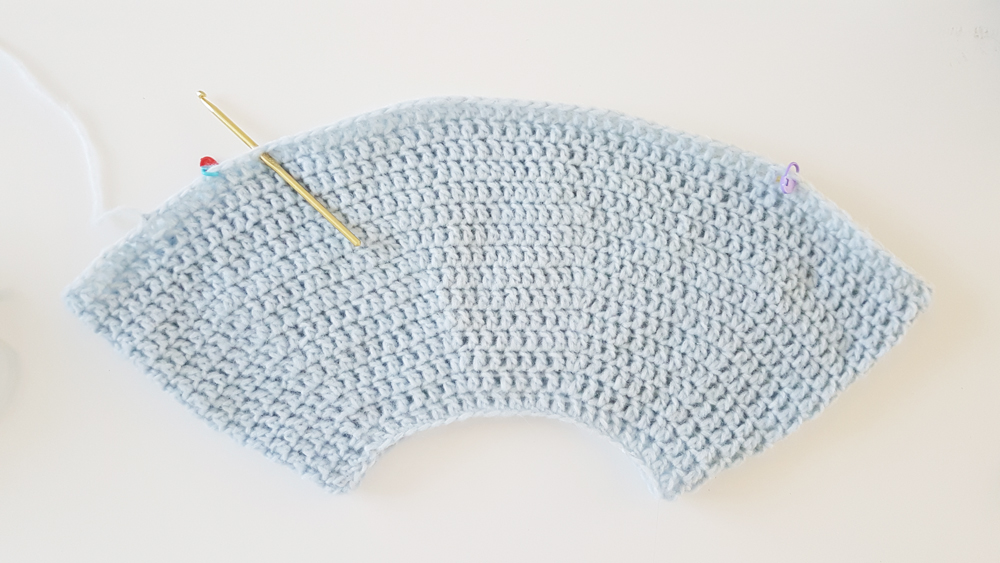
You want the back of your top (the side with the 3 chains/seam) facing you. Turn your garment so that the neckline is facing towards you.
Insert your hook one stitch to the right of the stitch marker closest to the seam (the seam is the same point where you just fastened off and left a tail of yarn).
Insert hook into the stitch with a stitch marker. Secure your yarn and pull through a loop.
BODY ROUND 1: Ch 3, DC in every stitch until the 1st stitch marker, Dc into the 1st stitch marker. Turn your work. DC into the stitch with the 2nd stitch marker – You have created your first armhole. DC into every stitch until the next stitch marker (3rd stitch marker). DC into the stitch with the 3rd stitch marker. Turn your work.
DC into the stitch with the 4th stitch marker. DC in every stitch until the end of the round. Sl st into the 3rd chain at the start of the round.
BODY ROUND 2: Ch 3, DC in every stitch in the round. Sl st into the 3rd chain at the start of the round.
Repeat BODY ROUND 2 until you reach the correct length for your size.
XS: Work to ROUND 11
S: Work to ROUND 11
M: Work to ROUND 12
L: Work to ROUND 12
XL: Work to ROUND 13
2XL: Work to ROUND 13
3XL: Work to ROUND 13
Do not fasten off. Move directly onto the peplum.
Peplum
PEPLUM ROUND 1: Ch 3, *DC 2, 2DC*. Repeat * - * until the end of the round.
(You can end with a DC or 2DC e.g. if you only have 1 stitch left place one DC into the last stitch).
PEPLUM ROUND 2: Ch 3, *DC 3, 2DC*. Repeat * - * until the end of the round. (You can end with a DC or 2DC e.g. if you only have 1 stitch left place one DC into the last stitch).
PEPLUM ROUND 3: Ch 3, DC into every stitch until the end of the round. Sl st into the 3rd chain at the start of the round.
Repeat PEPLUM ROUND 3 until you reach the correct length for your size.
XS: Work to ROUND 8
S: Work to ROUND 8
M: Work to ROUND 8
L: Work to ROUND 10
XL: Work to ROUND 10
2XL: Work to ROUND 10
3XL: Work to ROUND 10
Fasten off.
Sleeves
Remove the stitch markers. Place your hook anywhere along the edge of the sleeve. (I prefer to place my hook at the back of the garment to make the seam less noticeable). Secure your yarn and pull through a loop.
SLEEVE ROUND 1: Ch3, DC in every stitch of the round. Sl st into the 3rd chain at the start of the round.
Repeat SLEEVE ROUND 1 until you reach the correct length for your size or your sleeves reach your desired length.
*Alteration Note – Remove 5 rounds if you don’t want the sleeve to be add long/roll up the cuffs. E.g. If you want normal length sleeves for Size XL work until ROUND 22 (not ROUND 27).
The ribbing adds 7.5cm/3" of length to the sleeves.
XS: Work to ROUND 25
S: Work to ROUND 25
M: Work to ROUND 26
L: Work to ROUND 26
XL: Work to ROUND 27
2XL: Work to ROUND 27
3XL: Work to ROUND 27
Move directly onto the ribbing. Do not fasten off.
*Note – Count the number of stitches you have in the last round of your sleeve.
Sleeve Ribbing
*For the sleeves’ ribbing, we will be creating rows of SC in the back loops. If you are not familiar with this method I highly suggest watching the YouTube video.
FOUNDATION CHAIN: Ch11.
ROW 1: SC in the 2nd chain from the hook. SC in each chain (back towards the sleeve’s edge).
Sl st into the next stitch (DC) on the edge of the sleeve. Sl st into the next stitch (DC).
(You will have slip stitched into the next 2 stitches. These stitches should have no other stitches in them)
<Total stitches: 10>
ROW 2: Turn your row of SC. Skip the first 2 sl sts. Working in the back loops only, SC 10.
<Total stitches: 10>
ROW 3: Ch 1 and turn. Working in the back loops only, SC 10 (moving back towards the edge of the sleeve). Sl st into the next stich along the sleeve’s edge. Sl st into the next stitch.
<Total stitches: 10>
Repeat ROW 2 and 3 until you have the same number of rows as stitches in your sleeve.
E.g. I had 32 DC stitches in my sleeve. Therefore, I crocheted 32 rows of back loop SC.
Once you’ve finished your last row (it can be an odd or even number), fasten off and sew together the two edges of your ribbing.
Repeat for the other sleeve.
Weave in all of your ends!
The Peplum sweater is really cute and looks easy to make.
Thank you! Yes its mainly worked up in double crochet so it's a nice, easy pattern 🙂
hi! i'm finding it difficult to start the body. are you supposed to pull a loop through the stitch with a stich marker or one to the right? thank you!
just realized i have a few more questions as well, lol!
from the body part, it gets very unclear. which stitch should i start with? the one with the first stitch marker, or the fourth? when i start with the fourth one (which i think is the one closest to the seam), my armholes are too big, and the chest is too small - i'm making a size small, so my armholes are about 44 stitches wide, and the chest is 28 stitches.
this is such a pretty pattern, i would very much like to make it properly!
thank you so much!
if i start with the first one, the stitch markers don't coincide with the pattern. i obviously can't DC to the first marker, as that's the one i started with.
Hi Maryam, firstly you should insert your crochet hook to the right of the st marker, not in the st with a st marker. This is where you'll crochet your first st (ch 3). You can place your hook 1 stitch to the right of the stitch marker or more stitches further to the right depending on where you want your seam. If you've placed your hook 1 st to the right of the st marker - Ch 3, DC into the st with a st marker. If you haven't - cH 3, DC in each st until you reach the st marker, then DC into the st with a st marker.
I think you might have folded your yoke the wrong way. The body stitches should be 44 sts wide and the armholes should be 28 stitches. If you notice from the video the yoke seam/tail of yarn should be running along the armhole portion, not the body portion of the pattern.
For the body, the order of st markers doesn't correspond to the order you inserted them in as we are no longer working from the same turning chain. For size small, the st marker closest to the seam should be the st marker that was placed in st 140. For the body, the 'first' stitch marker is literally the first st marker you reach as you're crocheting around (that's why I didn't label the 24th, 68th, 96th, 140th sts from first - fourth). I also recommend checking out the video tutorial.
I hope this helps! Grace 🙂
i see the video on the blog so i didn't bother looking for it, lol. thank you so much for you help, it really helped 🙂
Hola me podrías ayudar las 56 cadenas no me entra la cabeza como modifico el patrón para las 62 cadenas que ahí si me entra el suéter gracias muy bonito, saludos desde Ecuador.
I'm very confused by the count. I'm on round 2 and the direction says "64 stitches (8 sets of 2DC...in the same stitch" ....I have no idea how you can get that. I run out of a chain before I'm done the 3rd "DC9" forget the 4th one. Am I missing a step or something? I tried the video and still am not seeing it. I've ripped it out for the last hour over and over and am trying to adapt but I know that's going to leave other steps haywire too. What am I missing?
Hi Jen,
The 8 sets of 2DC refers to the fact that in each round you'll increase 8 times by placing 2 DCs into the same stitch. This is just an extra note to make sure you have the correct number of increases - it's not the actual stitch pattern. So at the end of row 2 you should have 64 stitches.
Grace
I had the same issue she mentioned and you did not understand and answer the issue. I agree and had the same issue as her. It is obvious that isn't part of the pattern we are saying the pattern is wrong g and messed up by round 2. Its not even worth figuring out how to make it all work because the rest of the pattern could be equally a nightmare.
I'm having same problem, has anyone figured it out?
As I have a lot of hair I started with 64 chains and couldn't complete the first round (round 3 per pattern) either. The repeat number for DC 10, 2DC should be 2 and not 3 so there's one mathematical mistake or typo. (If you repeat it three more times the stitch count is actually 84.) But, there isn't enough of a foundation chain to get from 64 to 84 in that particular round. I'll see if I can modify the pattern as I go.
Hello, I noticed that the neckline in this pattern is too big for my head? (^^;) Is there anyway to modify this pattern to fit a bigger neckline? thanks in advance!!
Hi,
You can start with foundation double crochets to make the neckline more stretchy. Chances are you might be chaining too tightly during the foundation chain.
Grace
Hi, I'm not sure when this pattern was made, but in row 2 it says that I should have 64 stitches, I had 4 stitches left and no more to go, I'm confused where it says 2 more times and 3 more times, does that mean I add 2 or 3 to what I already have, I'm just confused
Hi Maddy,
If the pattern states repeat * - * 3 more times, you repeat the instructions in between the * markers 3 more times. If you'd like to be more familiar with reading crochet patterns there are lots of tutorials on YouTube and blog posts so you can learn all the abbreviations and instructions 🙂
Grace
How much yarn do you use for the sweater? 🙂
Am making S size in which the persons arm hole measure are 14" . In your pattern it says 11"...can you help me with this
Hello! I love this sweater, but I was wondering if there was any way to make the stitches tighter so it's less see through. Should I use a smaller hook or smaller yarn? Would doing either affect the pattern?
Thank you!
Chain 56 for all sizes...but the the ring of chains isn't going through my head. ...how many chains do I crochet to fit pass through the head
If I want to make the neck width more big how many foundation double crochet do.i need to make?
Well, I figured out what I was doing wrong. I started with 64 chains. (Lots of hair.) Even though I saw that for round 3 "DC 9, 2DC into the same stitch" was not in asterisks, somehow my brain supposed that was a repeat. However, "*DC 6, 2DC*" is to be repeated where it says "Repeat * - * 3 more times". My total stitch count at the end of the row was conform the pattern. Hopefully this helps you who were stuck too.
Hi, I'm trying to make this sweater with 5 bulky yarn, is there anything I need to do differently to make sure the sizing is still fairly similar for the medium size pattern? Thanks, I'm an advanced beginner crocheter and this is my first sweater and I'm in love with my yarn at the moment.
Hi, the 56 count chain is nowhere big enough to go over my head. Even if I do a looser foundation chain stitch. Do you have a modification?
I love you Sweaters, Bags, and Tops.. I have developed M.S. and no longer able to hand wash anything. So I was wondering what type of laundry bags are best to use in the washer on gentle the first time before I can lay them out to shape before air drying? I usually use Acrylic or cotton yarn , types that are machine washable and dryable. All suggestions are welcome . . Sincerely, Renae ctrl
I love you Sweaters, Bags, and Tops.. I have developed M.S. and no longer able to hand wash anything. So I was wondering what type of laundry bags are best to use in the washer on gentle the first time before I can lay them out to shape before air drying? I usually use Acrylic or cotton yarn , types that are machine washable and dryable. All suggestions are welcome . . Sincerely, Renae
PS Sorry If this is being posted twice. My screen went black then blank so I retype it.
I am using a. Caron Jumbo Medium 4 acrylic yarn and I just started with the 56 chain. It doesn't fit around my head I am wondering if you have any advice on how I can change the pattern to fit my yarn I really want to use it.