Hi everyone, today I'm going to show you how to crochet the Herringbone Single Crochet Stitch with a step-by-step video tutorial!
This post may contain affiliate links, view our disclosure policy for details.
Recently, I was looking through a Japanese crochet book and I saw a bag made with this stitch. Initially I thought it must be knit but since it was a crochet book (haha) I knew there must be a way to recreate this stitch! I can't read a single word of Japanese however I find that Japanese crochet books are a great resource because they usually have diagrams ...
Fast forward to an hour later and I still had no idea how to crochet this stitch! I did a bit of online research in English and finally figured it out but I couldn't find a video tutorial anywhere! I thought this stitch was too pretty not to share so I've created a tutorial for you 🙂
For this stitch there is video tutorial and a photo tutorial with written instructions if you prefer reading 🙂 Once you see this stitch being crocheted it's pretty easy follow as it's a 2 row repeat and uses only single crochets. There are also instructions on how to increase the herringbone single crochet so you can easily use this stitch to create a wide variety of patterns!
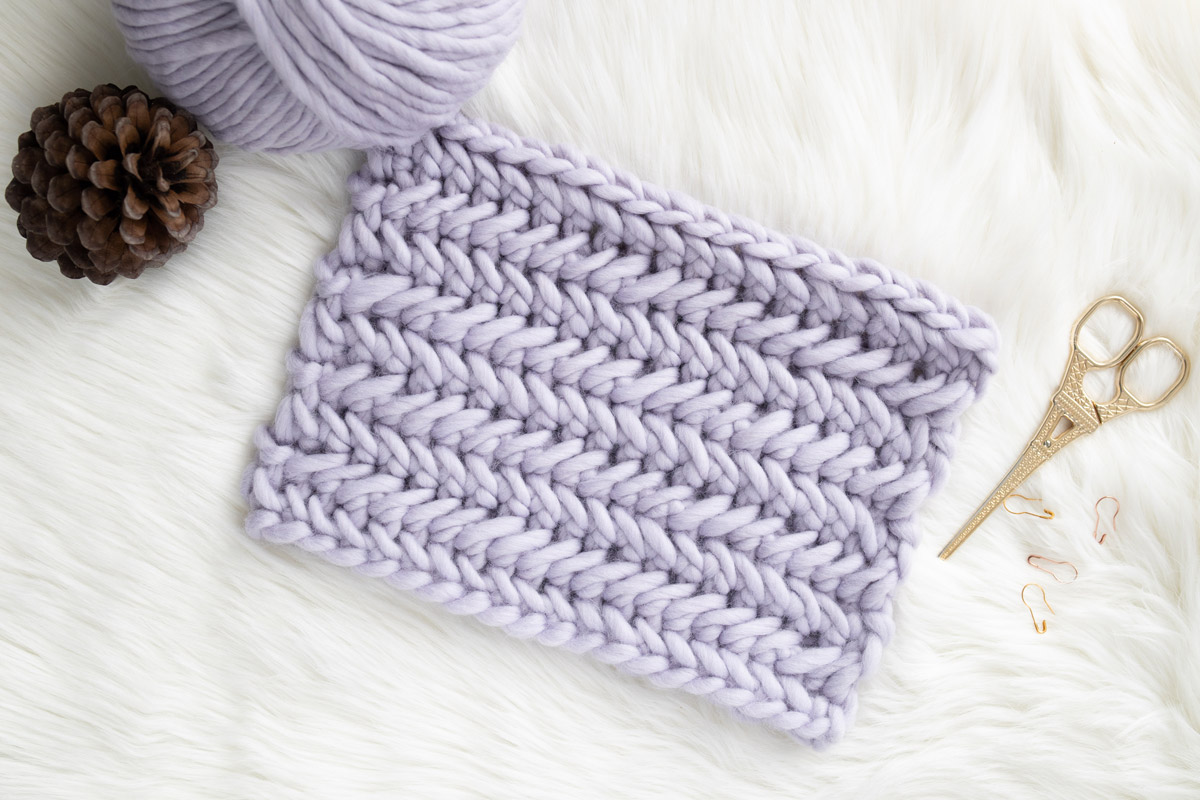
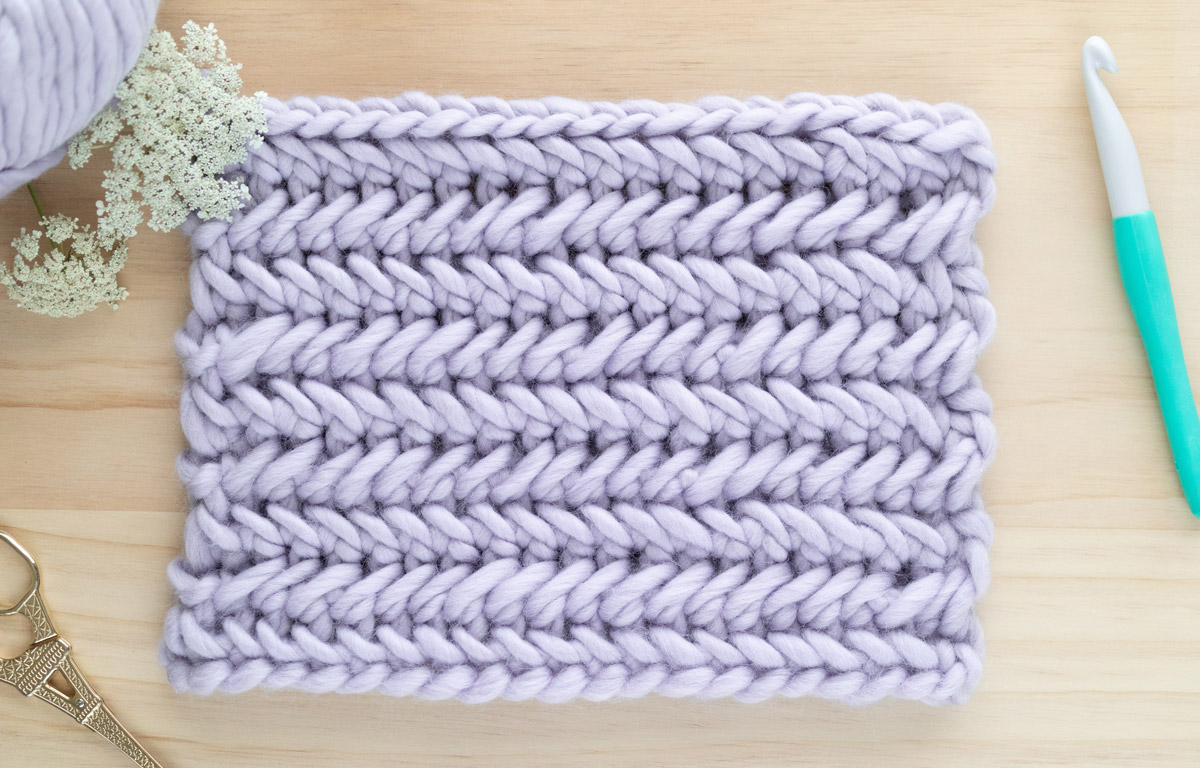
Although, I'm not even quite sure what this stitch's name is in English ... I think feels closest to Herringbone Stitch but using single crochets (instead of double crochets as per normal) but I find that the stitch pattern also has a chevron look to it? Do you think its a herringbone stitch or a chevron stitch? Let me know what you think!

In this tutorial, I used a super chunky yarn (Wool and the Gang's Crazy Sexy Wool) and a 12mm crochet hook so you can easily see the stitch definition. I've tested it out with a wide range of yarns and I think it looks best on DK weight or thicker but feel free to experiment!
Check our more free crochet patterns!
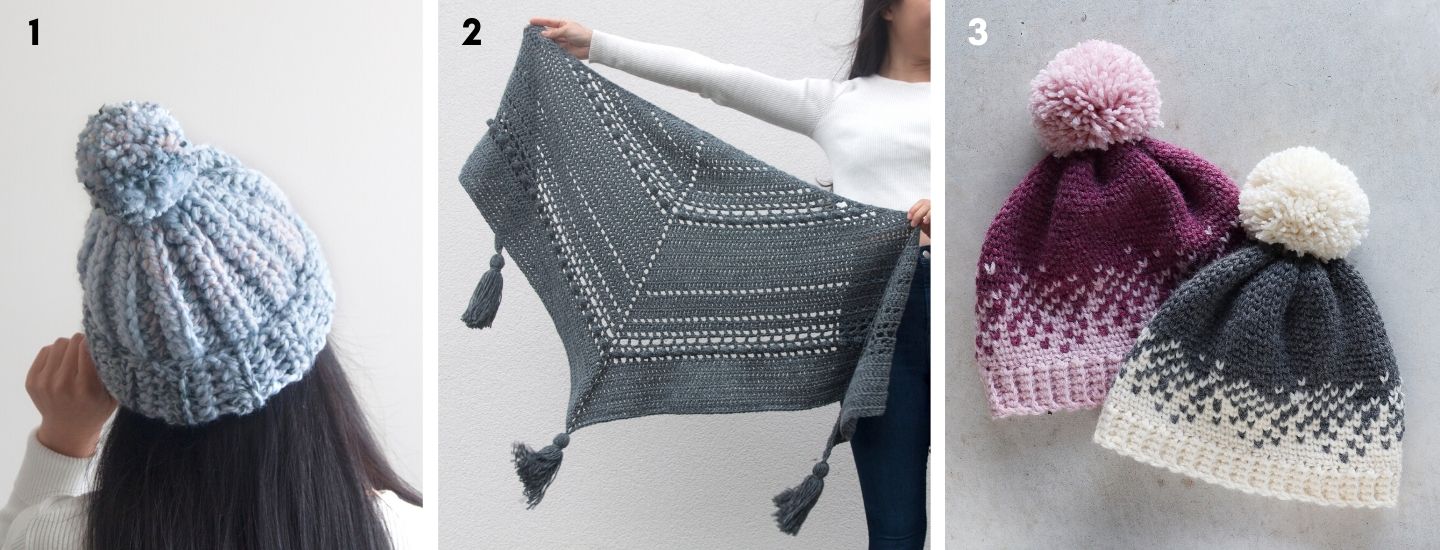
1. One Hour Crochet Beanie / 2. Stormborn Wrap / 3. Fair Isle Crochet Beanie
Pin me for later!
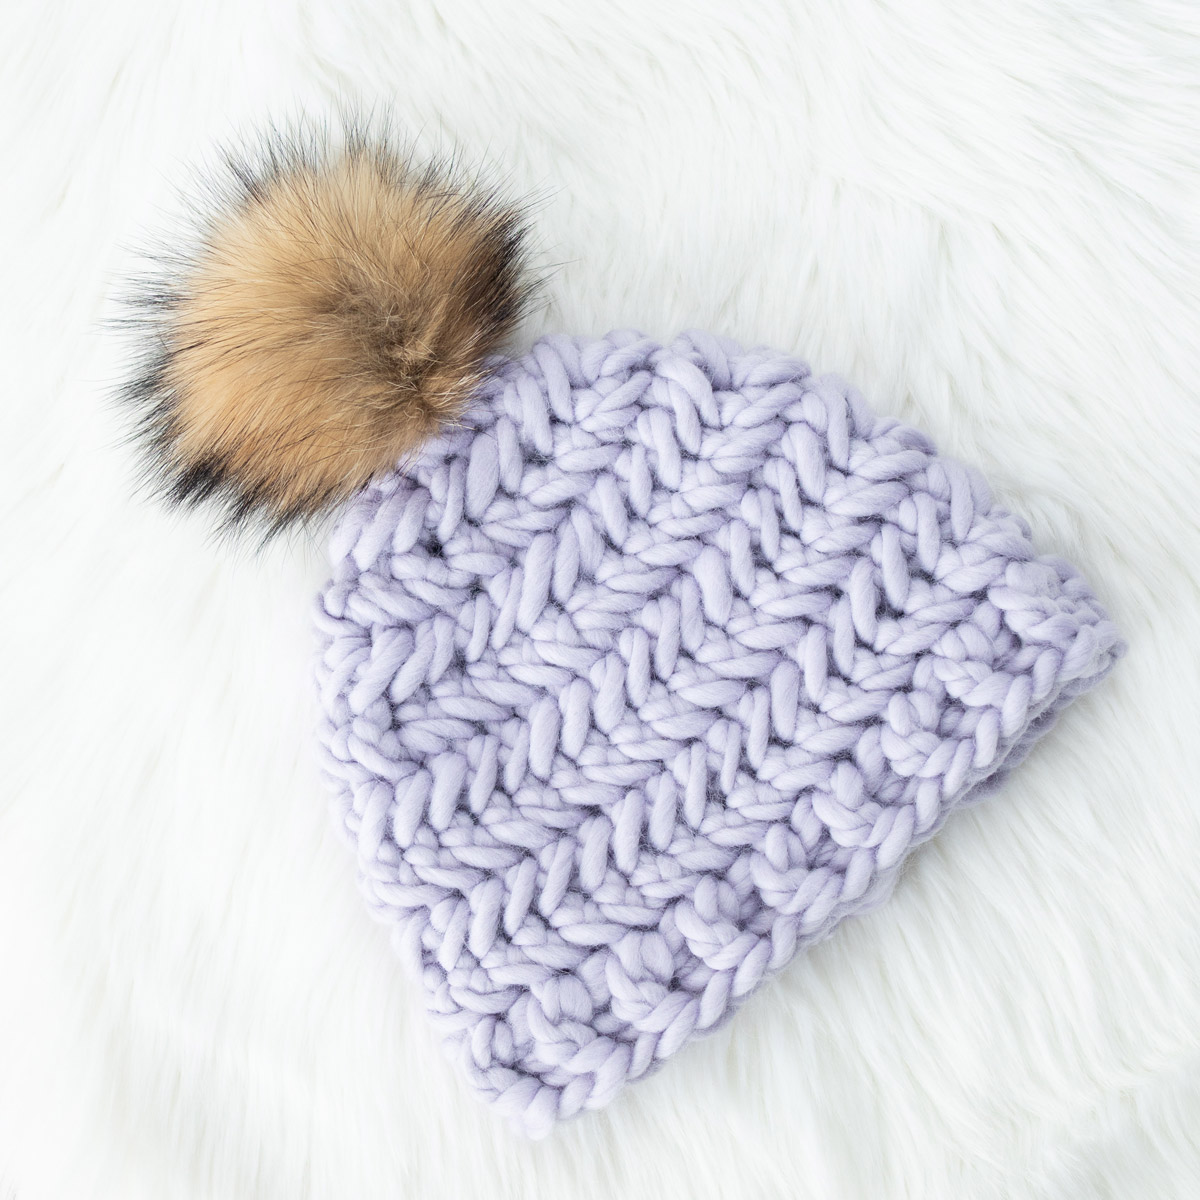
If you want to see this stitch worked in the round check out the Herringbone Beanie Crochet Pattern!
(You can also get the ad-free, printable pdf of this stitch tutorial with the beanie pattern here!)
Without further ado here is the tutorial!
Video Tutorial
Scroll down for the photo tutorial + extra tips for this stitch to look its best!
MATERIALS
12mm crochet hook
Yarn - Wool and the Gang Crazy Sexy Wool in Lilac, 100% Wool, Super chunky
Herringbone Single Crochet Stitch
*The Herringbone Single Crochet Stitch is a 2 row repeat stitch.
*It can be worked in rows or in the round. At the end of the round, sl st to join and turn.
*I find this stitch works best with 8ply/DK weight or thicker yarn.
*For herringbone single crochet stitch make sure that your tension isn’t too tight or it can be difficult to crochet.
*The turning chain ch 1 does NOT count as a stitch.
*This stitch only has one ‘right side’. Take note that the way the stitch is worked depends on the side that is facing you.
*FOUNDATION CHAIN: Any number of stitches + 1
STITCHES & ABBREVIATIONS
Ch = Chain
SC = Single Crochet
HSC = Herringbone Single Crochet
HSCinc = 2 Herringbone Single Crochets in the same stitch
St(s) = Stitch(es)
Rep = Repeat
RS = Right Side Facing
WS = Wrong Side Facing
BASIC WRITTEN PATTERN
FOUNDATION CHAIN: Ch 11. (Swatch has 10 sts)
ROW 1 (RS): Working into the back bumps of the ch, SC in the 2nd ch from the hook, HSC in each ch until end, turn.
<10>
ROW 2 (WS): Ch 1, SC in 1st st, HSC in each st until end, turn.
<10>
ROW 3 (RS): Ch 1, SC in 1st st, HSC in each st until end, turn.
Repeat ROWS 2-3 for pattern.
<10>
To increase the Herringbone Single Crochet ...
To increase, place 2nd HSC into the same stitch.
e.g. Insert hook in left strand of st, insert hook into the same st (instead of the next st), yarn over, pull up a loop (3 loops on hook), yarn over, pull through all 3 loops.
*Note – the increase is demonstrated in the video tutorial
Photo Tutorial
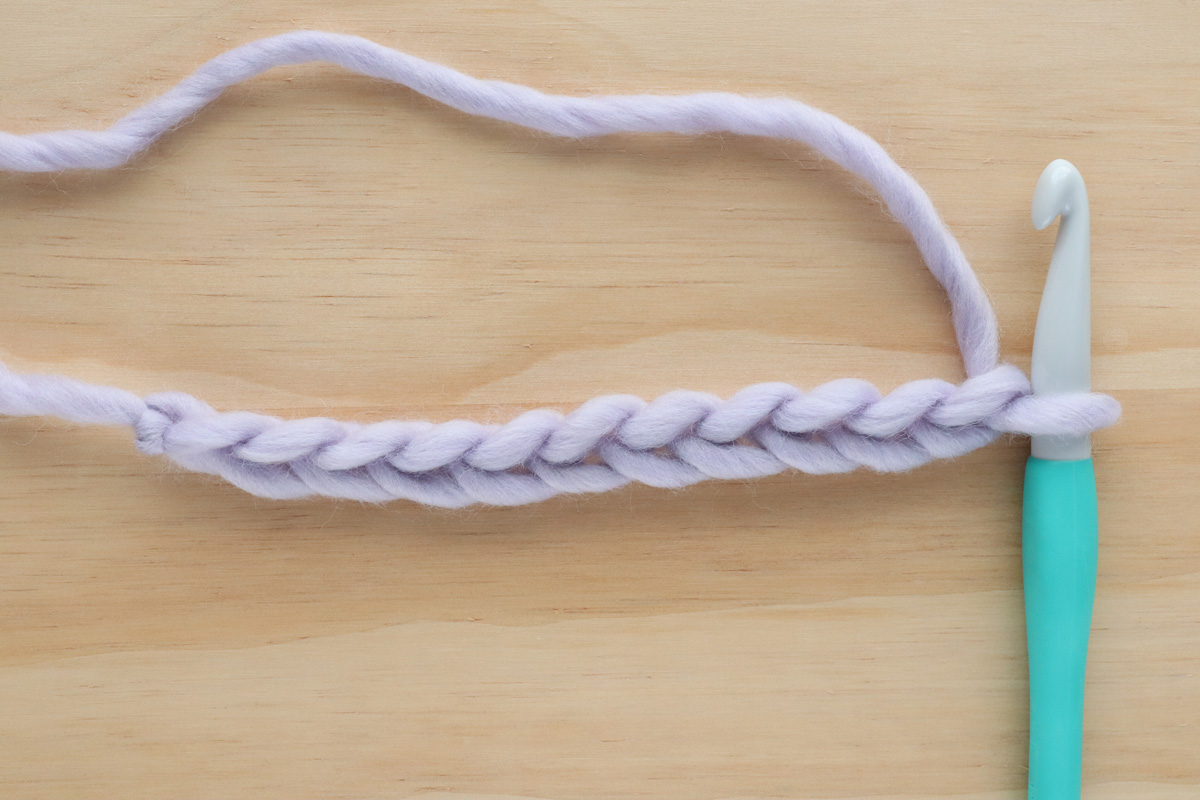
FOUNDATION CHAIN: Ch number of stitches + 1
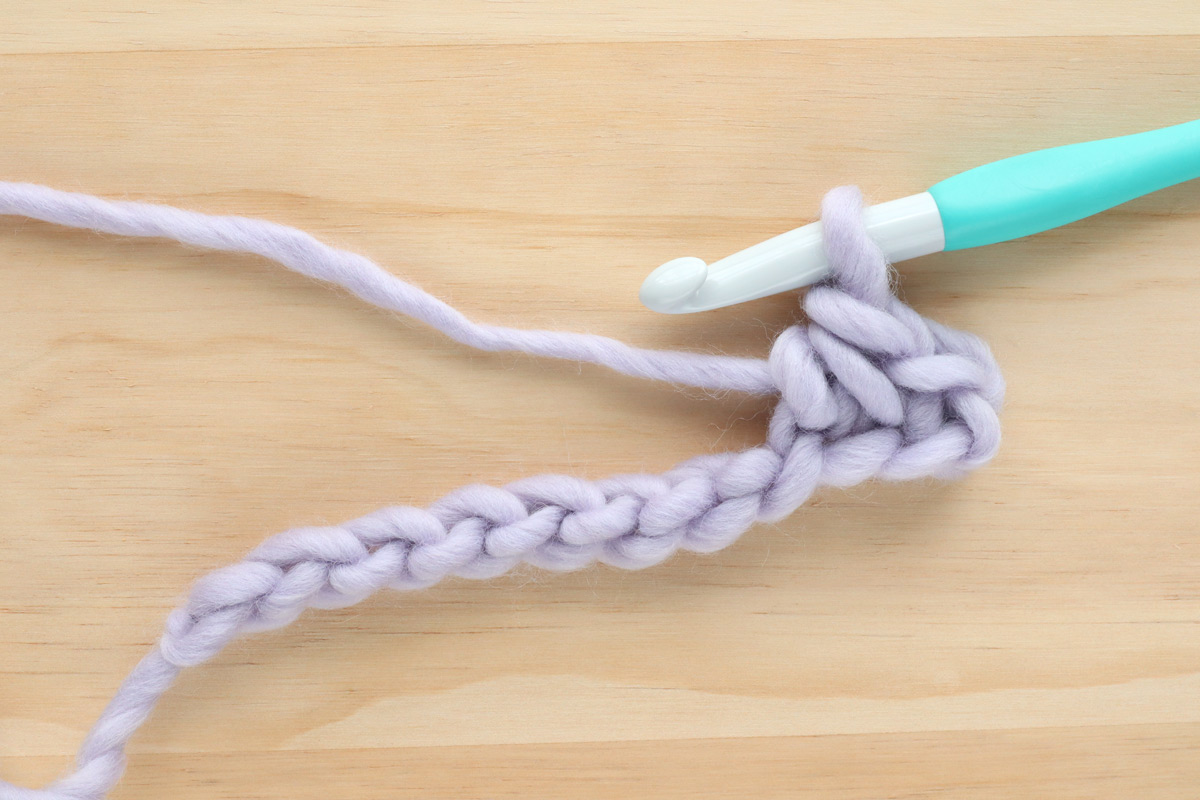
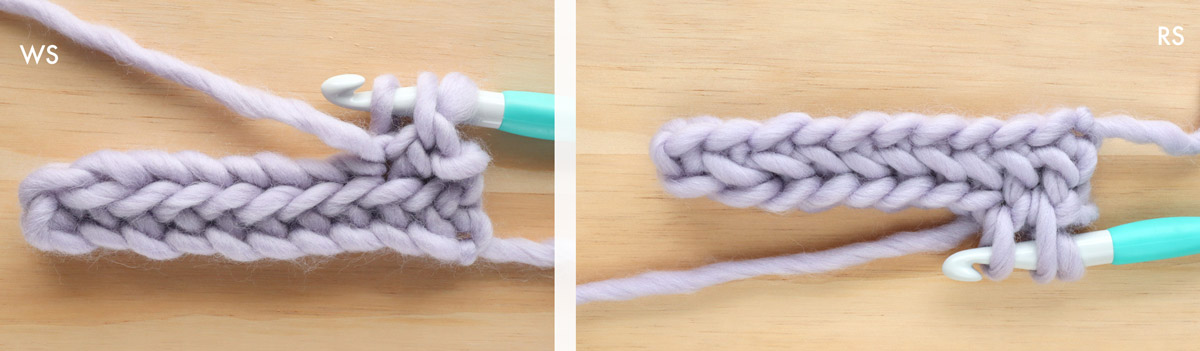
ROW 1: Working into the back bumps of the chain, SC in the 2nd ch from the hook.
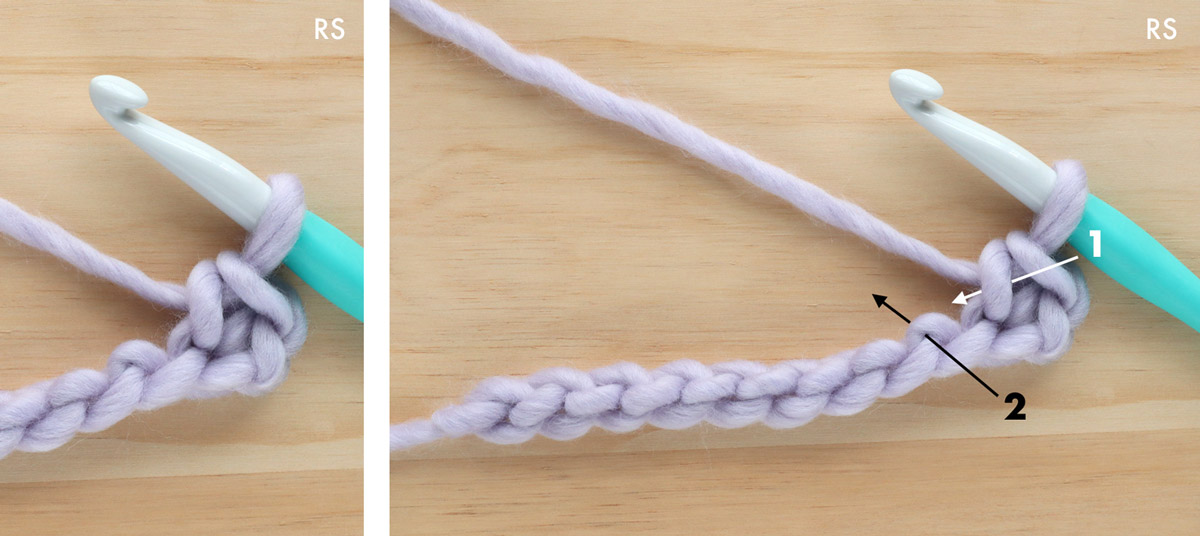
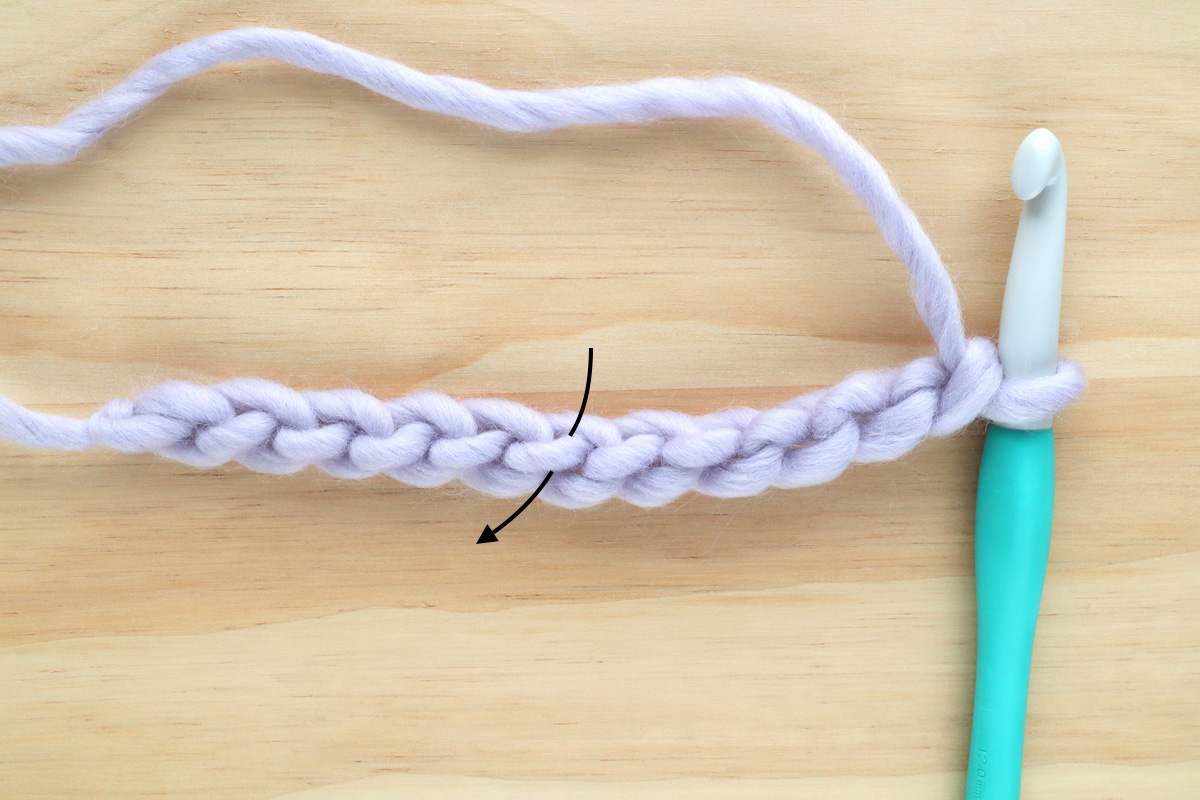
Herringbone Single Crochet: Insert hook into left strand of SC. Insert hook into next st ...
... Yarn over pull up a loop ...
(make sure your loop isn’t too tight)
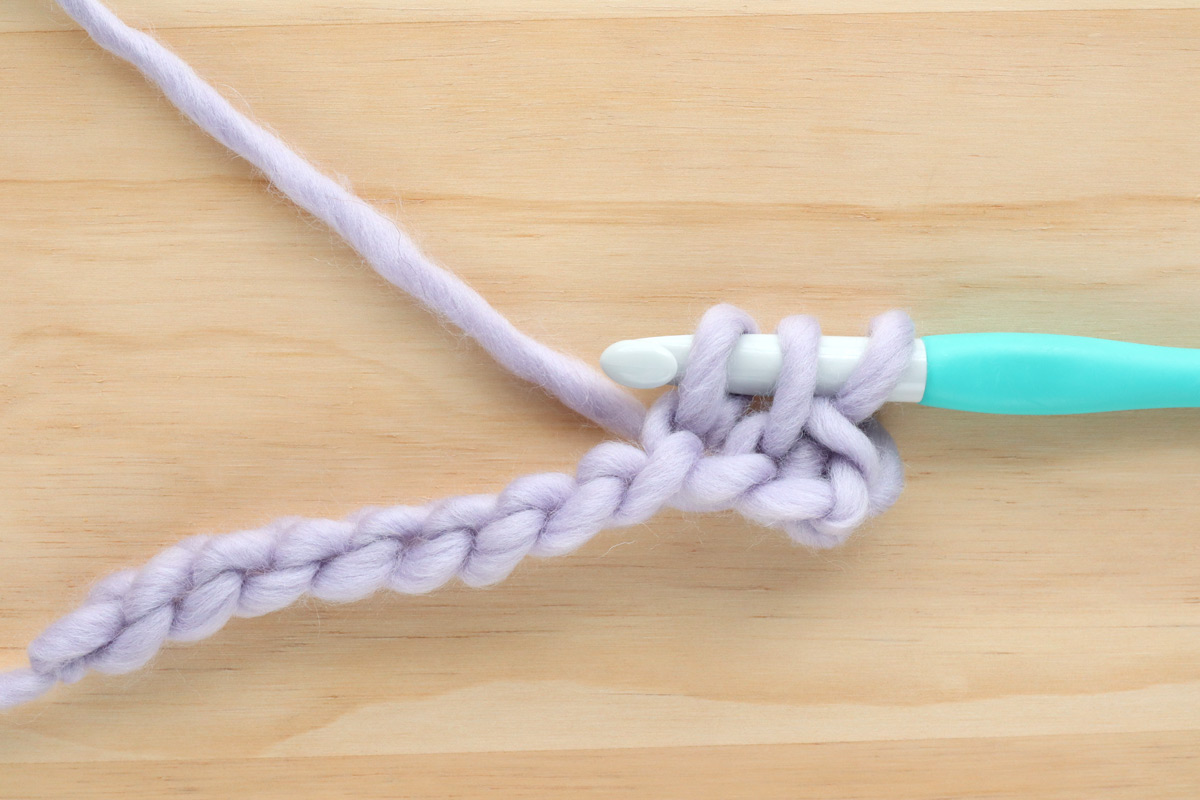
... Yarn over, pull through all three loops.
You've finished your first Herringbone Single Crochet Stitch.
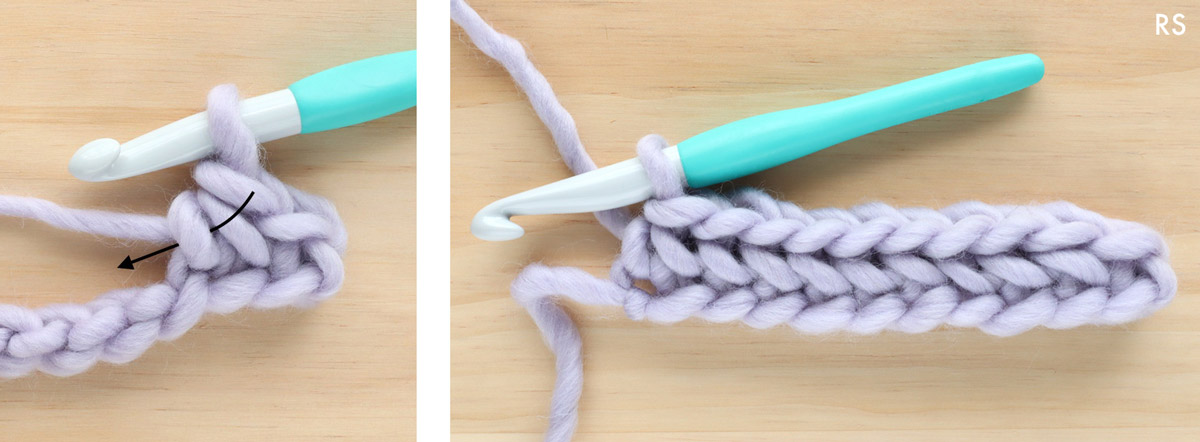
Repeat HSC steps in each st until the end of the row, turn.
Since this stitch pattern only has one ‘right side’, we’ll work ROW 2 by inserting the hook from back to front (instead of front to back) so the diagonal lines appear on the ‘right side’.
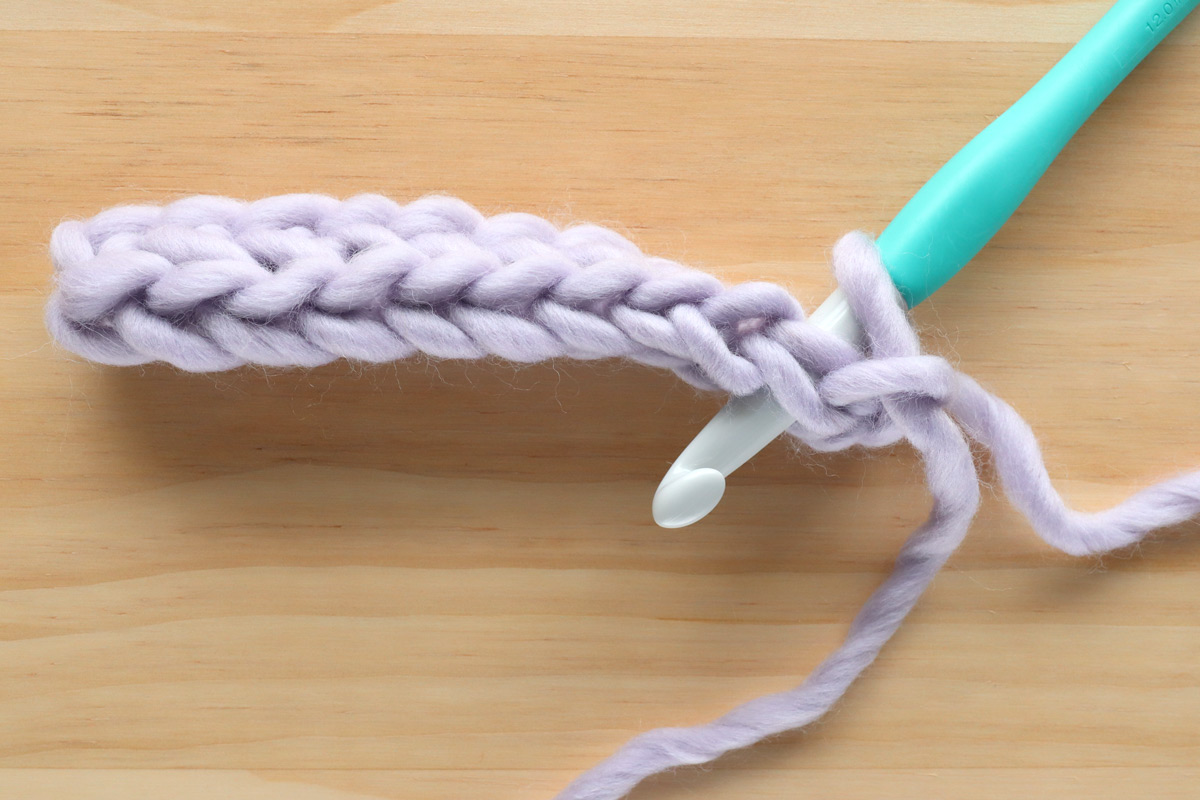
ROW 2: Ch 1, SC in 1st st by inserting hook from back to front.
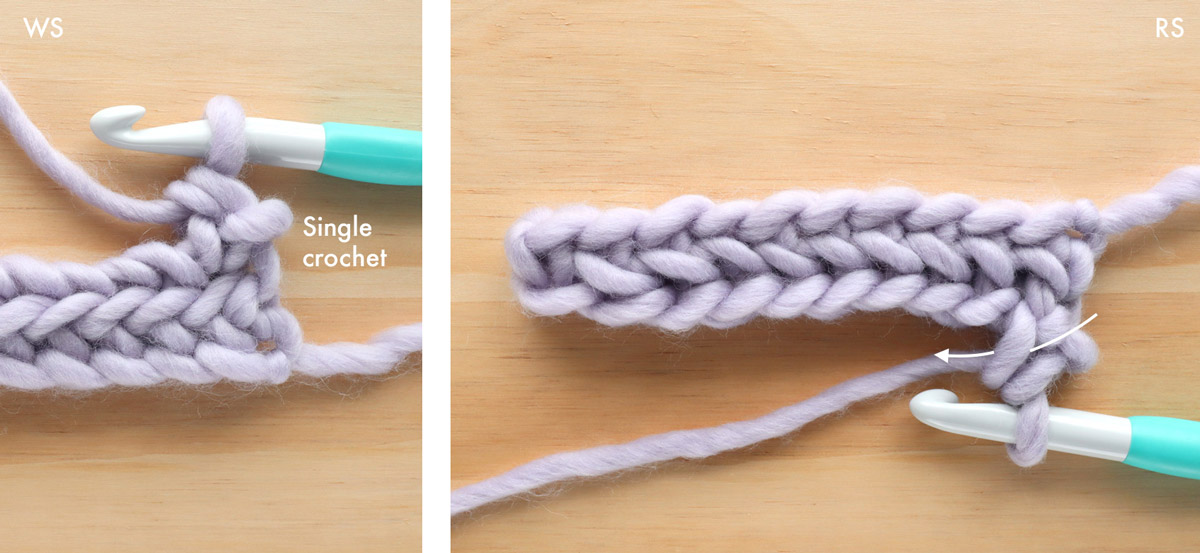
HSC: Flip your work so the RS is facing you, insert hook into left strand of SC, insert hook into the next st from back to front ...
... Yarn over, pull up a loop (3 loops on your hook) ...
*I find it helps to rotate your crochet hook away from you as you pull up the loop. This helps the hook to glide smoothly through the stitch and to keep the yarn on the hook
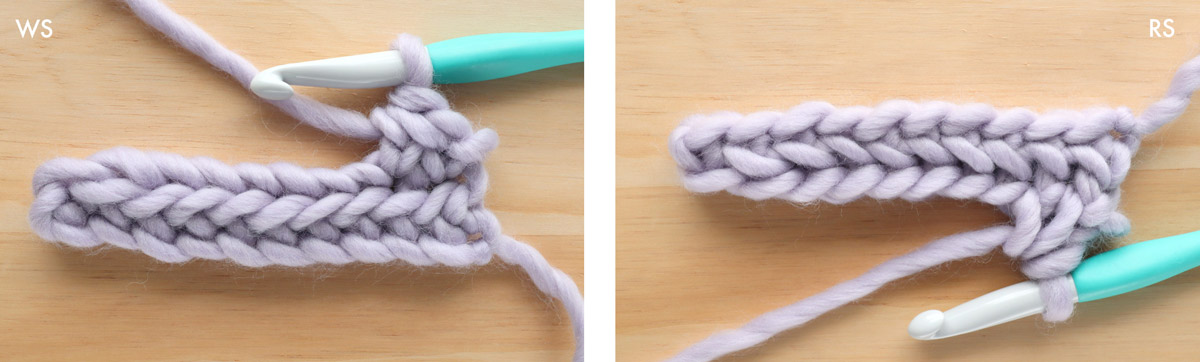
... Yarn over, pull through all 3 loops.
Repeat HSC steps in each st until the end of the row, turn.
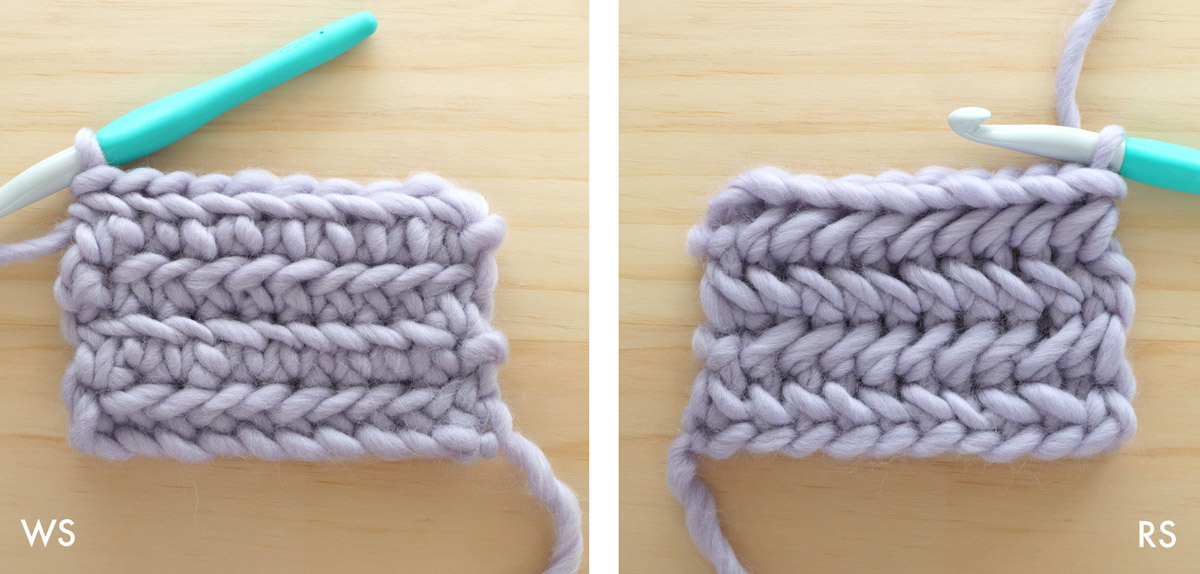
Repeat ROWS 2-3 for pattern.
And there you have the Herringbone Single Crochet Stitch!
If you'd like to see it worked up in the round, check out the Herringbone Chevron Beanie!
Brilliant! Good for you to figure this out!😃. Thank you for sharing!!!
CAN YOU TELL ME WHERE YOU FOUND THE TOP FOR THE HAT
Hi Lisa, I just search 'faux fur pom poms' on Etsy 🙂 You can also find them at craft stores.
Grace 🙂
For anyone looking for her video tutorial (there is no link on this page), it is on the Forthefrills Youtube channel. ♥
There is a link to the Youtube channel if you scroll down all the way to the bottom of this page.
How do I get to the video?
What brand of yarn is this, the light pole for the herringbone chain
I am a left handed crocheter.... So, I'm assuming that since I'm crocheting opposite as you that I would use the far right loop as opposed to the far left loop? Please help me with the jumble in my head!!
How do I do this stitch in the round pls?