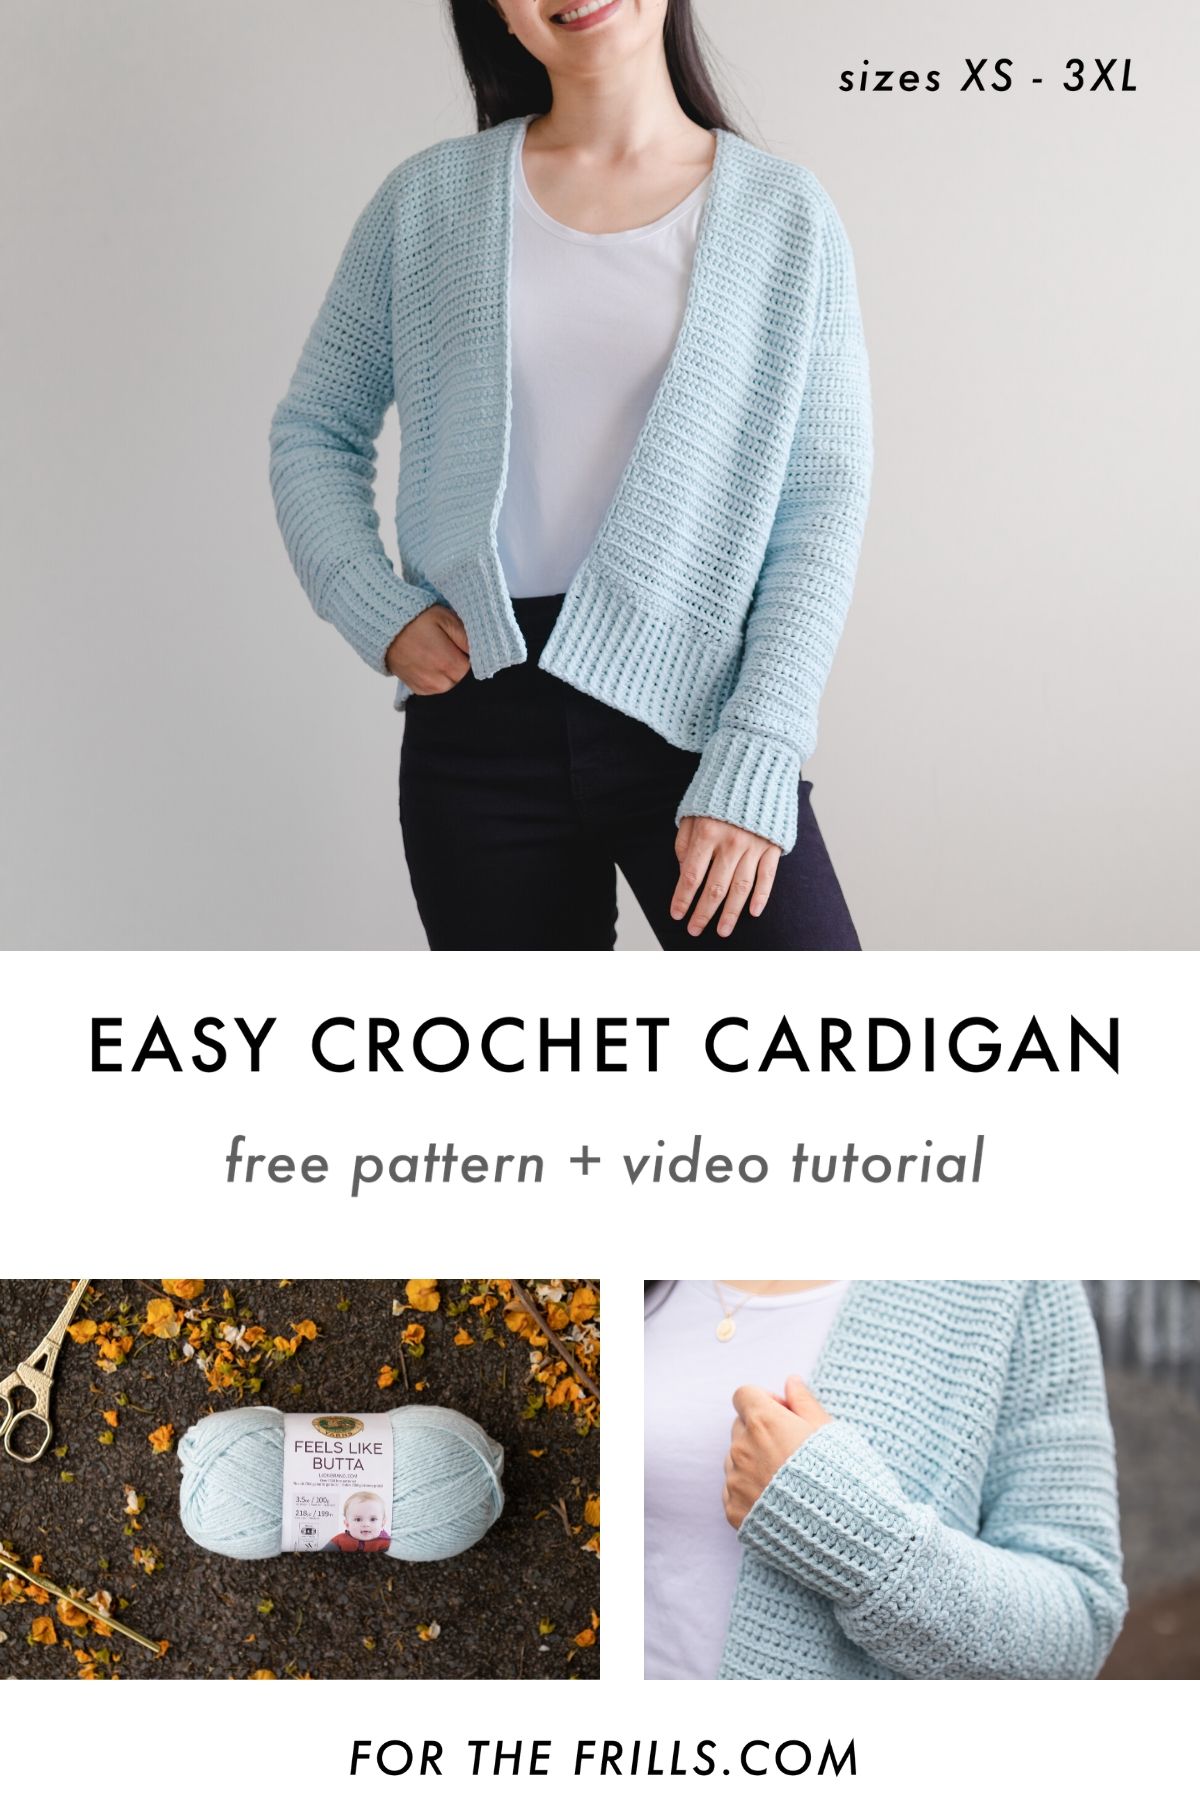
Introducing the Cuddly Cardigan! This easy crochet sweater is the softest thing you’ll ever crochet!
This free crochet cardigan pattern is accompanied by a video tutorial.
This post may contain affiliate links, view our disclosure policy for details.
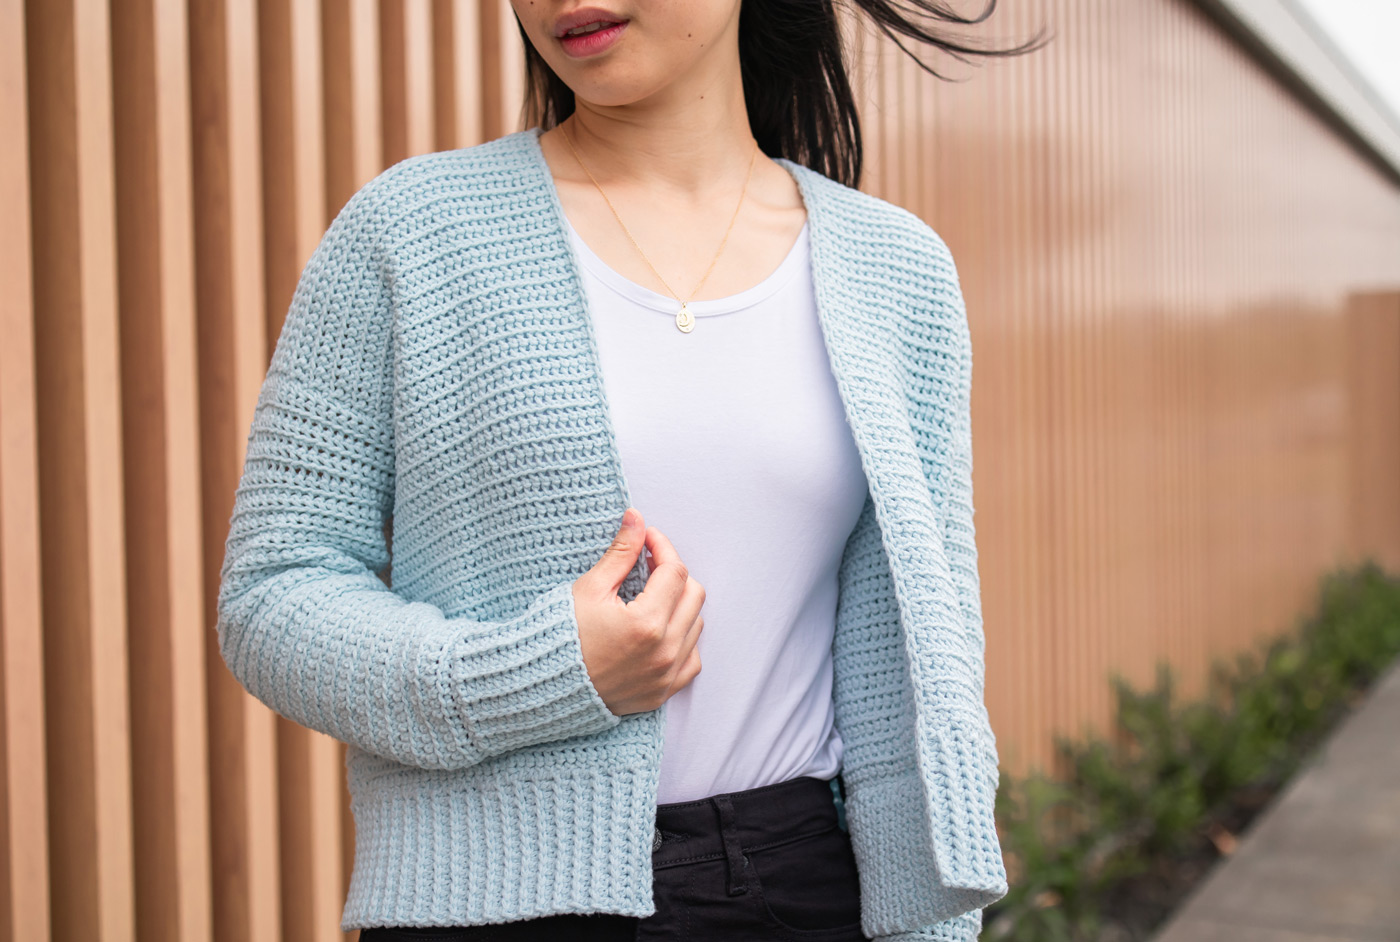
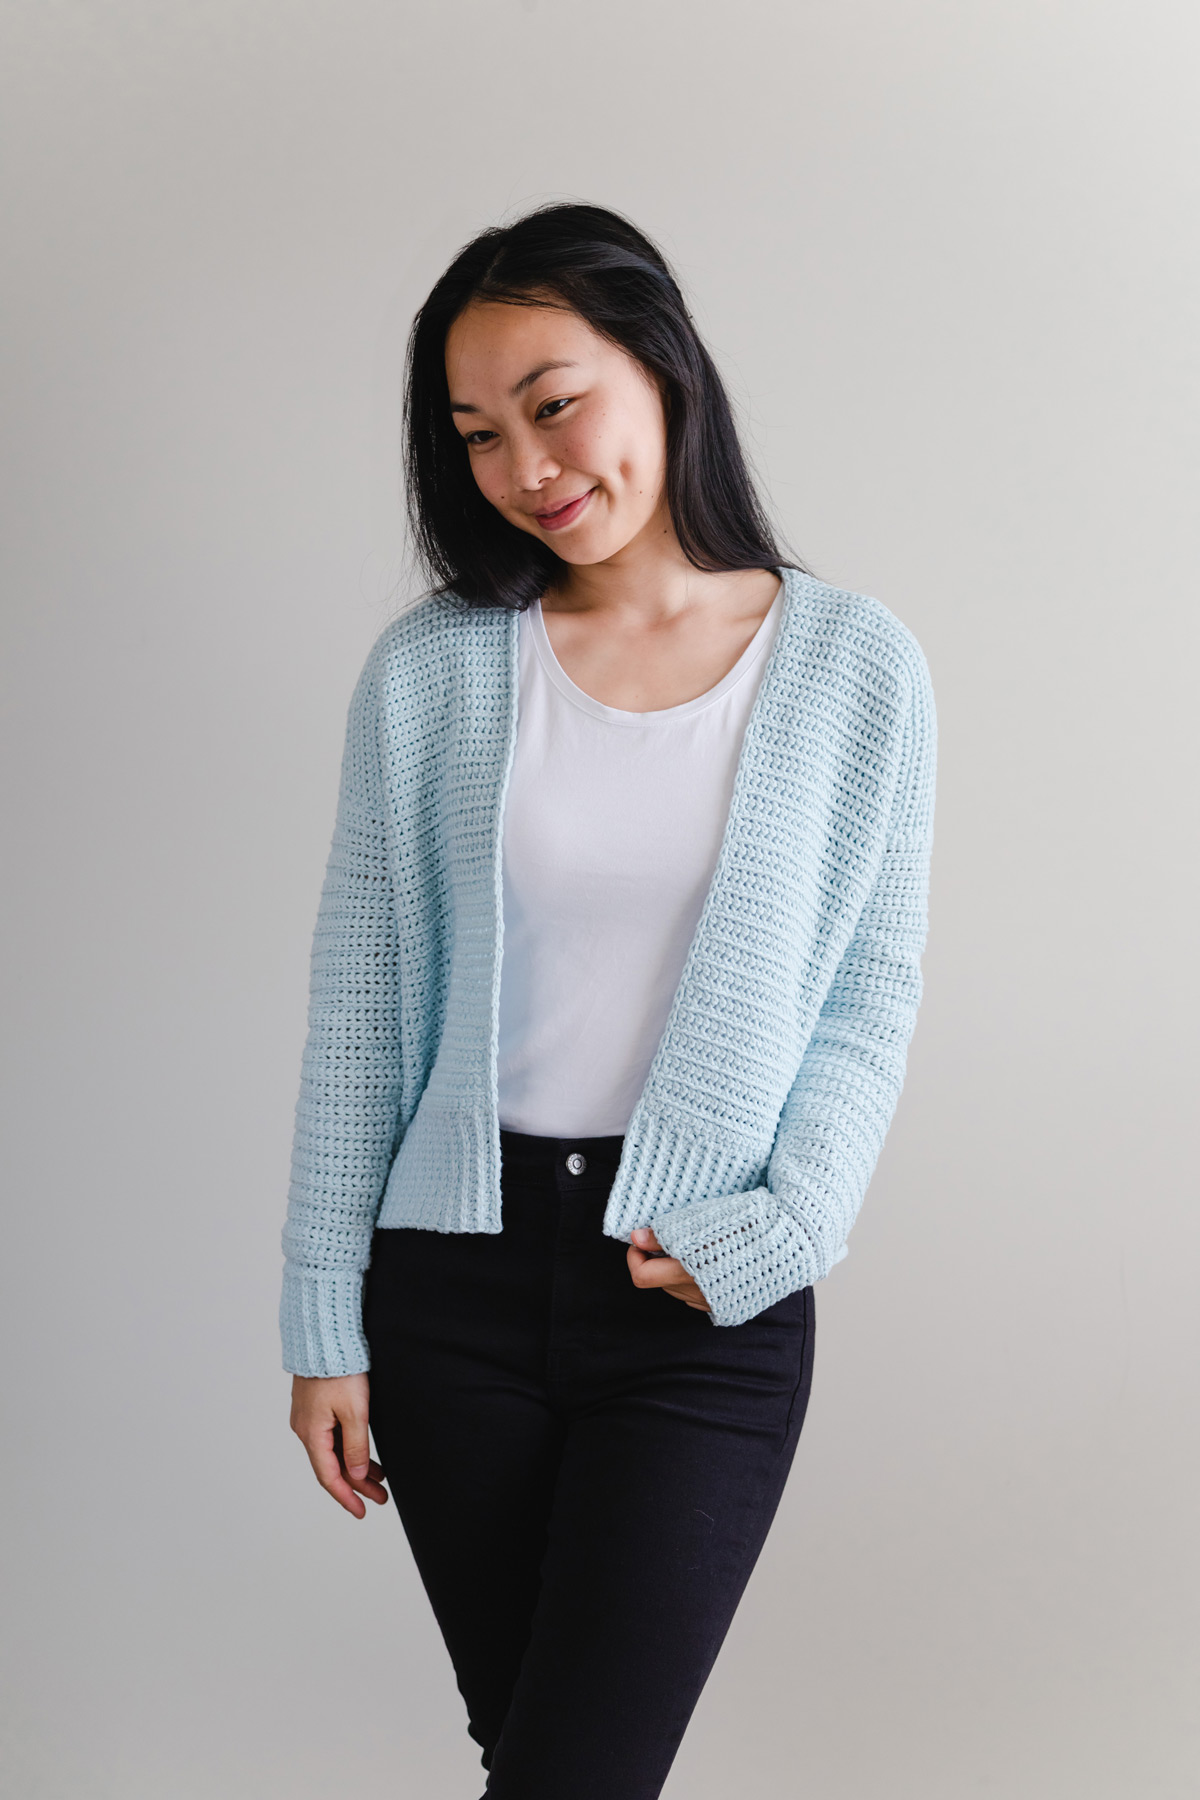
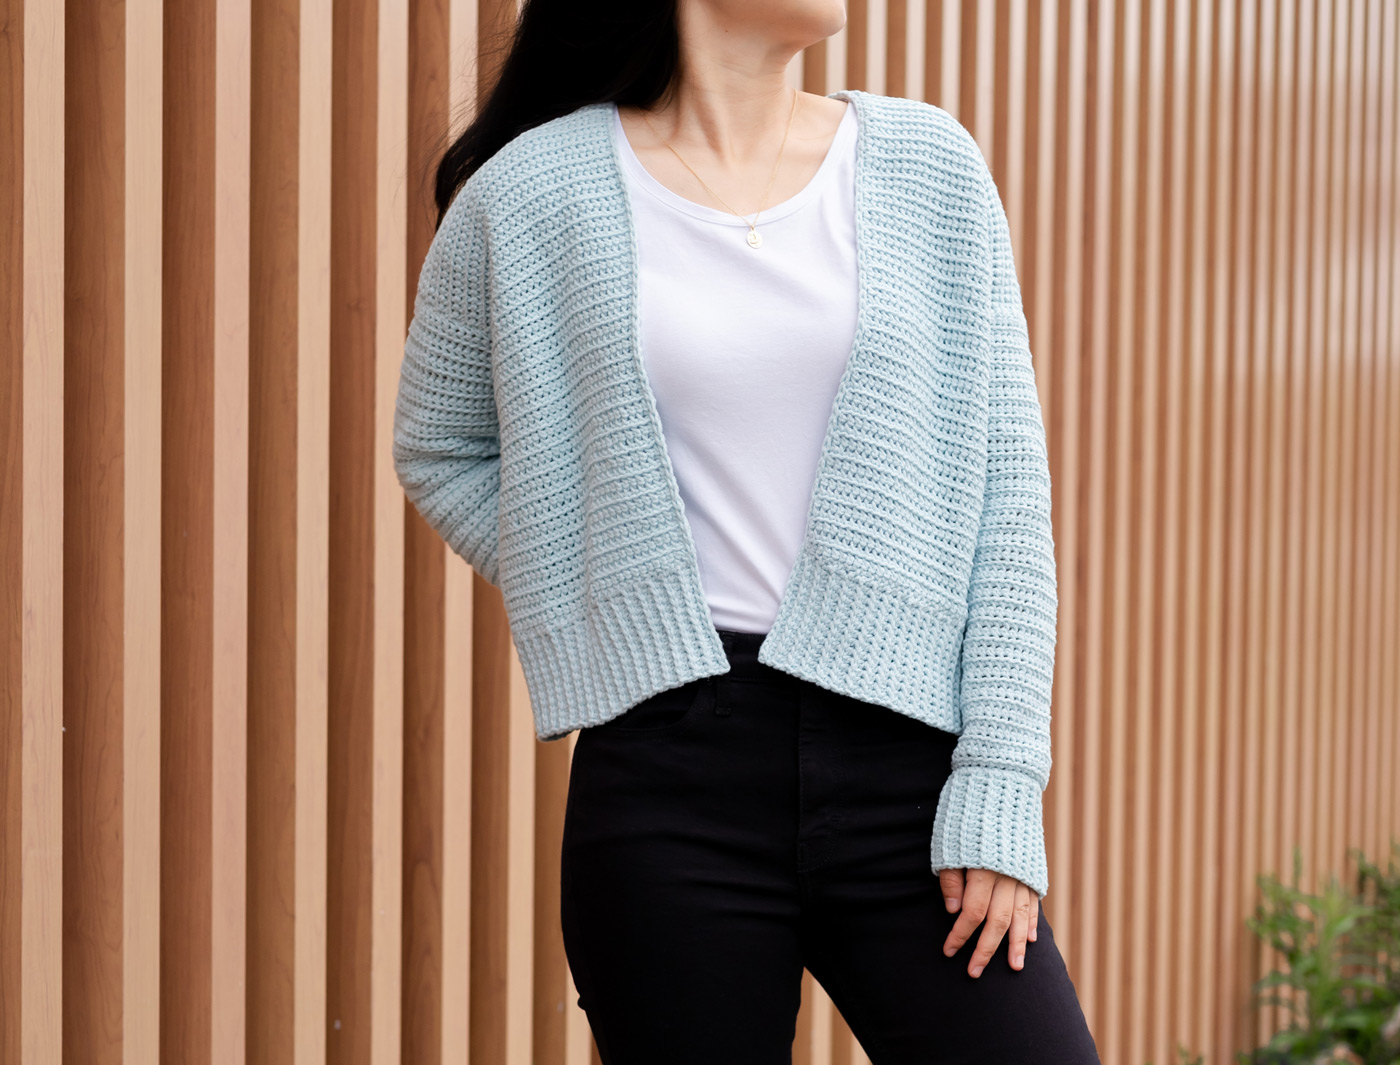
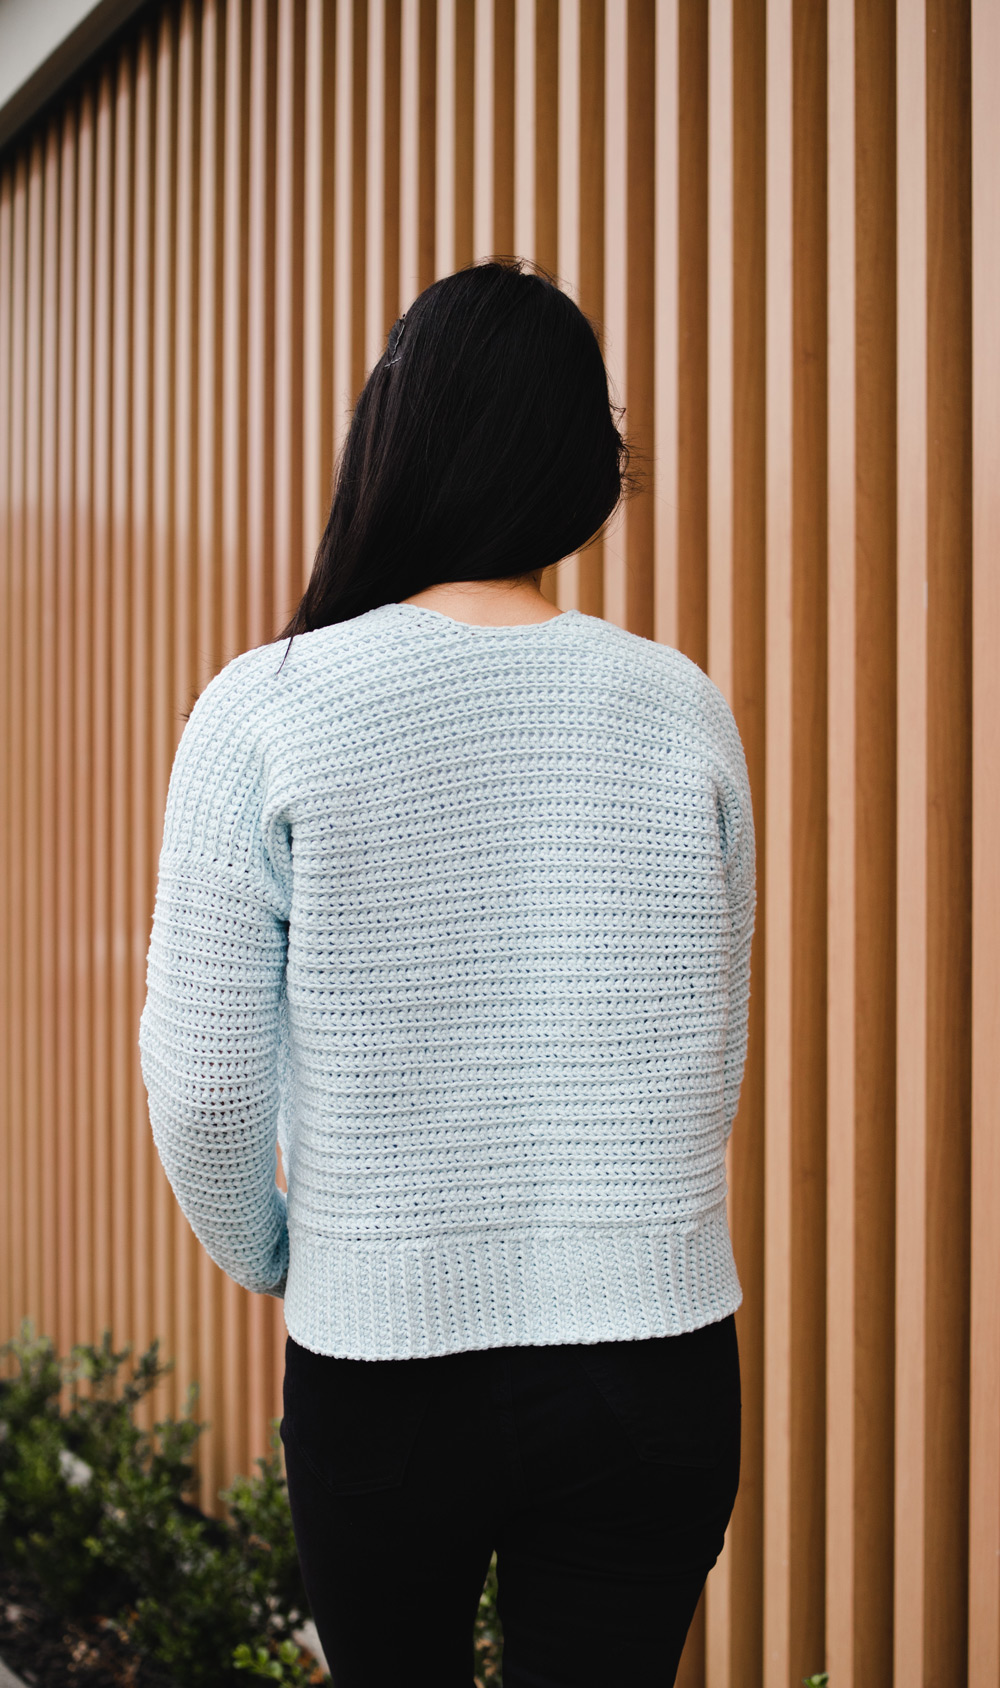
The Cuddly Cardigan is cosy, snuggly and comfy! Made with Lion Brand’s Feels Like Butta, this incredibly soft and squishy cardigan is great with any outfit. Wear it over jeans, with a dress or for lazing around the house, this simple crochet cardigan is wonderful for layering!
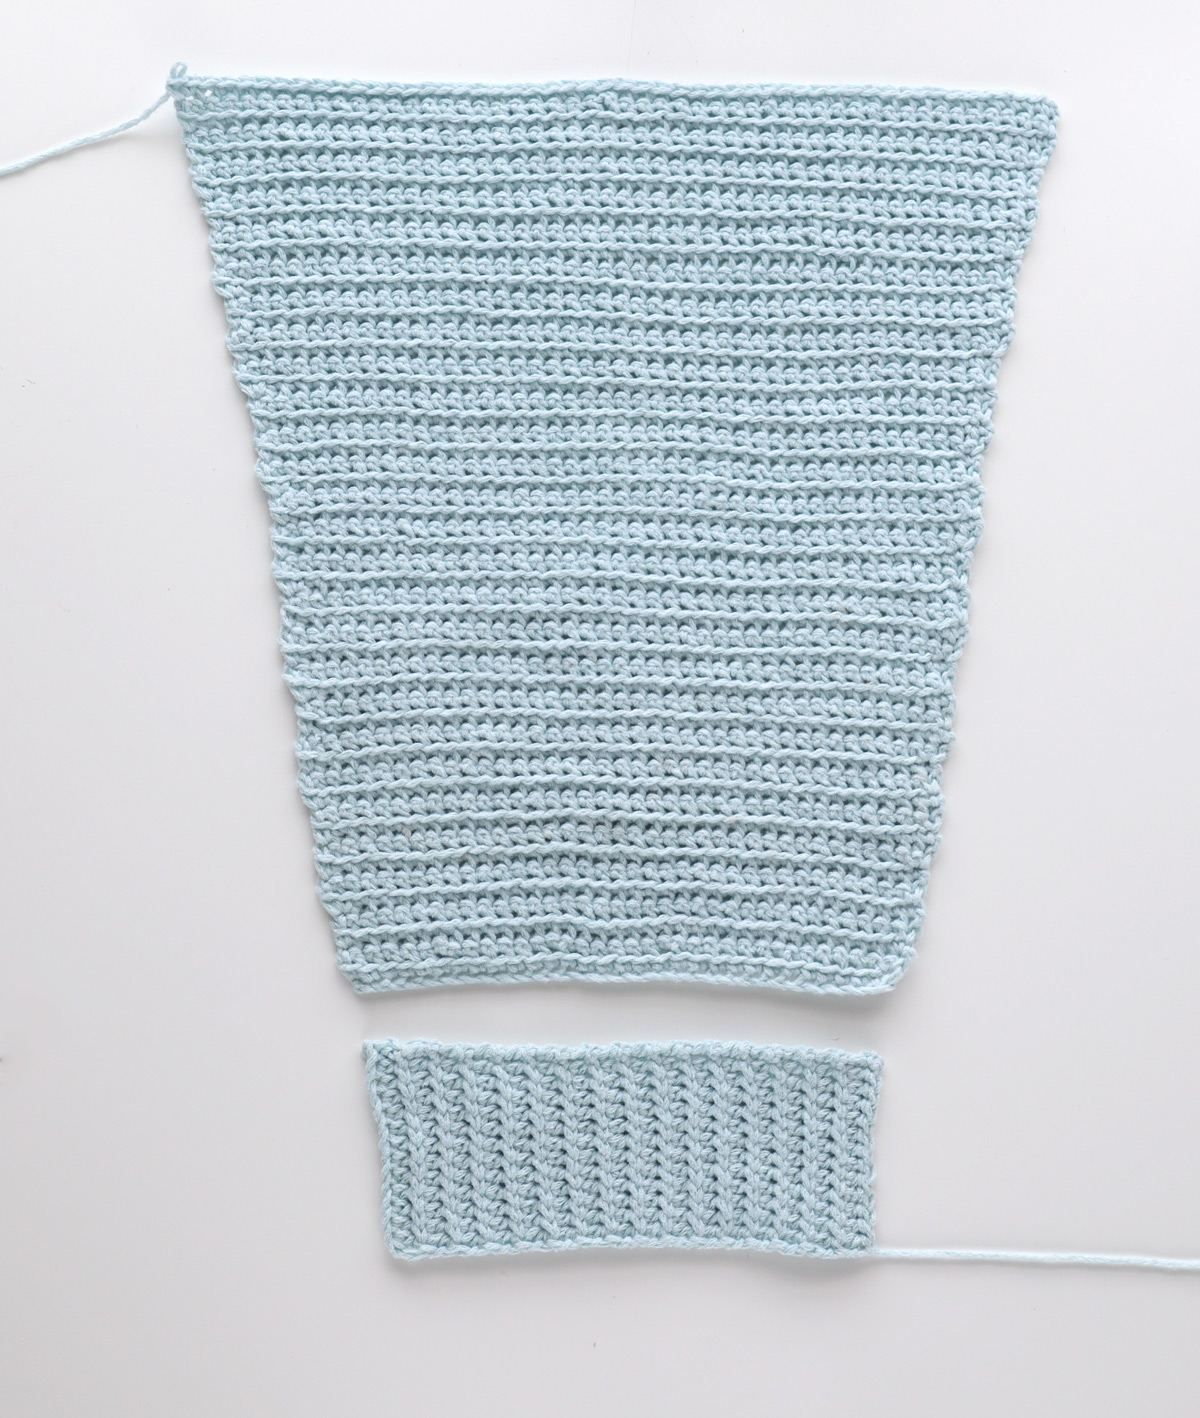
This cardigan has a nice and easy construction – it’s made up of a body piece with the front panels crocheted directly onto the back and 2 sleeves. The body and sleeve ribbing are crocheted separately and then sewn onto the cardi. This is the perfect project to make over the winter break as it also transitions well through the seasons!
DESIGN INSPIRATION
Cardigans are my favourite winter garment, especially loose comfy ones J It’s been a while since I designed a cardigan that was relaxed and casual and I’m so glad I did because I think this one might become my most worn item! The Cuddly Cardigan features a loose body with roomy sleeves finished with a simple knit-look ribbing. The clean and modern look to this cardigan means that it can be worn with literally anything! I decided to go for more of a long crop/just above hip length cardigan but you can easily make this cardigan as long or as short as you wish! (Alteration instructions provided in the pattern).
YARN
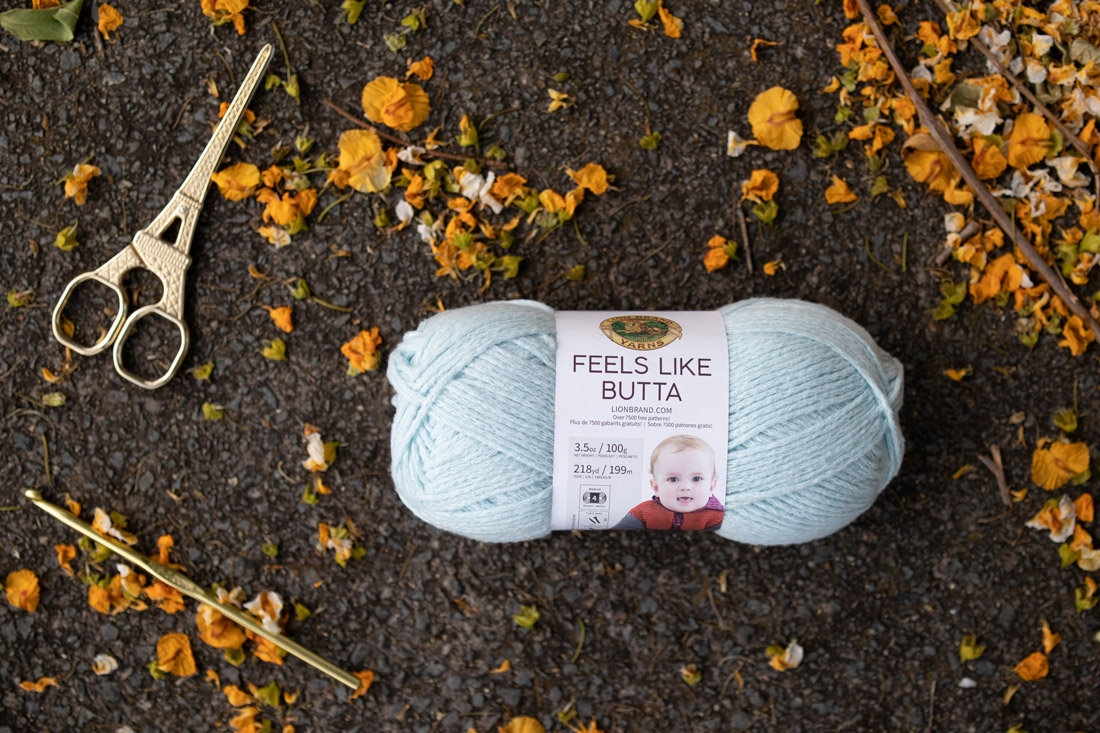
Lion Brand’s Feels Like Butta is the softest yarn ever! It has a smooth velvety feel with a fleece-like texture and it glides effortlessly over a crochet hook! The drape of the yarn is also wonderful as it relaxes over time to become even cosier. Even though it seems like a ‘baby’ yarn, who doesn’t like a soft cardi that feels like marshmallows? Seriously, every time I wear this cardigan I just love to pet it haha. I used the colour ‘Ice’ which is lovely light blue with a touch of green but there are lots of pastels and brights to choose from!
Check out more free crochet patterns!
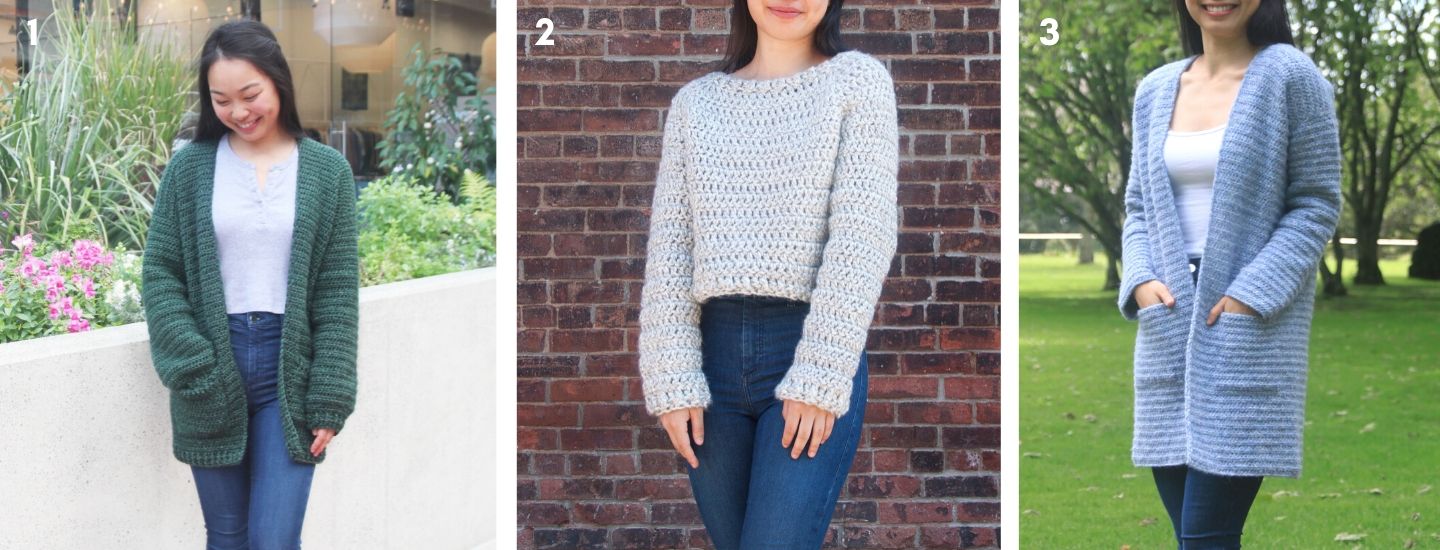
1. Stonewash Pocket Coatigan / 2. Quick & Easy Chunky Sweater / 3. Chunky Crochet Sweater
Pin me for later!
*Sample is a size small shown on a 5’3" model with a 32" bust.
*The sizing guide follows size XS(S, M, L, XL, 2XL, 3XL). E.g. “Ch 71(79, 87, 95, 103, 111, 119) means Ch 71 for XS, Ch 79 for Small, Ch 87 for Medium, Ch 95 for Large, Ch 103 for XL, Ch 111 for 2XL and Ch 119 for 3XL.” If there is only one number, it applies to all sizes.
*"SC 10” means SC into the next 10 stitches.
*"2 SC" means place 2 SC into the same stitch.
*The turning chain ch 1 does NOT count as a stitch.
*Total stitches are indicated between < >.
*This pattern uses US crochet terms.
*This pattern is crocheted in 3 main pieces – body and 2 sleeves.
*The Body piece is worked in rows and starts with the back panel. The 2 front panels are crocheted directly onto the back panel.
*The sleeves are worked in rows from the cuff up. These sleeves are designed to be long and fall past the wrist.
*The sleeve ribbing and body ribbing are crocheted separately and sewn onto the sleeves and body panel.
*Alteration instructions for body and sleeve length are provided in the patten.
MATERIALS
Yarn – Lion Brand Feels Like Butta – 10plyAran/Worsted/Medium (4), 119m/100g, 100% Polyester, Ice
5(5, 6, 6, 7, 7, 8) skeins
Measurements cm:
To fit Bust: 76(81, 91, 101, 112, 122, 132)
Back Width: 47(51, 57, 63, 68, 73, 78)
Length: 48(48, 51, 52, 54, 55, 57)
Armhole: 15(16, 18, 19, 21, 22, 23)
Measurements inches:
To fit Bust: 30(32, 36, 40, 44, 48, 52)
Back Width: (19, 20.5, 23, 25, 27, 29, 31)
Length: 19.5(19.5, 20, 20.5, 21, 21.5, 22.5)
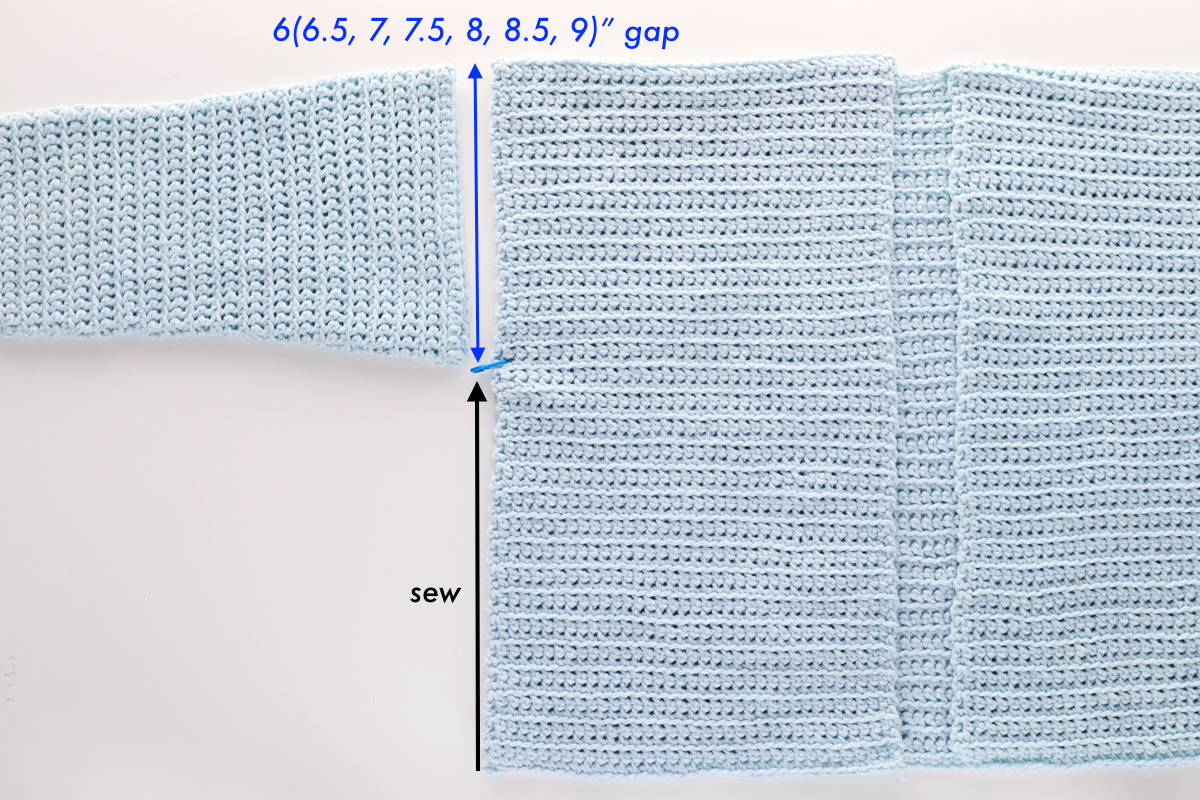
Armhole: 6(6.5, 7, 7.5, 8, 8.5, 9)
Full measurement chart available in the ad-free pdf on Etsy or Love Crafts!
STITCHES & ABBREVIATIONS
Ch = Chain
Sl st = Slip Stitch
SC = Single Crochet
HDC = Half Double Crochet
FLO = Front Loop
St(s) = Stitch(es)
Rep = Repeat
Sk = Skip
GAUGE: 10cm/4” square = 15 stitches wide x 14 rows tall in front loop single crochet
Add pattern to your Ravelry queue here!
Ad-free, printable version on Etsy or LoveCrafts!
Cuddly Cardigan Crochet Video Tutorial
Cuddly Cardigan Crochet Pattern
BACK PANEL
FOUNDATION CHAIN: Ch 71(77, 87, 95, 103, 111, 119).
ROW 1: SC into 2nd ch from hook, SC in each st until end, turn.
<70(76, 86, 94, 102, 110, 118)>
ROW 2: Ch 1, FLO SC in each st until last st, SC in last st, turn.
<70(76, 86, 94, 102, 110, 118)>
Repeat ROW 2 until ROW 58(58, 60, 62, 64, 66, 68).
*ALTERATION NOTE: You can make your cardigan longer/shorter by adding/removing rows. Please keep in mind that the ribbing adds 8cm/3” to the body length.
Do not fasten off! Proceed directly to ‘FIRST FRONT PANEL’ instructions.

FIRST FRONT PANEL
ROW 1: Ch 1, FLO SC 32(35, 39, 43, 45, 49, 53), SC in next st, turn.
<33(36, 40, 44, 46, 50, 54)>
ROW 2: Ch 1, FLO SC in each st until last st, SC in last st, turn.
<33(36, 40, 44, 46, 50, 54)>
Repeat ROW 2 until ROW 58(58, 60, 62, 64, 66, 68).
*ALTERATION NOTE: If you altered the number of rows in the back panel, make sure that the front panel has the same number of rows.
Fasten off.
SECOND FRONT PANEL
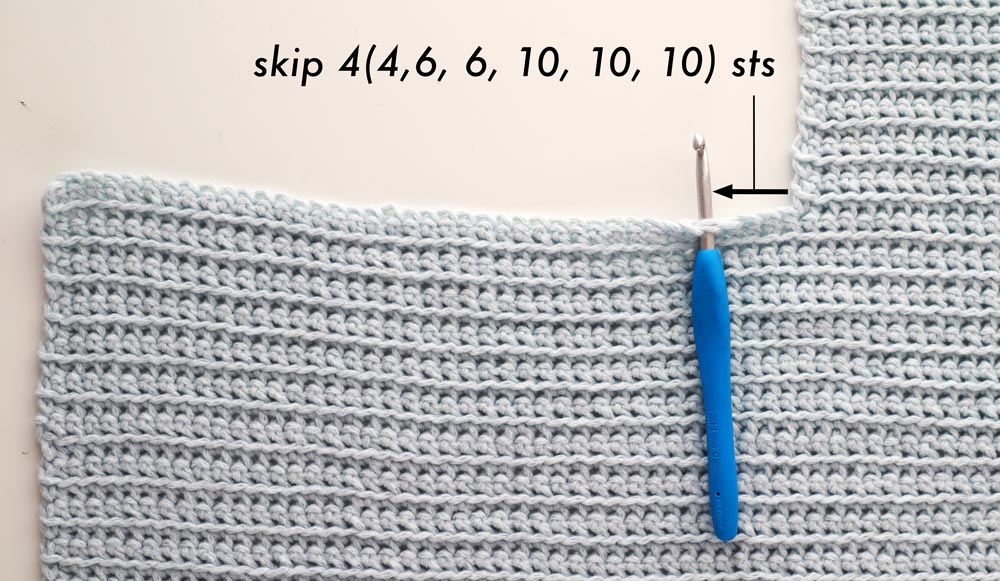
Counting from the last st of FIRST FRONT PANEL ROW 1, skip 4(4, 6, 6, 10, 10, 10) sts. Insert hook into next stitch, secure yarn and pull up a loop.
ROW 1: Ch 1, SC in first st, FLO SC 31(34, 38, 42, 44, 48, 52), SC in next st, turn.
<33(36, 40, 44, 46, 50, 54)>
*Note your last st of ROW 1 the second front panel should be on top of the last st of the back panel.
ROW 2: Ch 1, FLO SC in each st until last st, SC in last st, turn.
<33(36, 40, 44, 46, 50, 54)>
Repeat ROW 2 until ROW 58(58, 60, 62, 64, 66, 68).
*ALTERATION NOTE: If you altered the number of rows in the back panel, make sure that the front panel has the same number of rows.
Fasten off.
SLEEVES
(make 2)
FOUNDATION CHAIN: Ch 27(31, 35, 39, 42, 46, 50).
ROW 1: SC into 2nd ch from hook, SC in each st until end, turn.
<26(30, 34, 38, 41, 45, 49)>
ROW 2: Ch 1, *FLO SC 4(5, 6, 7, 7, 8, 9), 2 FLO SC; rep from * three more times, FLO SC 5(5, 3, 5, 8, 8, 8), 2SC, turn.
<31(35, 39, 43, 46, 50, 54)>
ROWS 3 - 4: Ch 1, FLO SC in each st until last st, SC in last st, turn.
<31(35, 39, 43, 46, 50, 54)>
ROWS 5: Ch 1, FLO SC in each st until last st, 2 SC in last st, turn.
<32(36, 40, 44, 47, 51, 55)>
Repeat ROWS 3-5 until ROW 47(50, 50, 50, 53, 53, 53) or sleeve measures 33(35, 35, 35, 38, 38, 38)cm / 13(14, 14, 14, 15, 15, 15)”.
<45(50, 54, 58, 62, 66, 70)>
*ALTERATION NOTE: You can add/remove rows to make your sleeves longer/shorter. Please note that this will change the size of your armhole. I recommend adding/removing a maximum of 10 rows so the armhole will only change by less than 1.5cm/0.5”.
SLEEVE RIBBING
(make 2)
FOUNDATION CHAIN: Ch 14
ROW 1: HDC into 2nd ch from hook, HDC in each st until end, turn.
<13>
ROW 2: Ch 1, sl st in each st until end, turn.
<13>
ROW 3: Ch 1, HDC in each st until end, turn.
<13>
*Note: turn your work so the top of the stitches are facing you and make sure to insert hook into the sl sts of the previous row (not through the top of the HDCs)
ROW 4: Ch 1, sl st in each st until end, turn.
<13>
Repeat ROWS 3-4 until piece measures the same length as the width of the cuff - approx. ROW 26(30, 34, 38, 42, 46, 50).
Fasten off.
*For neater seaming, always stitch pieces together with the wrong side facing up.
(For the ribbing, the ‘flat side’ = wrong side and the ‘ribbed side’ = right side)
With a tapestry needle and length of yarn whip stitch the sleeve ribbing to the edge of the sleeve cuff.
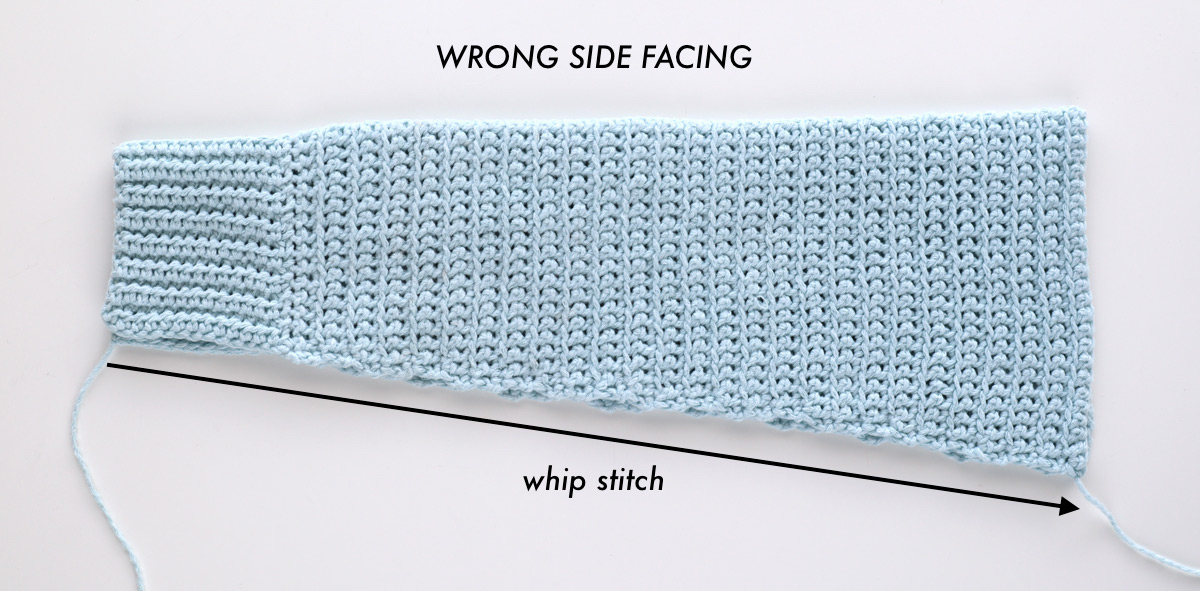
Fold sleeve in half lengthways and whip stitch sides together.
BODY ASSEMBLY
Fold front panels on top of back panel.
With a tapestry needle and length of yarn, whip stitch sides of back panel to the front panels, leaving an armhole gap measuring 6(6.5, 7, 7.5, 8, 8.5, 9)”.
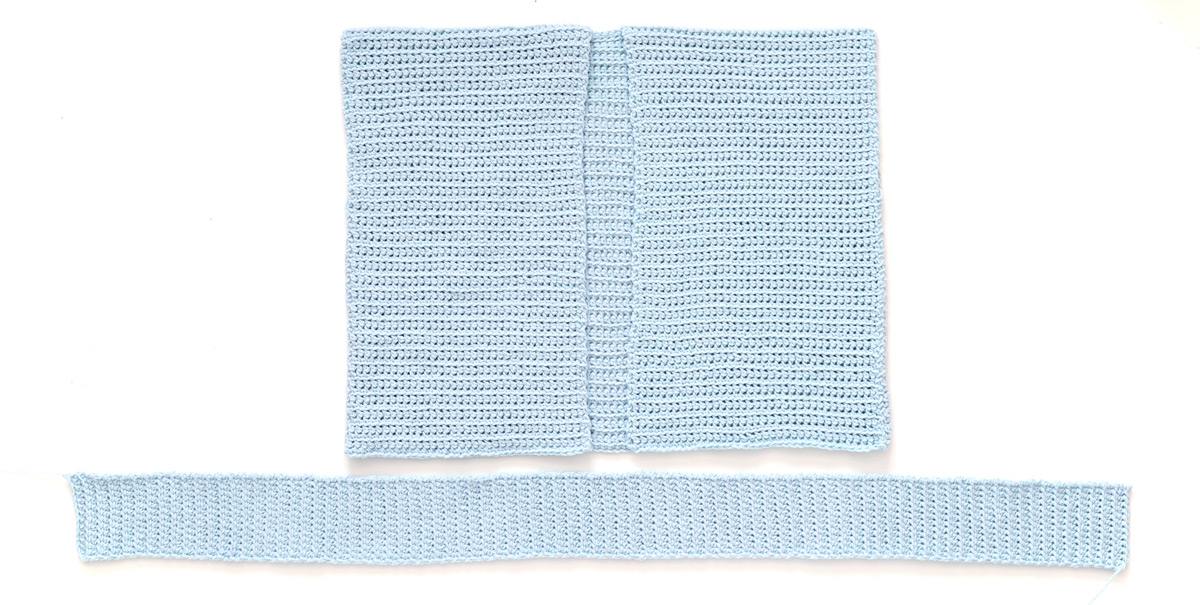
BODY RIBBING
FOUNDATION CHAIN: Ch 14
ROW 1: HDC into 2nd ch from hook, HDC in each st until end, turn.
<13>
ROW 2: Ch 1, sl st in each st until end, turn.
<13>
ROW 3: Ch 1, HDC in each st until end, turn.
<13>
*Note: turn your work so the top of the stitches are facing you and make sure to insert hook into the sl sts of the previous row (not through the top of the HDCs)
Repeat ROWS 2-3 until piece measures the same length as the width of the back panel + 2 front panels – approx. ROW 155(171, 189, 207, 221, 239, 257). Make sure to end with an odd numbered row e.g. end on an HDC row.
Fasten off.
ASSSEMBLY
Whip stitch the body ribbing to the bottom of the front and back panels.
Whip stitch top of sleeve to arm hole.
Repeat steps for the second sleeve.
FINISHING
With the right side facing you, insert hook into corner of the front panel. Secure yarn and pull up a loop.

Ch 1 (counts as a stitch), Sl st along the edge of the neckline until the corner of the other front panel. Take care to keep your stitches even and neat.
If your neckline ruffles you have too many stitches and if your neckline puckers you have too few stitches.
Fasten off.
Weave in all of your ends.
Voilà! You’ve finished your Cuddly Cardigan 🙂
Thank you so much for this tutorial!! It's awesome😍 Love it ❤️ All your work is adorable ❤️ Wich you a happy new year🥂✨
Thank you for your kind words Sìlvia! I'm so glad you enjoy my designs! Happy New Year 🙂 Grace
Hi forthefrills, I want ask, how many meters / gram / roll of yarn (all totaly) needed to make this cardigan? I really like your cardigan and I also want to make it for myself. I really like your video on YouTube. Hope you reply my comment, thx😊💛💛💛💛😍❤
How much yarn need for M size??😘😘
Hi Nandar,
All the yarn amounts are in the 'Materials' section 🙂
Grace
Hi. I made with thhe foundation chain of 103 but when i got to the first front panel, i realized that i need longer foundation stiches. How can i add more chains, as i am now in the middle of first front part...
Hi Yustinia, the foundation chain runs the width, not the length of the cardigan, so adding more stitches will not make your cardigan longer. The ribbing adds quite a bit of length to the cardigan and if you want to add more length you can always make the ribbing longer. If you want to make your cardigan wider, after you've finished the second front panel, you can crochet along the edges of the cardigan to add width but this will give your cardigan a different look to the sample.
I hope this helps,
Grace
hi! will this work if I use a different stitch ?
Hi Grace, if you use a different stitch, that will change the gauge which makes the measurements of the cardigan change. I can't guarantee the cardigan will fit you but you can always use the pattern as a guide if you want to experiment!
Grace
This pattern is so cute but is it possible to add on to the front edging to make button holes?
Hi Tess, unfortunately this pattern won't work well with button holes. Since the front panels are rectangles of you add buttons there won't be any space for your neck to fit in the cardigan! I have a button down cardigan pattern coming out very soon though!
Grace 🙂
Hello, shouldn't it be skip 10 instead of skip 12 on the 3xl size?
Because the back panel have 118 stitch and the first front panel is 54 stitches, if you skip 12 for the second front panel then it will only have 52 stitches which make the two front panel uneven! or I messed up my math here? Possibly 😂
Hi Nam, so sorry for the error, I've fixed the pattern! Thanks for letting me know 🙂
Grace
I am currently making this beautiful cardigan but I am somewhat new to garments. Do you reccomend blocking before assembling? Thank you for this wonderful pattern.
Hi Ashley, I generally block my garments after assembly and if you need to block before I'll mention that in the pattern :). Generally you'd only block before assembly if you're using a lacy/mesh stitch pattern that completely changes the shape of the garment.
I hope this helps,
Grace
I thought I left a comment but I dont see it. I wanted to know if you block all pieces before seaming? Im new to making garments. Thank you.
Hi Ashley, I think I replied to your earlier question! For this pattern I blocked after assembling my cardigan.
Grace 🙂
hi grace! the instructions for the sleeves say that "Repeat ROWS 3-5 until ROW 47(50, 50, 50, 53, 53, 53) or sleeve measures 47(50, 50, 50, 53, 53, 53)cm / 16.5(17, 17, 17, 18, 18, 18)” but as the gauge is 14 rows tall for 10cm, wouldn't a row of 50 be 35.7cm? so should i make 70 rows for the sleeves for it to be 50cm in length instead? thanks so much for the lovely pattern.
Hi Joan, I'm so sorry - the measurements are for the entire length of the sleeve (including ribbing) - I've fixed that now! Thanks for letting me know 🙂
Grace
What is the gauge for this pattern?
Hi Kelley, the gauge is listed in the notes under 'Stitches & Abbreviations'. Grace 🙂
Hey, I want to know how much yarn gram do I need to make the xs pattern. Thx for your answer
Hi,
The number of skeins and yarn info is mentioned in the materials section.
Grace
Hi Grace! Regarding the sleeves, I decided to make my cardigan in a size medium, so after 2FLO SC in row 2, why is the FLO SC only 3? Is it supposed to be less than the small and large?
Hi Josh,
It's just the number of stitches you need to reach 1 st before the end of the row - each size has a different number since they follow a different stitch pattern to increase.
I hope this helps,
Grace
In the body ribbing it starts with HDC in 2nd ch...but it doesn't say how many to chain to begin with ??? Help please and thank you and also on 2nd front panel what does "last st should be onto of the last stitch of back panel" mean or is there a typo there ????? The wording is confusing to me there
Hi Pamela,
Sorry the foundation chain line seems to have disappeared! I've added it back in, the foundation chain is the same as the sleeve ribbing, ch 14. The last st of the front panel should be on top of the last st of the back panel, I've updated the pattern to make that clear.
Grace 🙂
Hello, I am having a hard time obtaining gauge. I've gone all the way up to a 6mm and no success. Any suggestions?
Hi Melissa,
It sounds like your yarn might be is too thin for this project. So changing the yarn you're using might make it easier to meet gauge. If you can't meet the number of rows, a change in hook size won't make a huge difference I'd suggest looking up 'golden loop crochet gauge' tutorials on youtube and they'll teach you how to alter your stitch height to meet gauge.
I hope this helps,
Grace 🙂
Hello,
You do a very good job with your tutorial!!! I'm making this and currently working on the sleeves. My 1st sleeve does not look like yours as mine is tapered only on one side and straight edge on the other. I believe I messed up when I added 2 at the end of every other row ( 5, 7, 9 etc ). After re reading the pattern I'm suppose to add 2 at the end of every 3rd row ( 3 & 4th row does not add ) add 2 to the 5th row, turn ch. 1. Do not add 2 to # 6 & 7. # 8 add 2 at the end of the row? Correct?
I recently finished this cardigan and have already gotten compliments! Thank you!
You have the best patterns and tutorials ever, and I appreciate you for that. And you don't know the gift you are to plus size people, who crochet. Thank you, and please don't stop. God bless you.
Hiii…lovely cardigan planning to do one for myself…..can u please tell waht are the multiples for foundation chain…to customise width
Hi grace,
I'm a beginner but i would like to try this cardi tutorial. the problem is I only have cotton milk yarn 5 ply . I tried the gauge for 15 stitches the length is 7cm but when I used bigger hook it became 9cm. Is it possible if I am still using cotton milk yarn and use bigger size? my size is L and do you think I can use 2XL-3Xl pattern ? Thank you...
hello! for the back panel are we going top to bottom or bottom to top? cause if i were to switch out colors i would need that different color for the towards the top? i hope i’m making sense
Hi Grace,
I’m confused about the sleeve length for small 47 rows, which makes it to short only goes to my elbow. Everything else has been spot on.
Hi Grace! Lovely pattern, as always 🙂
One thing I’m a little confused about is Row 2 of the Sleeve section, where it says FLO SC 4(5,6,….), then *FLO SC 2.* Did you mean a regular SC 2 instead?
thank you!
Hi Grace. I have looked cannot find this yarn. Canyon please tell me another yarn to use. ThankYou.
Hi Grace I have looked all over for this yarn. Is there a similar yarn I could use. Thank You.
Hi Grace,
I was wondering if I could use Bulky size yarn this cuddly cardigan pattern?
Sincerely, Theresa
I love your work so much, it's really detailed, especially for someone like me that doesn't like complicated stuff.