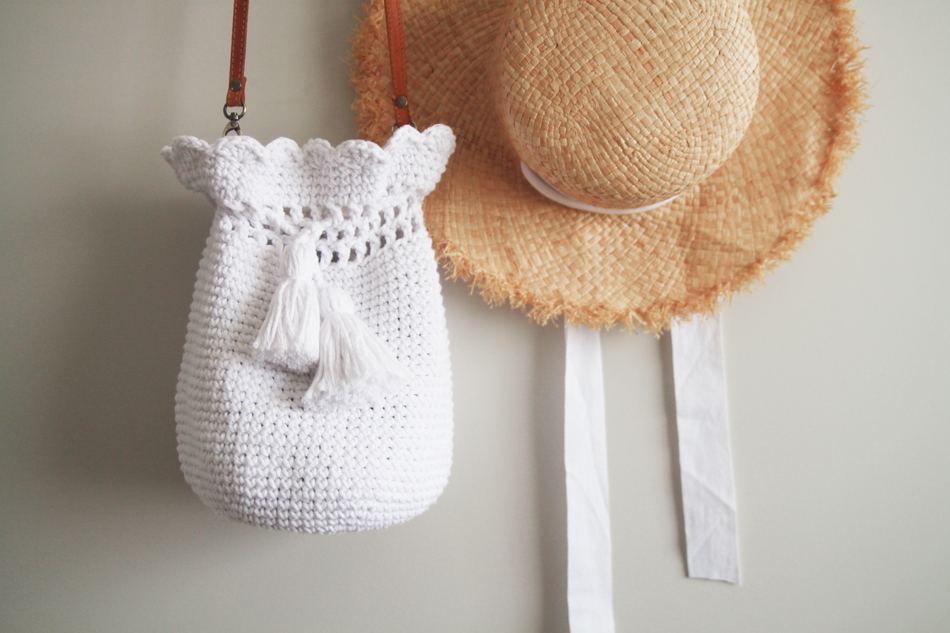
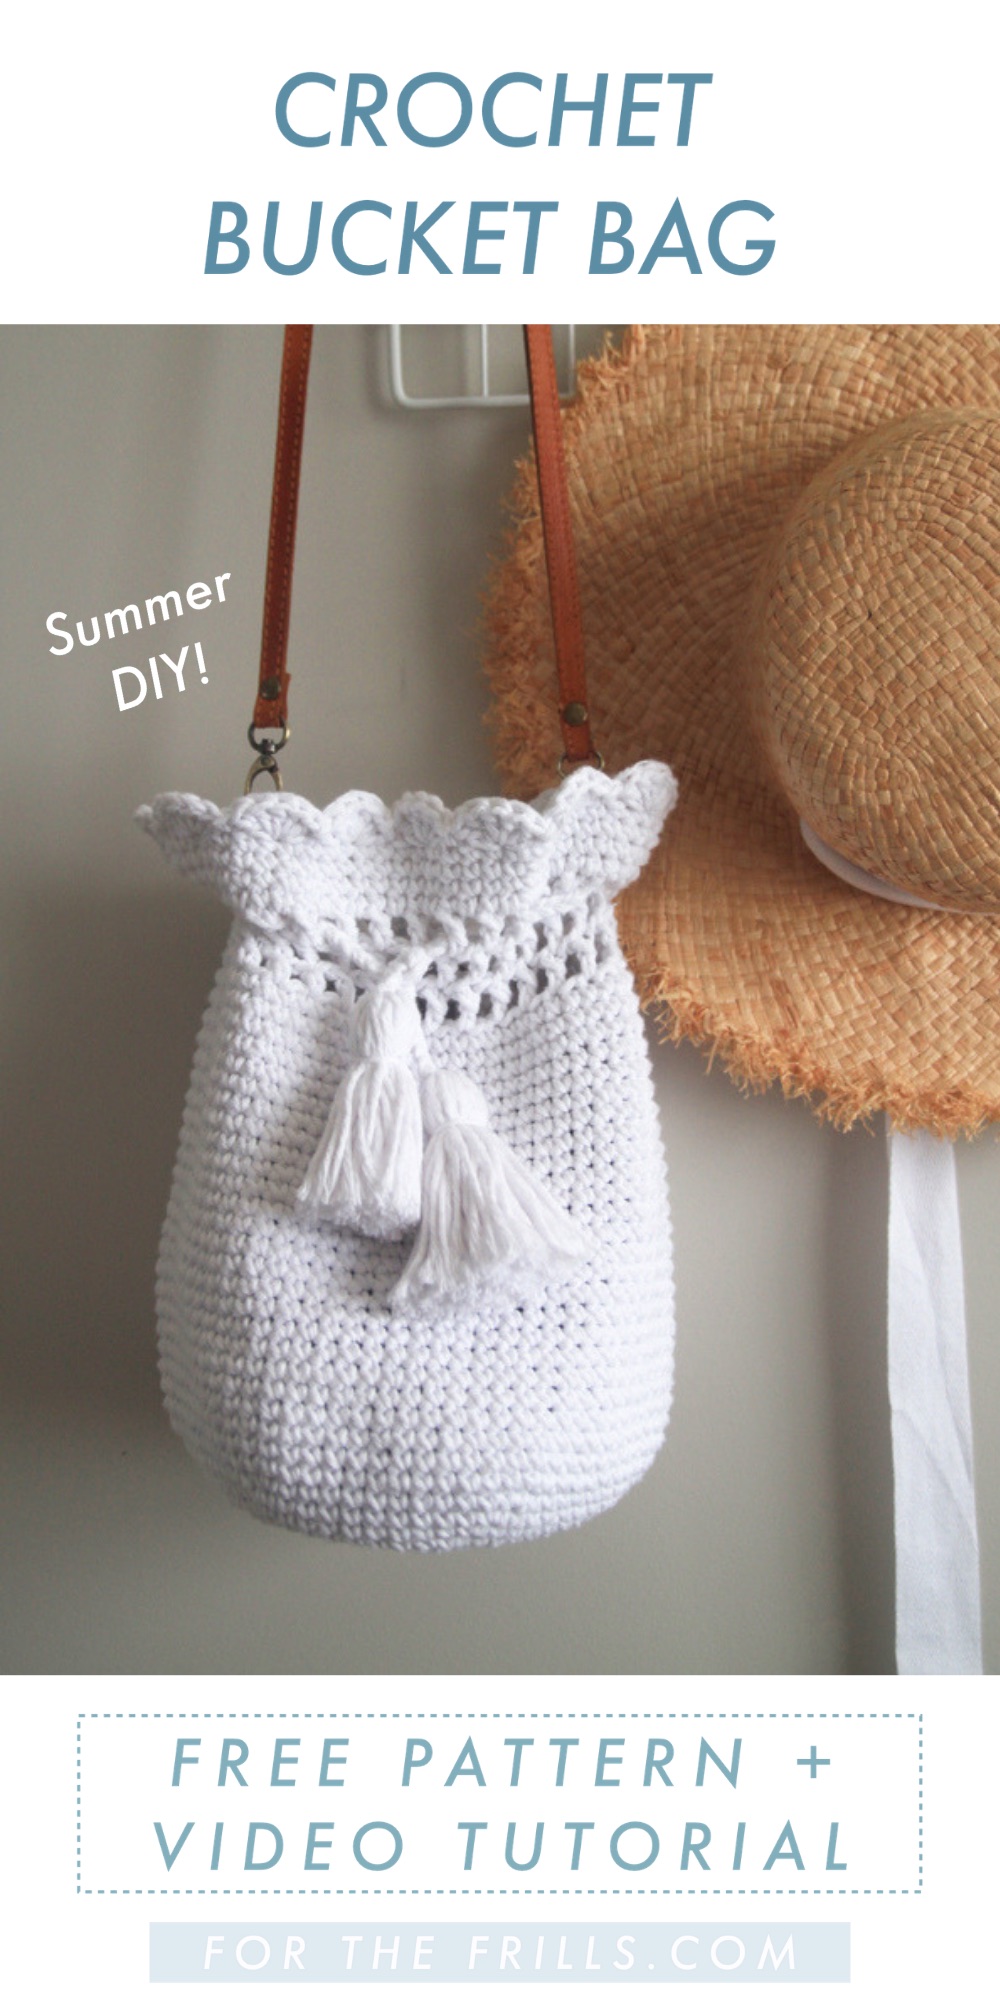
I’m so excited to share the Scallop Crochet Bucket Bag with you! Take it to the beach, the mall or on holiday - it’s the ultimate summer bag!
This free crochet bag pattern is also accompanied by a video tutorial.
This post may contain affiliate links, view our disclosure policy for details.
The Scallop Bucket Bag is a wonderful summer accessory that’s fun, modern with boho chic vibes. Single crochets are worked in the round to form a strong base and sides so you can rest assured that all of your belongings are safe and sound inside the bag.
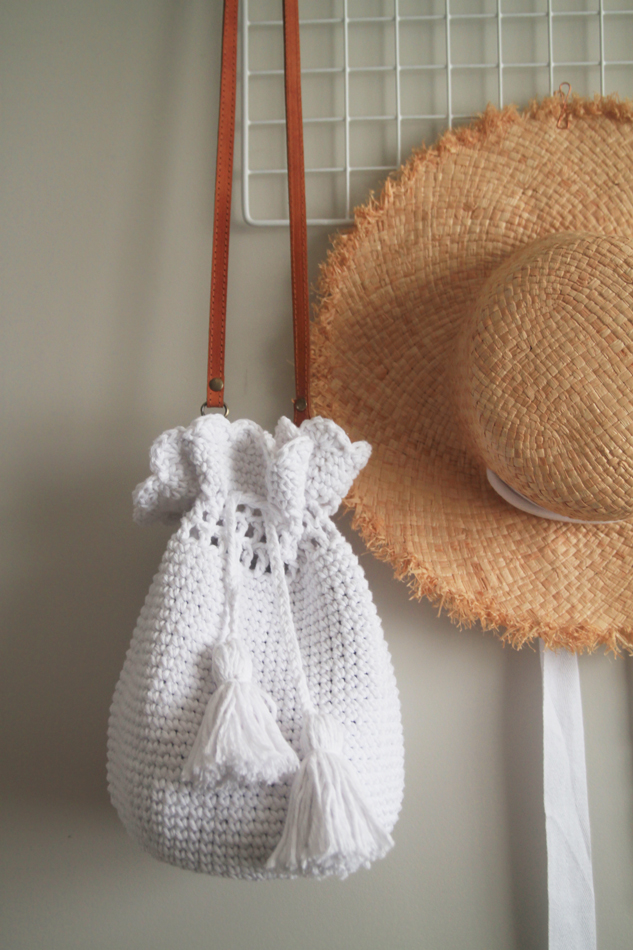
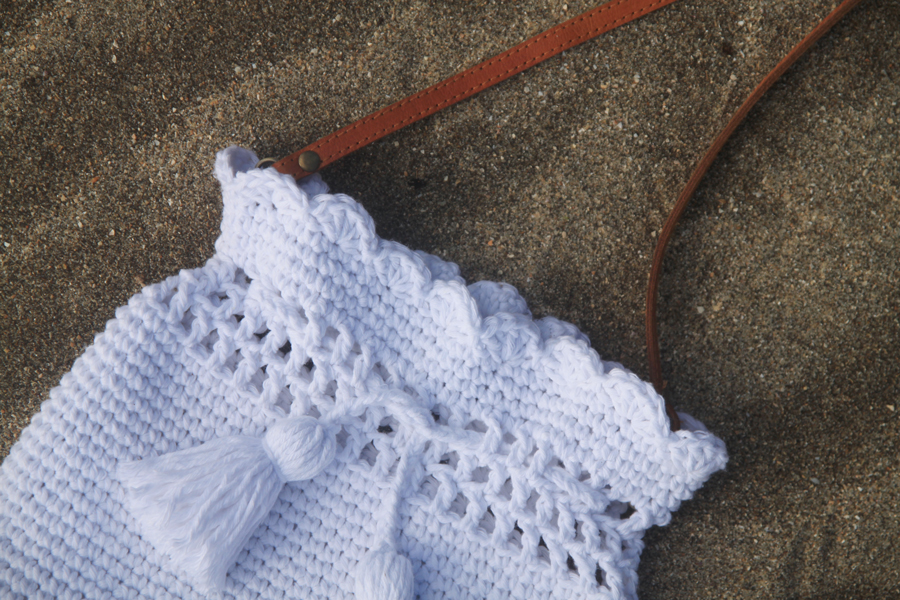
The top of the bag features mesh details finished with a cute scallop hem and the chunky tassels add a touch of whimsical fun!

Design Inspiration
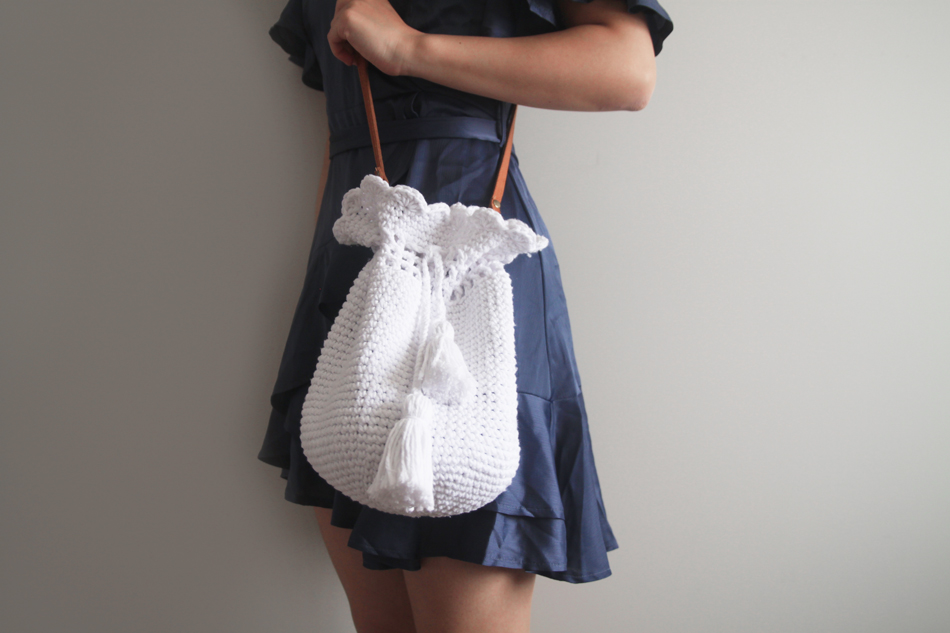
I love crochet totes and loose mesh bags as they always remind me of beach days 🙂 However I wanted a bag that had more shape and structure to it and with the Scallop Crochet Bucket Bag you never need to worry about your stuff falling out!
It easily transitions from the beach to brunch to running errands and its great for travelling. I think you can even take this bag to dinner! Versatile accessories are always so handy and this bag is like a mini Mary Poppins bag! Honestly, I can fit so much inside it I think I might make a mini version.
Yarn
I used the thickest cotton yarn I could find in New Zealand – Annette Eriksson Eco Cotton XL in the colour white. This cotton is made from 85% recycled cotton and 15% polyester. I liked the weight of the yarn and this yarn is nice and soft, but I think it’s just a tad too soft if you want a really structured bad. If you’re looking for a substitute I would recommend a mercerised cotton yarn or a yarn intended for accessories like Lion Brand Rewind Yarn.
Video Tutorial
Add the Scallop Bucket Bag to your Ravelry queue!
Purchase the ad-free, printable version of the Scallop Bucket Bag Pattern!
*"SC 10" means SC into the next 10 stitches
*"2SC" means place 2 SC into the same stitch
*Ch 1 always counts as a stitch unless otherwise noted
*This pattern uses US crochet terms
LEVEL: Easy
Materials
Yarn – Annette Eriksson Eco Cotton XL – Chunky/Bulky (12 ply), 220m/100g, 85% Recycled Cotton, 15% Polyester in White (760) - 1 skein
Stitches & Abbreviations
Ch = Chain
sl st = Slip Stitch
SC = Single Crochet
DC = Double Crochet
Special Stitches
Scallop = 5 DC into the same stitch
GAUGE: 10cm/4” square = 13 stitches wide x 15 rows tall in single crochet
Measurements (cm):
Circle diameter: 17.5
Height: 28
Measurements (inches):
Circle diameter: 7
Height: 11
Scallop Bucket Bag Crochet Pattern
Circle Base
To begin, create a magic or double magic loop.
ROUND 1: Ch 1 (does not count as a stitch), SC 6 into the magic loop, tighten and close magic loop, sl st into the first SC.
<6>
ROUND 2: Ch 1, SC into the same stitch as the Ch 1, 2SC in each stitch until the end of the round, sl st into the Ch 1 at the beginning of the round.
<12>
ROUND 3: Ch 1, SC into the same stitch as the Ch 1, SC, *2SC, SC; rep from * until the end of the round, sl st into the Ch 1 at the beginning of the round.
<18>
ROUND 4: Ch 1, SC into the same stitch as the Ch 1, SC 2, *2SC, SC 2; rep from * until the end of the round, sl st into the Ch 1 at the beginning of the round.
<24>
ROUND 5: Ch 1, SC into the same stitch as the Ch 1, SC 3, *2SC, SC 3; rep from * until the end of the round, sl st into the Ch 1 at the beginning of the round.
<30>
ROUND 6: Ch 1, SC into the same stitch as the Ch 1, SC 4, *2SC, SC 4; rep from * until the end of the round, sl st into the Ch 1 at the beginning of the round.
<36>
ROUND 7: Ch 1, SC into the same stitch as the Ch 1, SC 5, *2SC, SC 5; rep from * until the end of the round, sl st into the Ch 1 at the beginning of the round.
<42>
ROUND 8: Ch 1, SC into the same stitch as the Ch 1, SC 6, *2SC, SC 6; rep from * until the end of the round, sl st into the Ch 1 at the beginning of the round.
<48>
ROUND 9: Ch 1, SC into the same stitch as the Ch 1, SC 7, *2SC, SC 7; rep from * until the end of the round, sl st into the Ch 1 at the beginning of the round.
<54>
ROUND 10: Ch 1, SC into the same stitch as the Ch 1, SC 8, *2SC, SC 8; rep from * until the end of the round, sl st into the Ch 1 at the beginning of the round.
<60>
ROUND 11: Ch 1, SC into the same stitch as the Ch 1, SC 9, *2SC, SC 9; rep from * until the end of the round, sl st into the Ch 1 at the beginning of the round.
<66>
ROUND 12: Ch 1, SC into the same stitch as the Ch 1, SC 10, *2SC, SC 10; rep from * until the end of the round, sl st into the Ch 1 at the beginning of the round.
<72>
Sides of Bag
ROUNDS 13 - 26: Ch 1, SC in each stitch until the end of the round, sl st into the Ch 1 at the beginning of the round.
<72>
ROUND 27: Ch 4 (counts as a stitch), skip 1 stitch, *DC into the next stitch, ch 1, skip 1 stitch; rep from * until the end of the round, sl st into the 3rd Ch at the beginning of the round.
<72>
ROUNDS 28-29: Ch 4 (counts as a stitch), skip chain space, *DC into the next stitch, ch 1, skip chain space; rep from * until the end of the round, sl st into the 3rd Ch at the beginning of the round.
<72>
ROUND 30: Ch 1, *SC into chain space, SC into the next stitch (on top of the DC); rep from * until the end of the round, sl st into the Ch 1 at the beginning of the round.
<72>
ROUNDS 31 - 33: Ch 1, SC in each stitch until the end of the round, sl st into the Ch 1 at the beginning of the round.
<72>
ROUND 34: *Skip 1 stitch, scallop, skip 1 stitch, sl st into next stitch; rep from * until the end of the round, sl st into the first stitch. Fasten off.
Weave in all of your ends.
Cord
*To join the tassels and cord without sewing, please refer to the video.
Cut 3 pieces of yarn 160cm/63” long.
Fold in half and tie a knot at the top of the fold.
Braid the cord (2 strands together – 2x3 = 6 total strands) tightly until approx. 10cm/4” is left.
Tie the two outside strands together.
Assembly
With the front of the bag facing you, insert your braid into ROUND 29 and weave the braid throughout the bag, skipping 2 chain spaces each time.
Tassels
*Make 2
Credit card/plastic card
Yarn
Darning needle
Scissors
Wrap yarn around the width of the card (8.5cm/3.5”) 50 times, cut yarn.
Cut 2 x 20cm pieces of yarn.
Slide loop off the card (make sure to maintain the loop shape) and thread a piece of yarn through the loop and tie a double knot.
Tie the second piece of yarn around the tassel, about 2 cm from the top of the tassel.
Tie tassels onto the cord and weave in ends to secure the tassel in place.
Strap
*I just reused a leather strap from one of my old bags. To create a braided cord please follow the CORD instructions.
For the strap, you will need 3 pieces of yarn = your strap measurement x 6.
E.g. if you want your strap to be 100cm long, cut 3 lengths of yarn that are approx 600cm = 100 x 6
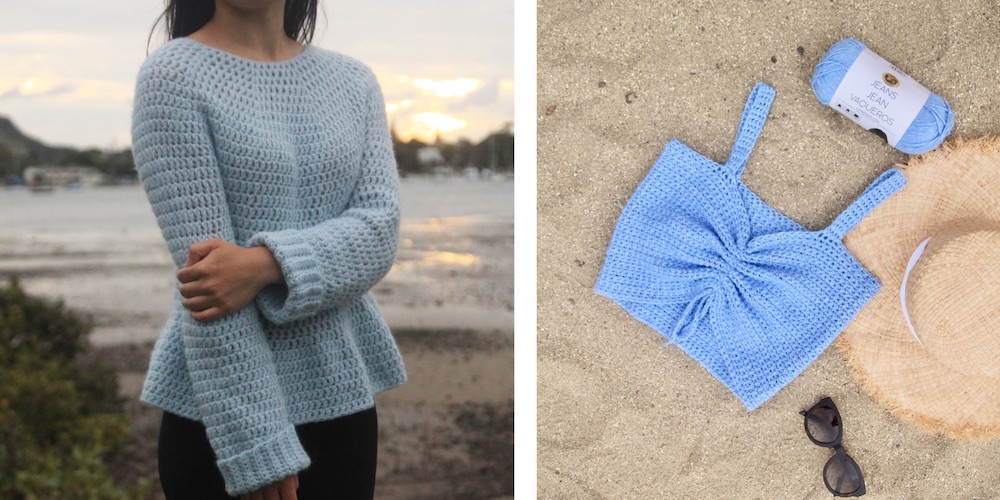
Looking for more free crochet patterns? Check out
I can't download this pattern. What's wrong with my downloader?
Hi Walela, you can view this pattern for free on my blog. If you'd like a downloadable pdf, you can purchase one from Etsy 🙂 https://etsy.me/2w49jFB
Hi! Do you think that the Bernat Maker yarn would be suitable for this project? I know it's meant for accessories and decor and have been wanting to use it.
Hi Joeli,
I think Bernat Maker Yarn could work really well - your bag will probably just have more structure to it 🙂
Grace
Hi there! I made this bag but it’s a lot shorter than the one you posted photos of! I counted the rows on your bag and you’ve done more rows than you stated in the pattern. Just thought I’d let you know bc it might be misleading.
Hi, I've made this bag exactly as the pattern states - your gauge might be off which is why your bag turned out a different size?
Grace
it was the same for me, i was using a 6mm hook and a worsted weight yarn. however i think this could easily be fixed by crocheting 4-ish extra rounds…?
Hi Grace,
I loved your bag so much that I learned to crochet with your video —— which is amazing. I used a thinner cotton yarn and hook therefore the bag os smaller - 6 inch x 9 inch. I did a few extra of the middle rows as it would have been a bit short.
I lined it and put a leather strap similar to yours. The cotton was also a soft so the bag is slightly floppy.
Thanks so much!
what weight yarn did you use? I am thinking of using this as a stash buster pattern but need to know what weight to crochet with. Adorable pattern, can’t wait 🙂
hi,
do you have any tips for getting rid of the ridge created by the slip stitch?