Hi everyone, here's part 2 of the Stonewash Pocket Coatigan pattern!
Read on for part 2 of the crochet pattern and video tutorial!
This post may contain affiliate links, view our disclosure policy for details.
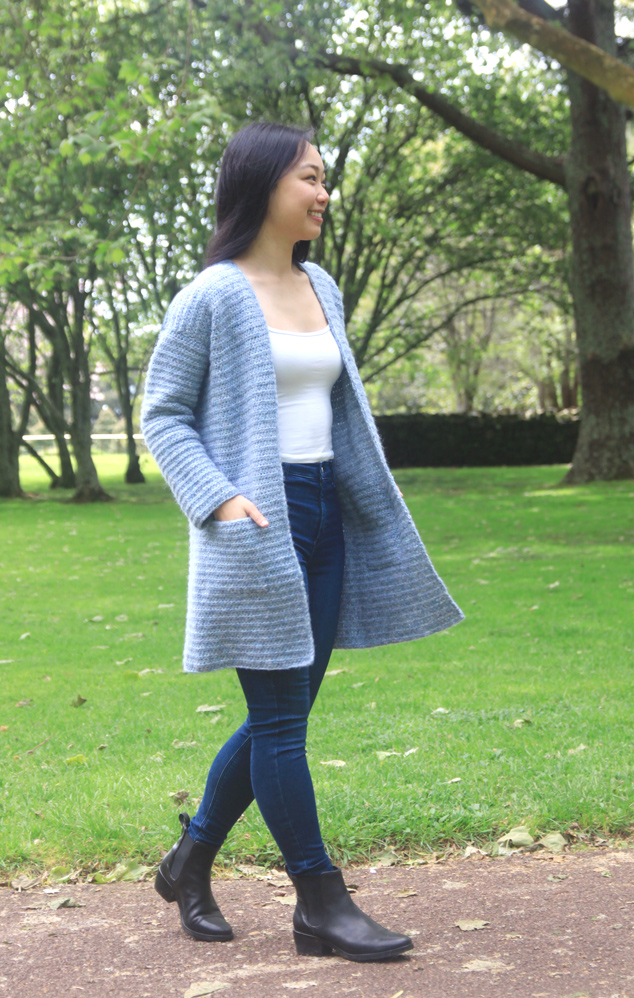
To recap: The Stonewash Coatigan is a modern crochet cardigan featuring tapered sleeves and seamless pockets for a coat-like look (hence the name Coat-igan 🙂 ). The long length makes this cardigan super easy to pair over jeans, dresses and leggings and the clean, streamlined look means that this coatigan will effortlessly fit into anyone’s wardrobe!
In Part 1, we went over how to crochet the body and pockets of the coatigan. In Part 2 we'll focus on the sleeves and assembling everything together!
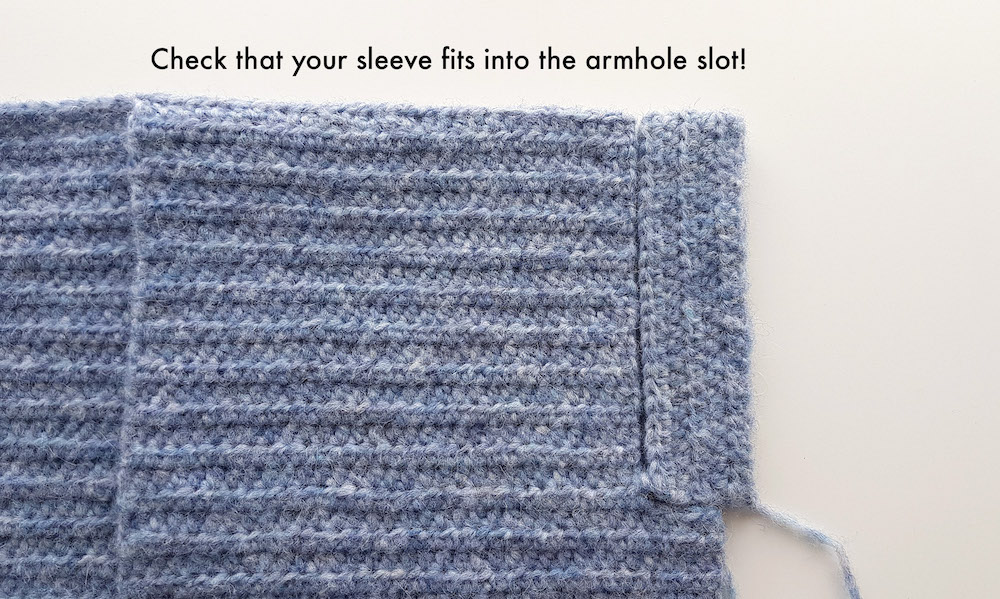
We'll start by crocheting the sleeves in rows (this option will slot into the armhole indent on the body) and then we'll join the rows to work in rounds so we don't need to sew the length of the sleeves together. This method is a bit different from normal as the sleeves are worked from the armhole to the cuff (as opposed to working sleeves from the cuff up).
However, this way we can easily check that the sleeve will fit into the body portion which it crucial for a well-fitting coatigan! For the sleeves gauge is really important (especially when crocheting in rows) so take care to make sure your stitches are nice and even 🙂
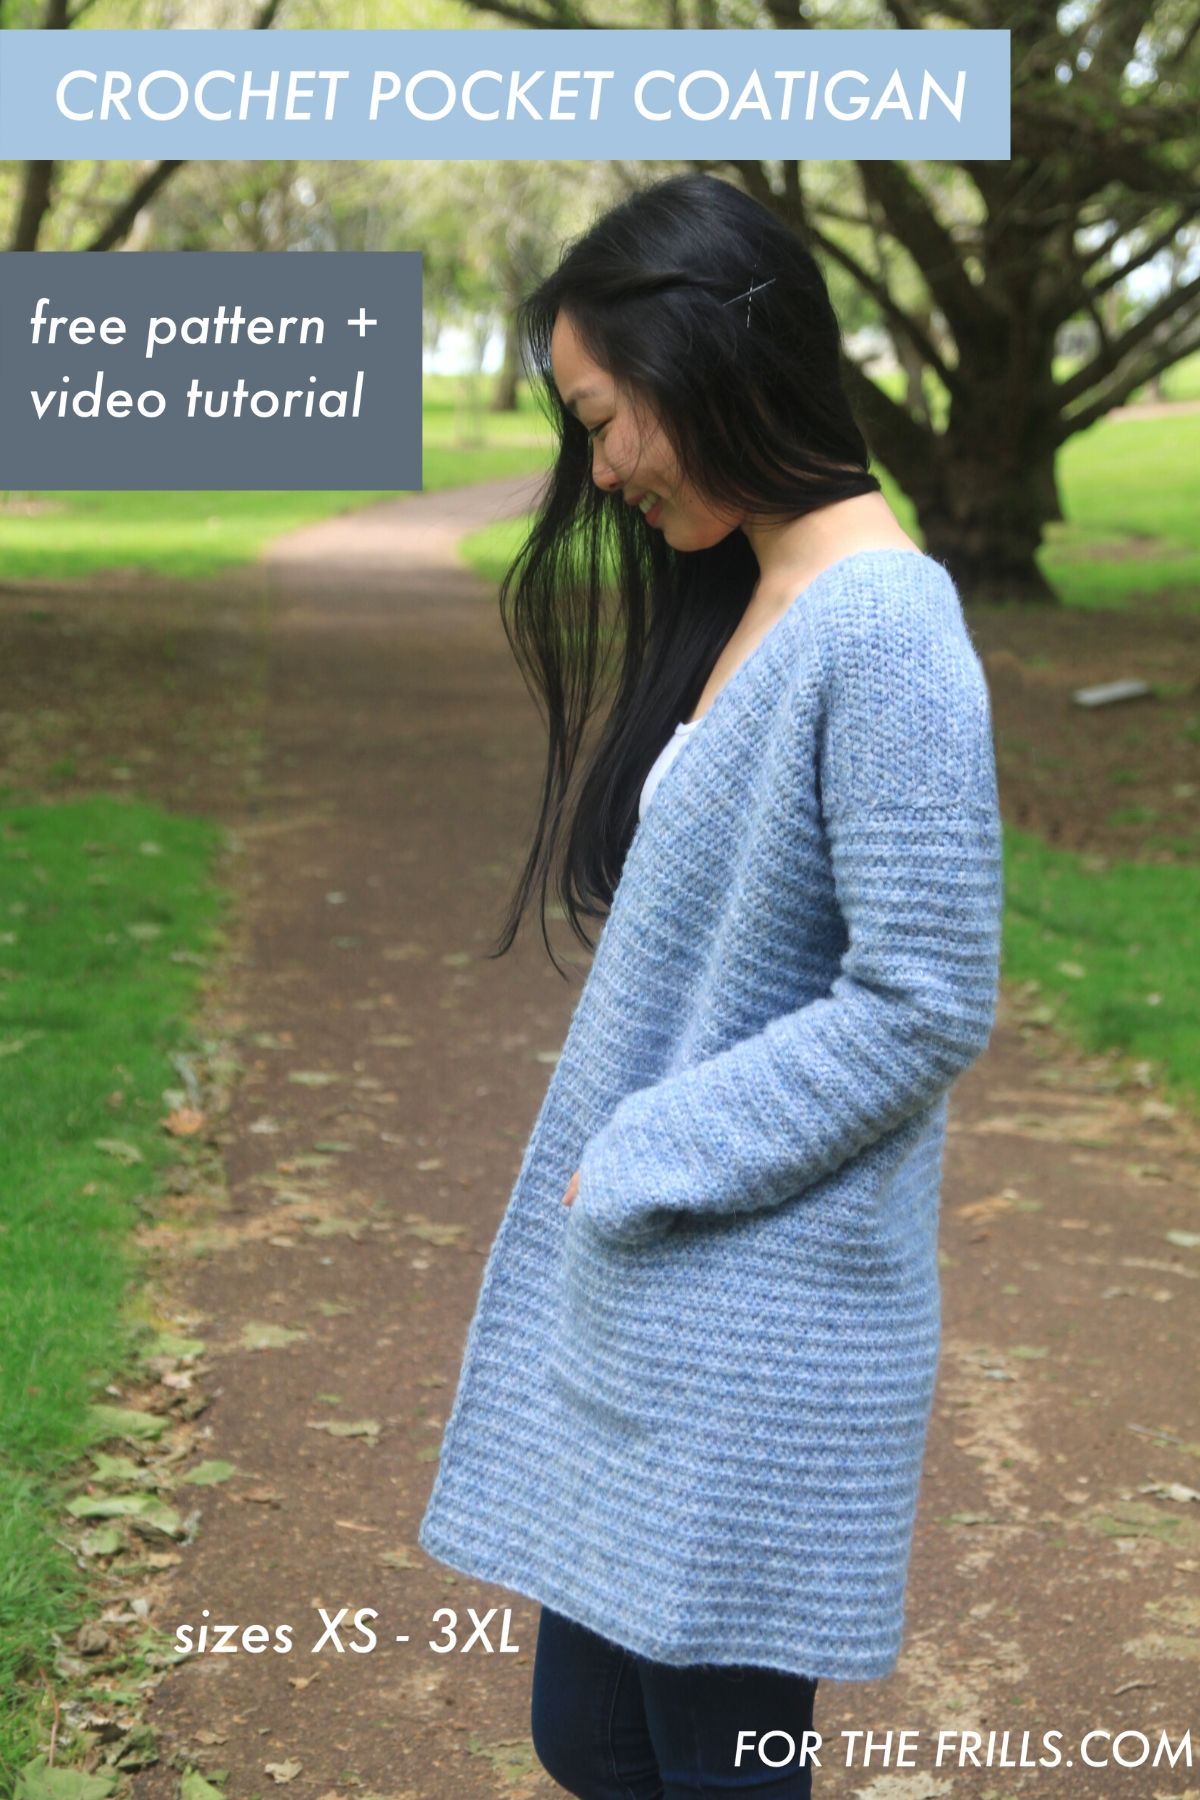
Pin me for later!
Check out more free crochet patterns here!
1. Sea Breeze Tank Top / 2. Stormborn Wrap / 3. Forest Breeze Tee
To learn how to crochet the body of the cardigan, check out Part 1 !
Add this pattern to your Ravelry queue!
Purchase the inexpensive ad-free printable pdf on Etsy or LoveCrafts!
*The sleeves are worked in rows, so that the armholes can easily be seamed to the body and then we will work the rest of the sleeves in rounds, to eliminate seaming.
*The shoulders are seamed together and then the sleeves will be seamed to the armholes. This method removes most of the seaming you’d find in the traditional method of a crochet cardigan 🙂
GAUGE: 10cm/4” square = 15 stitches wide x 13 rows tall in half double crochet
MATERIALS
Yarn – Drops Air – 10ply/Aran/Worsted/Medium(4), 150m/50g, 65% Alpaca + 28% Polyamide + 7% Wool, Fog (10)
STITCHES & ABBREVIATIONS
Ch = Chain
Sl st = Slip Stitch
HDC = Half Double Crochet
HDC2tog = Half Double Crochet 2 stitches together
FL = Front Loop
BL = Back Loop
St(s) = Stitch(es)
Rep = Repeat
Sk = Skip
RS = Right Side
WS = Wrong Side
SM = Stitch Marker
Crochet Coat Video Tutorial: Part 2
Stonewash Coatigan Pattern: Part 2
SLEEVES
FOUNDATION CHAIN: Ch 44(49, 54, 59, 63, 68, 72).
ROW 1: HDC in 2nd ch from the hook, HDC in each ch until end, turn.
<43(48, 53, 58, 62, 67, 71)>
ROWS 2-5: Ch 1, HDC in each st until end, turn.
<43(48, 53, 58, 62, 67, 71)>
To check that your sleeve will fit into the armhole, fold the front body panels inwards (the inner top corners of the front panels should meet up with the top corners of the back panel). Fold the sleeve in half (width ways) and make sure that the sleeve will fit into the armhole space. If your sleeve does not fit e.g. it’s too large/short, you need to add/remove chs in the FOUNDATION ROW and repeat ROWS 1 – 5 or adjust gauge.
Once you’re satisfied with the size of your sleeve, at the end of ROW 5, sl st into the first st. The rest of the sleeve is worked in the round to minimise seaming.
ROUND 6: Ch 1, HDC in each st around, sl st to join, turn.
<43(48, 53, 58, 62, 67, 71).
ROUND 7: Ch 1, HDC in each st around, sl st to join, turn.
ROUND 8: Ch 1, HDC, HDC2tog, HDC in each st around, sl st to join, turn.
<42(47, 52, 57, 61, 66, 70)>
ROUNDS 9-12: Ch 1, HDC in each st around, sl st to join, turn.
ROUND 13: Ch 1, HDC, HDC2tog, HDC in each st around, sl st to join, turn.
<41(46, 51, 56, 60, 65, 69)>
Repeat ROUNDS 9-13 until ROUND 53.
<33(38, 43, 48, 52, 57, 61)>
ROUND 54: Ch 1, HDC in each st around, sl st to join, turn.
Repeat ROUND 54 until ROUND 58(58, 60, 60, 62, 62, 64).
Fasten off.
Repeat ‘SLEEVE’ instructions for the 2nd sleeve. If you altered your foundation chain/gauge for the first sleeve make sure you follow the same alterations for your second sleeve.
ASSEMBLY
Remove all stitch markers.
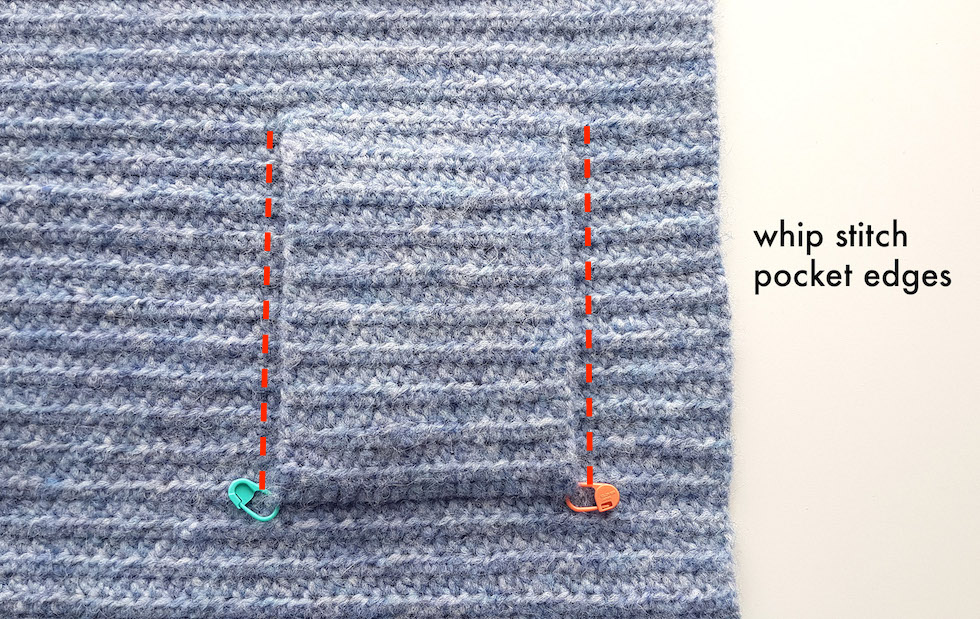
With the WS facing (the pockets should outwards), whip stitch the edges of the pockets to the body of the cardigan. When inserting your needle to the body, take care to only pick up the strands of yarn on the wrong side of the cardigan. Do not insert your needle through the front of the cardigan or the seam of the pockets will become visible. When stitching into the pocket feel free to stitch through the front to back for a strong seam.
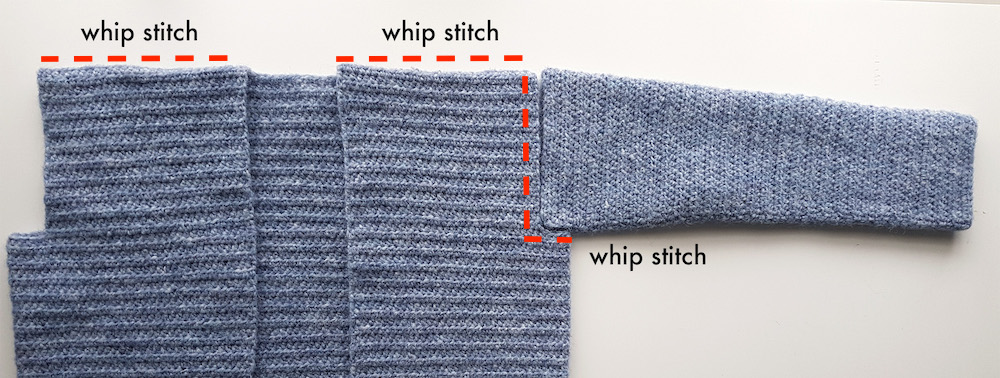
For a cleaner finish, the WS should be facing upwards and whip stitch along the top of the shoulder seams.
If needed, turn your sleeves inside out so the WS is facing outwards.
Pin your sleeves into the armhole gap. The ‘v’ opening should slot into the bottom of the armhole (length of V should easily slot into the indent of the armhole). Whip stitch the edges of the armhole to the sleeves.
With the RS facing you, insert crochet hook in corner of right front panel (if you’re a right handed crocheter) or left front panel (if you’re a left handed crocheter). Secure yarn and pull up a loop. Slip stitch along the neckline, making sure to keep your tension even. If your neckline ruffles you have too many stitches and if your neckline puckers you have too few stitches.
Weave in all of your ends. Steam and block your coatigan!
You’ve finished your Stonewash Coatigan! 🙂
Can you tell me how long the sweater should be before starting the panels?
Hi Dawn, what size are you making? For size S (as pictured), your sweater should be about 62cm/25" before starting the panels. Grace 🙂
I'm almost done but I'd like to adjust the sleeves to make them slimmer. Any suggestions on how to do this? Thanks so much!
Hi Natalie, you could size down for the sleeves and add a bit of extra length at the end if you need it! Keeping in mind that the top of the sleeve still needs to fit in the armhole slot, you could also decrease with more frequency e.g. repeat rows 9-11 and then do one decrease row (same as Row 13) as row 12. Then repeat 9-12 until you reach your desired length. Either way I'd recommend trying on your sleeve as you go too make sure it isn't too tight! I hope this helps, Grace 🙂
i purchased the pattern, but i still would like to know how wide the whole coatigan should be at the bottom for a size small. what i mean is, how wide is the whole rectangle? thanks
Hi Elaine,
For size small the entire width of the coatigan (back panel + 2 front panels) should measure 100cm wide.
Grace 🙂
Hi ..how do I measure the stitches for a large or extra large coatigan?
Hi Peris, you can find all of the measurements from sizes XS-3XL in the first part of the pattern here - https://forthefrills.com/easy-crochet-cardigan-pattern-stonewash-pocket-coatigan-part-1
Grace 🙂
Hi Grace, just ordered all my yarn for your beautiful cardigan. I do not seem to be able to Getto your tutorial. When I click on it, nothing happens. Can you help me please? Thanks so much,
Sabine